Project Financial Assets
A user will need the following permissions to access and perform any actions on this tab:
AA_Appraisal_Projects_Asset_Costs
AA_Appraisal_Projects_Asset_Costs_Create
AA_Appraisal_Projects_Asset_Costs_Update
AA_Appraisal_Projects_Asset_Costs_Delete
The Project Financial Assets Tab allows a user to add Asset Costs per Asset for Financial Groups and Years.
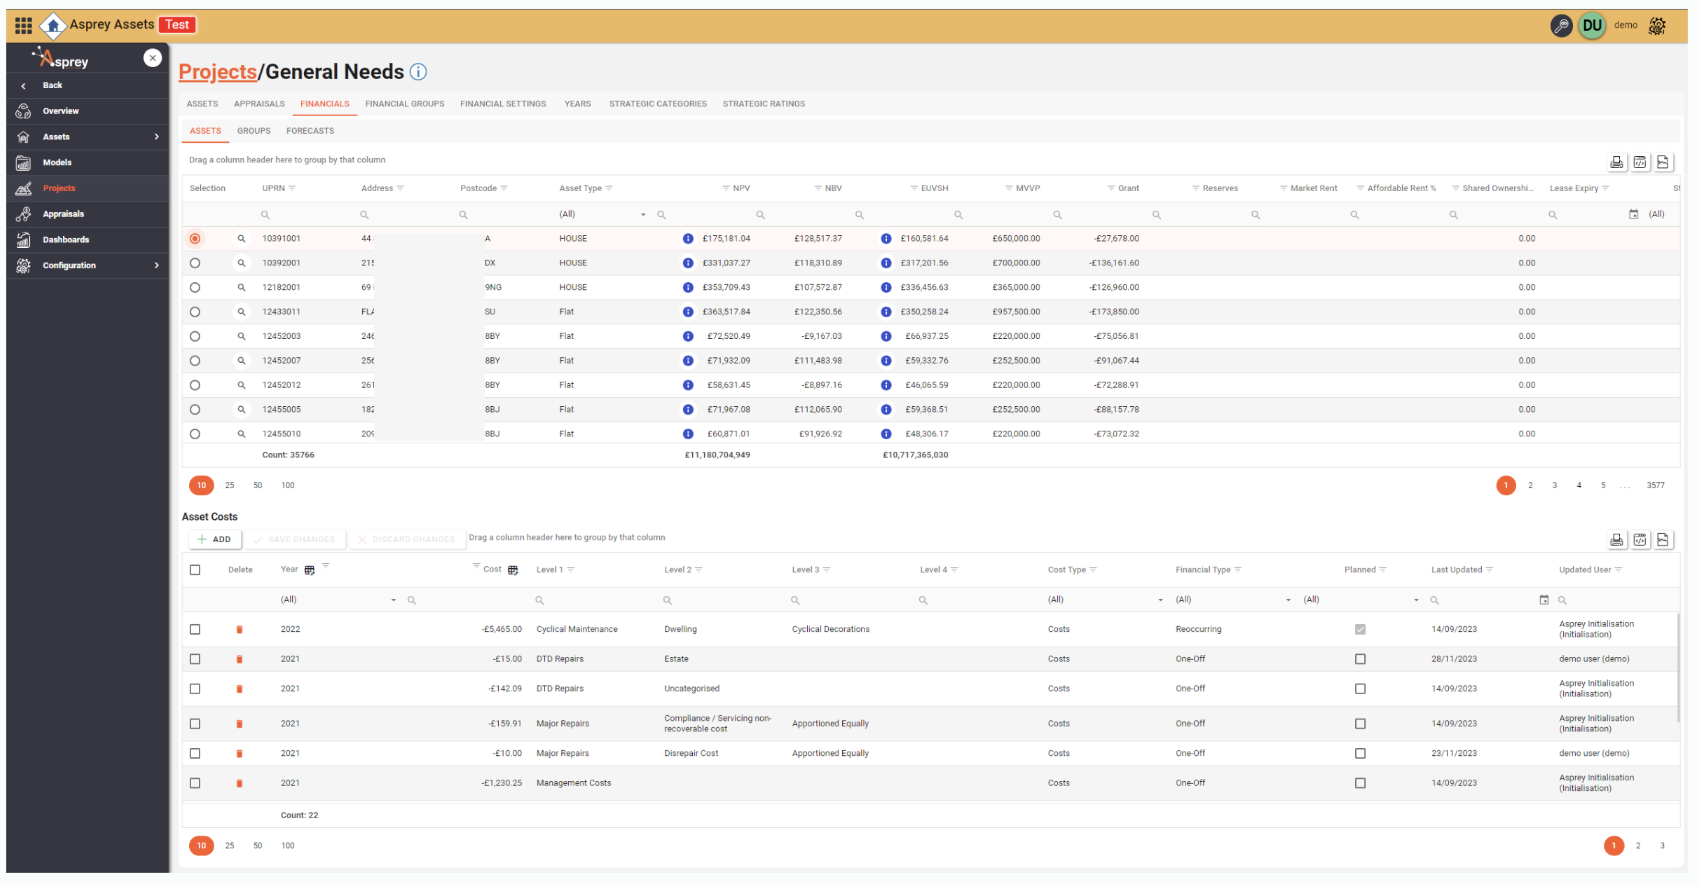
If an Asset has an NPV value, an 'i' icon in a blue circle will appear on the righthand side of the NPV value indicating that you can inspect the NPV breakdown.

Clicking on the 'i' icon will reveal the NPV breakdown for the currently selected asset. (see below)
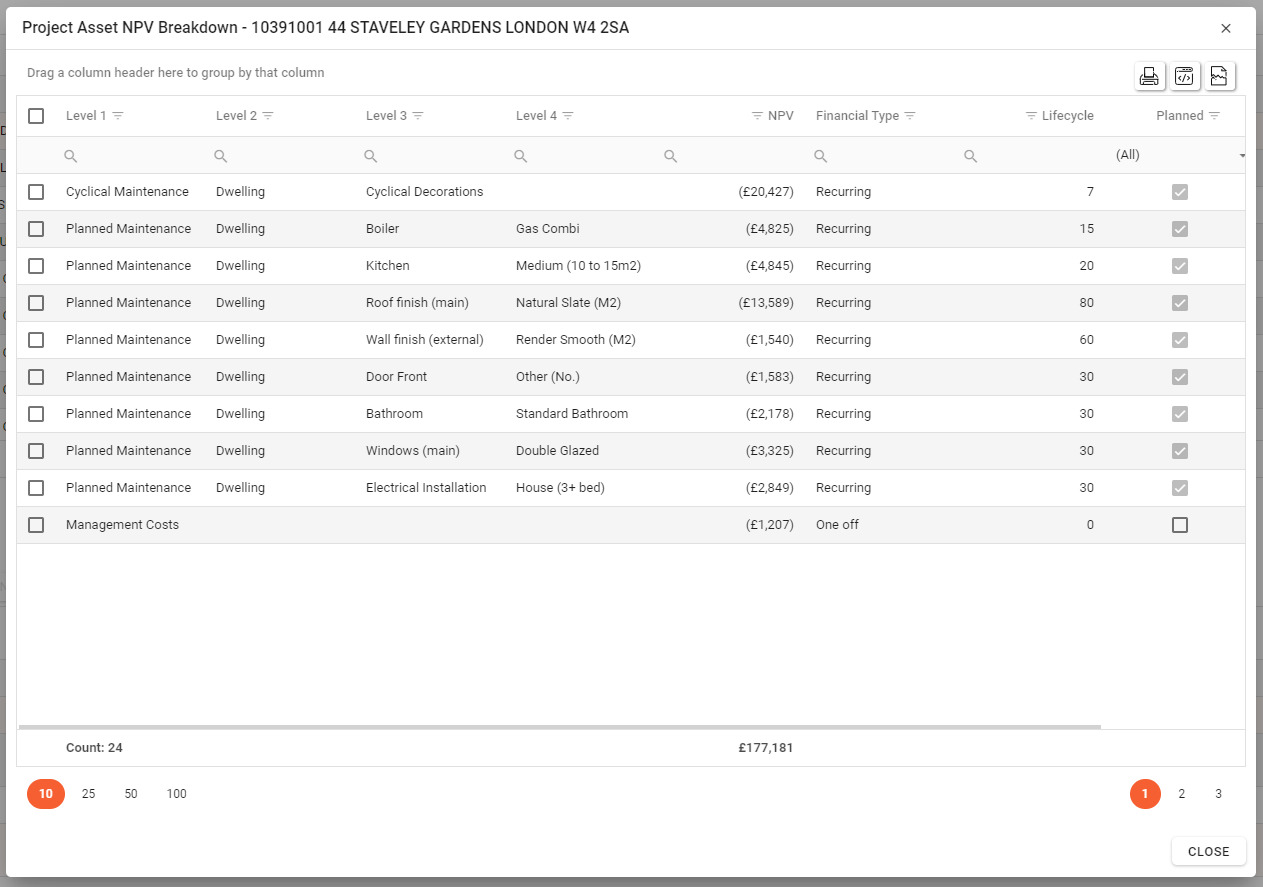
The NPV breakdown popup dialogue will list the costs that the NPV value is comprised of.
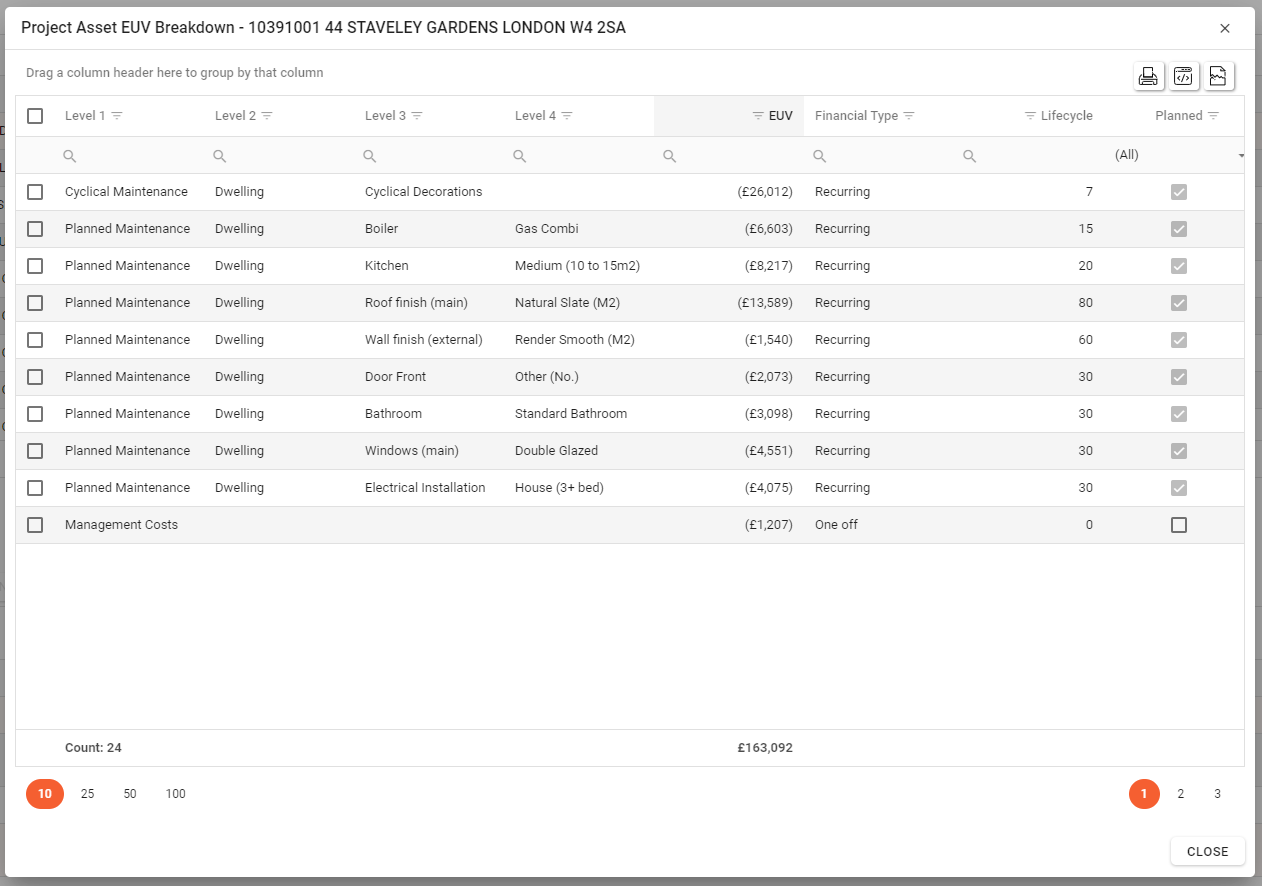
As well as the NPV value having a breakdown the Existing Use Value (EUVSH) also has a breakdown, if the EUVSH has a value)
Clicking on the 'i' icon next to the EUVSH value for an asset will reveal the breakdown. (see below)
Creating a Project Asset Cost
To be able to create Project Assert Costs the Project you’ve selected will required Assets. Assets can be added to the Project via the Project Assets tab.
Clicking on the “Financials” Tab at the top of the Project Drilldown screen will open the Project Assets Financial Screen, the Asset tab will open by default. (see below)
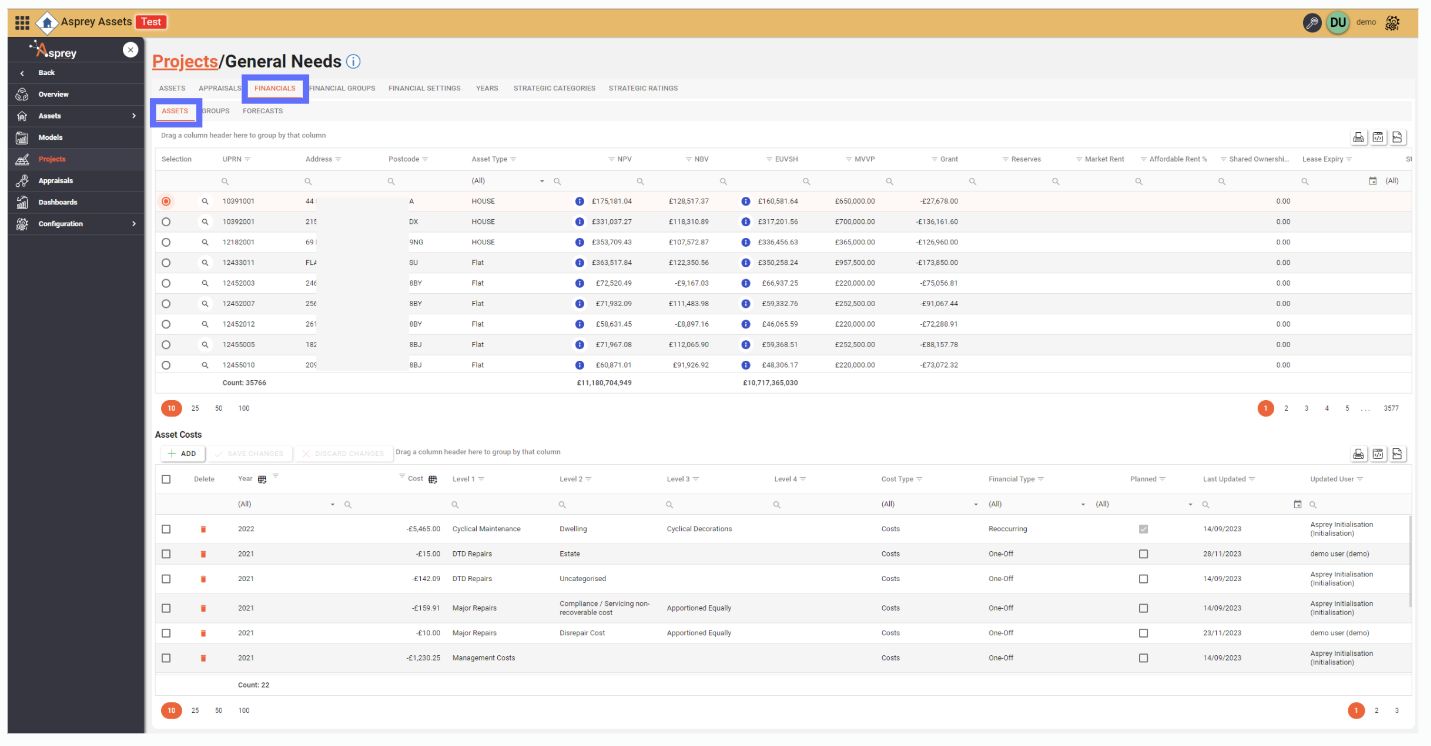
The Assets selected for the Project will be shown on this tab allowing the user to select an Asset via the radio button on the far lefthand side of the screen.
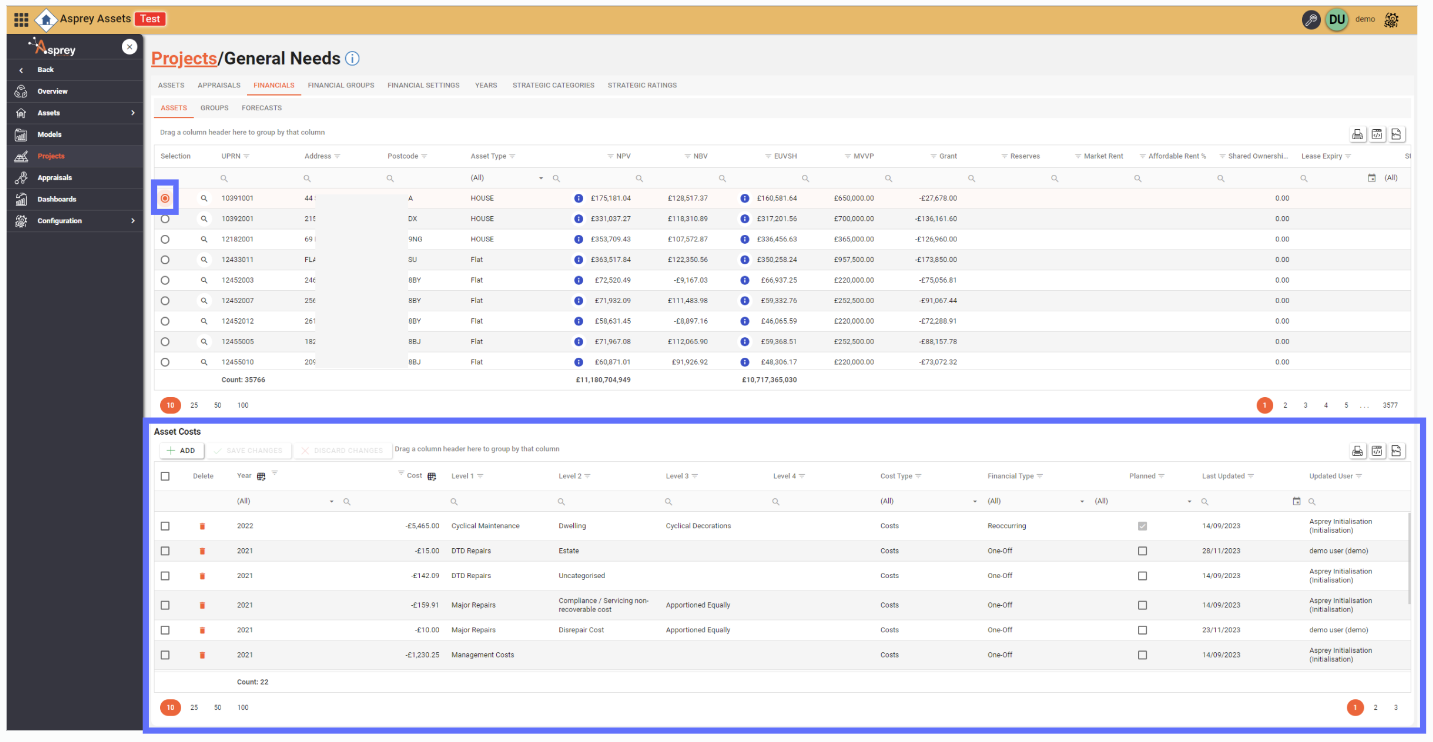
Upon selecting an Asset the bottom half of the Asset Tab will reveal a new Asset Costs grid. The Asset Costs grid will initially be empty if no previous costs have been added.
Click on the “Add” button in the Asset Costs Grid to add new Asset Costs based on the available Financial Groups.
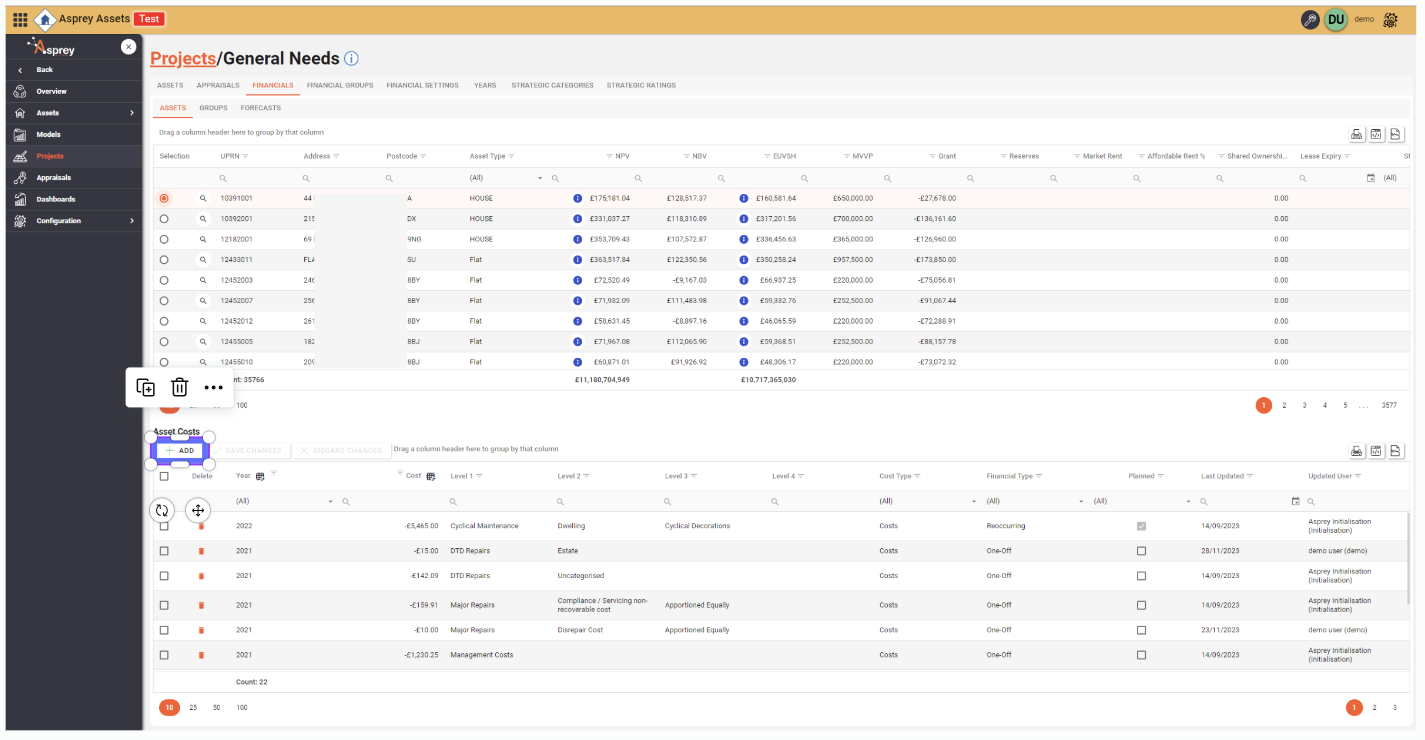
A popup dialogue will appear (see below)
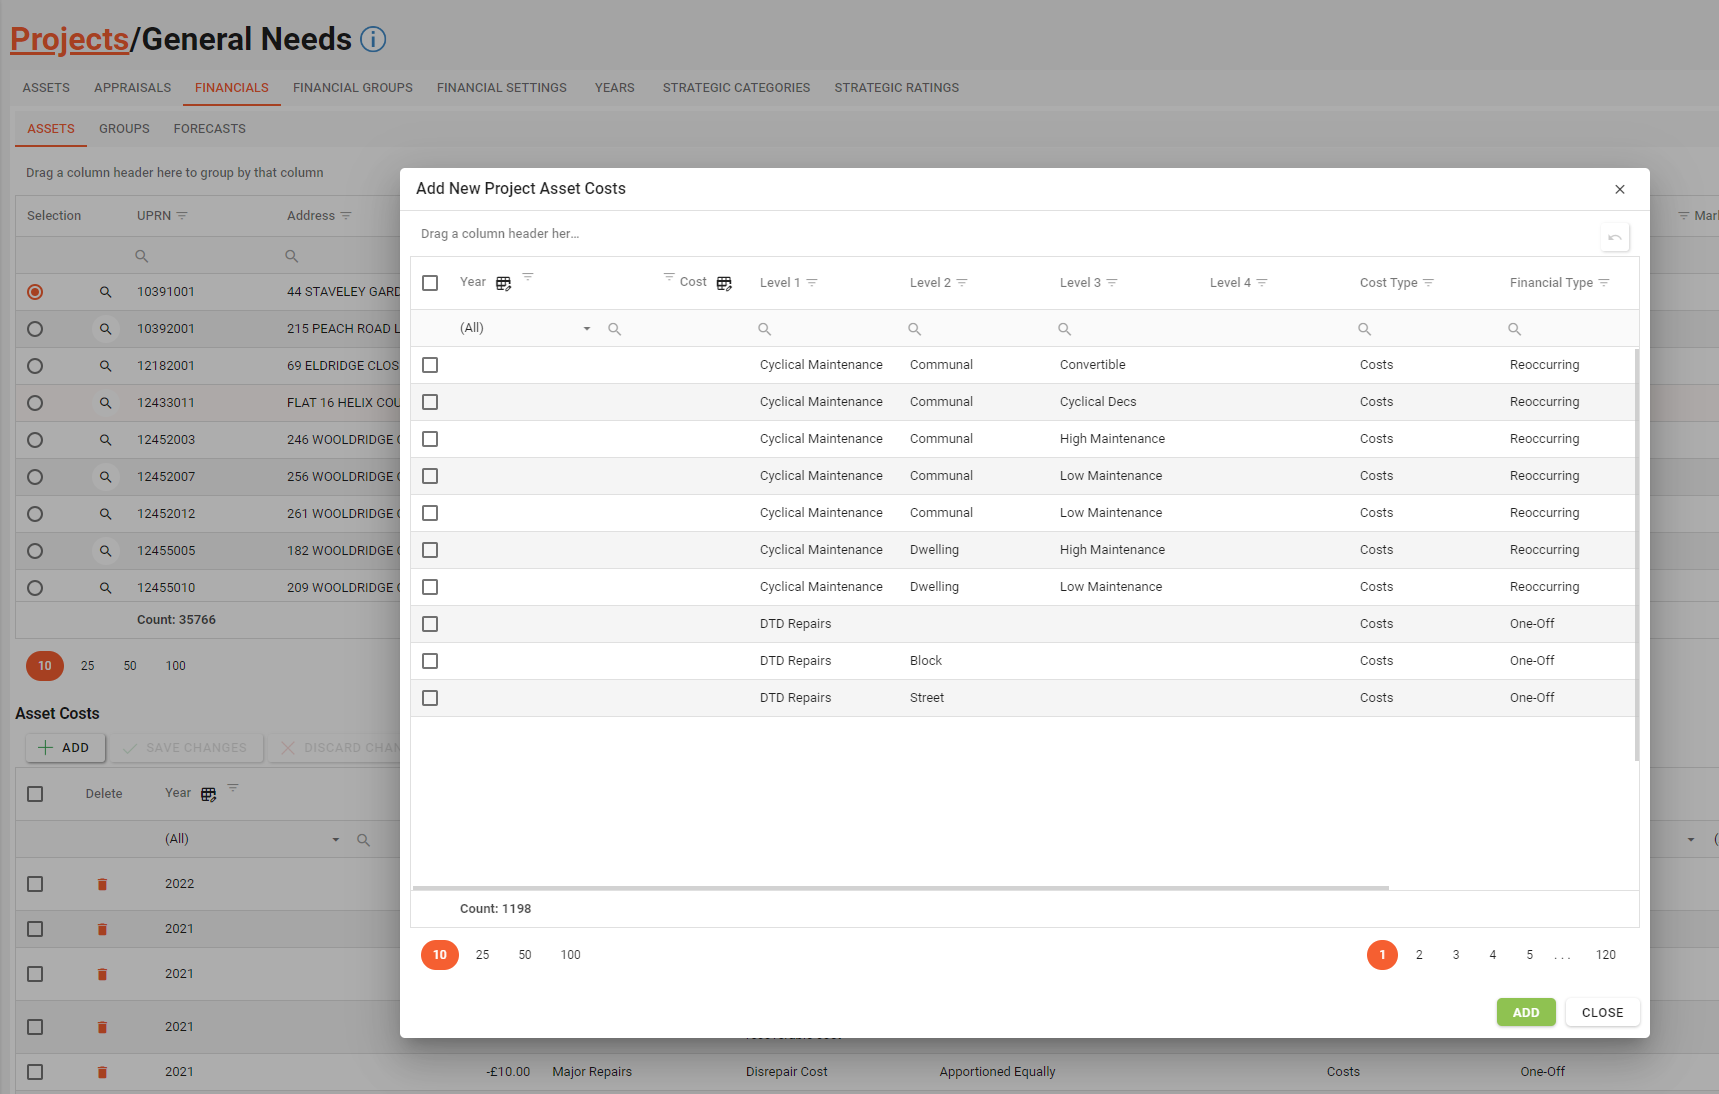
Here is a definition of the columns for the “Add New Project Asset Costs” grid.
Field | Type | Description | Editable | Bulk Update |
|---|---|---|---|---|
Year | List | A list of root level Project Years as defined on the Project Years tab. i.e. 2021, 2022, 2023 etc | Yes | Yes |
Cost | Decimal | The actual cost of the Asset. | Yes | Yes |
Level 1, Level 2, Level 3 … | Text | The amount of Level columns will depend on how many were set up in the Financial Groups screen. | No | No |
Cost Type | List | The Cost Type of the chosen Financial Group, i.e. Costs or Revenue | No | No |
Financial Type | List | The Financial Type of the Financial Group, i.e. One-Off, Reoccurring | No | No |
Lifecycle | number | The frequency the cost reoccurs | No | No |
Planned | Yes / No | Whether or not the chosen Financial Group is Planned or not. This is defined per Financial Group on the Project Financial Group tab. | No | No |
Numerous Asset Costs can be added at once by choosing the Year from the dropdown of years and specifying a cost for each Financial Group. Once you’re satisfied you have entered the costs, click on the “Add” button in the bottom righthand corner to save to the Asset Costs grid to the previous screen. (see below)
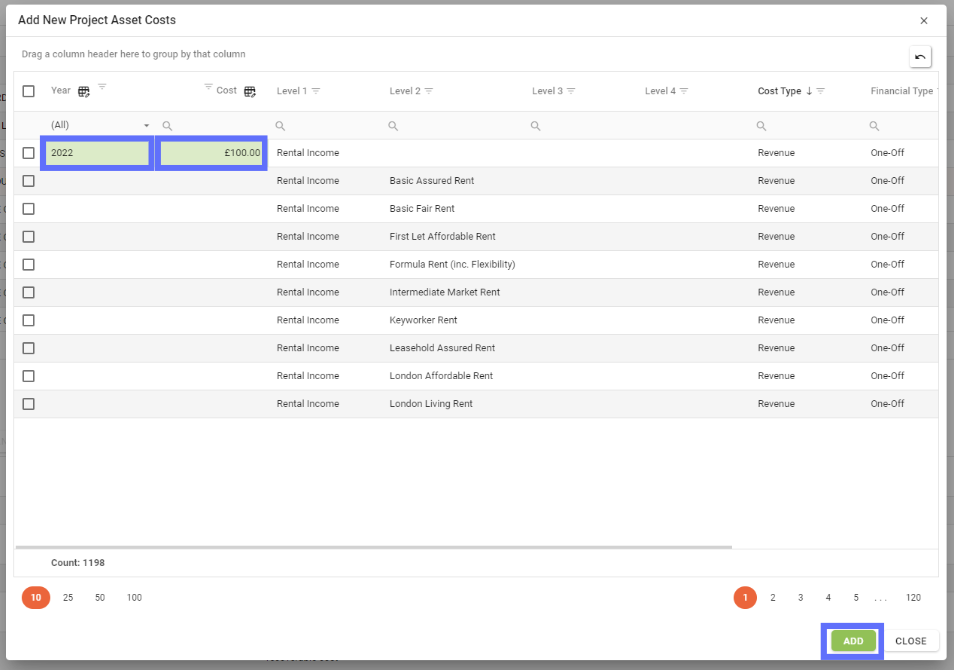
The new cost has been added to the Asset Costs grid:

When the new Asset Cost record has been created, the Cost Type, Planned, Last Updated and Updated User fields will populate accordingly.
Editing an Asset Cost
In order to edit an existing Asset Cost, you will first need to select the Asset you want to make changes to.
This can be achieved by selecting the Asset from the top Assets grid using the radio button on the lefthand side of the screen.
Upon clicking the radio button next to the Asset row, the bottom Asset Costs grid will display with the linked costs displayed in the grid.
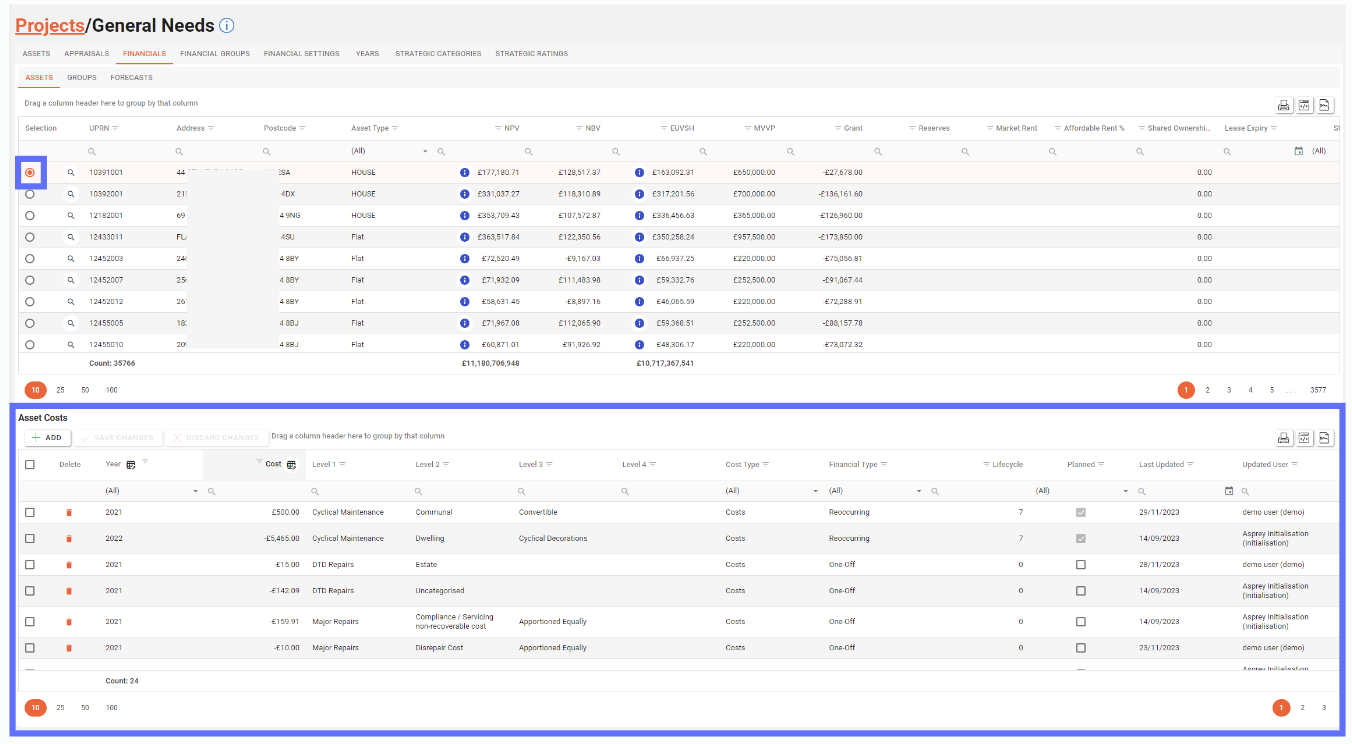
Here’s a definition of the columns in the Asset Costs grid:
Field | Type | Description | Editable | Bulk Update |
|---|---|---|---|---|
Year | List | A list of root level Project Years as defined on the Project Years tab. i.e. 2021, 2022, 2023 etc | Yes | Yes |
Cost | Decimal | The actual cost of the Asset. | Yes | Yes |
Level 1, Level 2, Level 3 … | Text | The amount of Level columns will depend on how many were set up in the Financial Groups screen. | No | No |
Cost Type | List | The Cost Type of the chosen Financial Group, i.e. Costs or Revenue | No | No |
Financial Type | List | The Financial Type of the Financial Group, i.e. One-Off, Reoccurring | No | No |
Lifecycle | number | The frequency the cost reoccurs | No | No |
Planned | Yes / No | Whether or not the chosen Financial Group is Planned or not. This is defined per Financial Group on the Project Financial Group tab. | No | No |
Last Updated | Date | The data the record was last updated or created | No | No |
Updated User | Text | The user that last updated or created the record | No | No |
The only fields you can edit are:
Year
Cost
Simply click on the field you want to edit and choose a new year or specify a new value for the cost. Multiple fields across many rows of data can be edited.

As soon as you’ve finished making changes you will need to click on the “Save Changes” button to persist the amendments back to the database.
Upon saving the Last Updated and Updated User fields will be populated accordingly.
If there are any unsaved changes, clicking the “Discard Changes” button will cancel the amendments and return the grid to a state before the changes were made.
Deleting an Asset Cost
Deleting an Asset Cost will permanently remove it from the database and therefore remove it from the currently selected Asset. and trigger financial values to be recalculated.
In order to delete an existing Asset Cost, you will first need to select the Asset you want to delete Asset Costs from.
This can be achieved by selecting the Asset from the top Assets grid using the radio button on the lefthand side of the screen.
Upon clicking the radio button next to the Asset row, the bottom Asset Costs grid will display with the linked costs displayed in the grid.

To delete an asset cost you will need to click on the “Trash Can” icon on the far lefthand side of the Asset Costs grid. (see below)

This will mark the row for deletion by changing the background colour of the row in question “Pink” and displaying a “Revert Arrow” icon in place of the “Trash Can”.

Clicking on the “Revert Arrow” icon will return the row’s background colour to normal and unselect it for deletion. Alternatively clicking on the ”Discard Changes” button will also reset any and all rows that have been marked for deletion.
If you’re sure you want to proceed with the Asset Cost deletion, click on the “Save Changes” button and the record will be permanently deleted from the database
Bulk Editing Asset Costs
In order to bulk edit an existing Asset Costs, you will first need to select the Asset you want to make changes to.
This can be achieved by selecting the Asset from the top Assets grid using the radio button on the lefthand side of the screen.
Upon clicking the radio button next to the Asset row, the bottom Asset Costs grid will display with the linked costs displayed in the grid.

Select the Asset Cost rows you want to bulk edit by ticking the checkboxes on the far lefthand side of the Asset Costs grid.
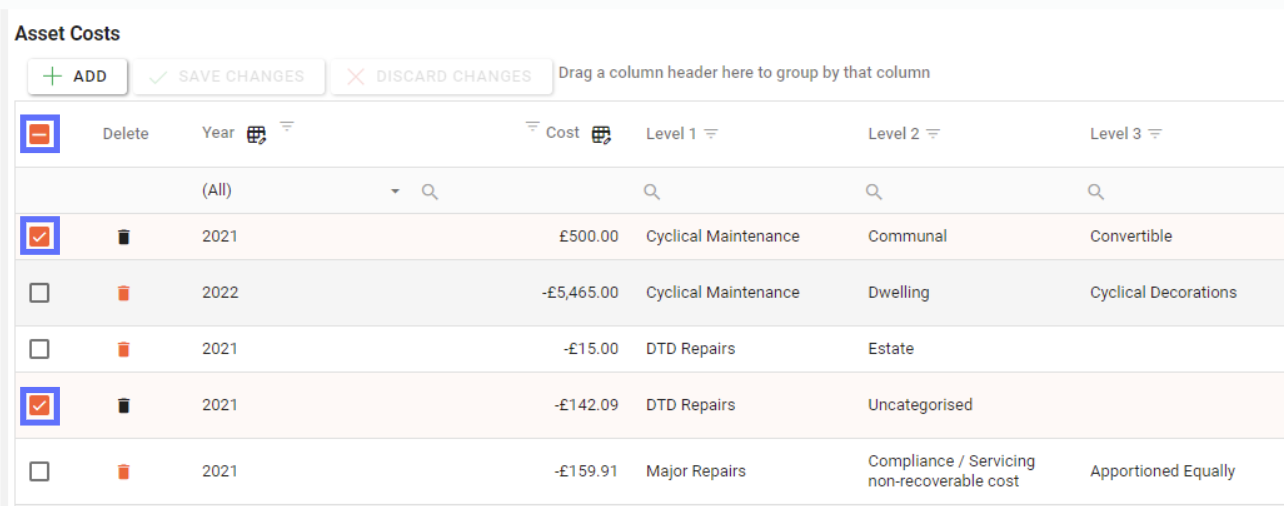
The Asset Costs grid has buttons in the column headers for Year and Cost that allow you to bulk edit.
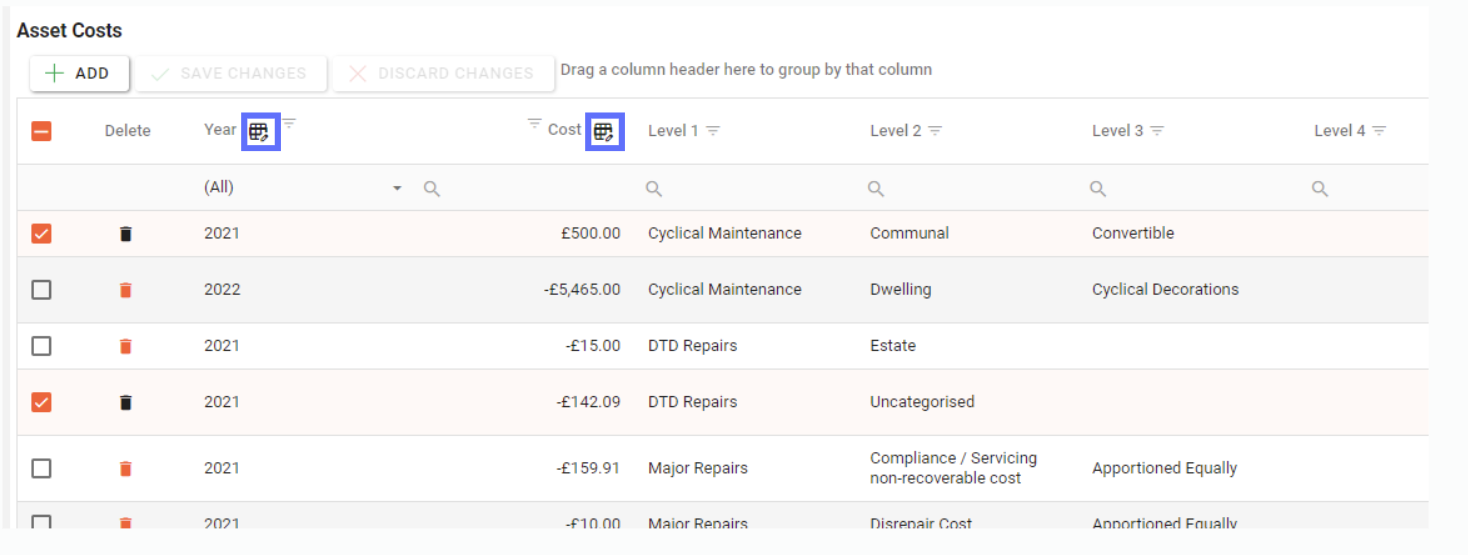
Click on a button in the grid header to open the bulk edit dialogue.
In this example I’ve clicked on the Year bulk edit button and the following “Edit Year” dialogue has appeared (see below)
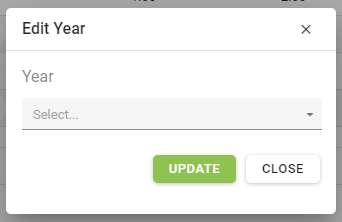
Upon clicking on the dropdown box a list of years pertinent to the current Project will be displayed:
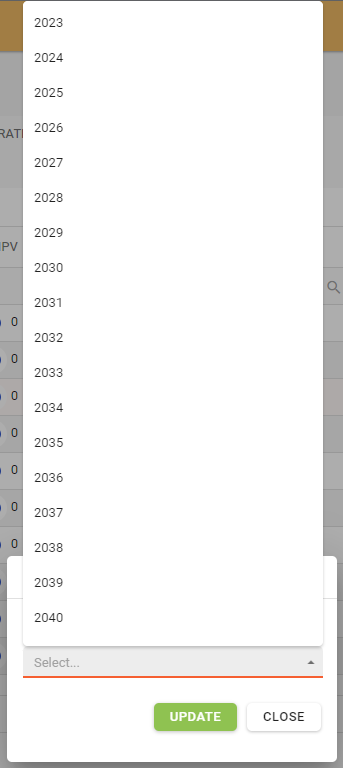
Choose the Year from the list that you want to apply to all of the previously selected Asset Cost rows and click on the “Update” button.
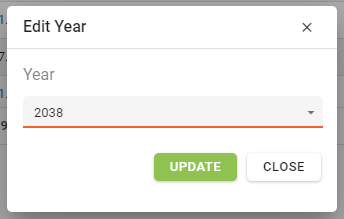
In this example the Year 2038 was chosen. It will now be applied to all of the previously selected rows. The amended rows will have a green background.
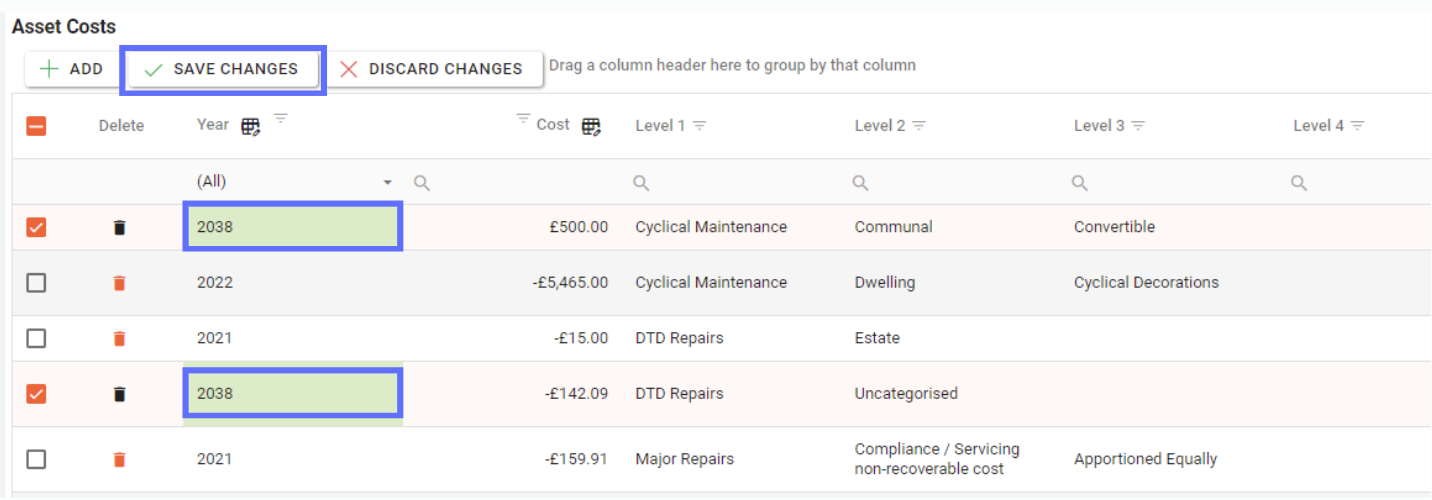
Once you’ve finished bulk editing remember to click on the “Save changes” button to persist the changes to the database.
