
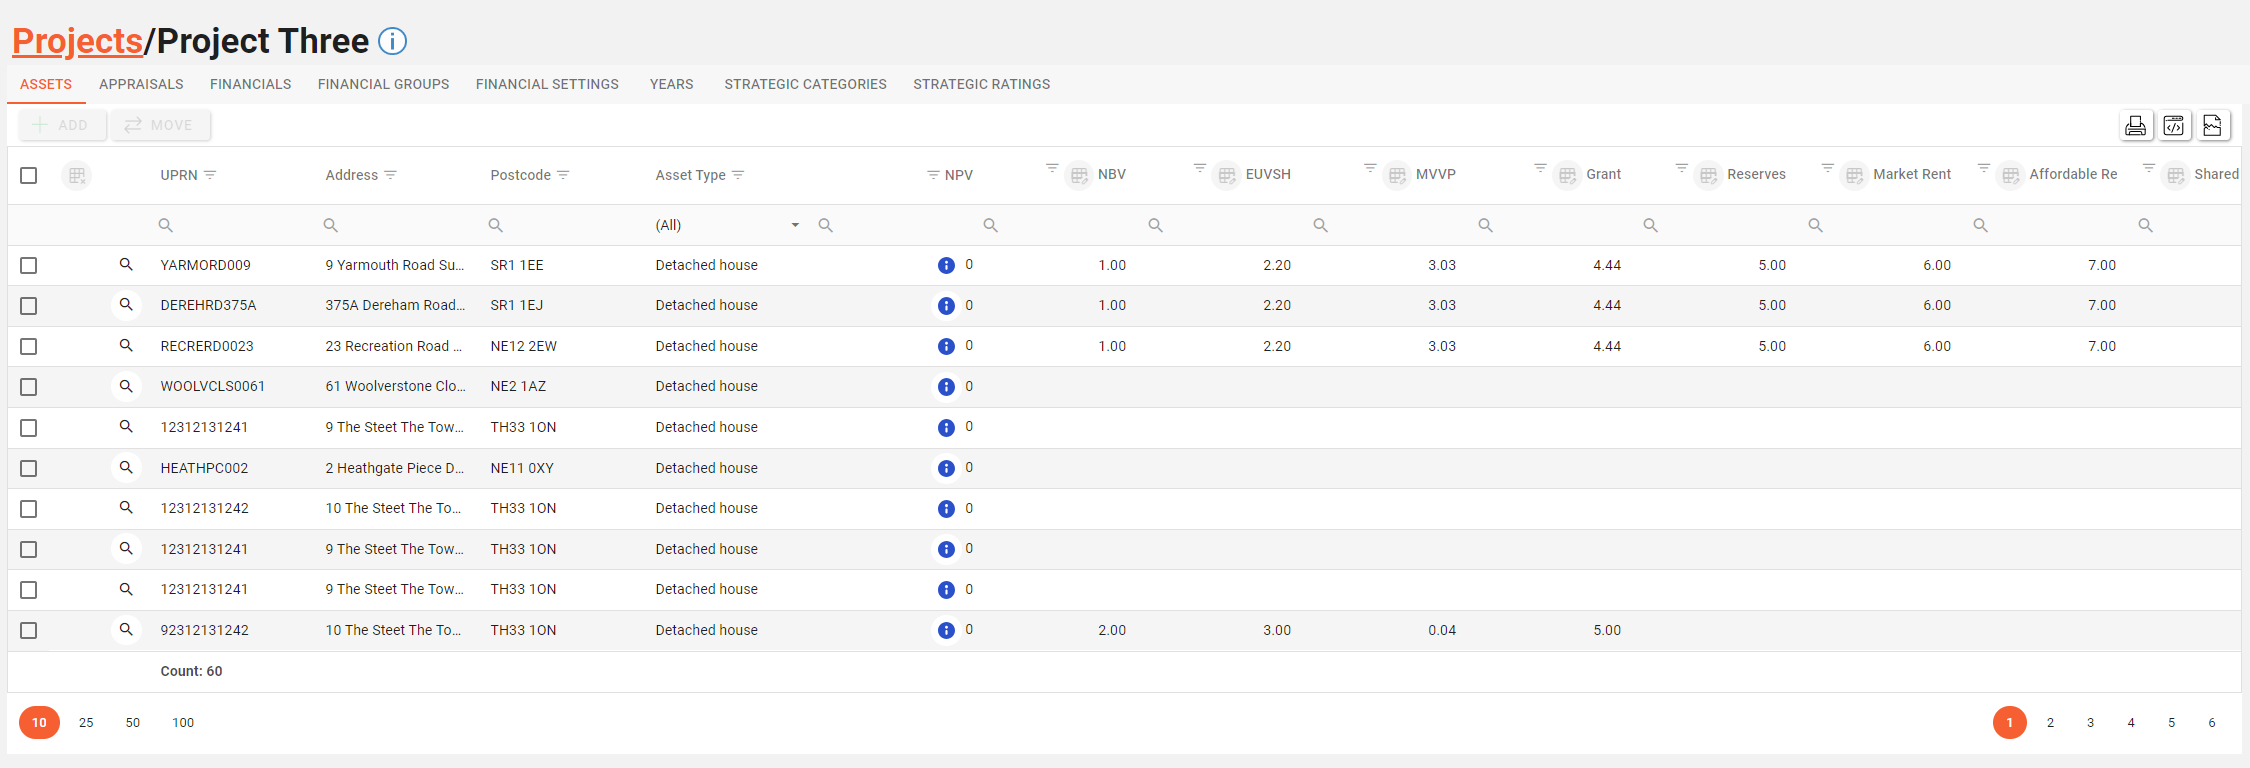
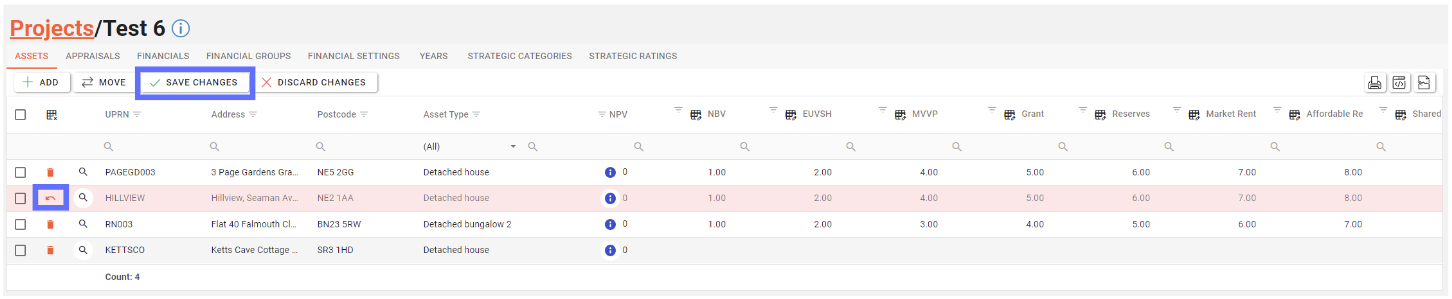
Project Assets
The Project → Assets Tab displays all of the Assets that have been assigned to the currently selected Project.
Permissions are required to manage the Project Assets screen. Please speak to your internal administrator to enable the following permissions:
AA_Appraisal_Projects_Assets_Create
AA_Appraisal_Projects_Assets_Update
AA_Appraisal_Projects_Assets_Delete
The Asset tab will display general information about an Asset e.g.
Column | Type | Description |
|---|---|---|
UPRN | Text | The Unique Property Reference Number |
Address | Text | The Address of the Asset |
Postcode | Text | The Postcode of the Asset |
Asset Type | Text | The type of Asset i.e. the type of property: Detached, Bungalow |
NPV | Decimal | Net Present Value |
NBV | Decimal | Net Book Value |
EUVSH | Decimal | Existing Use Value for Social Housing |
MVVP | Decimal | Market Value on Vacant Possession |
Grant | Decimal | The Grant amount |
Reserves | Decimal | The Reserves amount |
Market Rent | Decimal | The current market rent |
Affordable Rent Percentage | Decimal | The percentage of Affordable Rent |
Shared Ownership Equity | Decimal | The amount of shared ownership equity |
Lease Expiry | Date | The expiry date of lease for this Asset |
Staircase | Yes or No | Whether to Staircase or not. |
Has Data | Yes or No | Whether or not the Asset has data |
Last Updated | Date | When the row was created or last updated |
Updated By | Text | Who created or last updated the row |
From this tab a user can easily navigate to a specific Asset using the “Magnifying Glass” button on the left-hand side of the grid..
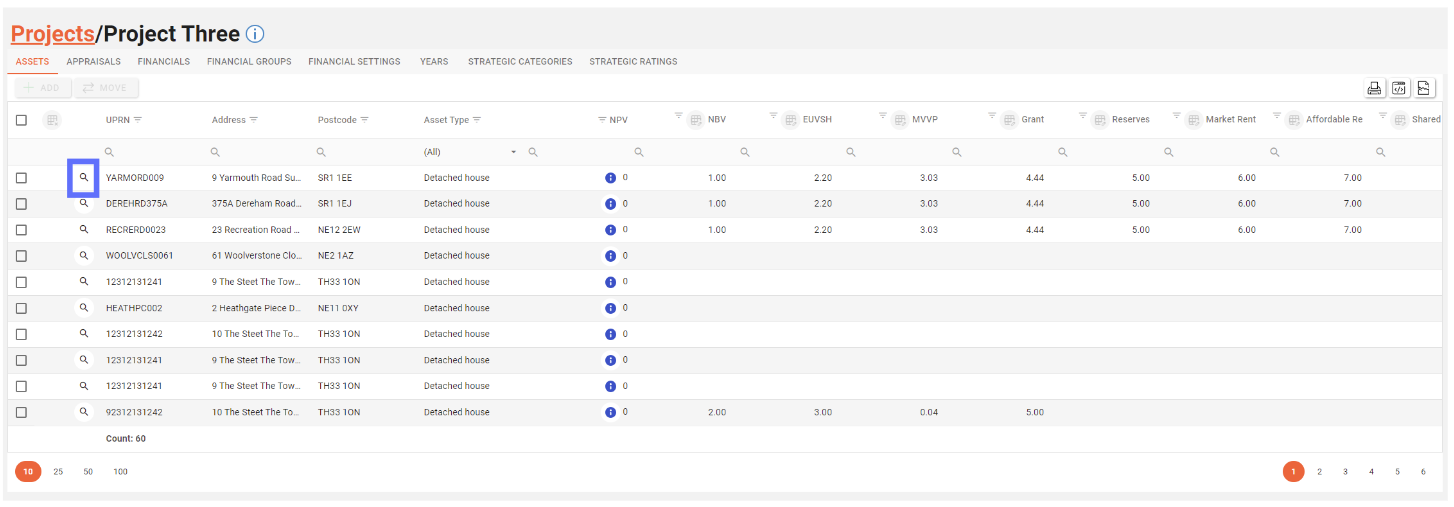
Clicking on the “Magnifying Glass” button will take the user to the Appraisal Asset Synopsis screen where more detailed information about the Asset can be viewed & edited.
Adding an Asset to a Project
If there are Assets in Asprey Assets that haven't already been added to the current Project the “Add” button will show in the toolbar at the top of the screen.

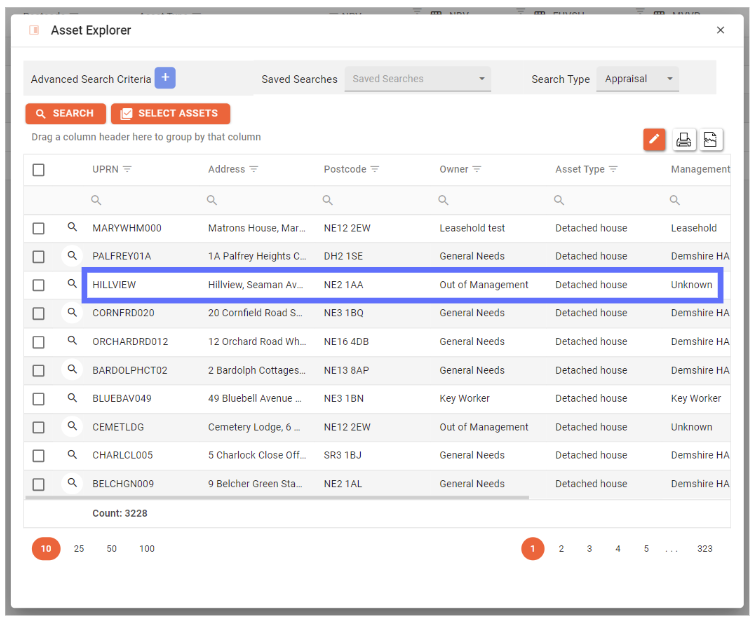
Clicking on the “Add” button will open the Asset Explorer in selection mode.
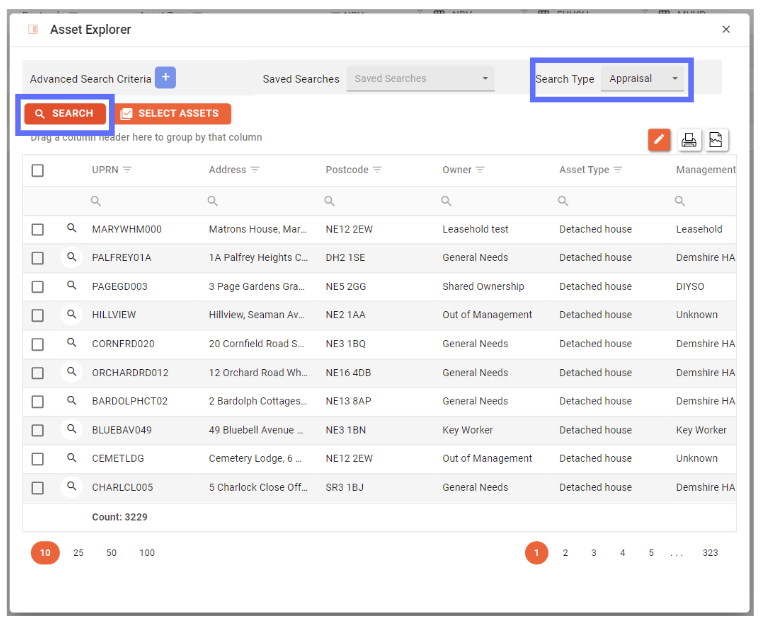
Within the Asset Explorer you can choose between the two different Search Types:
Search Type | Description |
|---|---|
Appraisal | Temporary Assets found in the Appraisal Asset Synopsis screen |
Asset | Assets that already exist in the Asset Register in the Asset Synopsis screen |
When you’ve selected the appropriate Search Type click on the “Search” button to perform a search for Assets.
Select the Assets that you want to add to the current Project by ticking the checkboxes on the left-hand side of the Asset Explorer and click the “Select Assets” button.
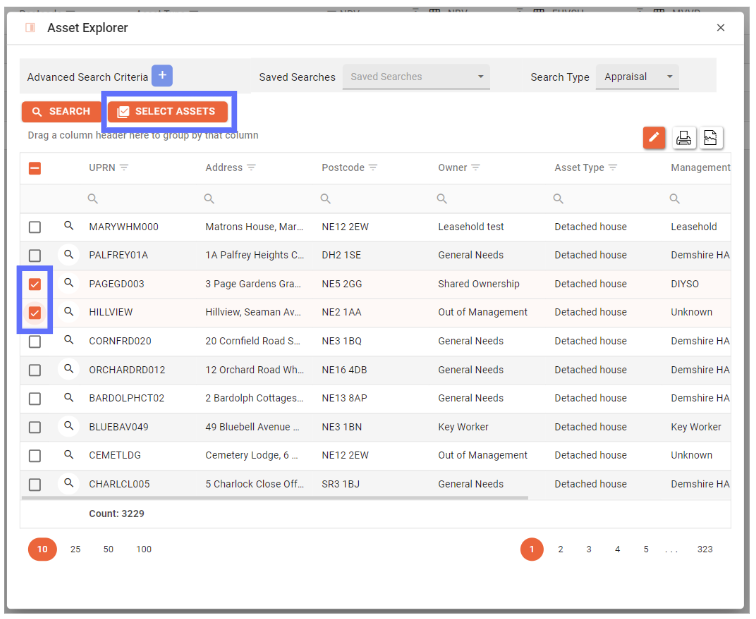
The Asset Explorer will disappear but don’t be alarmed, your Asset selection will be remembered by the Application.
A supplementary dialogue “New Project Asset” will be displayed in place of the Asset Explorer where you’ll be able to configure financial settings (identical to those on the Project Assets grid) for ALL of the Assets you previously chose to select.
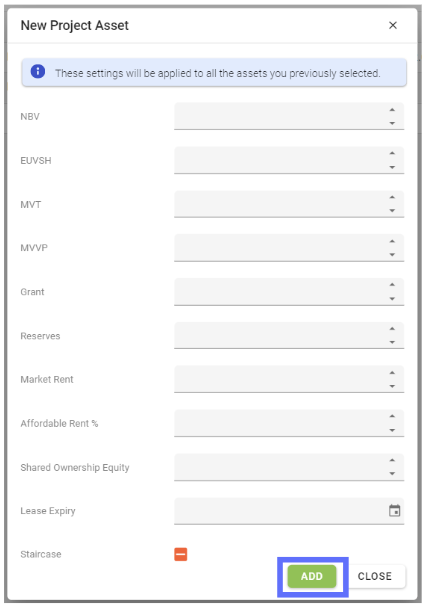
When all of the required fields have been filled out click on the “Add” button to add the previously chosen Assets to the Project Assets screen.
Editing a Project Asset
You can only edit Project Assets if the Project is unlocked.
The following Project Asset cells can be edited by simple clicking into the cell and overtyping the original value.
Editable Project Asset Cells |
|---|
NBV |
EUVSH |
MVVP |
Grant |
Reserves |
Market Rent |
Affordable Rent Percentage |
Shared Ownership Equity |
Lease Expiry |
Staircase |
Has Data |

When you’ve completed your amendments to the grid; click on the “Save Changes” button to persist the changes to the database.
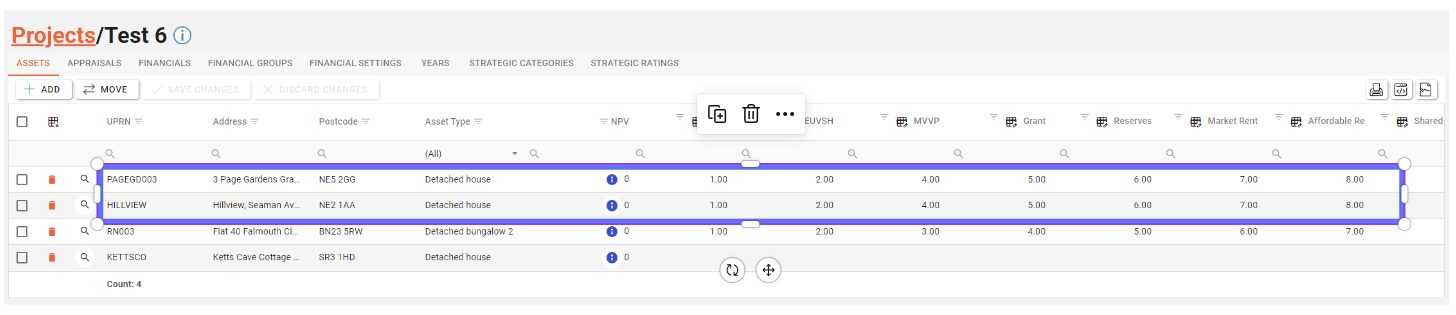
Bulk Editing Project Assets
Project Asset values can be bulk edited by first selecting the rows you want to bulk edit by ticking the checkboxes on the left-hand side of the grid.
Click on the “Bulk Edit” button in the column header you want to make en masse changes.

This will open the bulk edit dialogue specific to the column you want to edit.
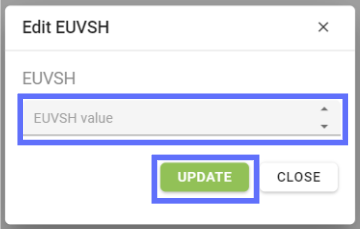
Enter a new value and click on the “Update” button to update the grid.

Click on the “Save Changes” button to persist the changes to the database.
Removing an Asset from a Project
If the current Project is unlocked you will be able to remove Assets from the Project.
Removing an Asset from a Project does NOT delete the Asset, it merely unlinks the Asset from the Project.
If an Asset is removed from a Project it can’t be used within any Appraisals that are linked to the current Project.
If an Asset has been previously been linked to an Appraisal, that belongs to the current Project it will be removed from the Appraisal if it’s unlocked.
Click on the trash can button on the Asset row you want to remove from the Project.
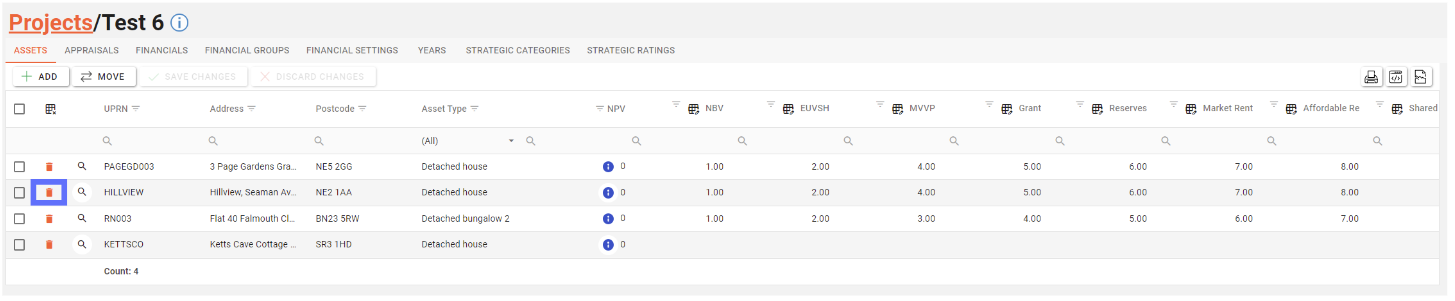
This will mark the row ready for removal. Click on the “Discard Changes” button or the undo arrow button on the row to reset the status and cancel the Asset from being removed.
If you want to proceed with removing the Asset from the Project, click on the “Save Changes” button.
The Asset will now be returned to the pool of Assets available for selection, should you want to add it back at a later date. (see below)
Moving an Asset
Assets can be moved from the current Project to another as long as it doesn’t already exist in the target Project and it’s unlocked.
Choose the Asset in the grid by selecting the left-hand checkbox in the Asset row and click on the “Move” button.

This will open the “Move Assets” dialogue where you can choose from pre-populated unlocked target Models & Projects.
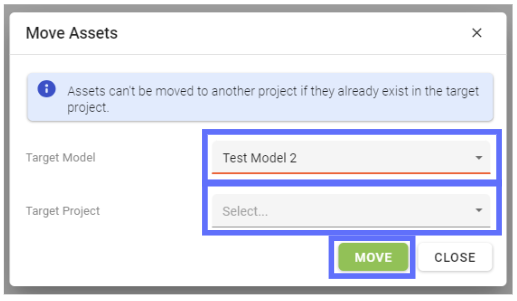
When the target Project has been selected, click on the “Move” button.
The Asset will either move successfully to the target Model & Project or a warning toast message will show in the top right-hand corner stating the Asset can’t be moved because it already exists in the target Project.