
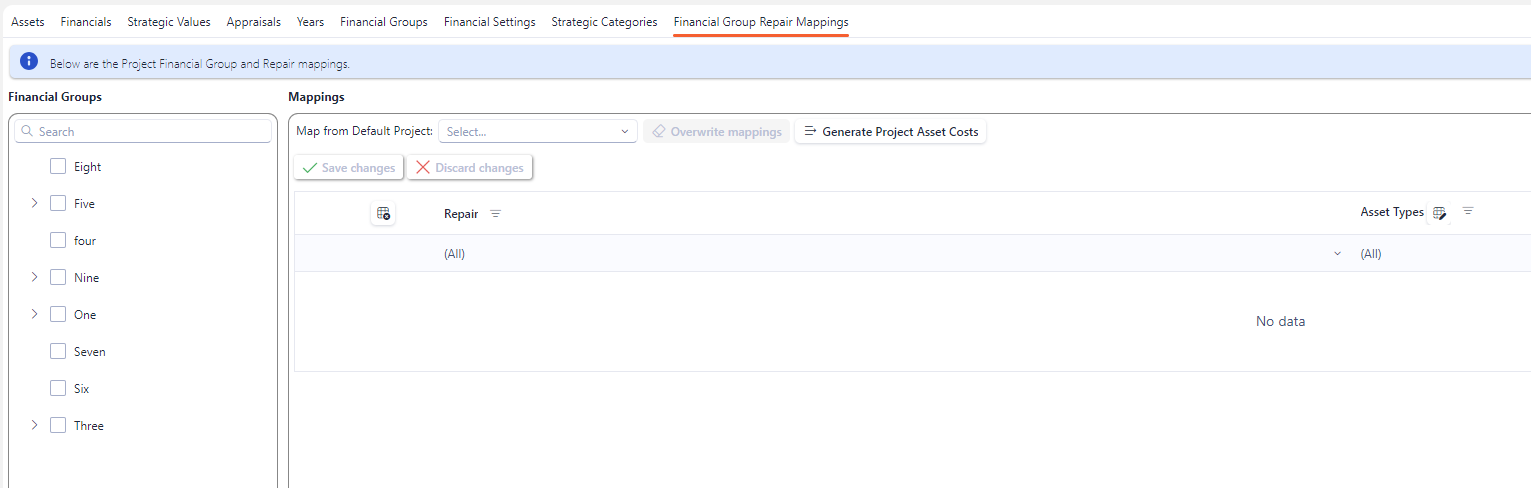
Financial Group Repair Mappings
The Financial Group Repair Mappings tab allows a user to configure mappings between Financial Groups and Repairs.
A licence and certain permissions are required to manage the Financial Group Repairs. Please speak to your administrator to enable the following license and permissions:
Licence:
AppraisalAssetsIntegrationPermission:
AA_Appraisal_Projects_Financial_Group_RepairsPermission:
AA_Appraisal_Projects_Financial_Group_Repairs_CreatePermission:
AA_Appraisal_Projects_Financial_Group_Repairs_UpdatePermission:
AA_Appraisal_Projects_Financial_Group_Repairs_Delete
If you haven’t done so already, create Project Financial Groups following this guide. Additionally if you haven’t configured any Repairs you will need to do so before attempting to add mappings. Follow this guide on how to add Repairs.
Adding a Mapping
Choose a Financial Group from the lefthand side of the screen (see below)
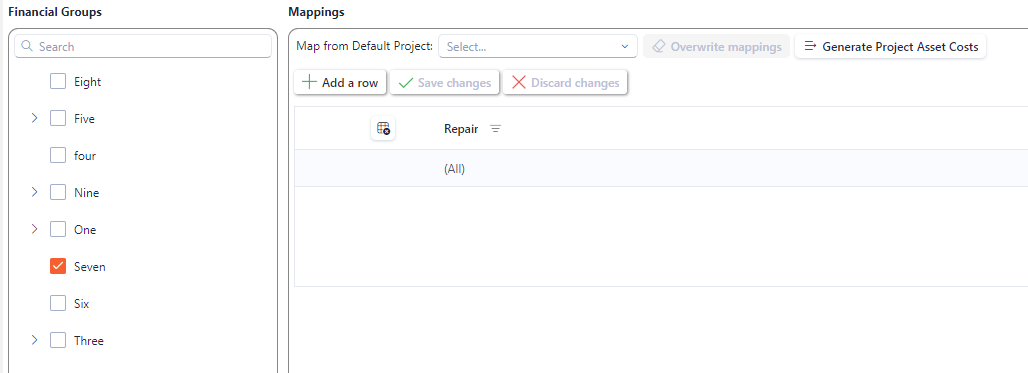
This will enable the “+Add a row” button on the righthand side (Mappings) of the screen.
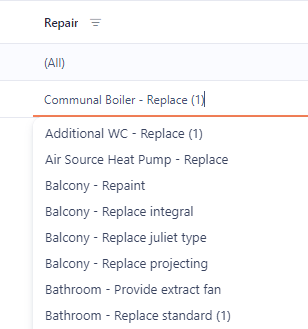
Clicking on the “+Add a row” button will add anew row, allowing you to choose from a dropdown list of Repairs currently configure within the system. (see below)
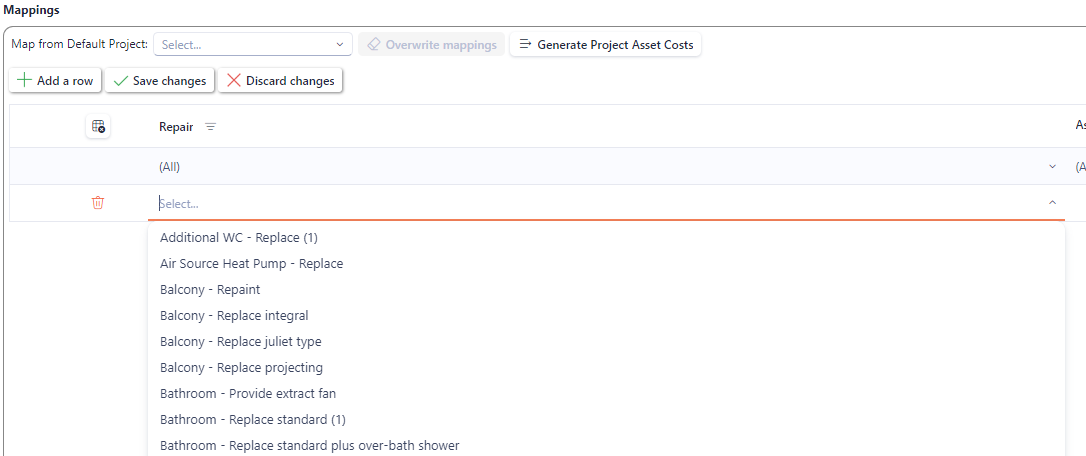
Choose a suitable Repair for the mapping.
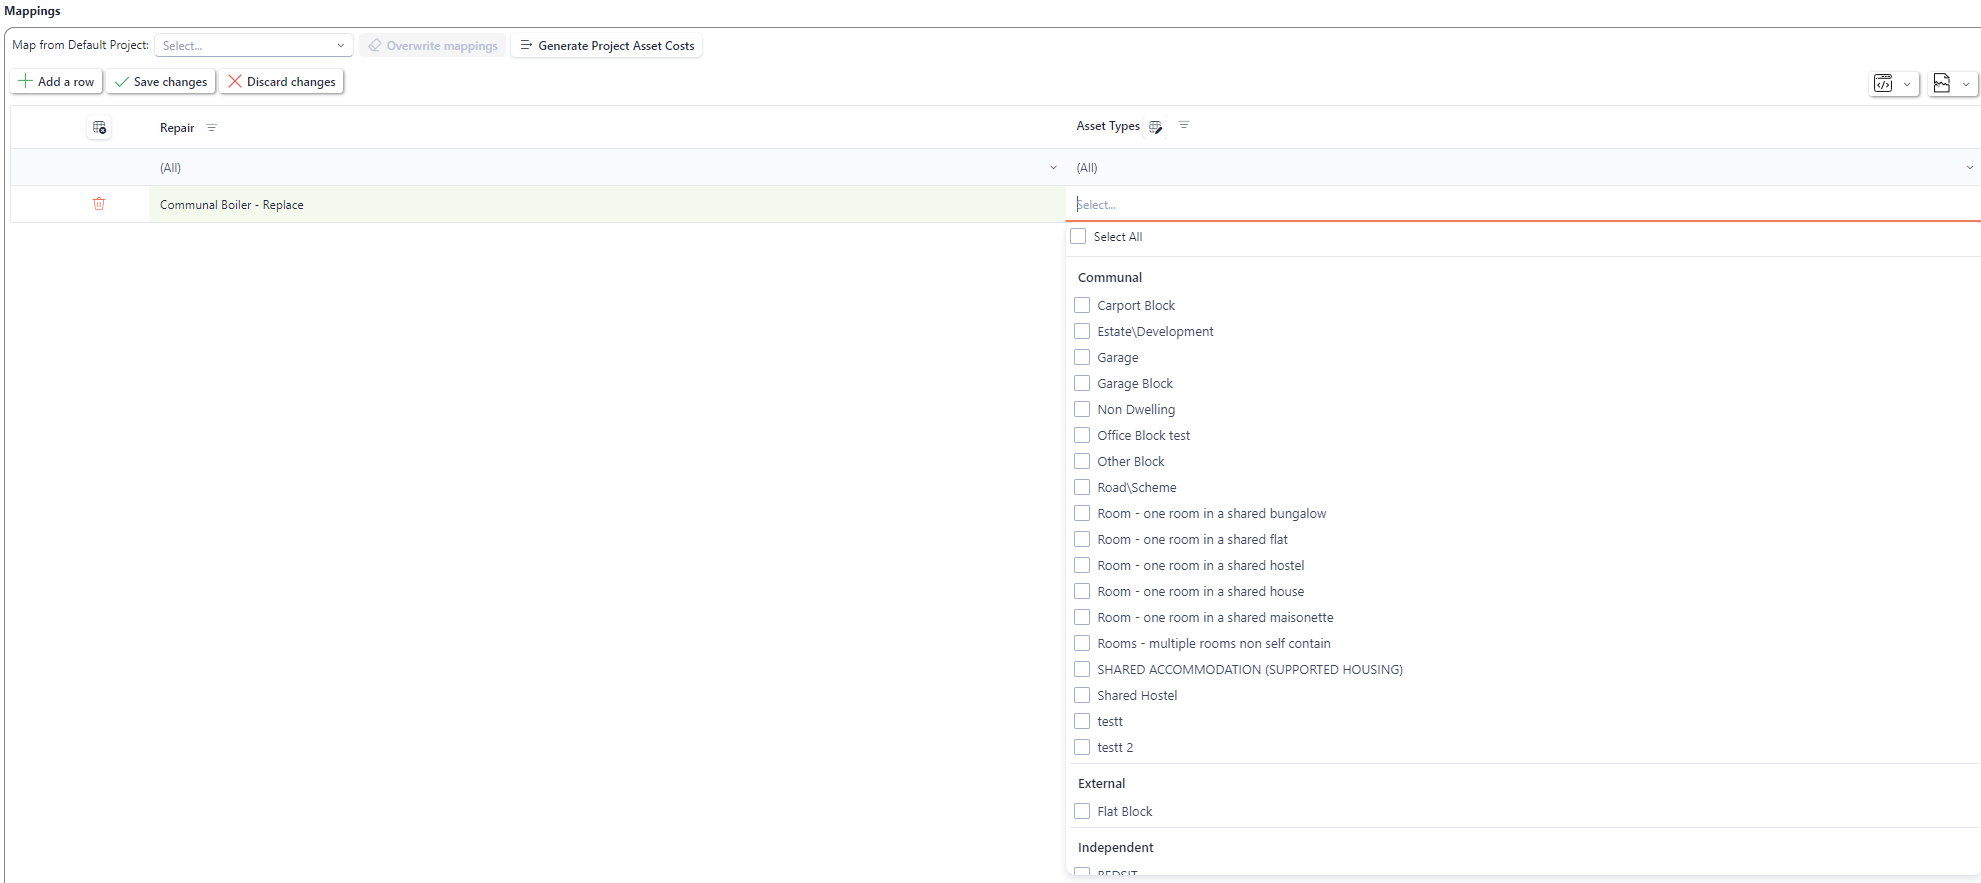
You can optionally choose which Asset Types will apply to this mapping by selecting from the dropdown selection of Asset Types currently configured in the system.
By leaving the Asset Type cell blank it effectively means that ALL Asset Types apply to the mapping instead of any specific ones that you might have selected. The Asset Type selection gives you a finer granularity of control over which mappings will be applied to which Assets in future steps.
Once you’re satisfied with you selection press the “Save Changes” button to persist the changes to the database.
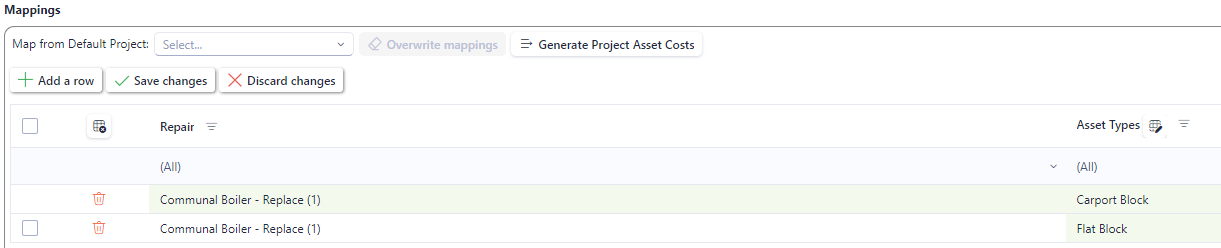
If you try and add the same repair for the same group or any other, you’ll be met with a validation warning (see below).

A mapping will have to have distinct Asset Types to permit the same Repair being configured.
For example:
Repair “Communal Boiler - Replace” has been used twice for two mappings for the Financial Group: “Seven” but has different Asset Types.
However the above example is exactly the same as this one:

The only difference is that the Asset Types are combined on to one row meaning less mappings to manage.
You may have noticed a number being add to the Repair when it’s been used for a mapping (see below)
The number in brackets next to the Repair indicates how many times the Repair has been used and also allows you to tack which Repairs have already been mapped.
Mapping from a Default Project
A different way to create mappings is to use preconfigured mappings from a Default Project that have been previously configured in the Appraisal → Configuration section.
To make use of existing mappings, choose a Default Project from the dropdown selection at the top of the screen (see below)

Once you’ve selected a Default Project, click on the button “Overwrite mappings” button.
Clicking on the “Overwrite mappings” button will overwrite any previously configured mappings so use this feature with caution.
Only the Financial Groups that match by name will be overwritten, so you need need to ensure they are named exactly as per the Default Project → Default Financial Groups are. If you used the Default Project Financial Groups originally when adding the Project they should match exactly.
Generate Project Asset Costs
When you’ve configured mappings you can use them to generate Project Asset Costs based on a previously configured Forecast.
If you haven't' done so already, you will need to create a Forecast(s) using this guide.
Click on the button “Generate Project Asst Costs”, this will show a popup (see below)
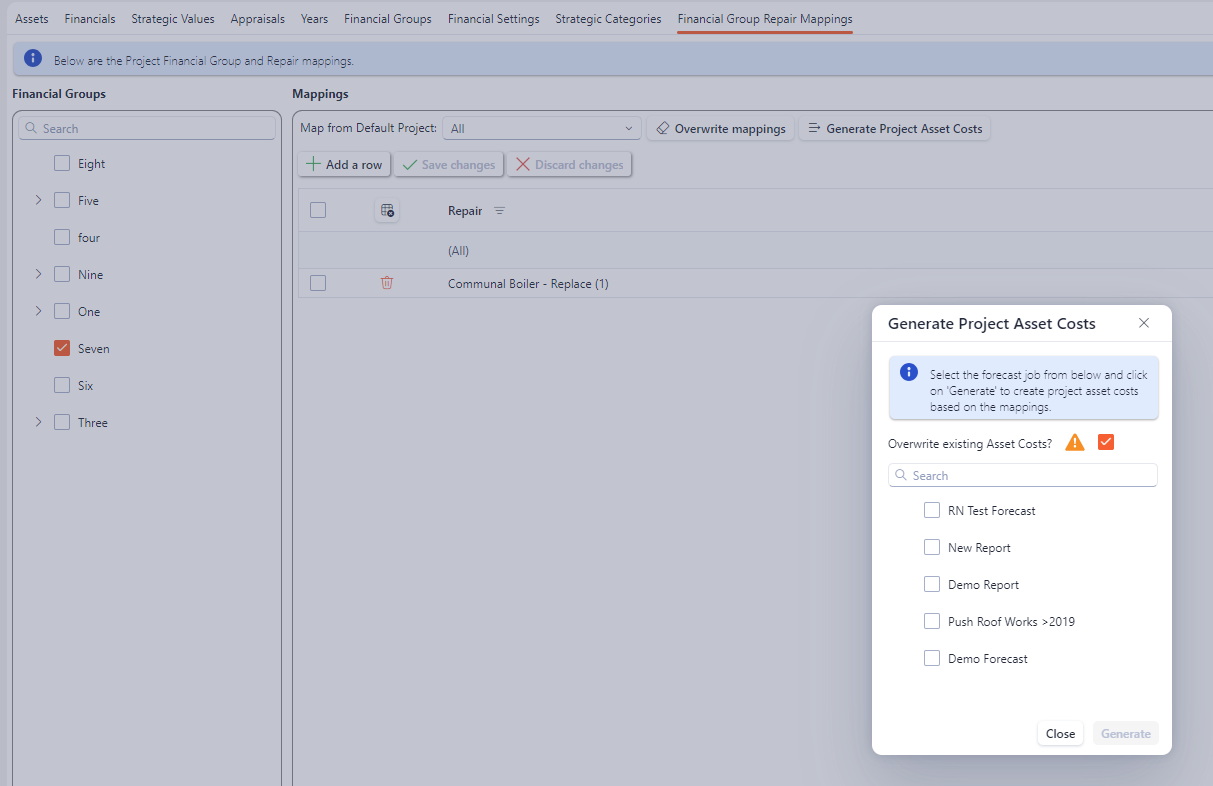
The popup will allow you to choose a Forecast as a basis for the Project Asset Costs based on the mapping’s you’ve previously configured.
The checkbox “Overwrite existing Asset Costs” when ticked will permit the system to overwrite any existing Asset Costs that have been configured. If you want to maintain Asset Costs you’ve already defined then untick this check box before clicking “Generate”.