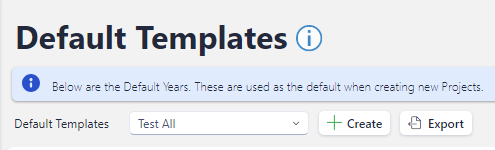
Default Templates
The Default Templates screen allows a user to create a custom import template for the purpose of importing, Assets, Classifications, Project Assets, Financial Costs, Project Groups, Years and Settings.
The reason a user might want to use the custom templates is for New Build data imports.
The Default Templates screen can be found under the Appraisal → Configuration section.
Permissions are required to manage Default Templates, please speak to your internal administrator to enable the following permissions;
AA_Appraisal_Configuration_Templates
AA_Appraisal_Configuration_Templates_Create
AA_Appraisal_Configuration_Templates_Update
AA_Appraisal_Configuration_Templates_Delete
Creating a Default Template
Default Templates are based upon Default Projects so you will need to set up at least one Default Project by following this guide.
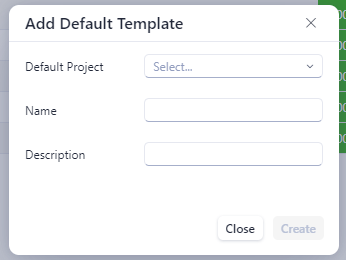
Start by clicking on the “Create” button (see below)
This will open a popup allowing a user to choose a Default Project and specify the name and description of the template (see below).
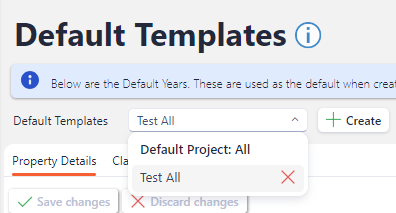
Upon creation of the Default Template a user will be able to select the newly created template from the dropdown list in the top left of the screen (see below).
Configuring a Default Template
The Default Template screen is broken up into three tabs:
Property Details
Classifications
Financial Groups
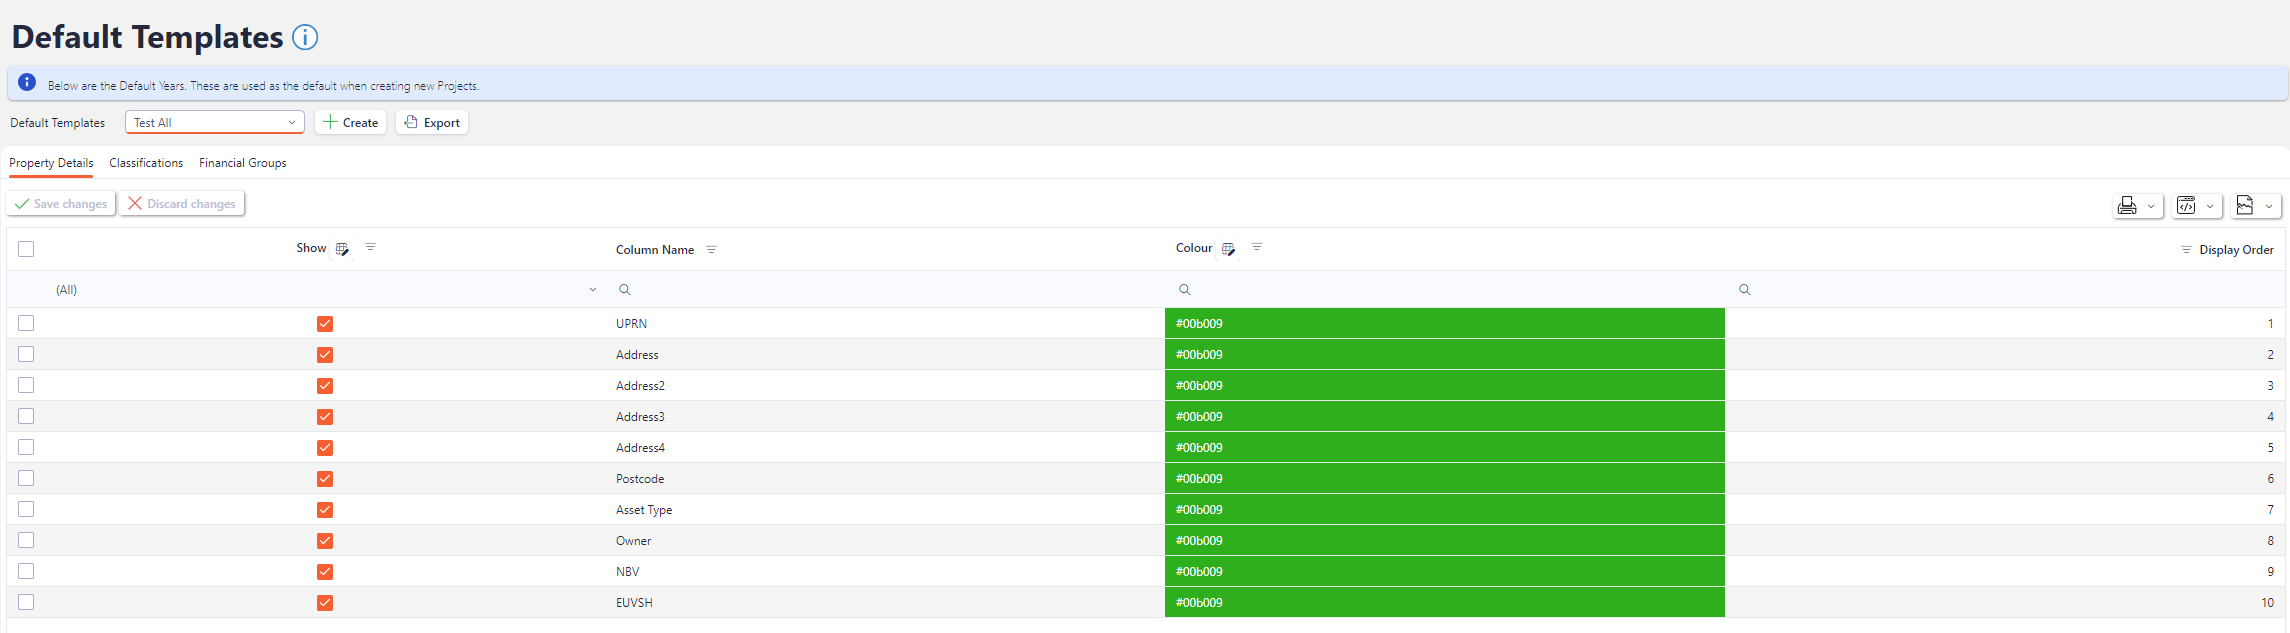
Property Details Tab
The Property Details tab allows a user to indicate which Asset fields will be shown in the Propert Details section of the Template.
A user can choose from any of the following fields:
UPRN (Mandatory)
Address (Mandatory)
Address 2
Address 3
Address 4
Postcode
Asset Type
Owner
NBV
EUVSH
MVT
MVVP
Grant
Reserves
Market Rent
Affordable Rent Percentage
Shared Ownership Equity
Lease Expiry
Staircase
By ticking the “Show” checkbox and simply clicking on the “Save changes” button, the selection of fields will be persisted to the database for the selected Default Template.
The Property Detail fields have a default colour of #00b009 but this can be changed using the Colour Picker in the Colour column for the field that requires a different colour.
The Display order of the Property Detail fields will default to numeric values but these can also be changed to rearrange the fields in the template.
Classifications
The Classifications tab allows a user to choose which Classifications from the system will be included in the template. Please note that Classifications will need to be configured in the system prior to creating a template for them to show on this screen. (see below)
There are too many to list here, but examples of Classifications are Block, Construction, Dwelling Status, SAP Rating, etc.
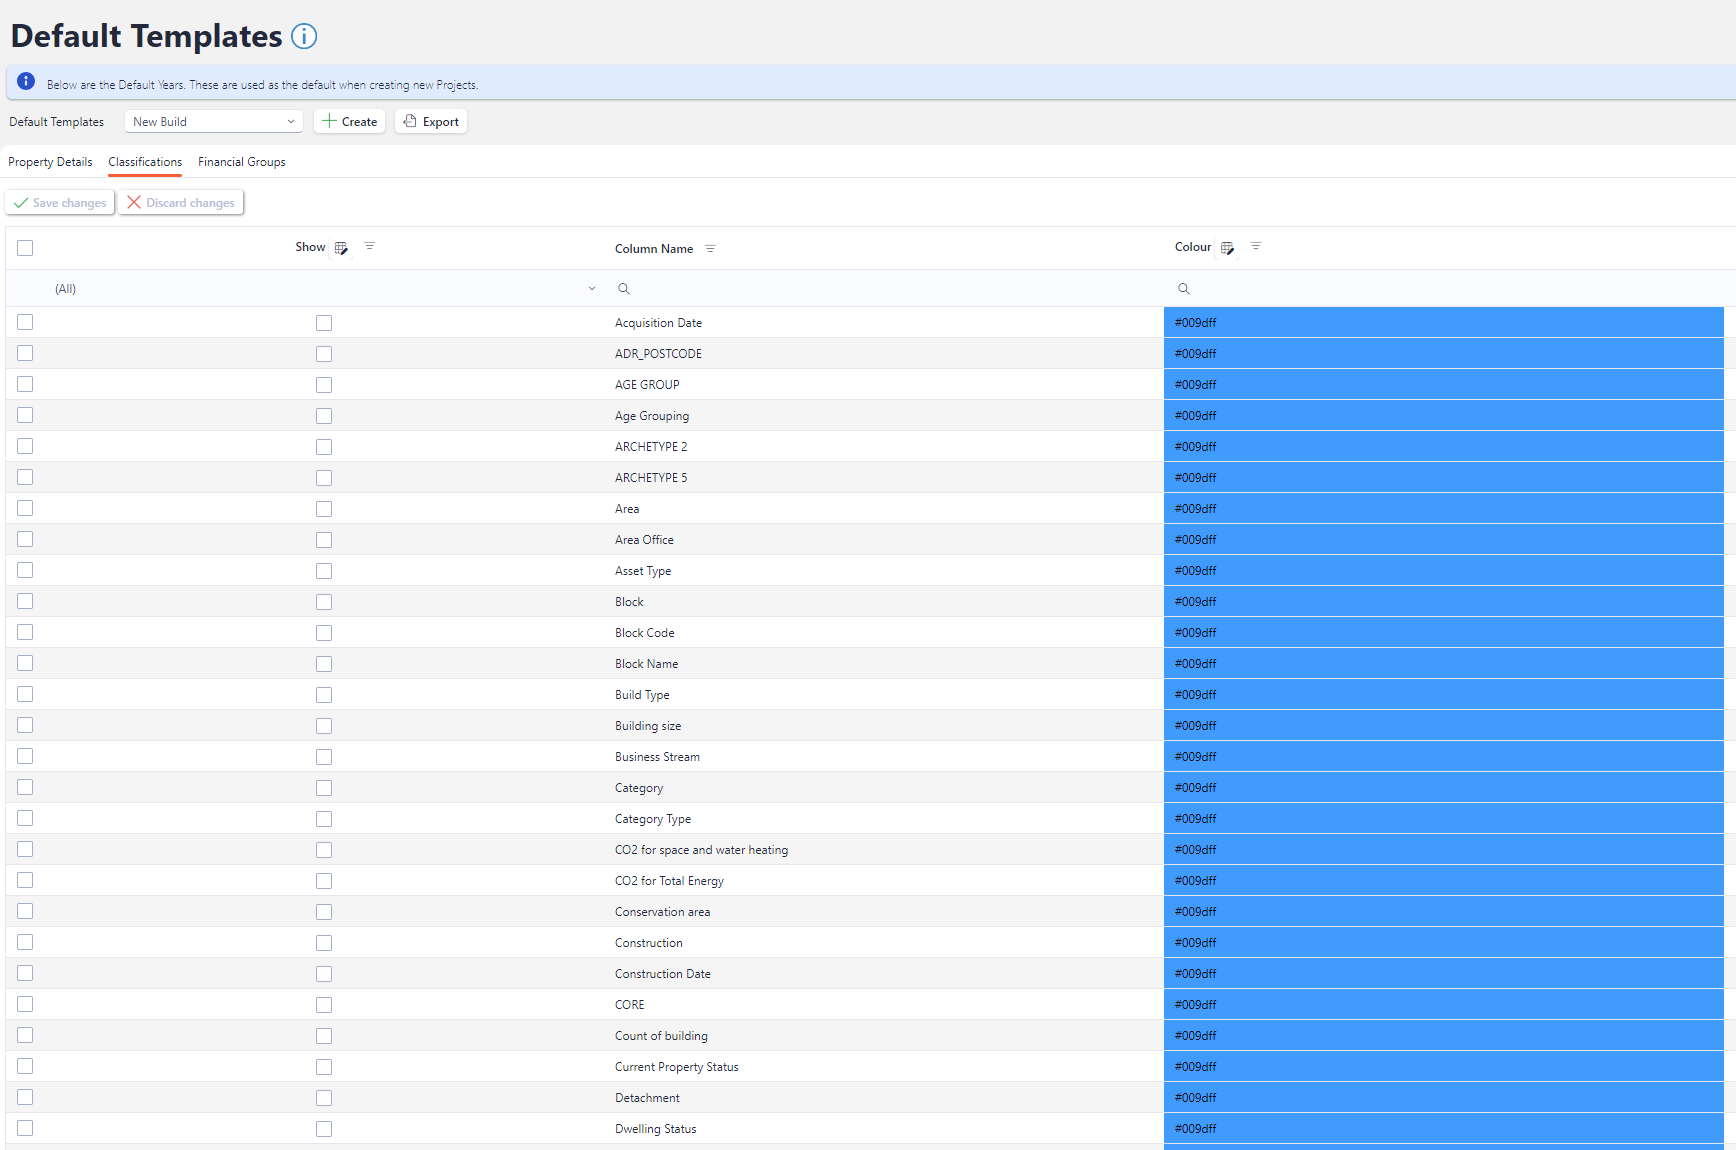
Again the Classifications the user want to see included in the template should be ticked in the “show” column and the “Save changes” button pressed.
Financial Groups
The Financial Groups tab will take the Default Financial Groups configured under the Default Project that was chosen when creating the template hence needing to set up the Default Financial Groups prior to building the template. (see below)
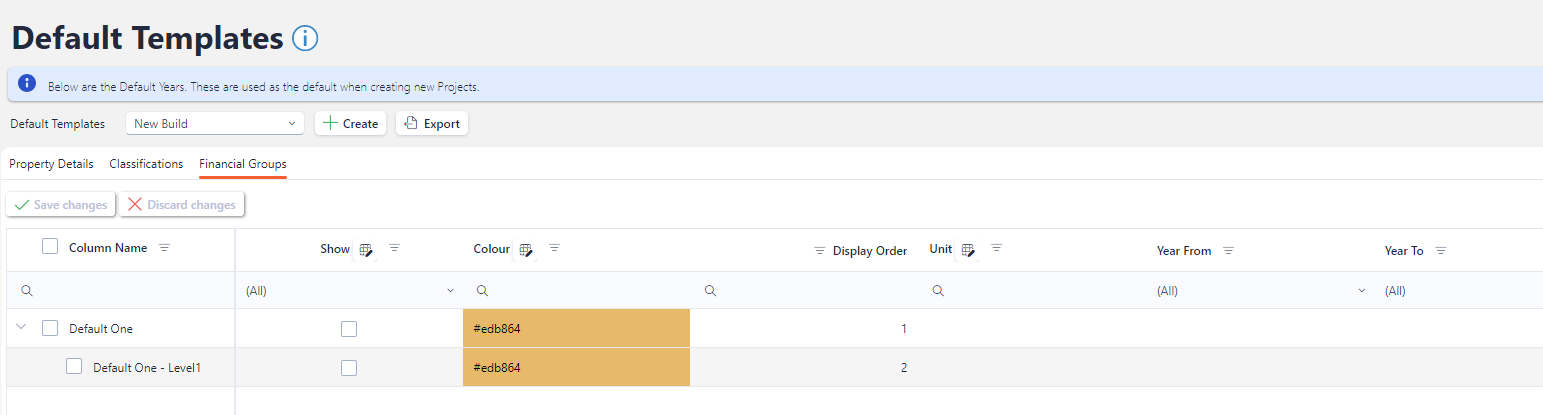
Again the Default Financial Groups ca be chosen by clicking on the “Show” checkbox and then clicking “Save changes”.
The colour of the Financial Groups defaults to #edb864, but this can be changed using the colour picker.
For each Default Financial Group the following fields can also be specified:
Unit - The Unit the user wants to display on the template i.e. m2, £, currency - it’s a free text field so can be specified or left blank
Year From & Year To - The “Year From” and “Year To” field allow the user to choose which Year the Project Asset Cost should apply. These fields use the Default Years from the Default Project and therefore will require setting up prior to template configuration.
Show Life - When ticked will display the Financial Group Lifecycle on the template
Show Cost Type - When ticked will display the Cost Type of the Financial Group on the template, i.e. Costs, Revenue or None.
Show Multiplier - When ticked will display a new column to the right of the Financial Group column on the template, so that the Multiplier can be recorded for the corresponding Financial Group.
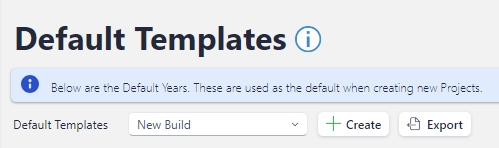
Exporting the Default Template
When the user has finish configuring the fields for the template they can click on the “Export” button at the top of the screen to download the Excel version of the custom template. (see below)
The downloaded template will look similar to the example below.
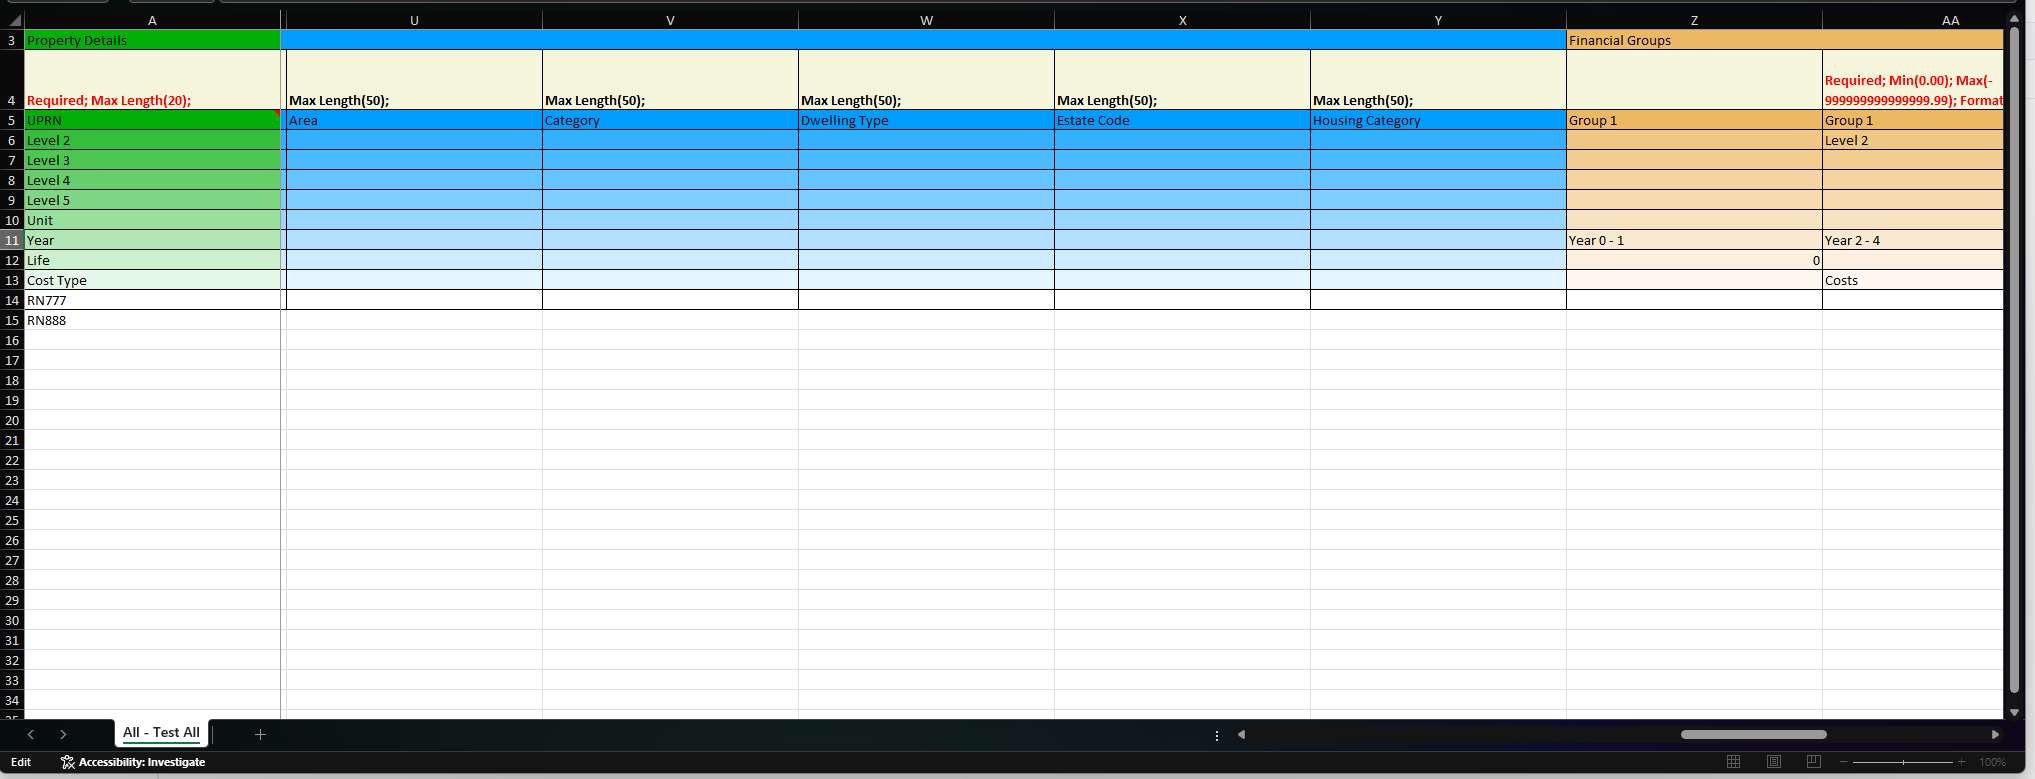
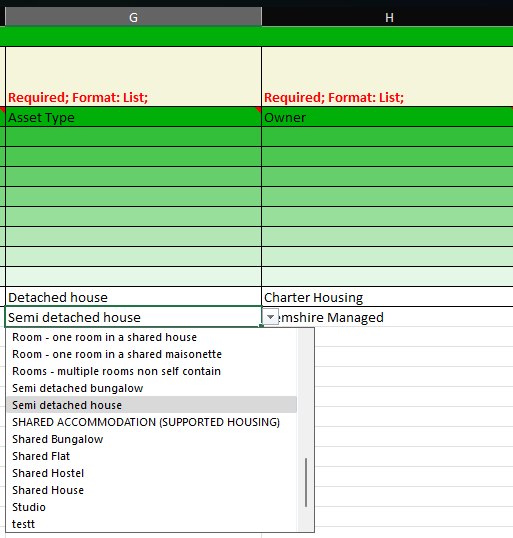
Each section is denoted by a column that spans the individual columns beneath it. Each column will display details about whether it’s required, it’s data format, min/max length etc. The template also includes validation to ensure the correct data input. Where multiple options are available a dropdown list will be displayed. (see below)
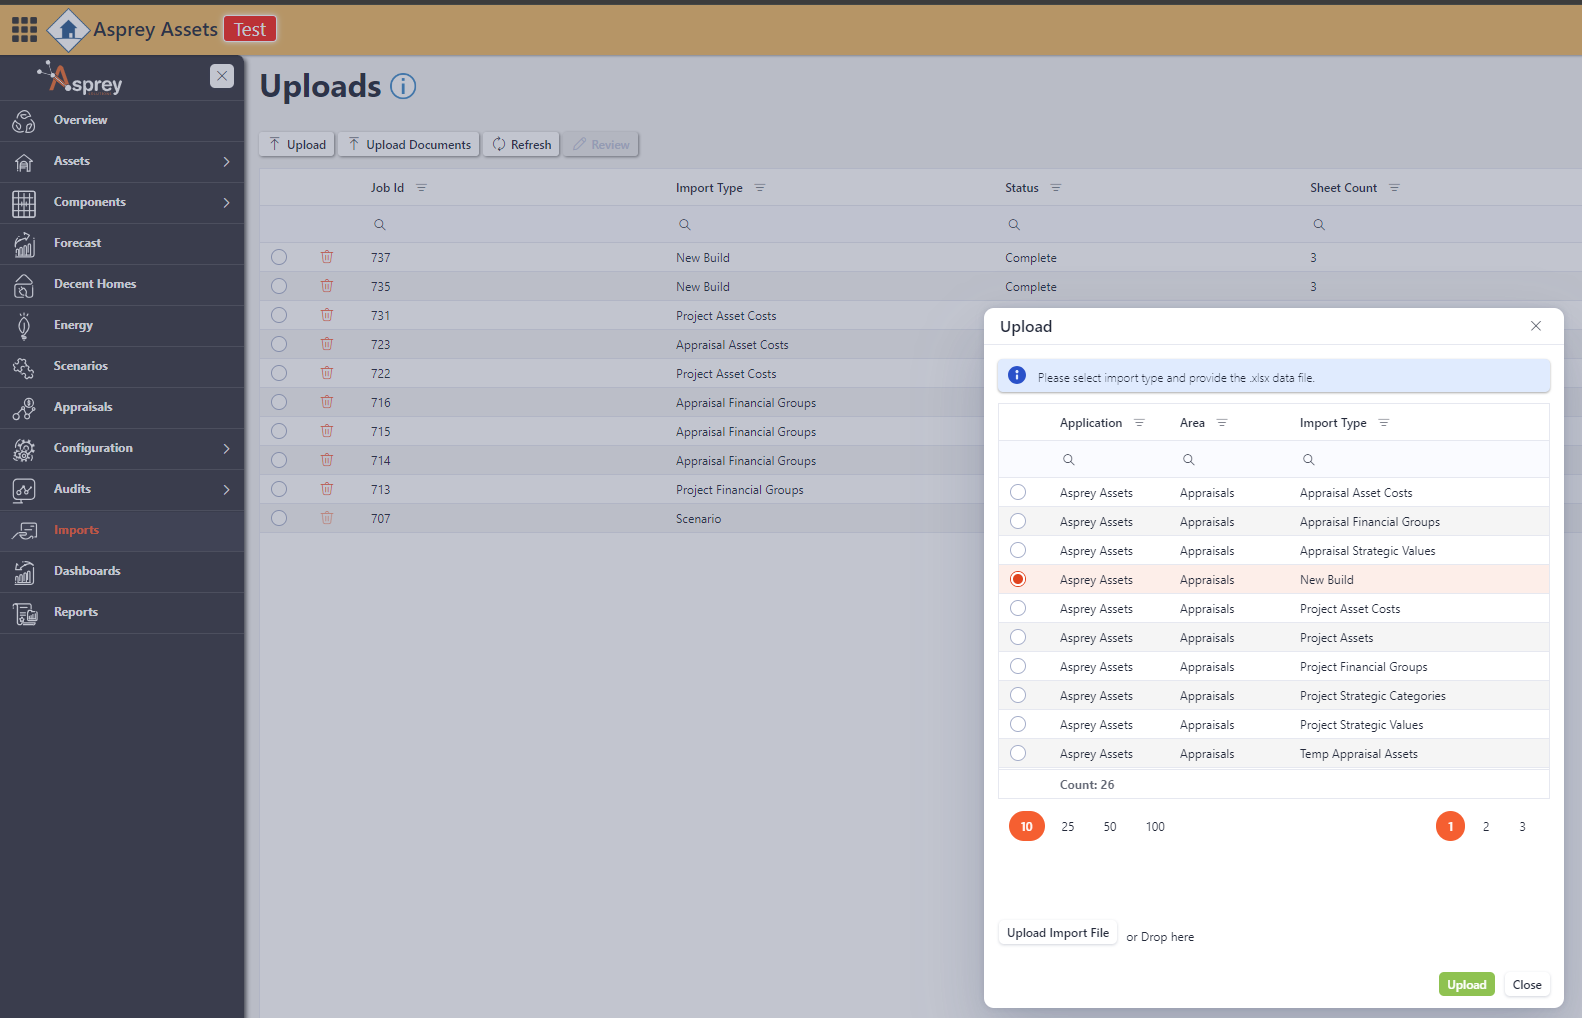
Importing the Default Template
When the template has been filled out it’s data can be imported into the system by using the Import → Upload.
In this example the “New Build “ template is being imported.