
Asset Synopsis
The asset synopsis page is accessed through the Asset Explorer and provides a detailed overview of an asset and is broken down into the following tabs:
General Details Tab
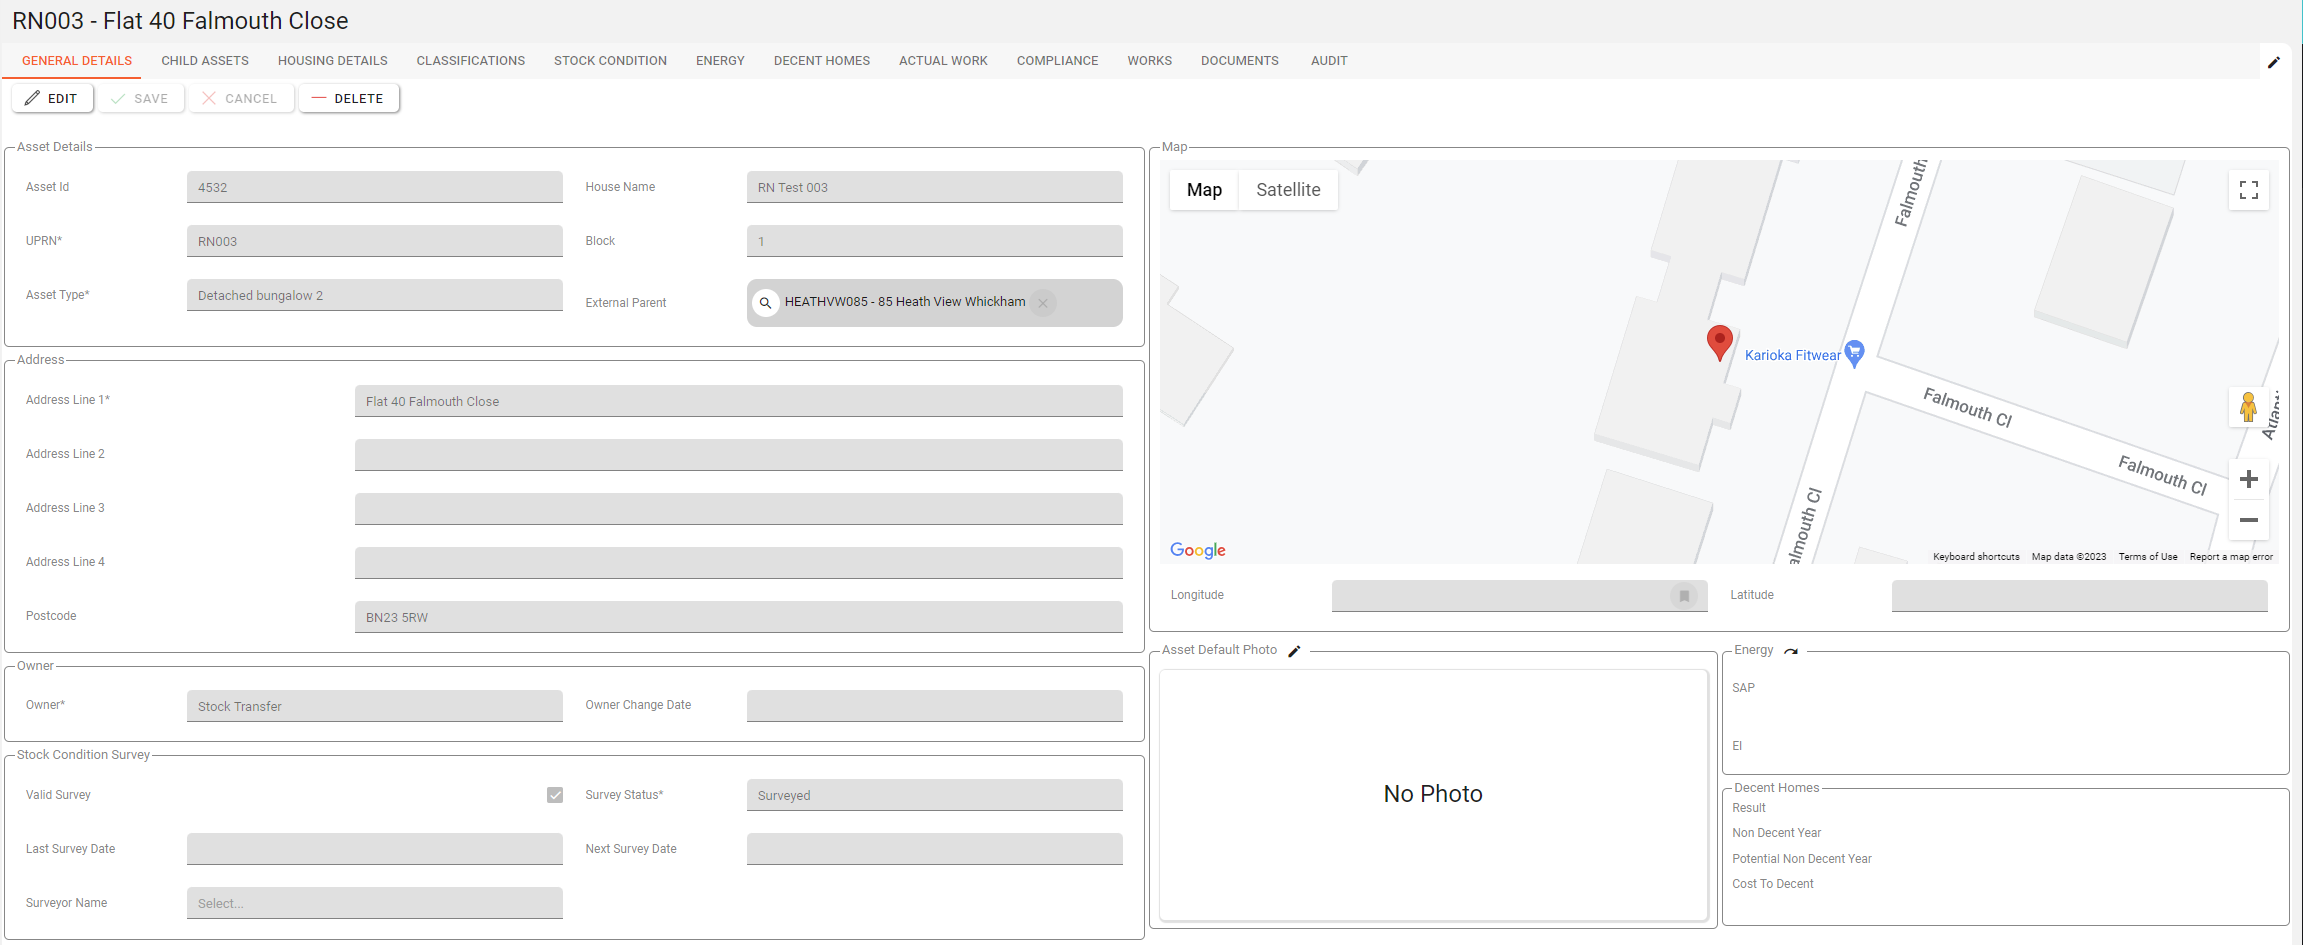
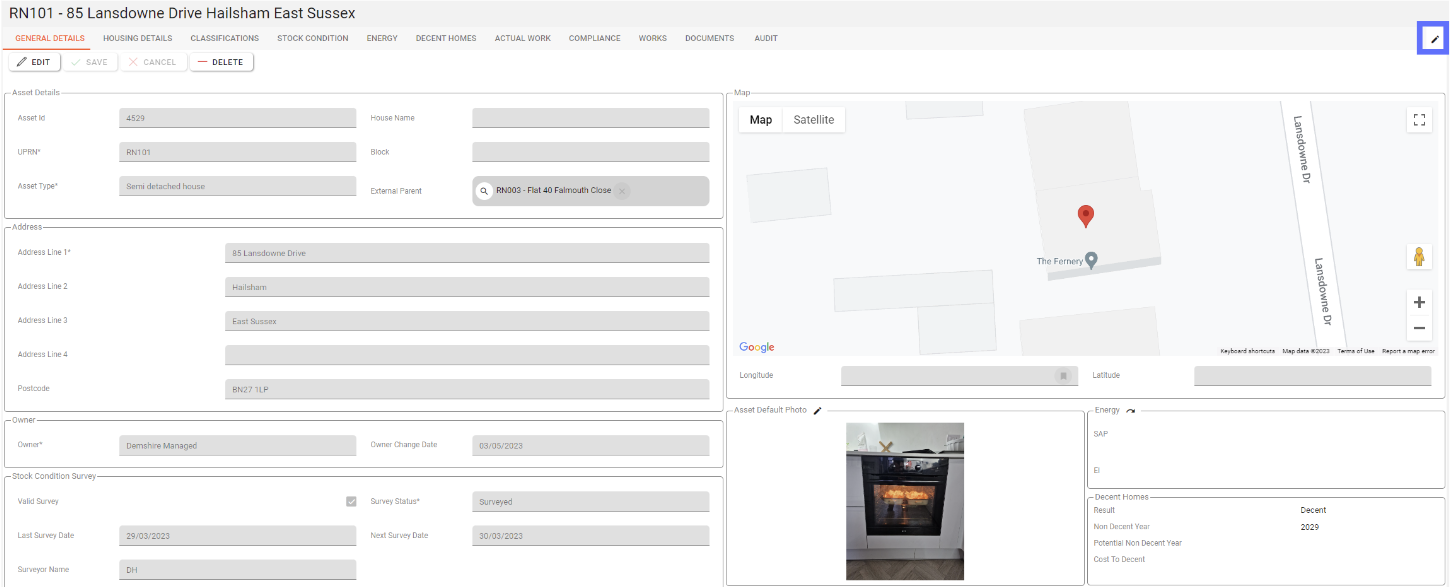
The General Details tab provides an overview of the asset. it provides key information about the asset such as its address, the ownership, stock condition status, energy, housing quality any images and a map.
Editing asset details
You will require the following permission to edit asset details.
AA_Asset_Edit
AA_Asset_Change_Default_Photo
AA_Asset_Upload_Documents
Please speak with your internal administrator to grant the relevant permissions.
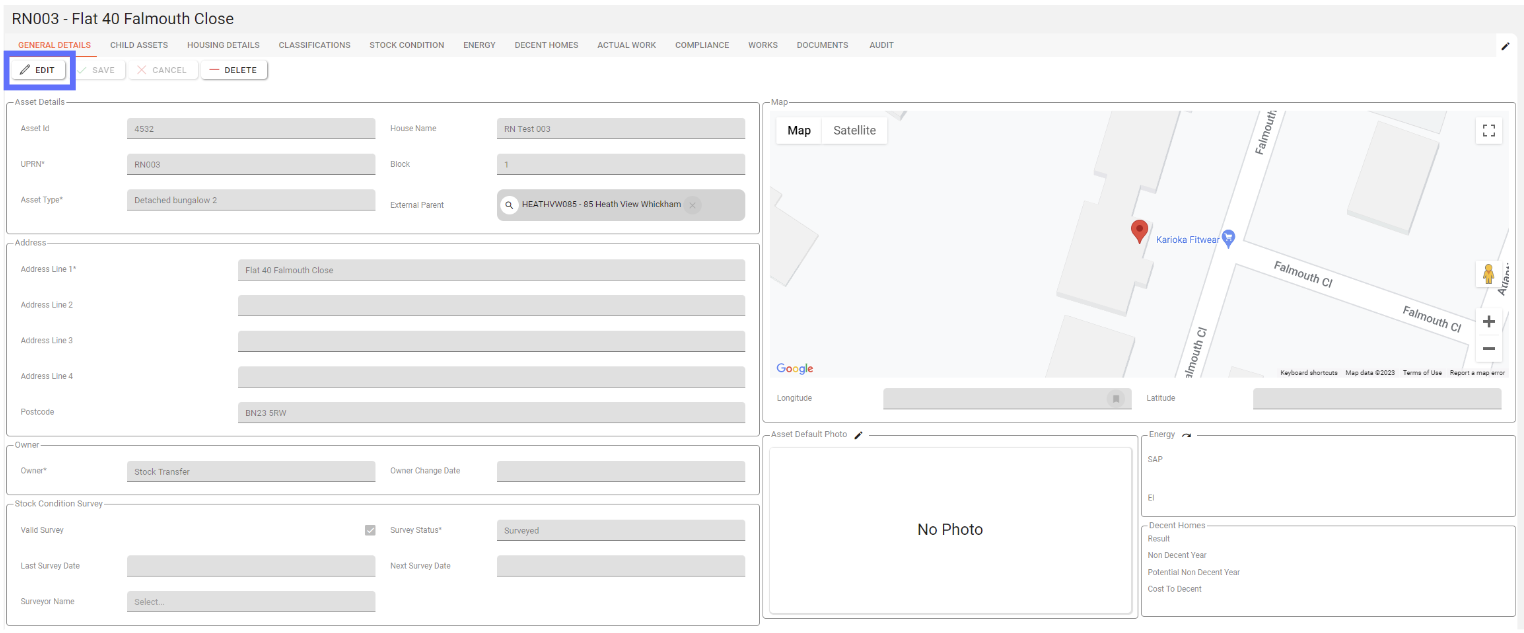
To edit the asset details click the “Edit” button located at the top left-hand corner of the page. Once clicked, the page will allow all editable fields to be amended and the edit button will become greyed out and cannot be clicked again.
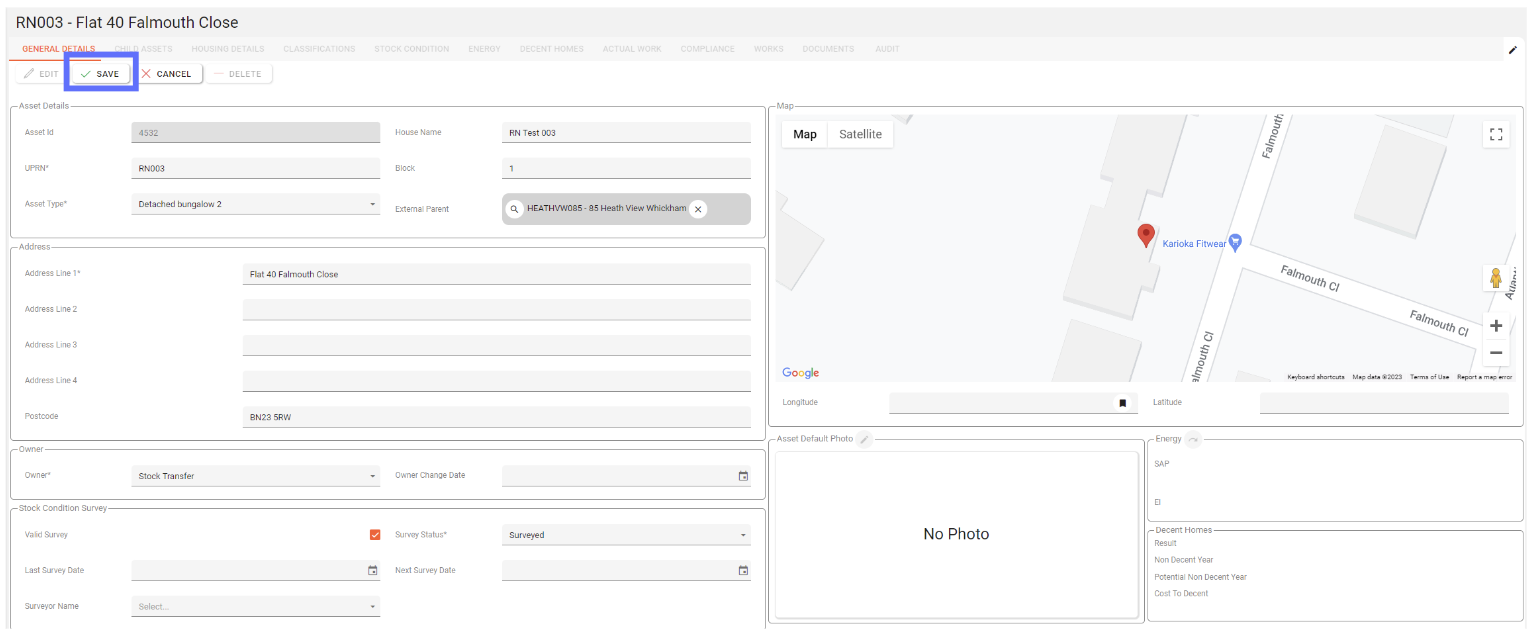
Once the changes have been made, click the “Save” button to commit the changes and update the asset details, or click the “Cancel“ button to undo any changes made.
Deleting asset details
You will require the following permission to delete asset details.
AA_Asset_Delete
Please speak with your internal administrator to grant the relevant permissions.
To delete an asset, click the “Delete” button located at the top left-hand corner of the page.

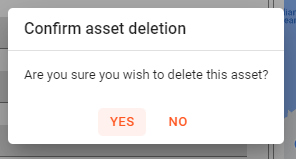
Once you’ve clicked the “Delete” button, a confirmation dialogue box will appear for you to confirm the deletion. Click “YES” to confirm the deletion or “NO” to dismiss the dialogue box and halt the deletion.
Once you delete an asset it is permanently deleted from the database!
External Parent
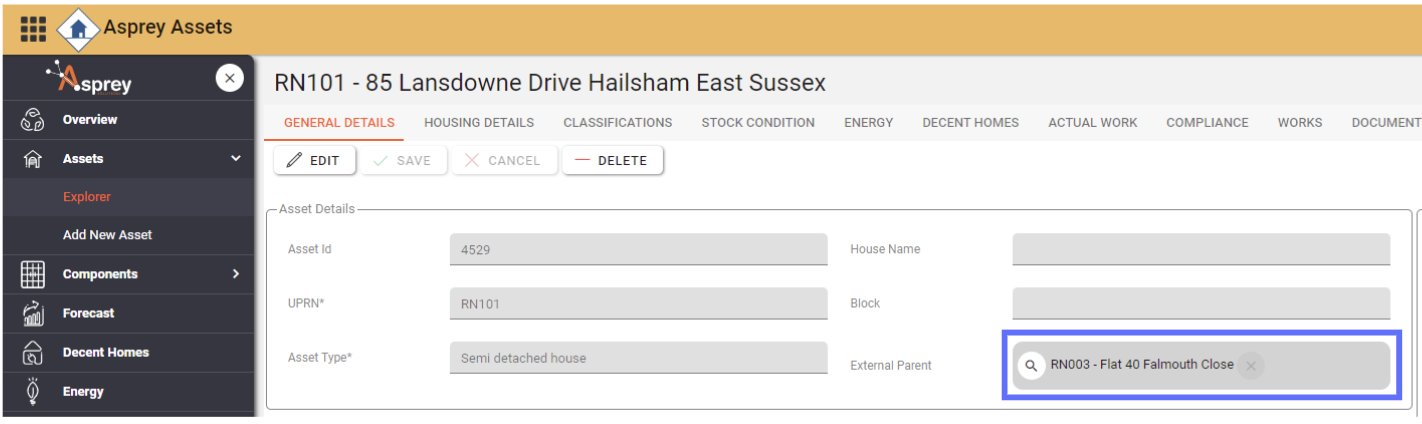
In the “General Details” tab you can indicate whether the current asset is a child asset of another, by choosing from existing assets in the system using the “External Parent” drop-down list.
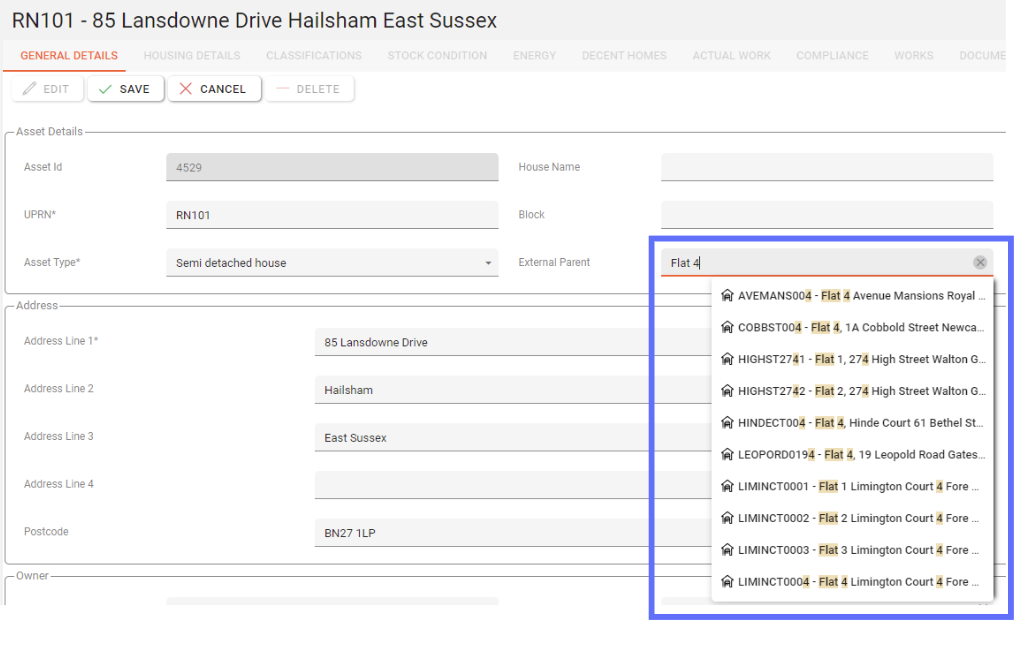
Remember to click the “Save” button to commit changes to the database.
Child Assets Tab
If the current asset has been marked as an external parent asset (see above), the “Child Assets” tab will be shown next to the other tabs in the asset synopsis screen.
The “Child Assets” tab allows you to drill into each child asset using the corresponding magnifying glass button on the lefthand side of the screen.

Housing Details Tab
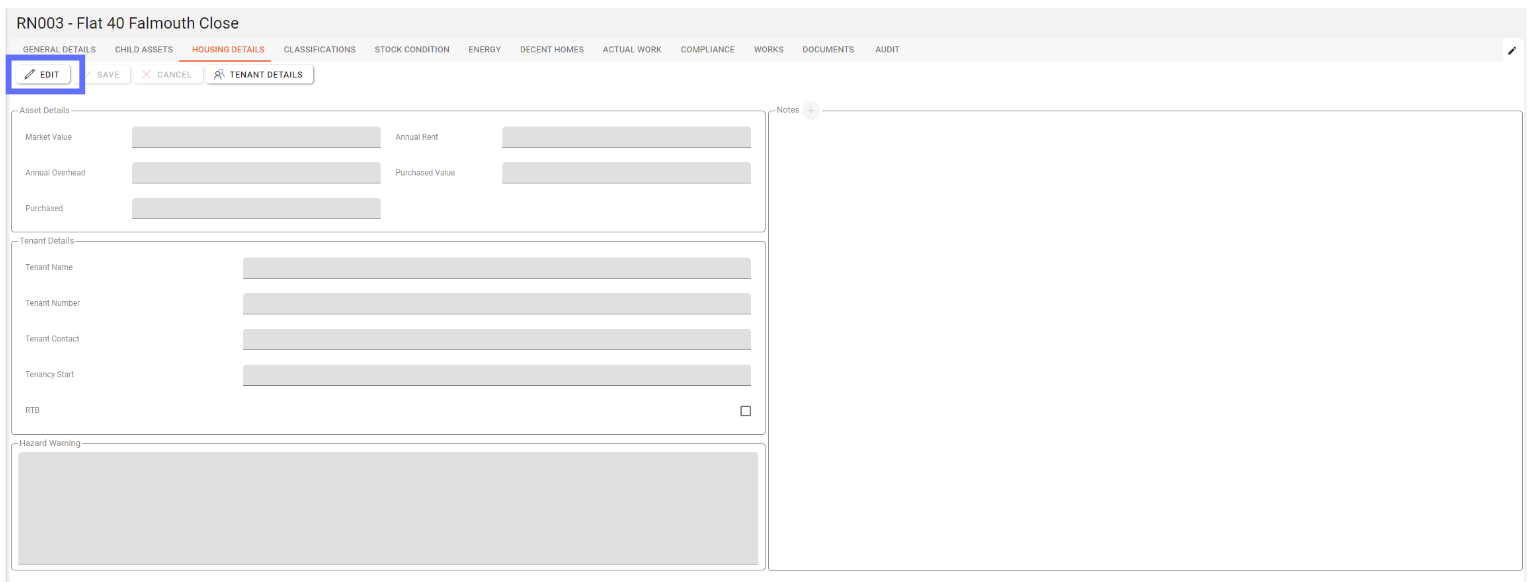
The Housing Details tab shows the tenant data and other data stored within Asprey Assets such as Market Values, Annual Rent, Overheads, purchase price and any pertinent hazard warnings.
Editing Housing Details
You will require the following permission to edit asset Housing Details.
AA_Asset_Edit
AA_Asset_External_TenantDetails_Show
AA_Asset_External_TenantDetails_Details
Please speak with your internal administrator to grant the relevant permissions.
To edit asset Housing details held in Asprey Assets, click the edit button. Once clicked, the page will allow all editable fields to be amended and the edit button will become greyed out and cannot be clicked again. Once the changes have been made, click the “save” button to commit the changes and update the Housing Management data, or click the “Cancel“ button to undo any changes made.
Adding and editing Housing Management Notes
In edit mode, notes can be edited and added to an asset.
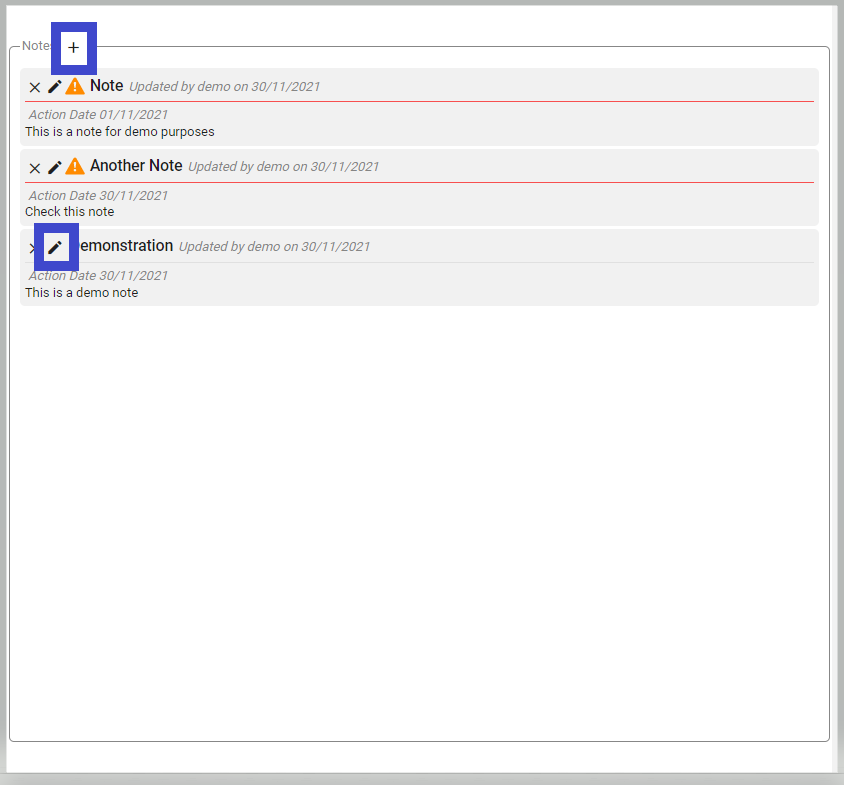
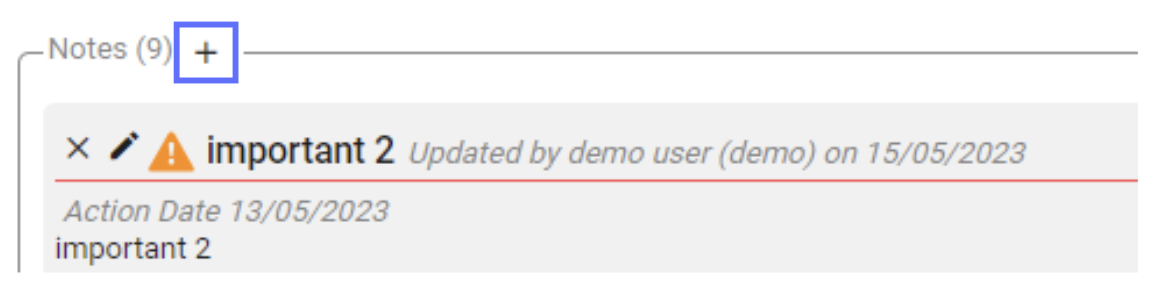
The Notes panel keeps a total of how many notes have been added next to the title.
To add a new note, click the plus button at the top of the notes dialogue.
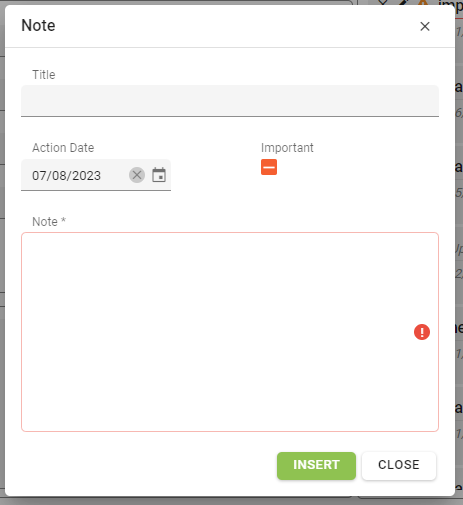
This will open the new note dialogue, allowing you to enter details regarding the note.
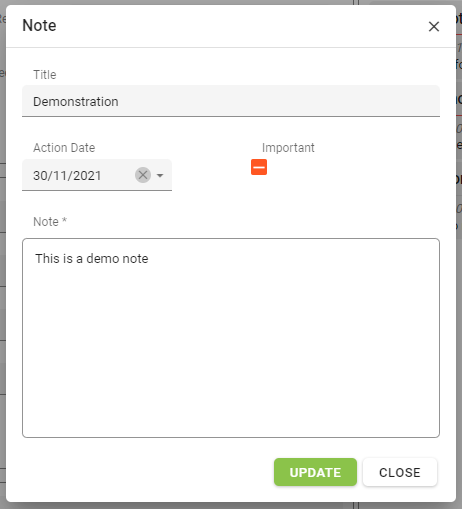
To edit an existing note, click the pencil icon next to the note that is to be changed. Once clicked, a dialogue box will appear allowing for changes to be made.

If a note has been edited, changes can be saved by clicking the “Update” button. to cancel any changes made in the dialogue box, click the “Close” button.
Important notes are marked with a warning triangle.
Deleting existing notes
To delete a note, enter edit mode and click the cross button next to the note.
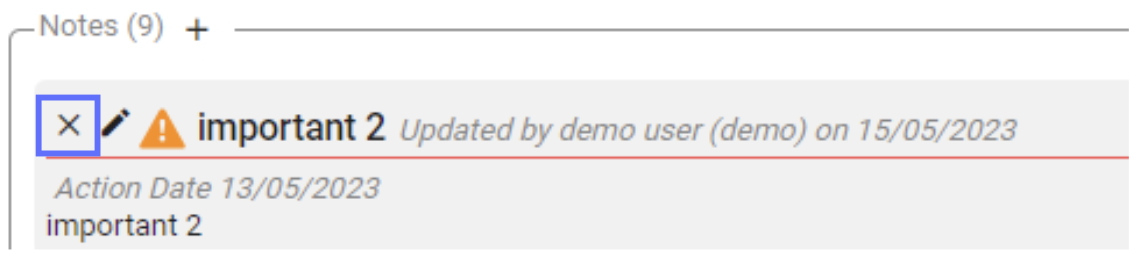
If this is an existing note, the note will turn red and a new icon will appear to undo the deletion.

Click the “Save” button to persist the changes made or click “Cancel” to undo the changes.
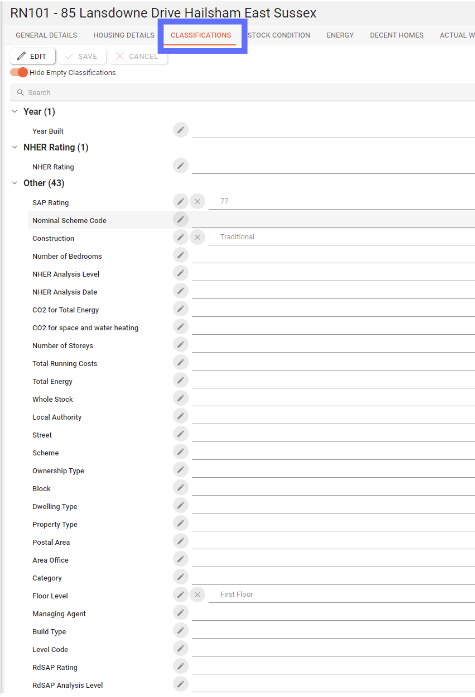
Classifications Tab
The Classifications tab of the Asset synopsis shows all the reporting classifications stored for the selected asset. These are custom classifications that can be configured on the classifications configuration page. The default view is to view these and they are grouped by the classification groups.
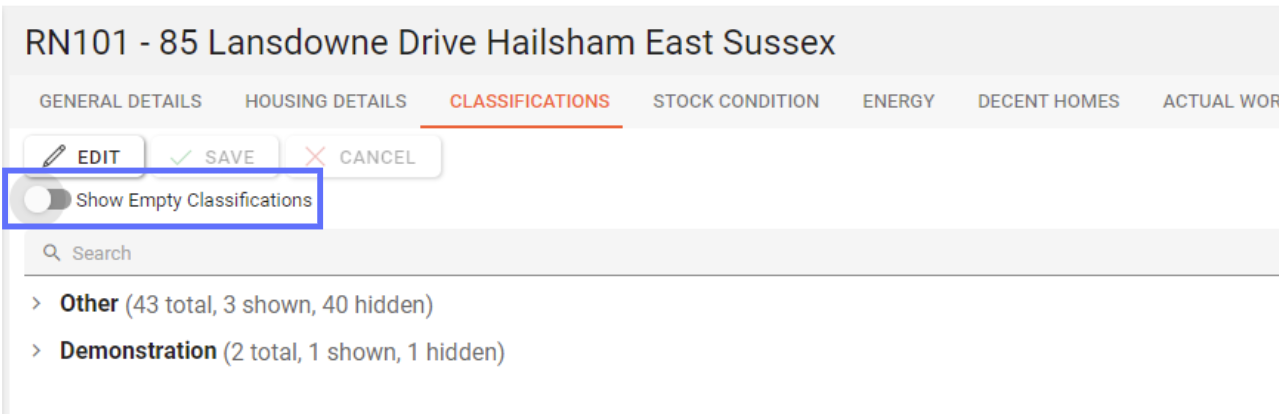
Hiding / Showing Empty Classifications
The toggle switch on the top lefthand-side of the Classifications tab, hides empty classifications so that it’s easier to focus on the ones that have been filled out. A breakdown is added per classification group to indicate how many there are in total, how many are shown and how many have been hidden from view.
Changing the toggle switch back will show both empty and filled out classifications.
Editing Asset Classifications
You will require the following permission to edit Asset Classification details.
AA_Asset_Edit
Please speak with your internal administrator to grant the relevant permissions.
To edit Classification data held in Asprey Assets, click the edit button. Once clicked, the page will allow all editable fields to be amended and the edit button will become greyed out and cannot be clicked again. Once the changes have been made, click the “save” button to commit the changes and update the classification data, or click the “Cancel“ button to undo any changes made.
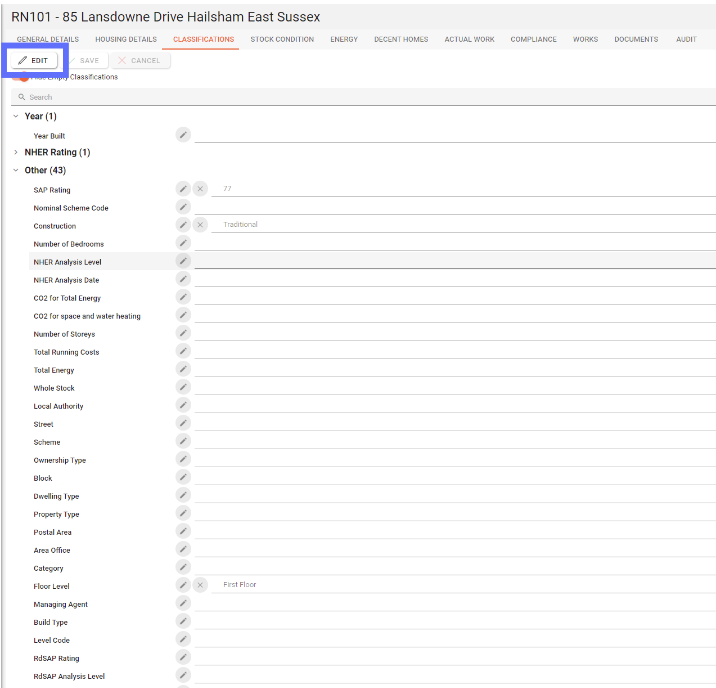
In edit mode, click on the pencil button next to the classification to be amended, and a dialogue box will appear where the Classification can be edited or added.
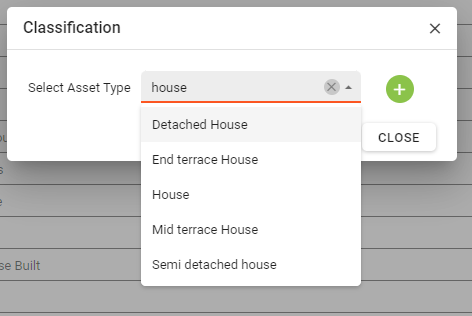
Select the response from the drop-down list and click the “Update” button once you have added or amended the response. Continue to make changes and when finished, click the “Save” button.
Within the response area, you can begin to type your response and the drop-down will filter with existing responses that match your search criteria.
If the response you want to assign is not present, click the green “Plus” button and enter the free-text response. Once entered, click the “Update” button.
Ensure the new response follows the format your organisation adheres to as this will be widely available. This can be configured in the Asset Types configuration.
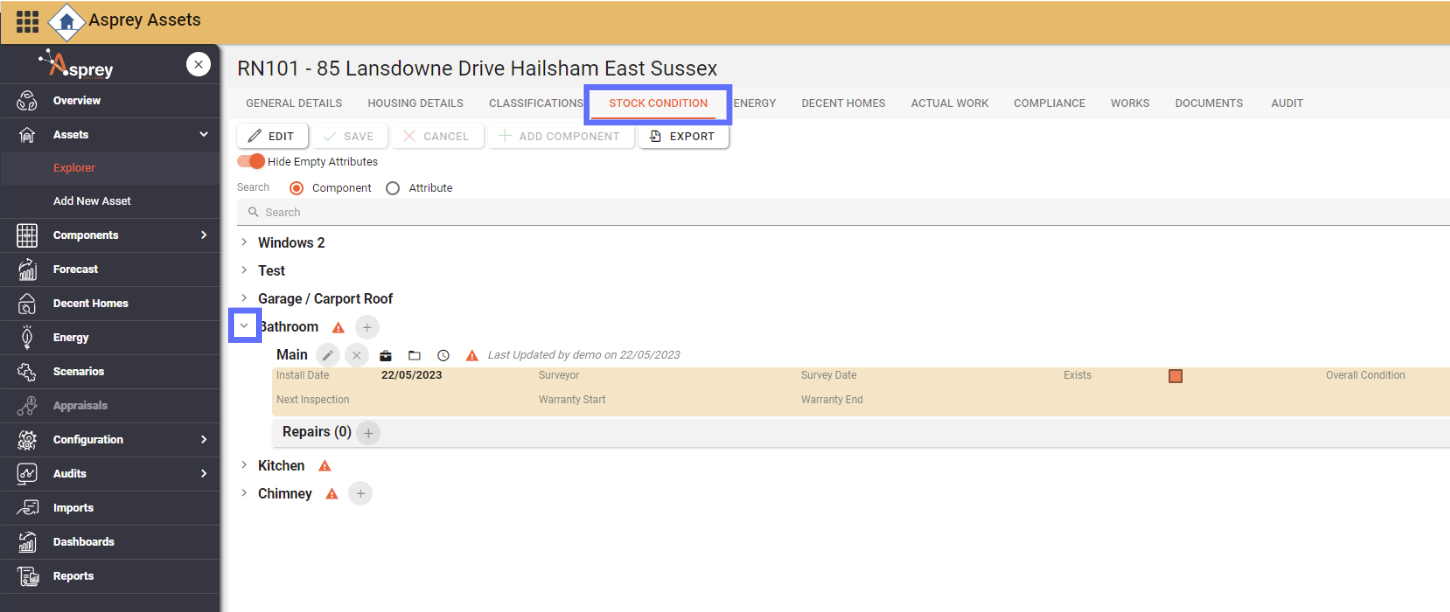
Stock Condition Tab
The Stock Condition tab shows all the component details for an asset and any repairs associated with the asset. Click on the chevron next to the section you want to see details for and it will expand. Details can be hidden again by clicking on the chevron.
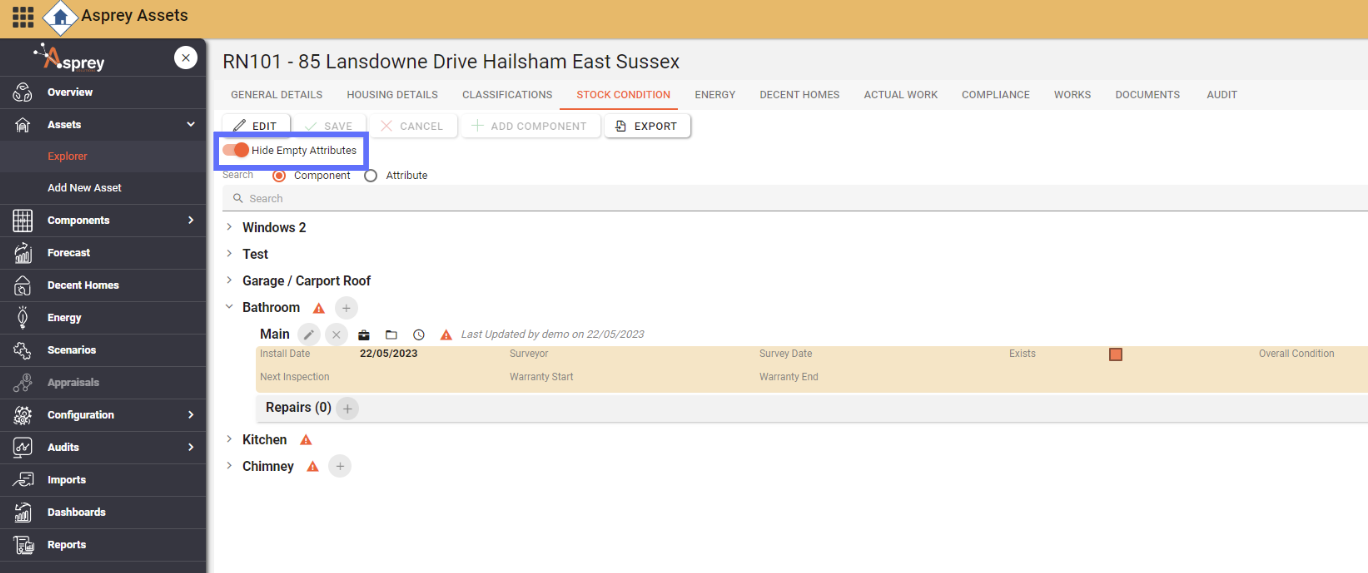
Hiding / Showing Empty Attributes
The toggle switch on the top lefthand-side of the Stock Condition tab, hides/shows empty attributes so that it’s easier to focus on the ones that have been filled out.
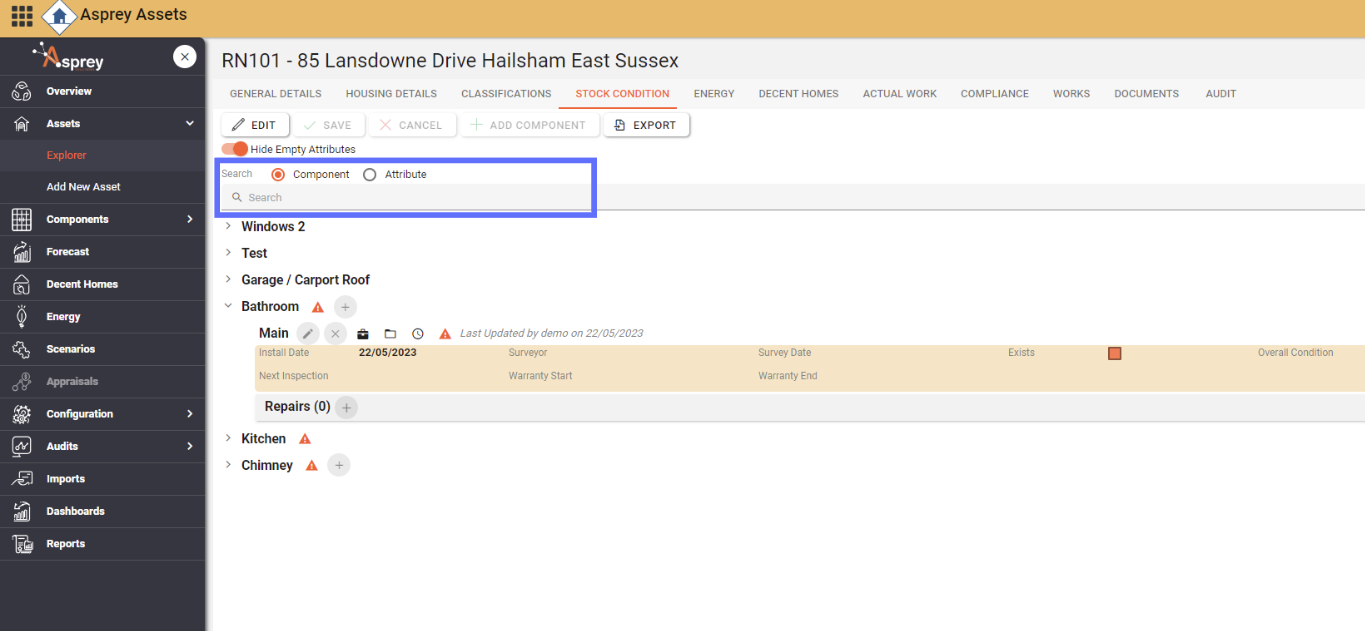
Searching Stock Condition
The search allows users to search for either Components or Attributes containing the search criteria. To do this, select either component or attribute above the search bar and begin typing the desired search criteria. The list will then filter according to that criteria.
Editing Stock Condition Data
You will require permission to edit Stock Conditions.
AA_Asset_Edit
Please speak with your internal administrator to grant the relevant permissions.
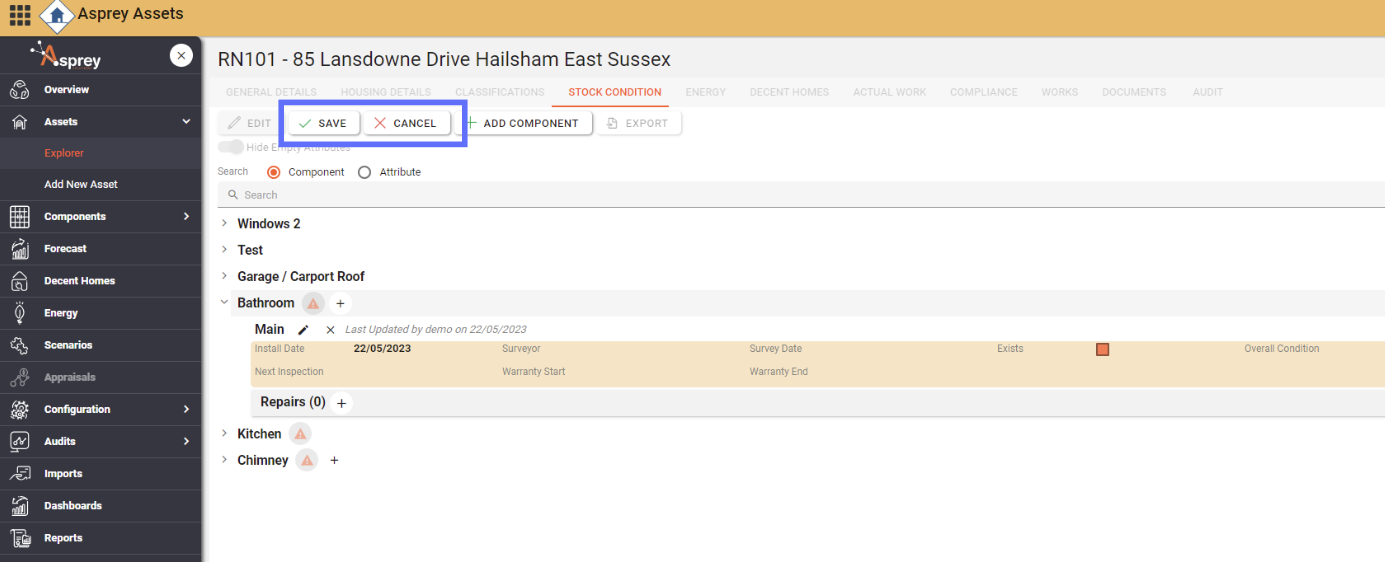
To edit asset stock condition data, click the “Edit” button. This will allow all editable fields to be amended and the “Edit” button will become greyed out and cannot be clicked again until changes have been saved or cancelled. Upon completion of the changes, click the “Save” button to commit any alterations to the stock condition data, or click the “Cancel“ button to undo any changes and return the data back to it’s original state.
In the edit mode, existing data can be altered by clicking the pencil icon next to the item to be amended.
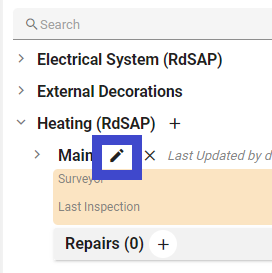
The corresponding dialogue box will appear, allowing details to be updated.

Field | Data Type | Description |
|---|---|---|
Exists | Yes/No | This indicates if the component exists in the assets. |
Survey Date | Date | This is the date of the survey. |
Surveyor | List | The Surveyor of the component. The list of Surveyors are configured within the Surveyor Section. |
Section | List | These are sections of the Stock Condition and are configured within the Section Configuration. |
Overall Condition | List | These are conditions generated from the survey design. |
Last Inspection Date | Date | The date of the last inspection. |
Next Inspection | Date | The date of the next inspection. |
Warranty Start Date | Date | The date the warranty starts (if applicable) |
Warranty End Date | Date | The date the warranty ends (if applicable) |
Click the “Update” button to close the dialogue box.
To ensure any alterations are persisted to the database, ensure you click the “Save” button at the top of the Stock Condition screen.
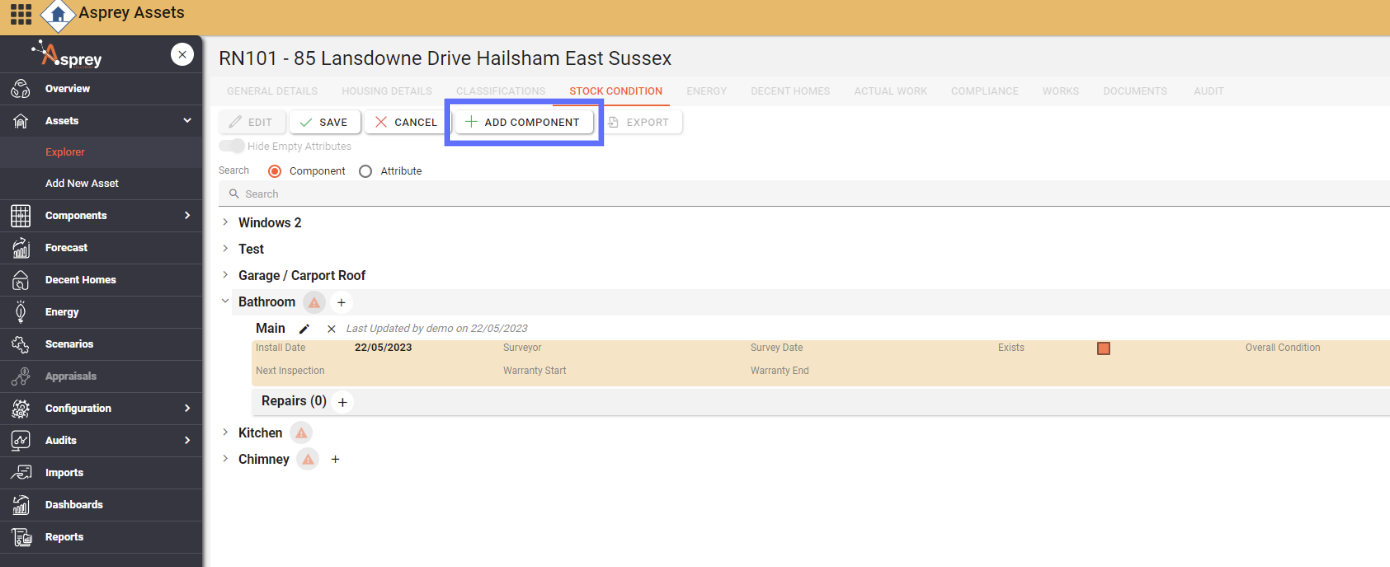
Adding a new Component to an Asset
To add a new component to an asset, click the “Add Component” button.
The following dialogue box will appear to show all the available components to be added to the asset:
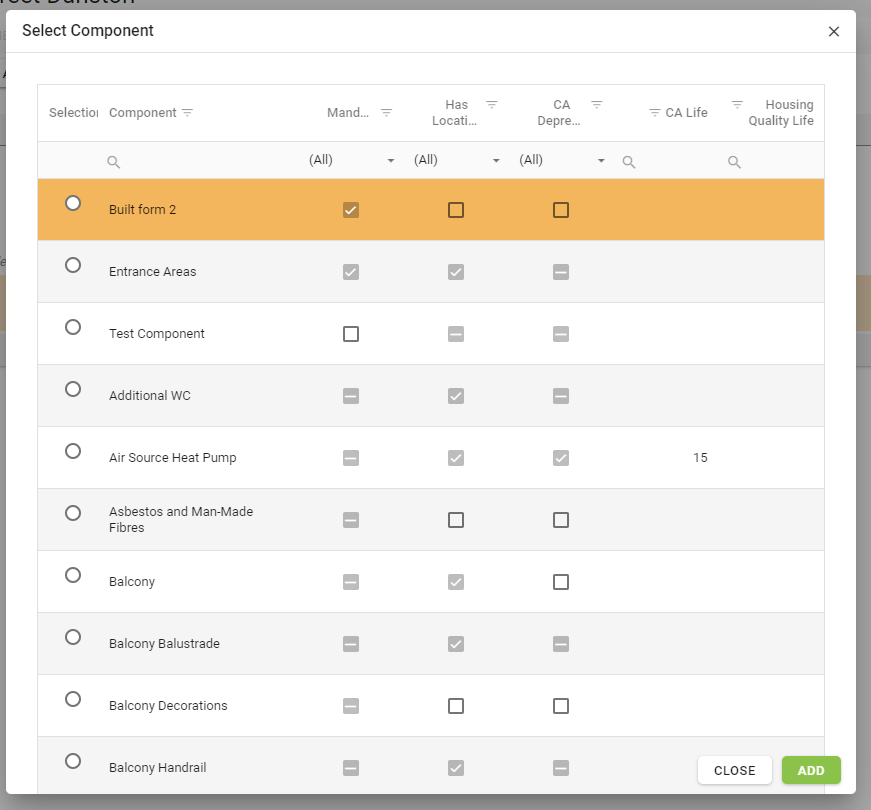
The columns can be sorted and filtered by clicking in the header. Once the desired component has been located, click the row and it will highlight, then click the “Add” button. The corresponding dialogue box will appear to enter the relevant data:
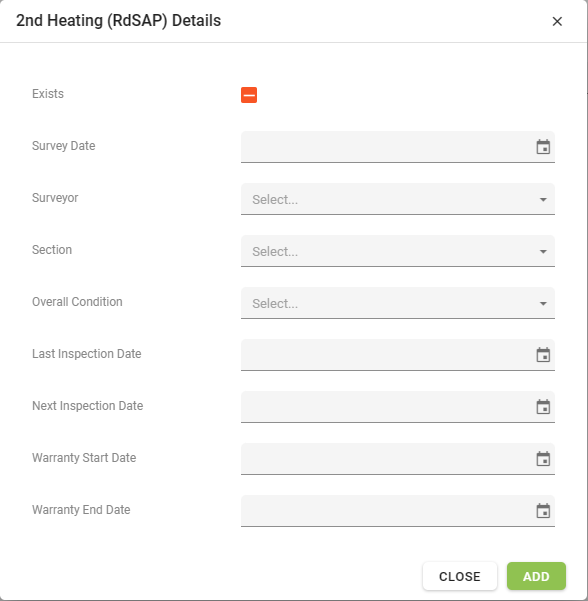
Field | Data Type | Description |
|---|---|---|
Exists | Yes/No | This indicates if the component exists in the assets. |
Survey Date | Date | This is the date of the survey. |
Surveyor | List | The surveyor of the component. These are configured within the Surveyor Section. |
Section | List | These are sections of the stock condition and are configured within the Section Configuration. |
Overall Condition | List | These are conditions generated from the survey design. |
Last Inspection Date | Date | The date of the last inspection. |
Next Inspection | Date | The date of the next inspection. |
Warranty Start Date | Date | The date the warranty starts (if applicable) |
Warranty End Date | Date | The date the warranty ends (if applicable) |
Adding a Repair to a Component
Locate the component that requires a repair by searching or using the chevrons on the left-hand side.
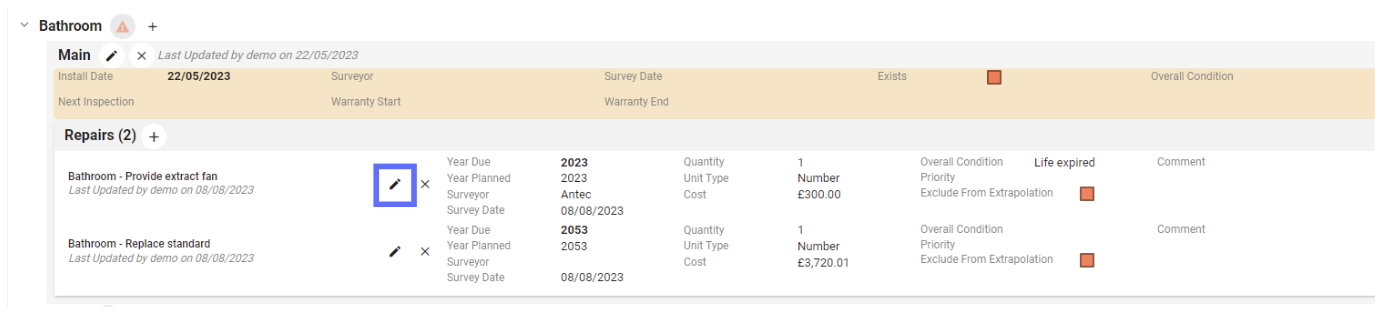
Click on the “Plus” button on the corresponding component near to the label “Repairs” (see the screenshot below)
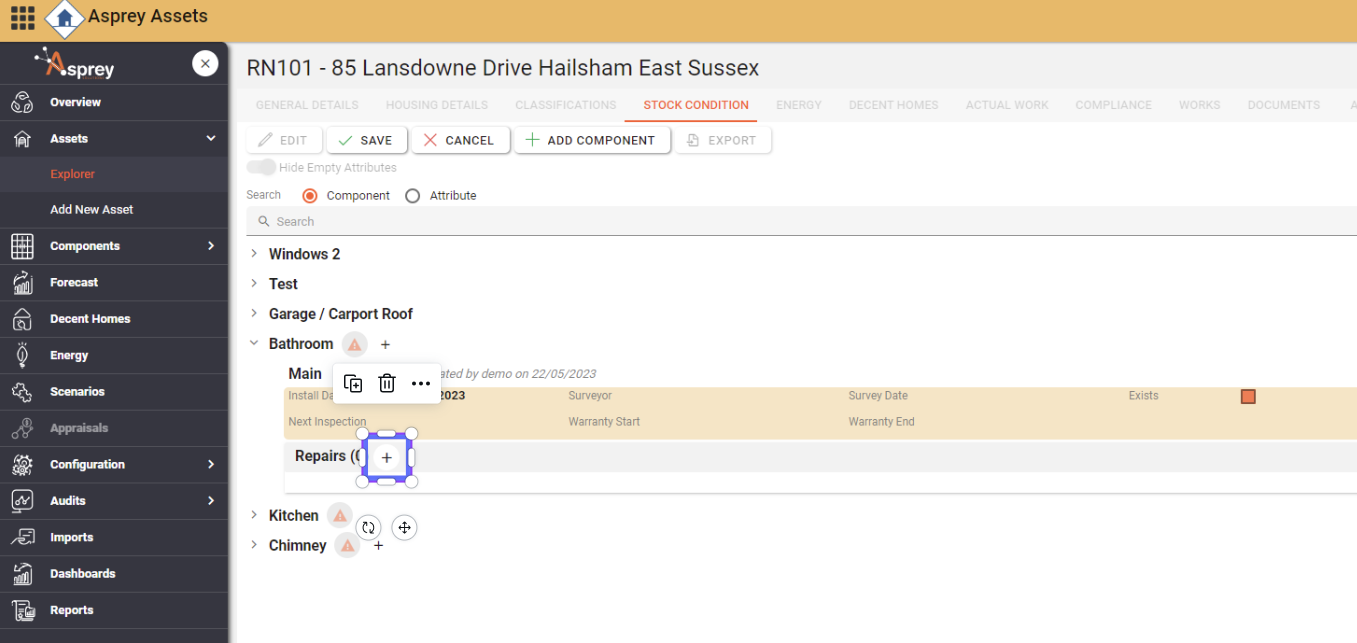
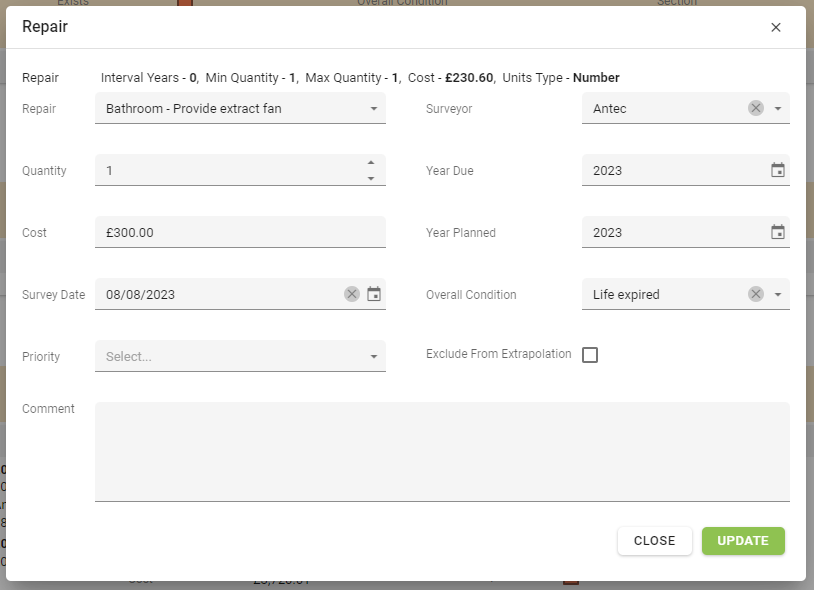
A repair dialogue will open up similar to the example below:
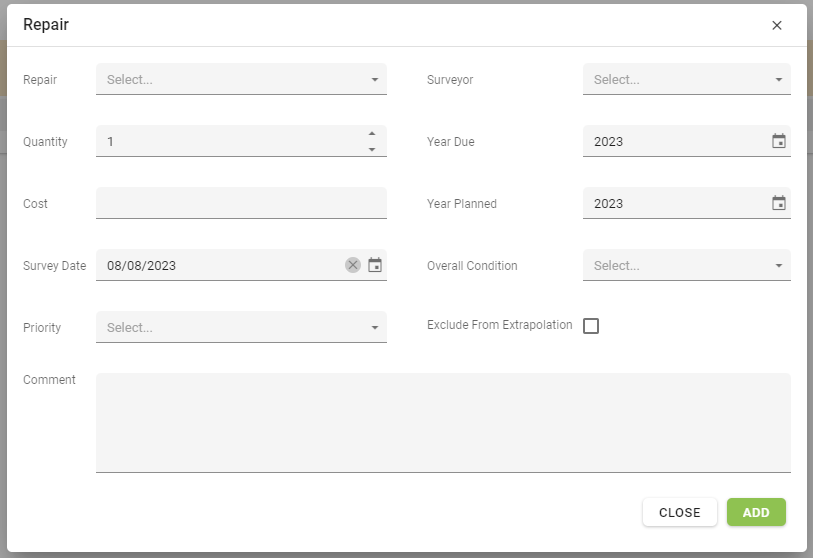
Field | Data Type | Description |
|---|---|---|
Repair | List | The repair that needs to be carried out to the component. This dropdown list of repairs will be pertinent to the component that requires the repair and can be configured within the Repair Section. |
Quantity | Number OR Square Metres | The number of repairs to be carried out. Usually this will be 1 but if several windows needed to be repaired the Quantity could be increased to represent the number of windows. The Quantity can be configured in the Repair Section. |
Cost | Currency | The cost of the repair. This can be pre-set and overridden. |
Survey Date | Date | This is the date of the survey. |
Priority | List | The Priority of this repair can be chosen from the dropdown list of pre configured priorities in the system |
Surveyor | List | The surveyor of the component. These are configured within the Surveyor Section. |
Year Due | Year | The Year the repair is due in the format YYYY, for example 2024. You’ll be able to pick a year from the date/year picker. |
Year Planned | Year | The Year the repair is planned to be undertaken in the format YYYY, for example 2023. You’ll be able to pick a year from the date/year picker. |
Overall Condition | List | These are conditions generated from the survey design. |
Exclude From Extrapolation | Yes/No | Whether or not to include the repair cost in the extrapolation |
Comment | Text | The comment box is reserved for comments & notes regarding the repair |
When you choose a repair from the dropdown list of repairs, information will be loaded about the chosen repair. For example interval years, the minimum & maximum quantity permitted and the estimated cost. This information can be configure in the Repair Section.
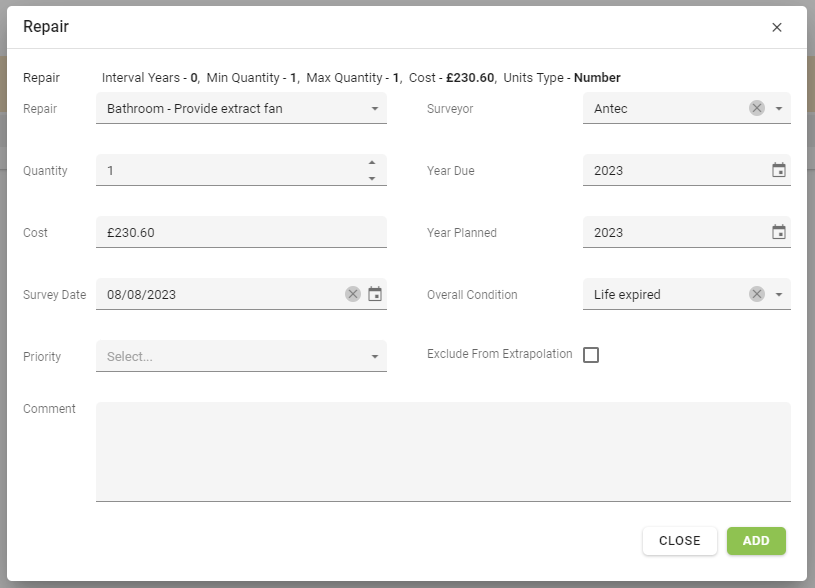
Clicking the “Add” button will add the repair to the component. Clicking the “Close” button will cancel the changes made in the repair dialogue and close it.
Repairs will show under the relevant component with a total in brackets. Clicking on the bold “Repairs” label will show/hide the repairs assigned to the component.
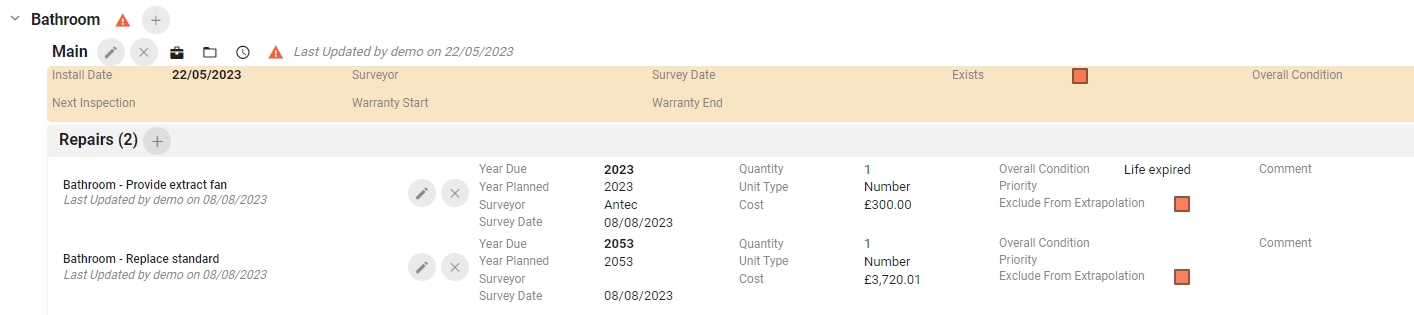
Editing a Repair
The Stock Condition screen needs to be in edit mode to enable editing of existing repairs. Clcik on the pencil button next to the repair that requires amending.
This will open up the repair dialogue where details about the repair can be altered. Once you’re satisfied all the changes have been made use the “Update” button to save the alterations or the “Close” button to cancel & close the dialogue.
Field | Data Type | Description |
|---|---|---|
Repair | List | The repair that needs to be carried out to the component. This dropdown list of repairs will be pertinent to the component that requires the repair and can be configured within the Repair Section. |
Quantity | Number OR Square Metres | The number of repairs to be carried out. Usually this will be 1 but if several windows needed to be repaired the Quantity could be increased to represent the number of windows. The Quantity can be configured in the Repair Section. |
Cost | Currency | The cost of the repair. This can be pre-set and overridden. |
Survey Date | Date | This is the date of the survey. |
Priority | List | The Priority of this repair can be chosen from the dropdown list of pre configured priorities in the system |
Surveyor | List | The surveyor of the component. These are configured within the Surveyor Section. |
Year Due | Year | The Year the repair is due in the format YYYY, for example 2024. You’ll be able to pick a year from the date/year picker. |
Year Planned | Year | The Year the repair is planned to be undertaken in the format YYYY, for example 2023. You’ll be able to pick a year from the date/year picker. |
Overall Condition | List | These are conditions generated from the survey design. |
Exclude From Extrapolation | Yes/No | Whether or not to include the repair cost in the extrapolation |
Comment | Text | The comment box is reserved for comments & notes regarding the repair |
To ensure any changes to repairs are persisted to the database, ensure you click the “Save” button at the top of the Stock Condition screen.
Exporting Asset Stock Condition Data
To Export the asset stock condition data, ensure the Stock Condition tab isn’t in edit mode. This will then enable the “Export” button.
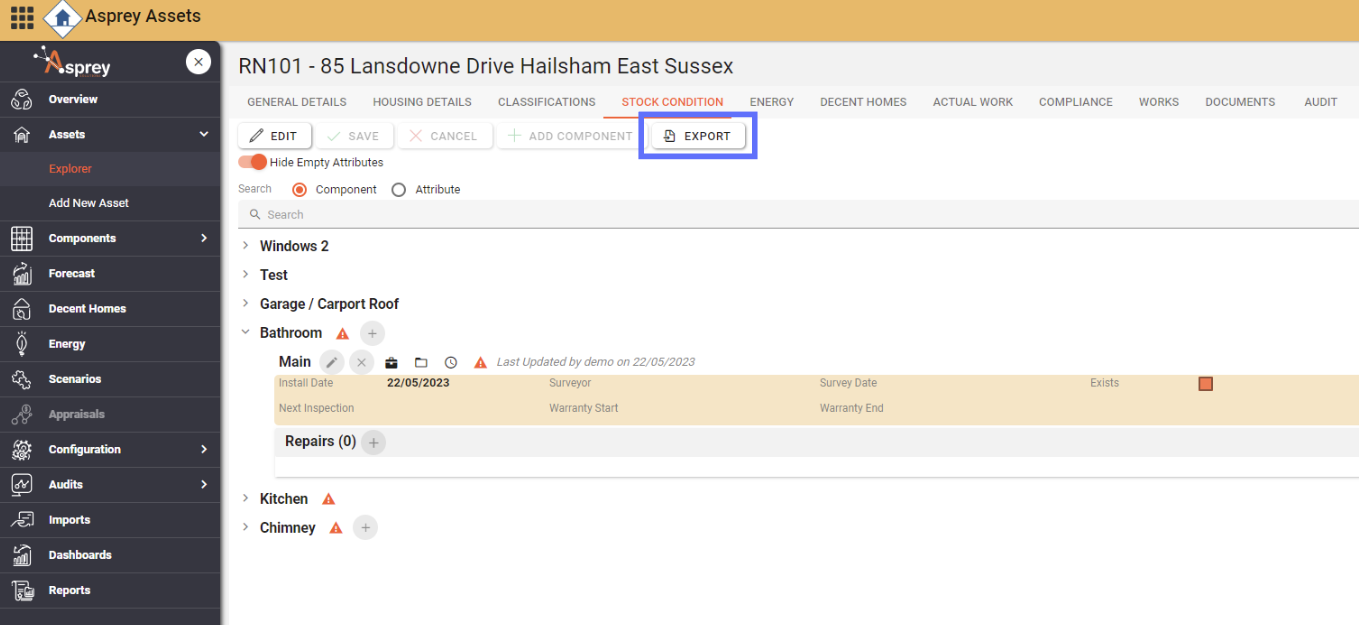
Simply clicking on the the “Export” button will collect the data into a template and download the file in Excel format.
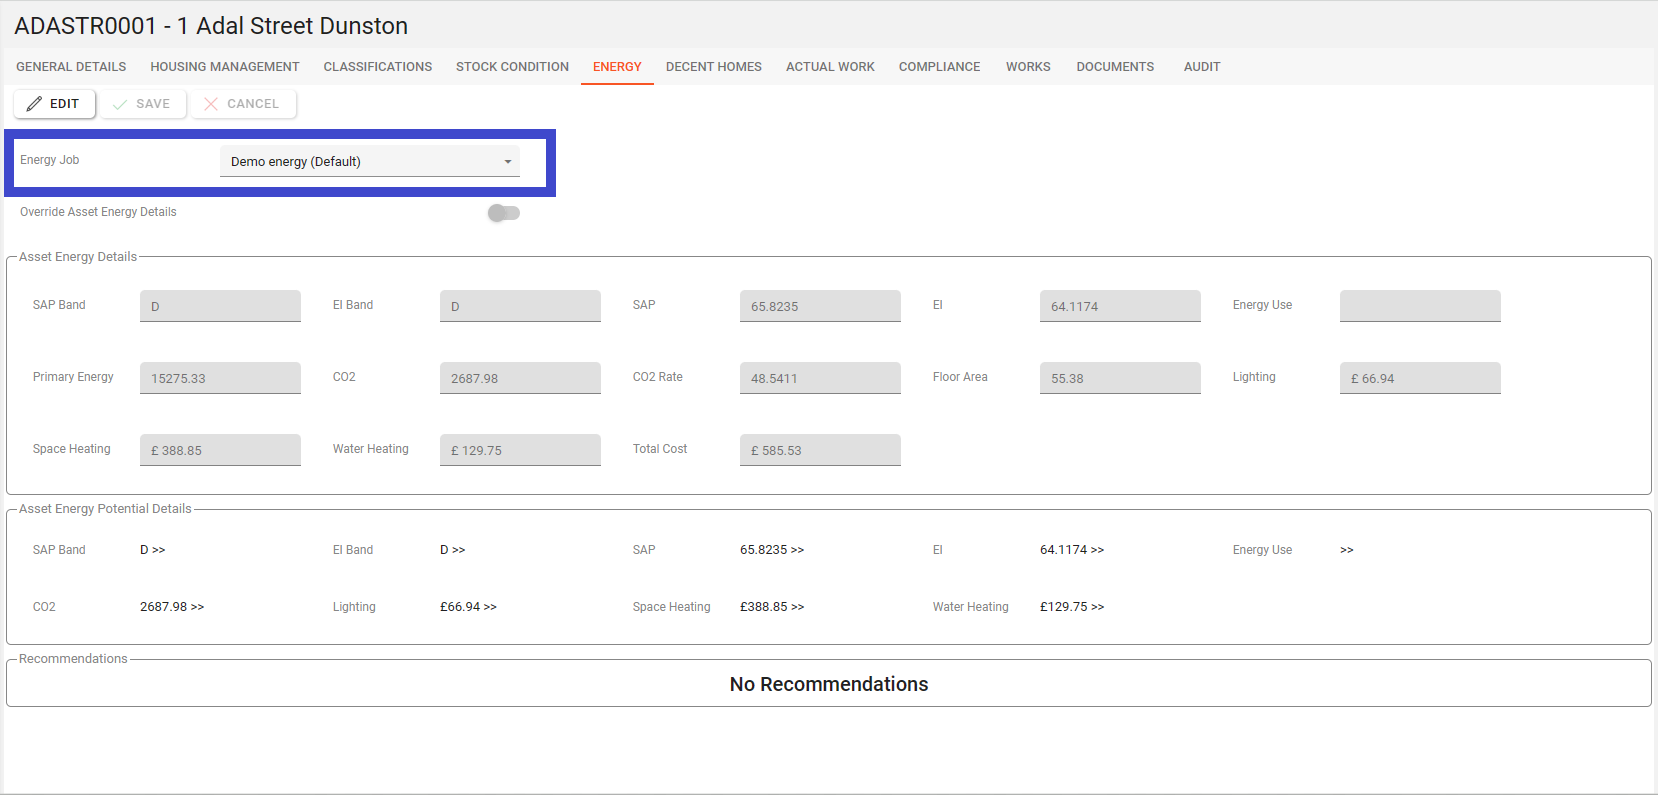
Energy Tab
The Energy tab shows all the energy details for an asset and any recommendations associated with the asset and energy job to be viewed and edited.
An Energy Job must have been completed for data to be present here.
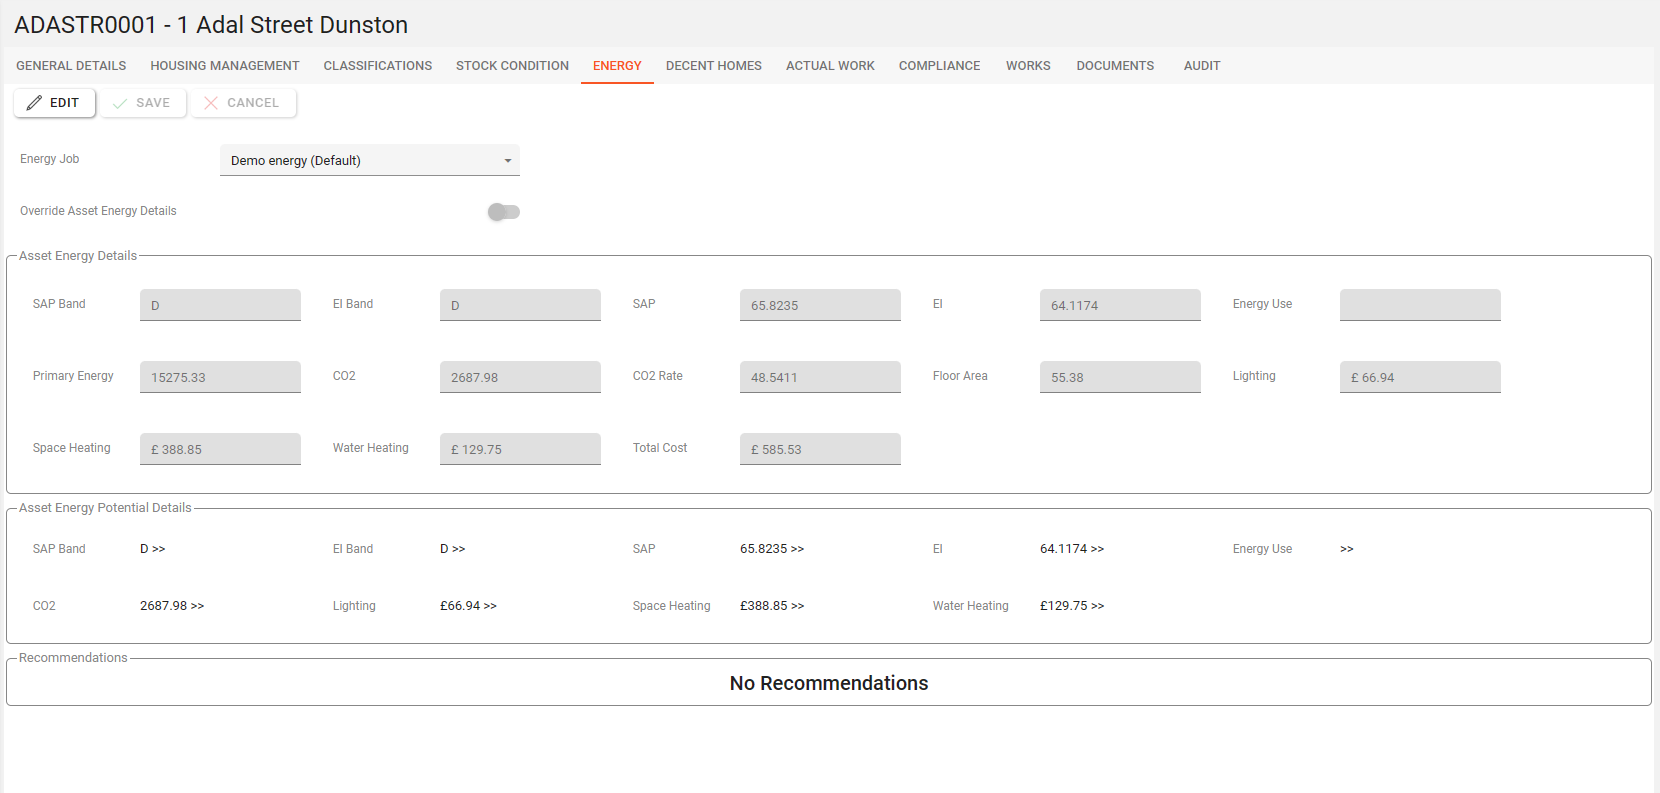
To change the energy job that the synopsis is associated with; select an energy job from the drop-down list marked “Energy Job” at the top of the screen.
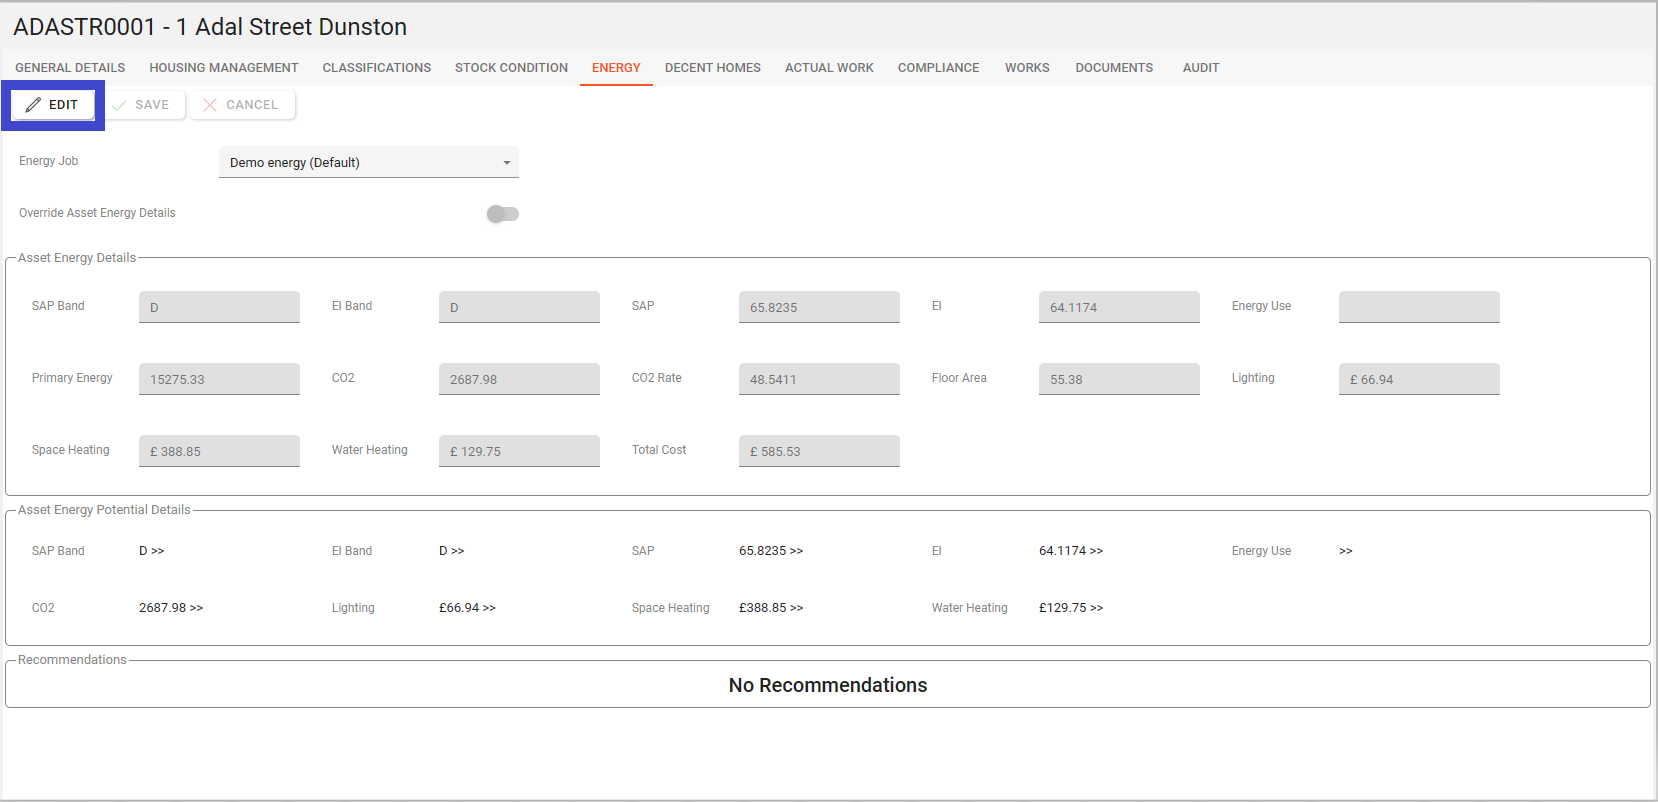
Editing Asset Energy details
You will require permission to edit Asset Energy details.
AA_Energy_Job_Drilldown_Overwrite
Please speak with your internal administrator to grant the relevant permissions.
To edit asset energy data, click the edit button and the page will allow all editable fields to be amended and the edit button will become greyed out and cannot be clicked again.
Once the changes have been made, click the “save” button to commit the changes and update the energy data, or click the “Cancel“ button to undo any changes made.
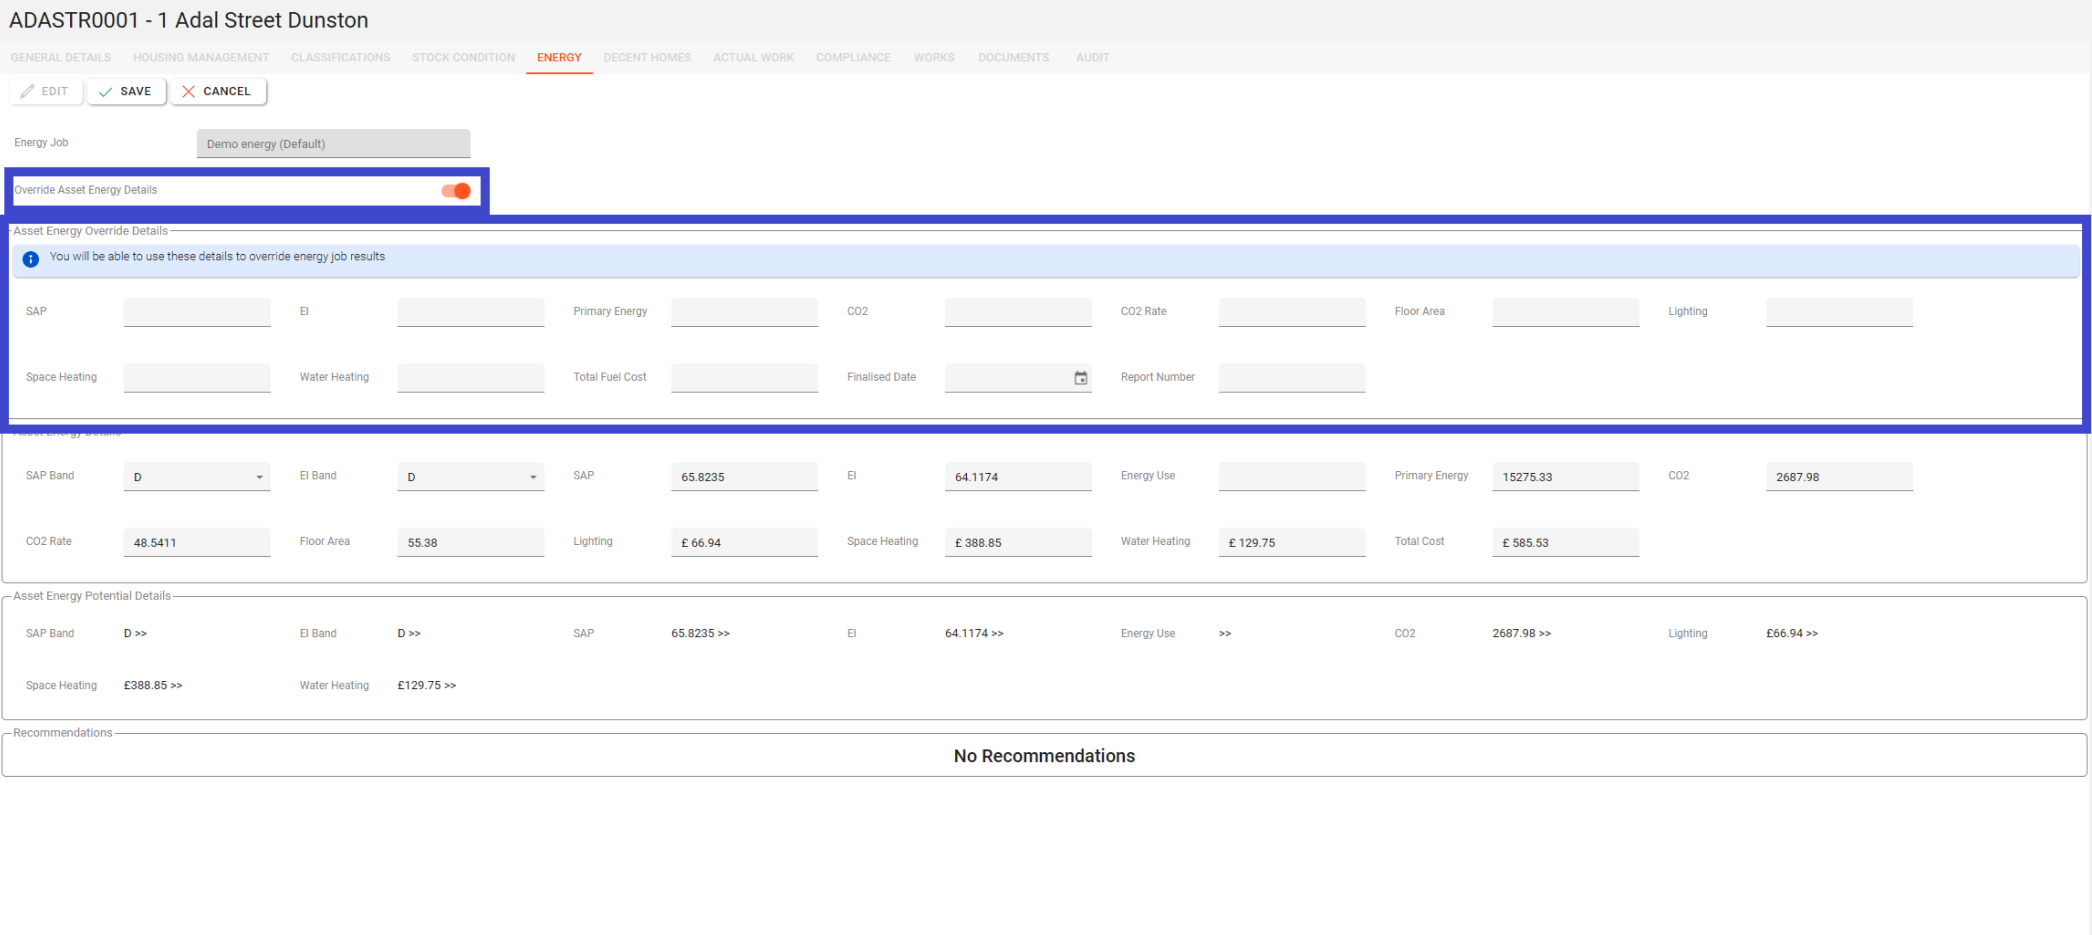
Override Asset Energy Details
To override existing asset energy details, click the toggle and the following boxes will appear to enter override data for energy.
Decent Homes Tab
The Decent Homes tab shows the details of the decent homes standards of the asset.
To show data in this tab a Decent Homes job must have been completed for the selected asset.
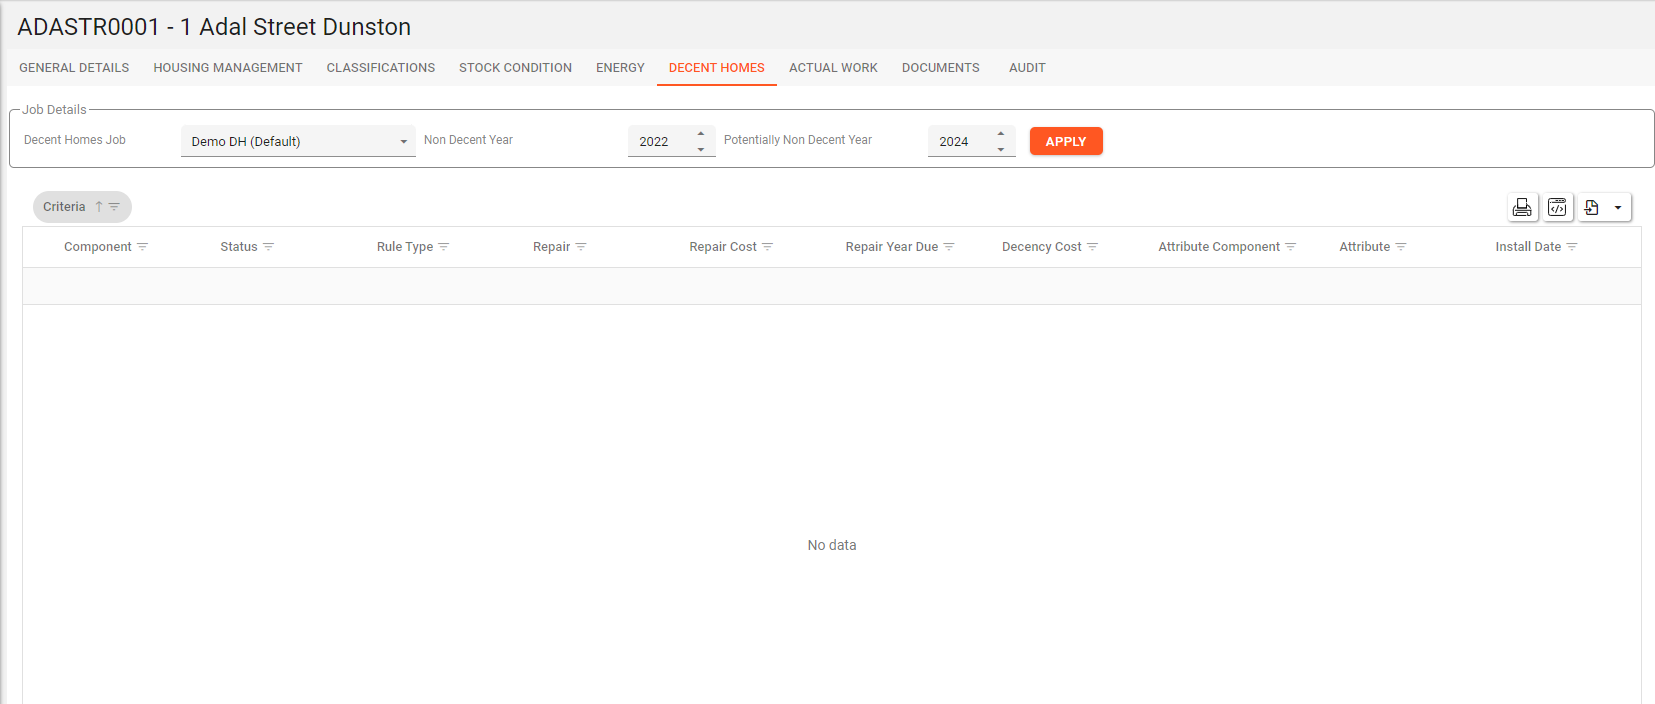
Before any data is shown in this overview, the date ranges must be completed and the Decent Homes job selected from the drop-down list. Once these have been completed, click the “Apply” button and data will appear (if present for the job and parameters entered).
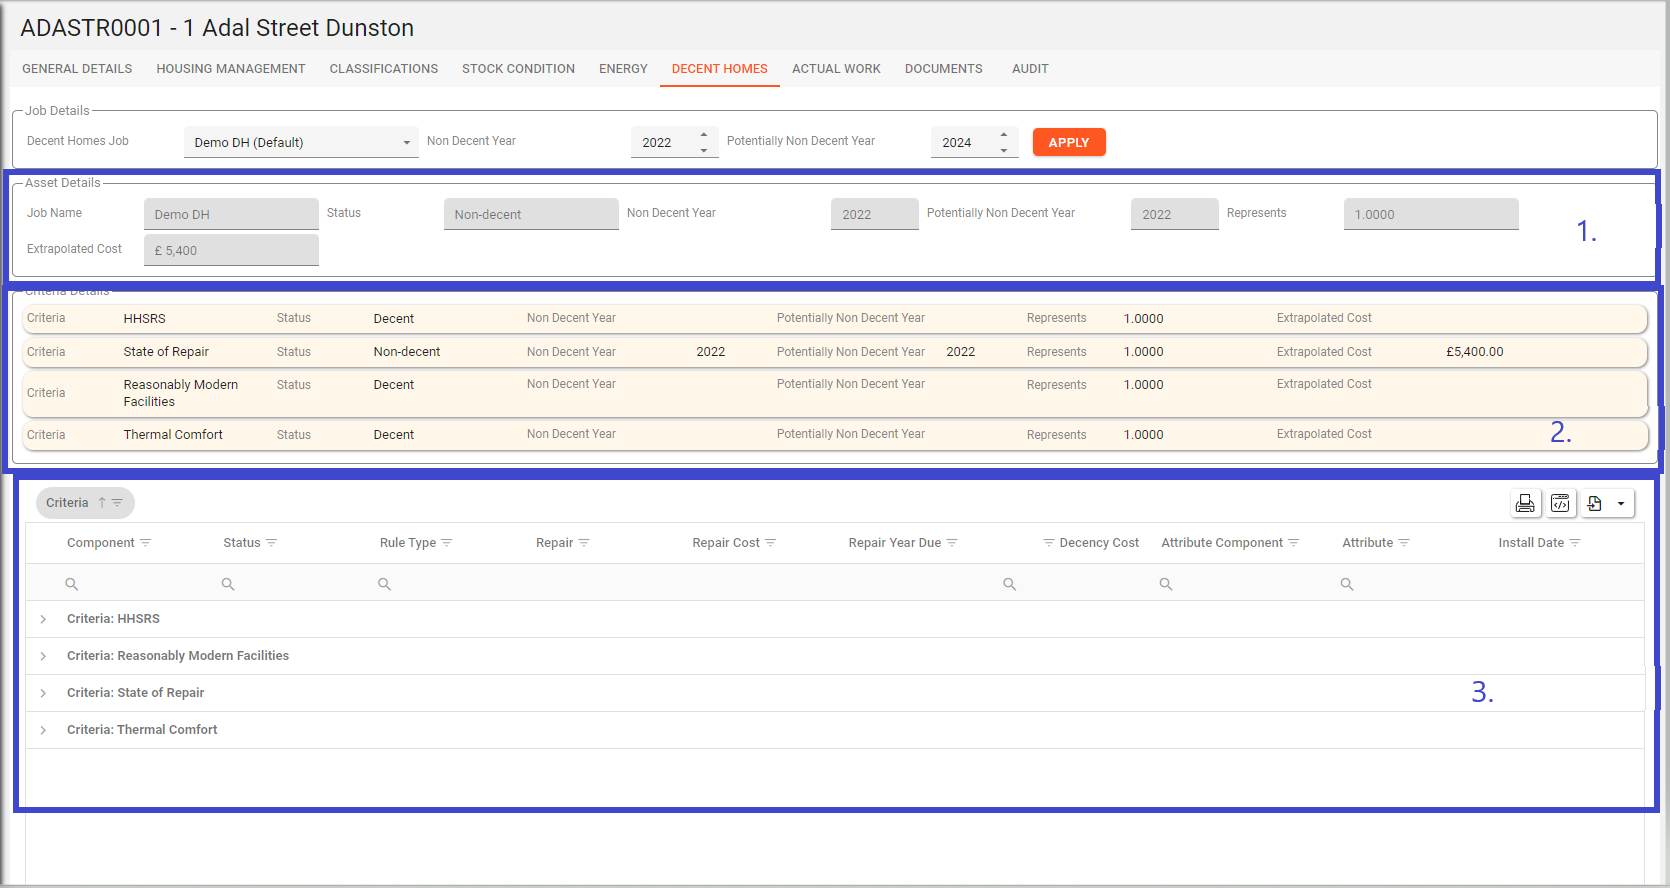
This shows a summary of the asset status to give quick insights into the Decent Homes status of the assets.
This shows the criteria details of the Decent Homes status. This shows the summary details of each criterion which falls within the parameters set for the synopsis.
This is an exportable grid showing the full details of the decency status of the asset.
Actual Work Tab
The Actual Work tab shows the details of the works carried out on the asset broken down by component.
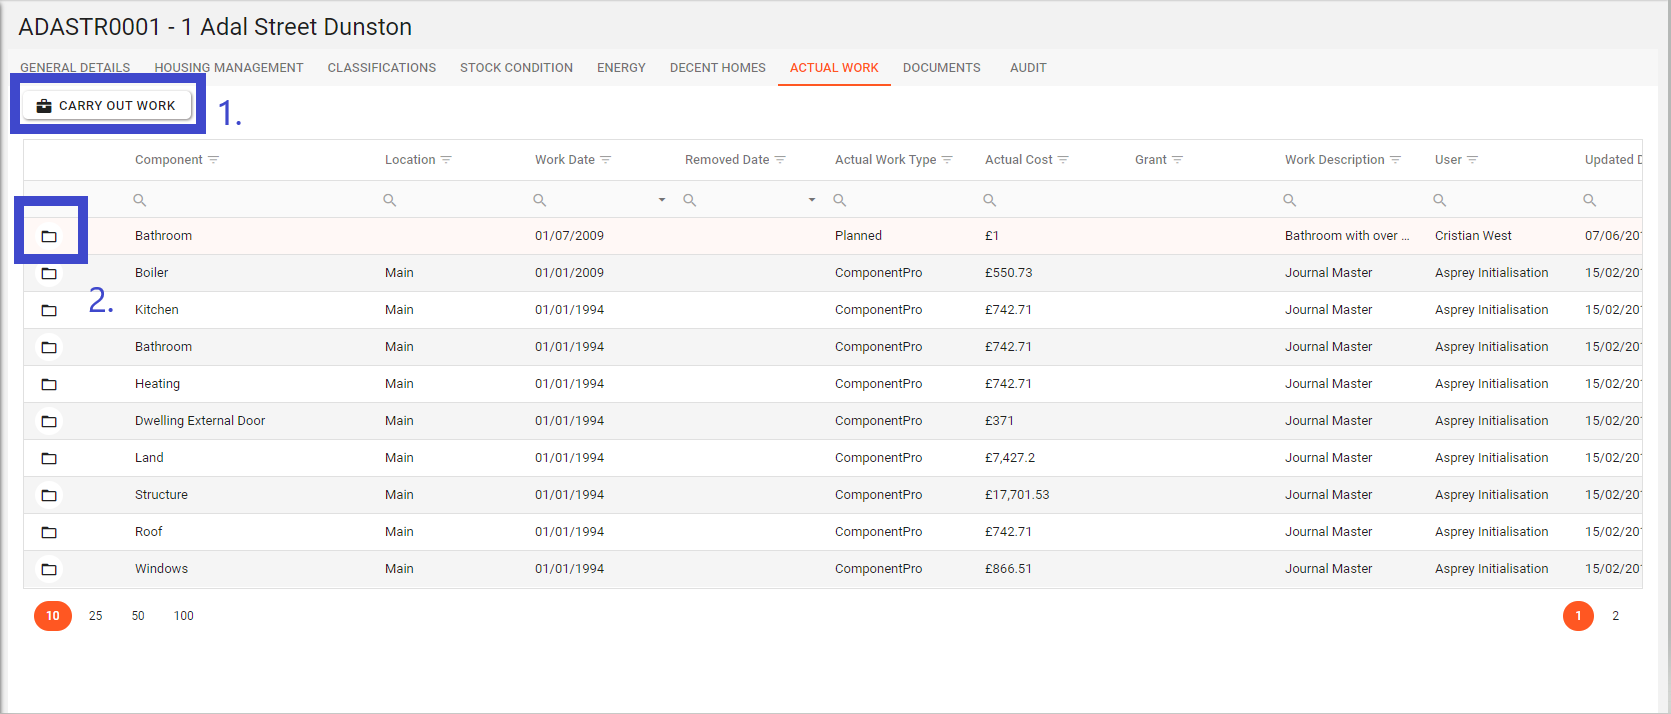
The grid at the bottom half of the page shows the details of the actual works completed for the asset broken down by component.
Add details of actual work
To add details of actual works completed, click the “Carry out work” button (1) and the following dialogue box will appear:
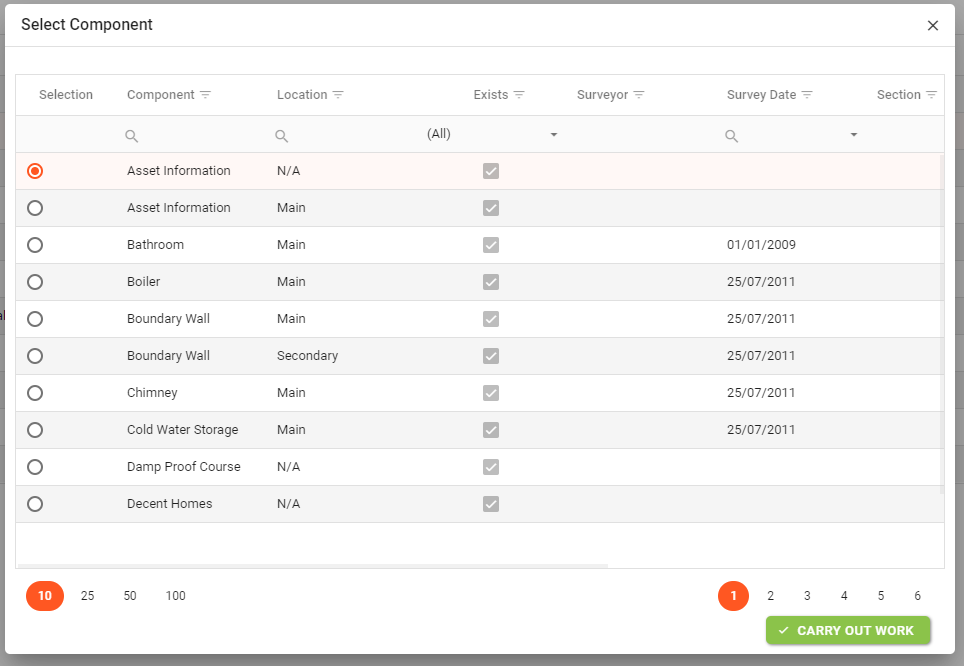
Select the component to add actual works data to by using the selection column on the left. Once selected, click the “Carry Out Work” button. This will open up a new dialogue box to enter the details of the actual work completed.
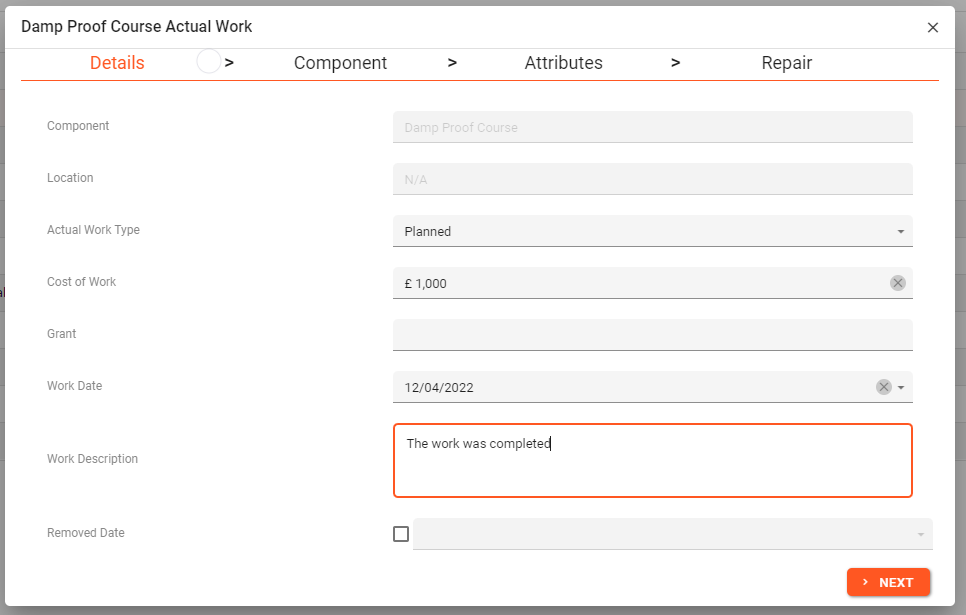
Items that are greyed out are derived from the selection made on the previous screen. Continue to complete the form with the required data to meet your requirements, then click “Next”.
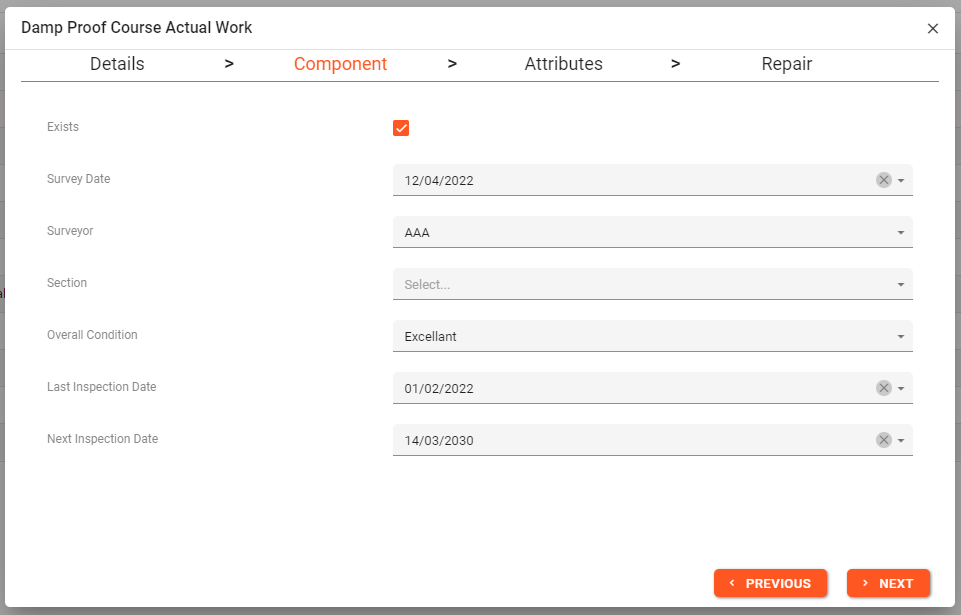
Add the component details as required then click next.
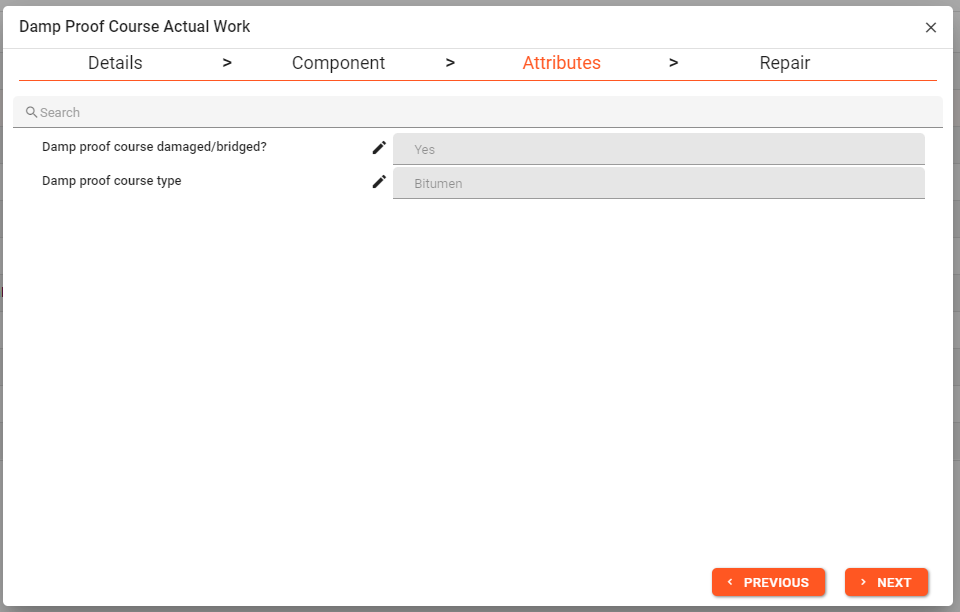
Edit the attribute details as required by clicking the pencil icon next to each row that needs amending. Then click “Next” button.

Add any repairs details to the component by clicking “Add Repair”. Once complete (if required), click the “Save” button to update the changes made.
At any point you can click the previous button to go back to the previous page to make amendments as required before clicking save.
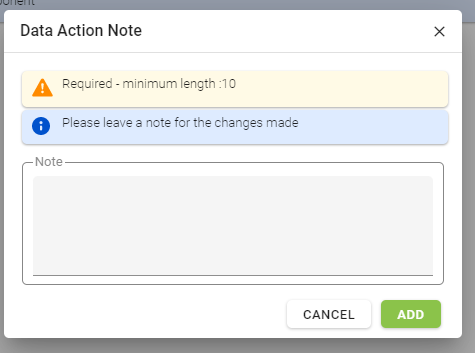
To save the changes, a note may be required to activate the changes. Enter the required number of characters in the text box and click the “Add” button.
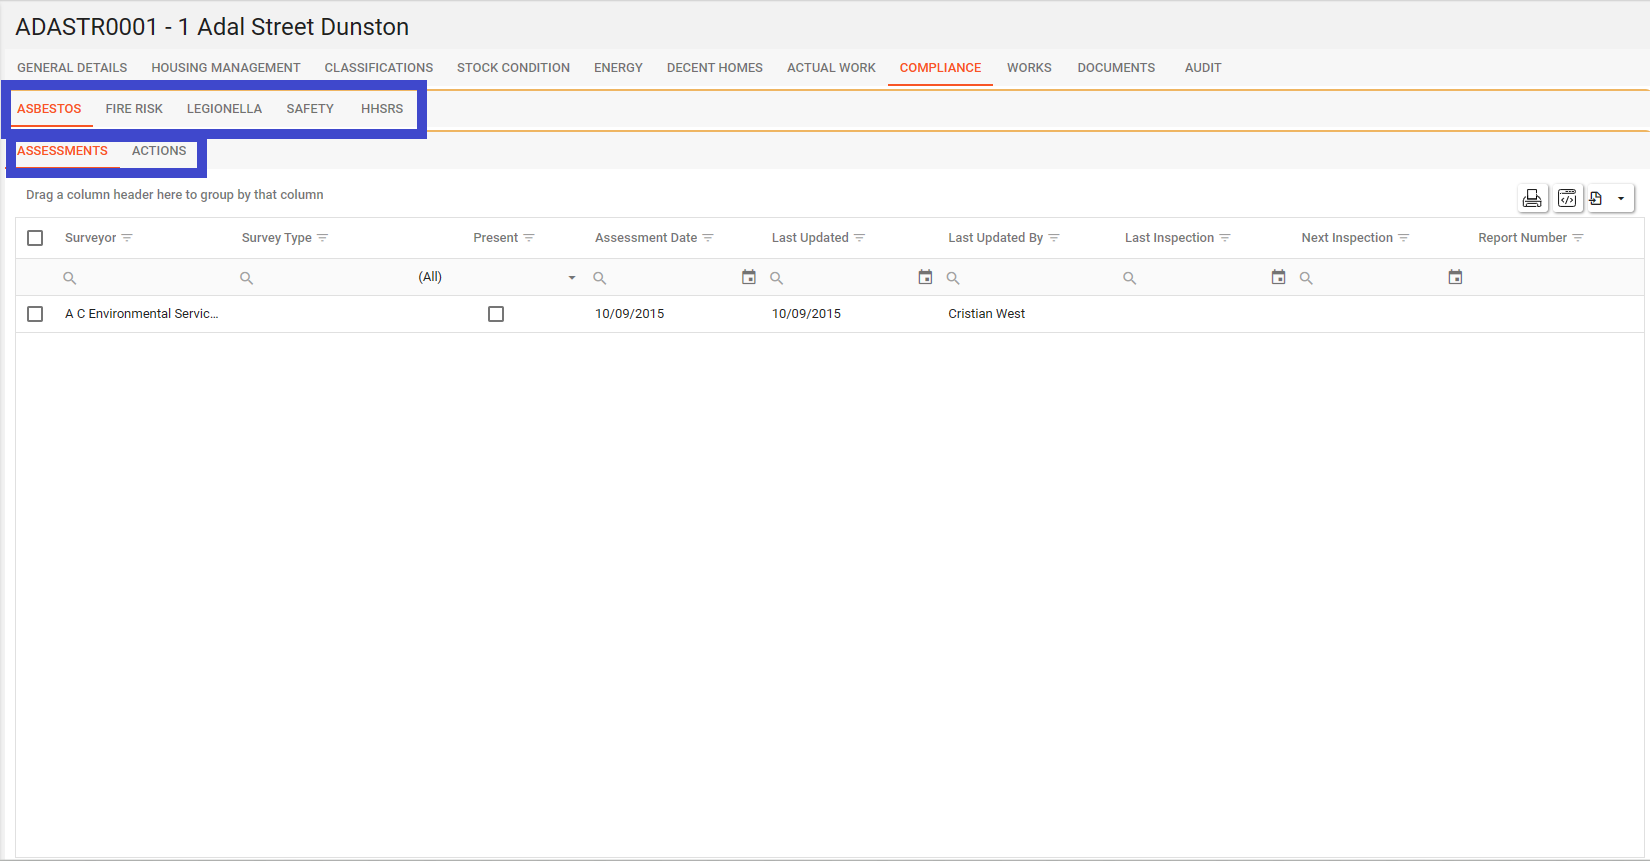
Compliance Tab
The compliance tab shows data held against the asset for compliance of the following areas:
Asbestos
Fire Risk
Legionella
Safety
HHSRS
To navigate to the relevant compliance area, use the top menu for compliance area and the sub menu to see the assessments, actions, hazards and risks.
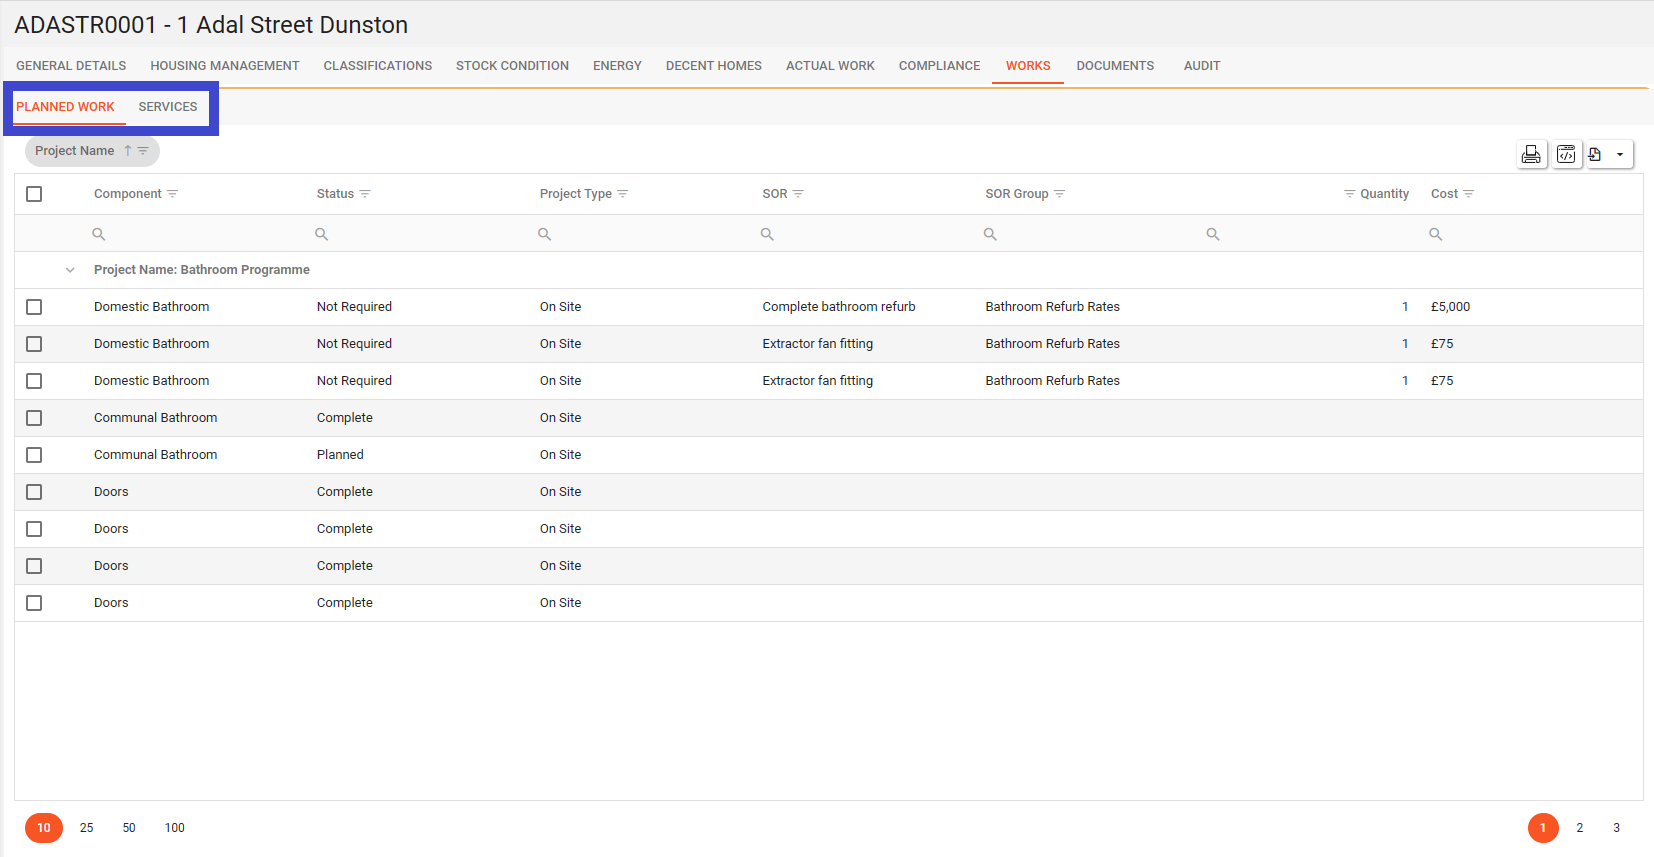
Works Tab
The Works tab takes data from Asprey Contracts and shows any planned work or services associated with the asset. Use the sub menu at the top to switch between servicing and planned works.
Documents Tab
You will require permission to manage documents.
AA_Asset_Upload_Documents
Please speak with your internal administrator to grant the relevant permissions.
The documents section within the Asset Synopsis allows for documents related to the asset to be stored and viewed.
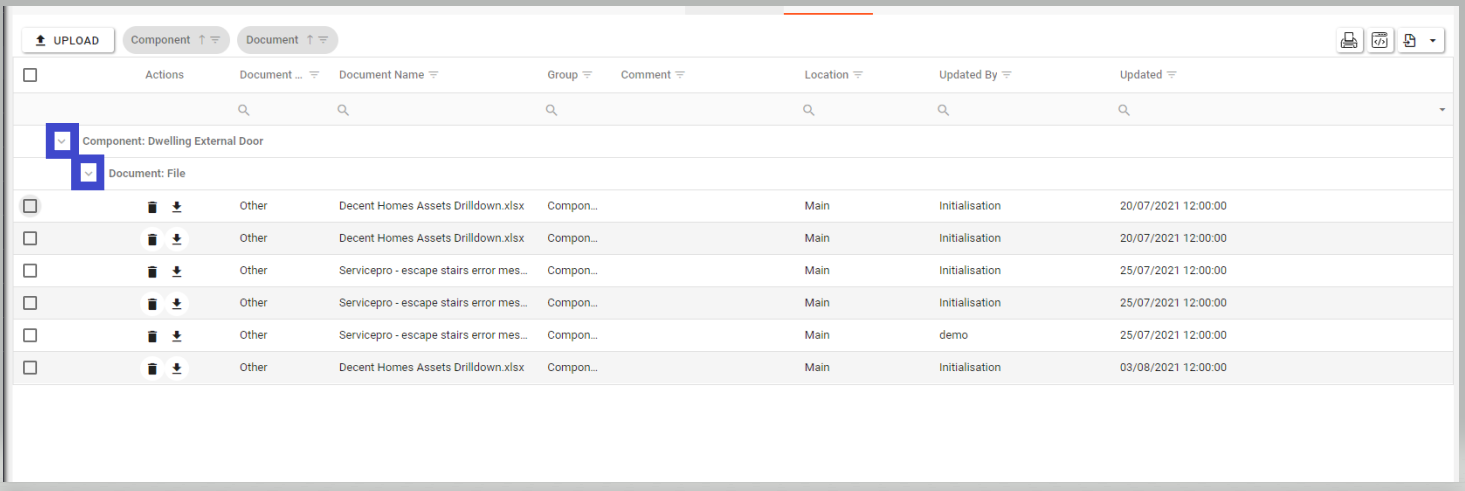
Use the expand arrows to see all the documents held against an asset. Once expanded, a file can be downloaded or deleted as required.
Uploading a photo in the asset synopsis
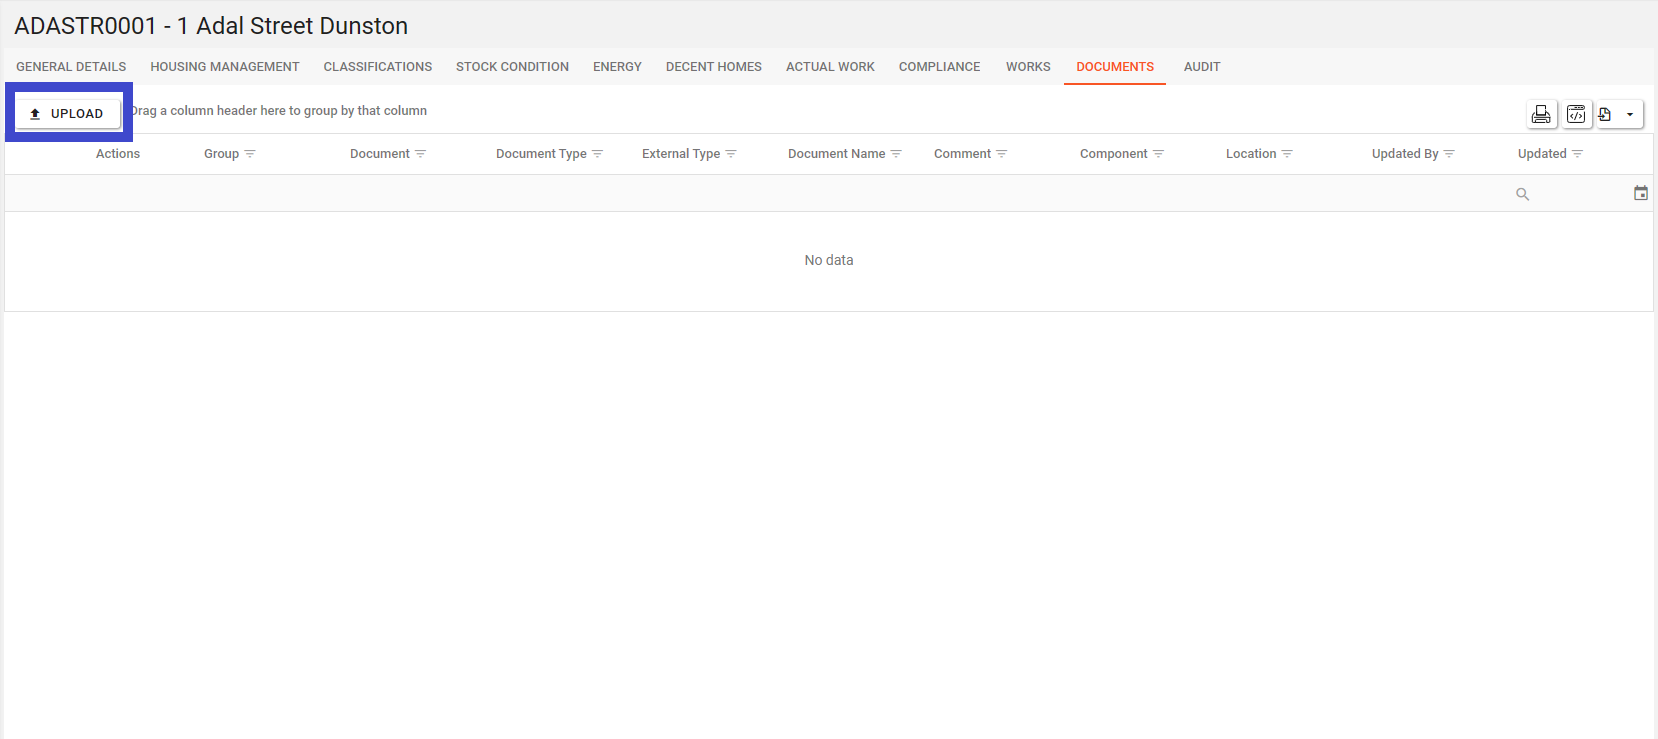
To upload a document, click on the “upload” button within the documents tab of the asset synopsis.
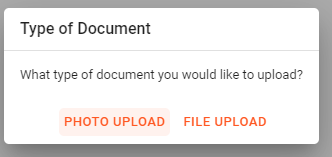
Select “Photo Upload”.
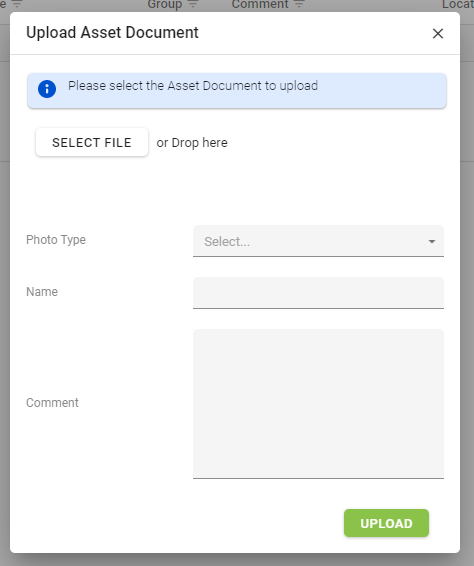
Click “Select File” to find the desired photograph or drag the photo into the space marked “drag here”. Continue to fill in the information by selecting the required photo type and providing a name and comment relating to the photo. Once complete, click the “upload” button to save the file.
Uploading a document in the asset synopsis

To upload a document, click on the “upload” button within the documents tab of the asset synopsis.
Select “File Upload”.
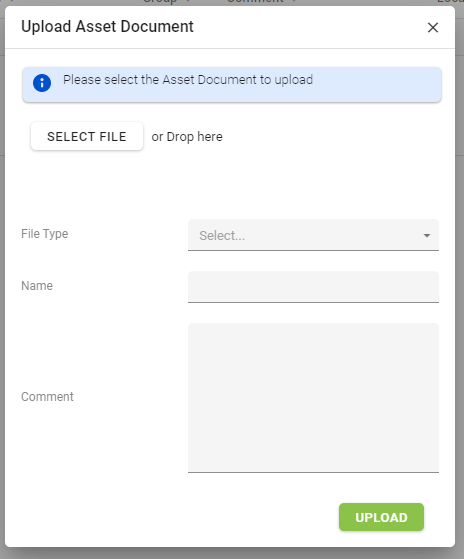
Click “Select File” to find the desired file or drag the file into the space marked “drag here”. Continue to fill in the information by selecting the required file type and providing a name and comment relating to the file. Once complete, click the “upload” button to save the file.
Audit Tab
The Audit facility within the Asset Synopsis allows for detailed tracking of changes made to an asset.
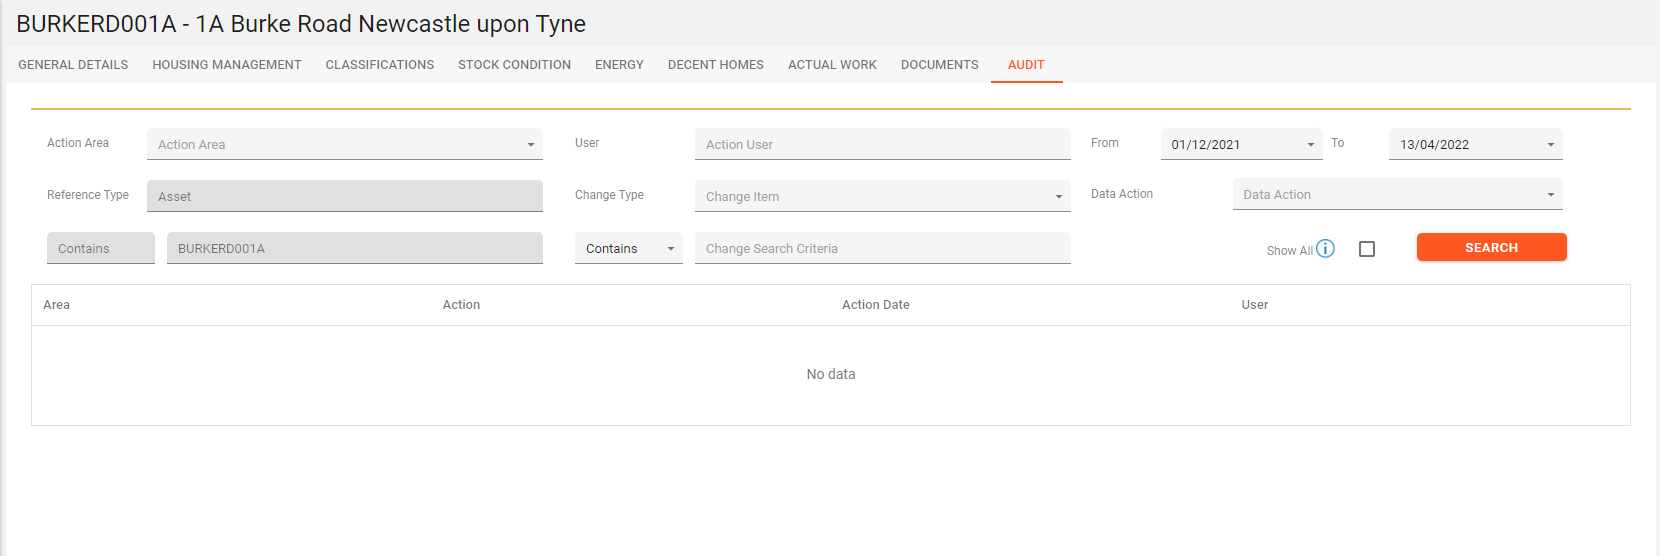
This can be filtered by the action type, the user, between specific dates, the change type and the action along with text search. Once the parameters of the search have been completed, click the “search” button. The Select All button allows for all results to be returned, however, this has a limit of 200 records.
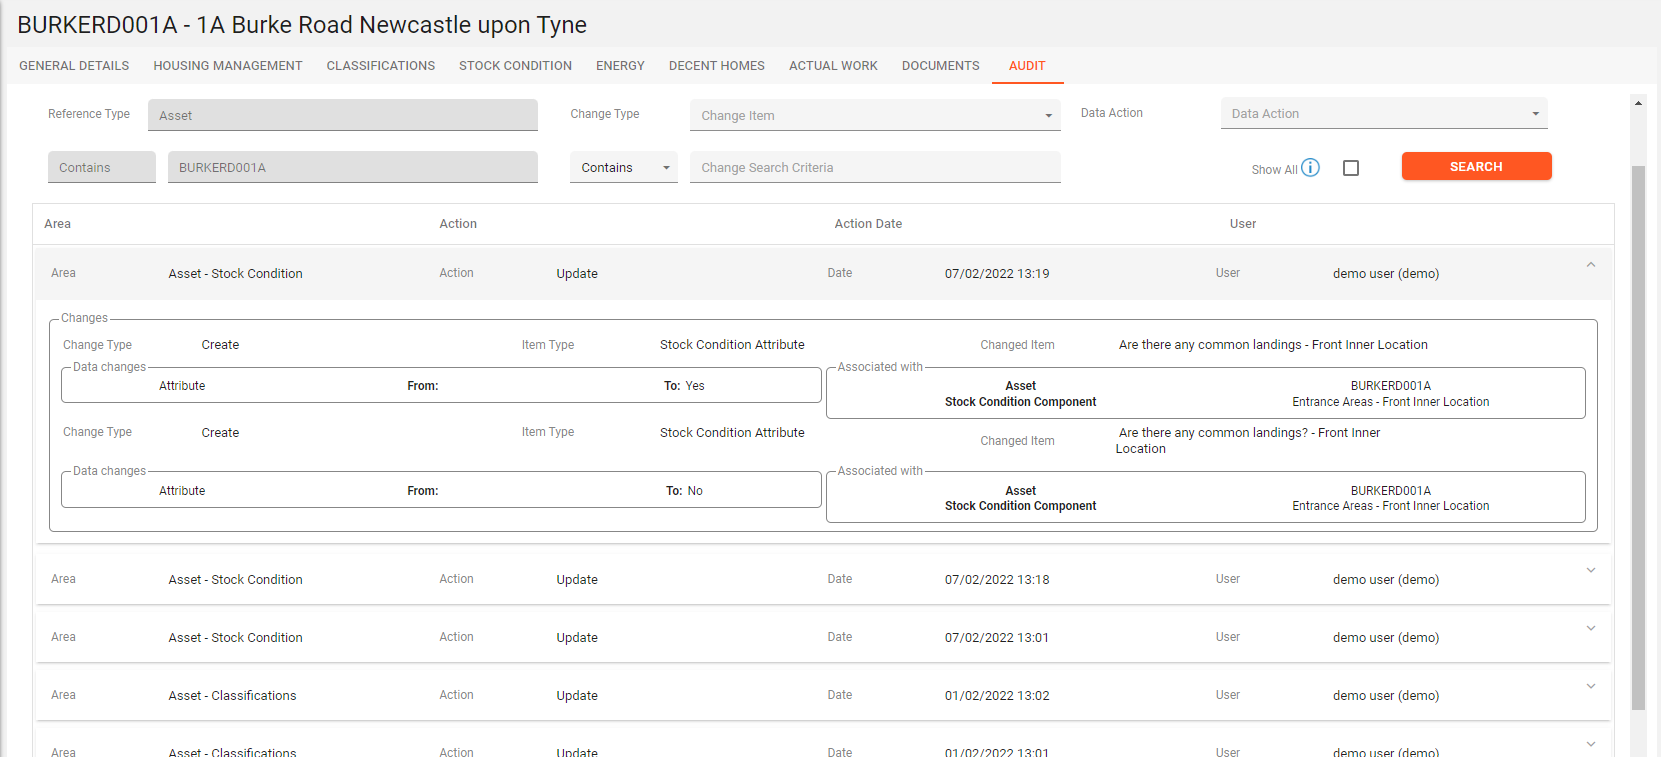
Once the search has been completed, the lower grid will populate with all changes made to the current asset. Select any item to expand the details of the change. This then shows the details of what has been changed, what it was changed from and to, the user who made the change and when the change was made.
Editing Tabs
You will require permission to edit tabs.
AA_AssetScrenTabs_Edit
Please speak with your internal administrator to grant the relevant permissions.
Should users want to personalise the tab labels, show/hide or reorder tabs, this can be achieved by clicking on the pencil button (if enabled via permissions) on the top right-hand corner of any tab screen. (see screenshot below)
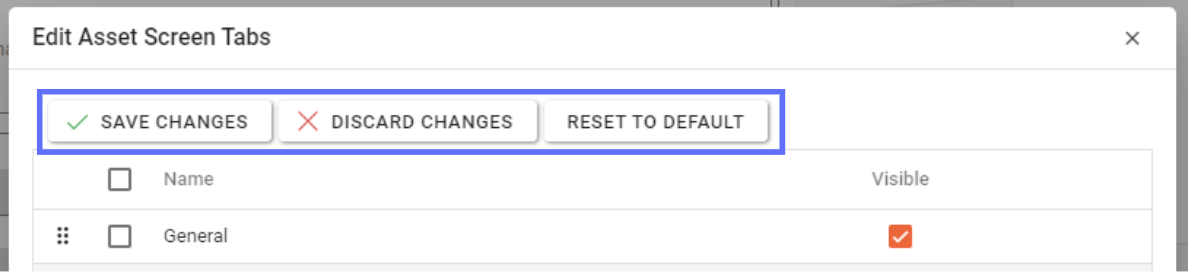
Clicking on the pencil button will open the following dialogue:
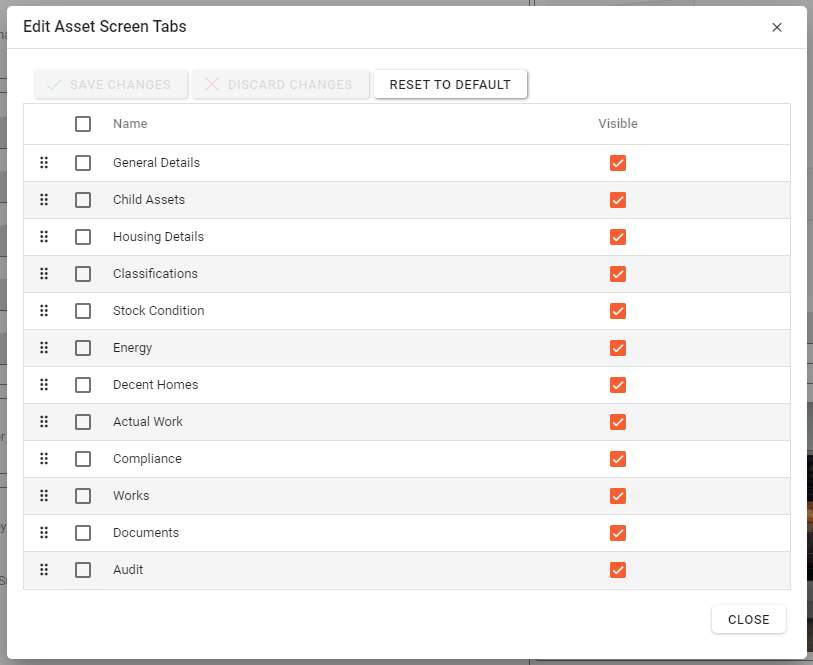
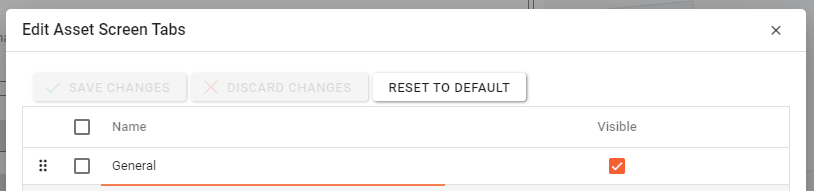
The name of the tab can be simply edited by clicking on the relevant row and changing the name.
Tabs can be hidden by unticking the checkbox on the right-hand side of the dialogue labelled “Visible”.
Tabs can be reordered by dragging the icon that has six dots to a new location in the list.

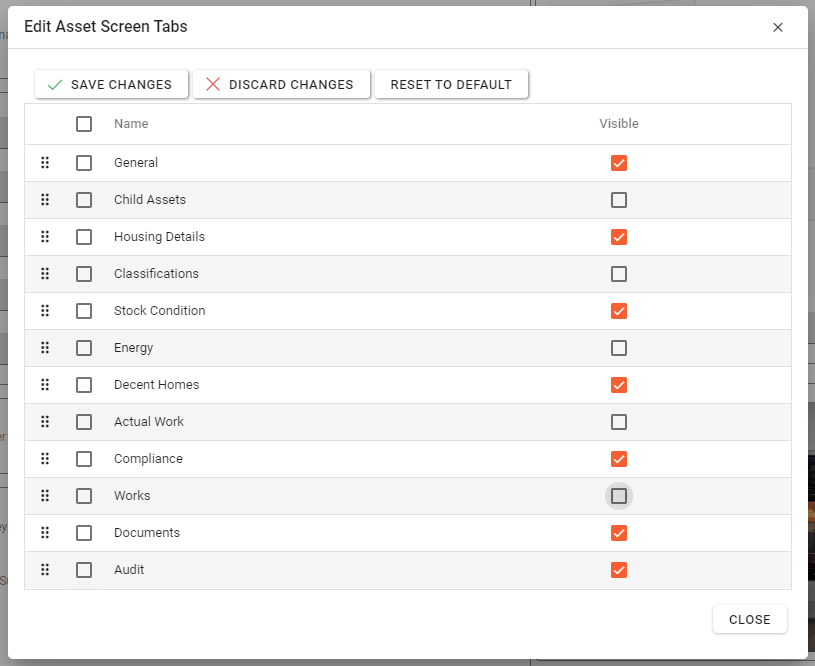
Any unsaved changes to the tabs can be reverted by clicking on the “Discard Changes“ button. Should you want to reset the tabs back to their original names, positions & visibility click on the “Reset To Default” button.
When you're satisfied with the alterations to the tabs click on the “Save Changes” button to persist the changes to the database.
Any time you come back to the asset synopsis screen the new tab configuration will be applied.
Below is an example of the asset synopsis tabs having been renamed, re-positioned and some hidden.

System wide changes to tabs can be made via the Data Control → Asset Tabs section.