
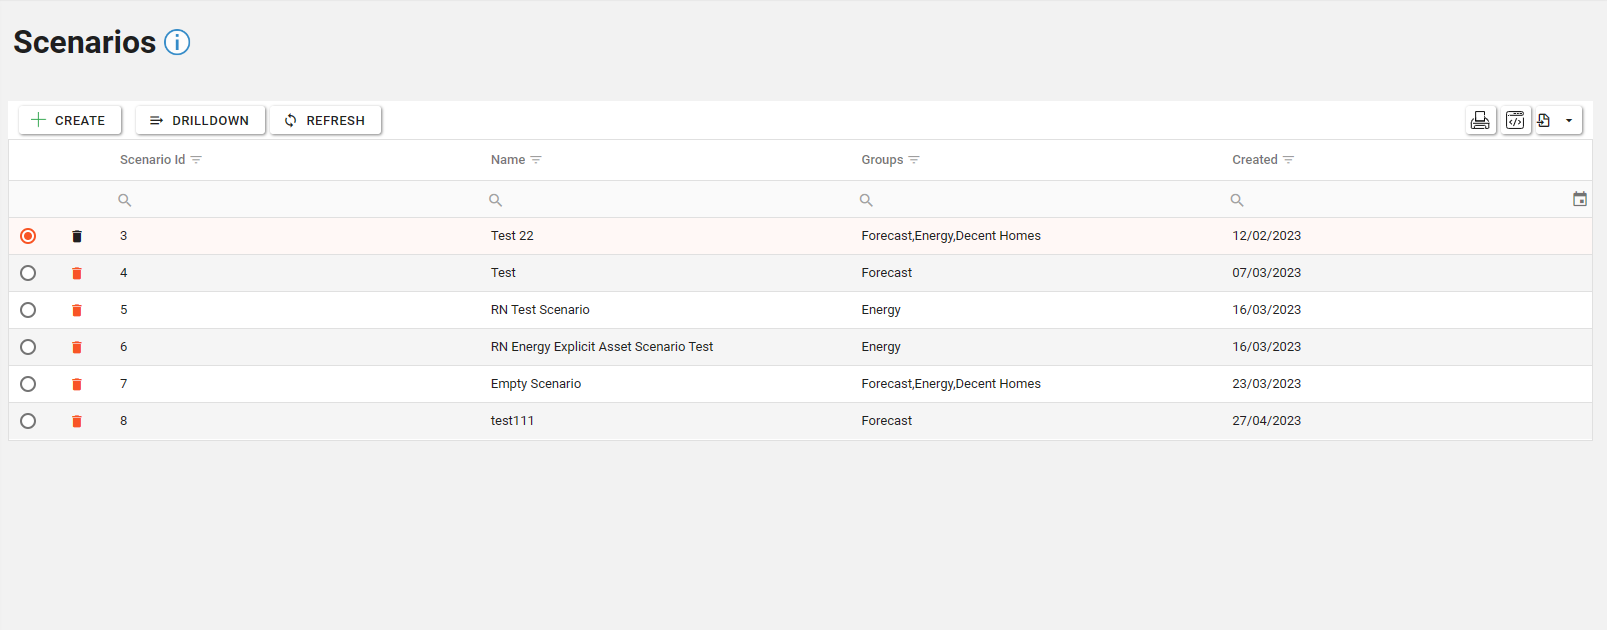
Scenarios
The Scenario's section of Asprey Assets allows users to create scenarios for Energy, Decent Homes/Housing Quality, and Financial Forecasts.
Drill down into a Scenario
To view an existing Scenario, select the Scenario in the list and click on the “Drilldown” button.
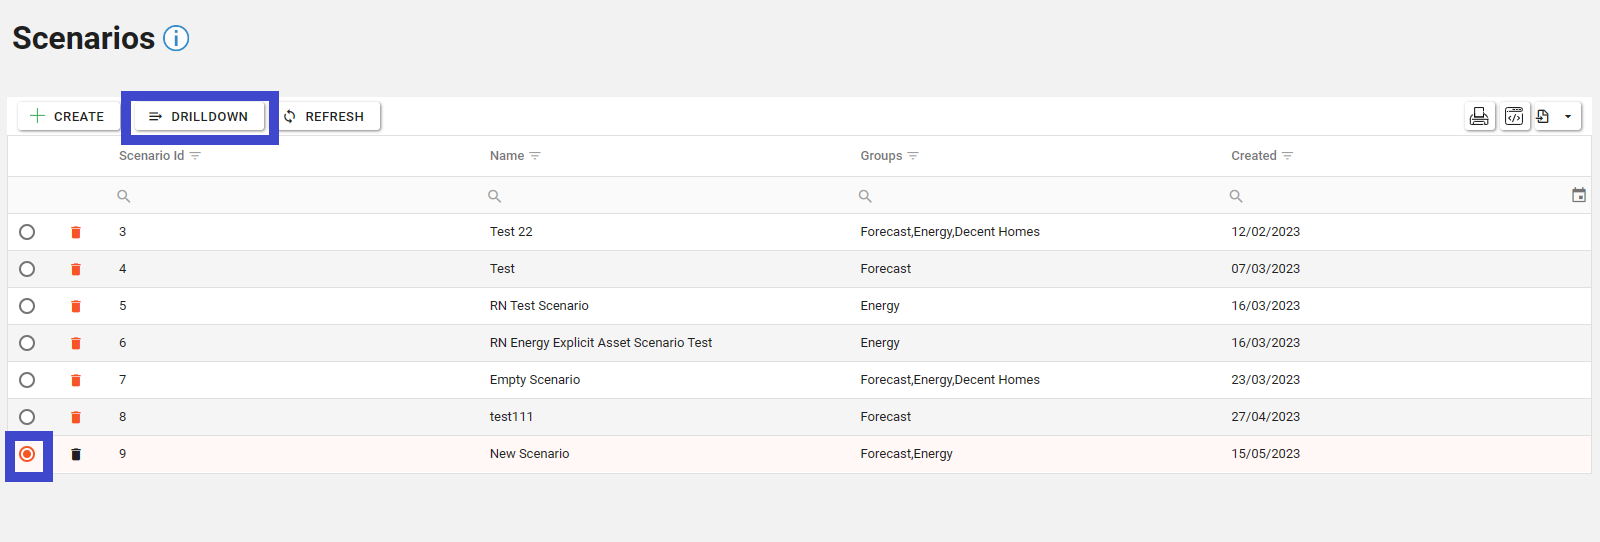
The selected Scenario will show the rules associated with that Scenario.

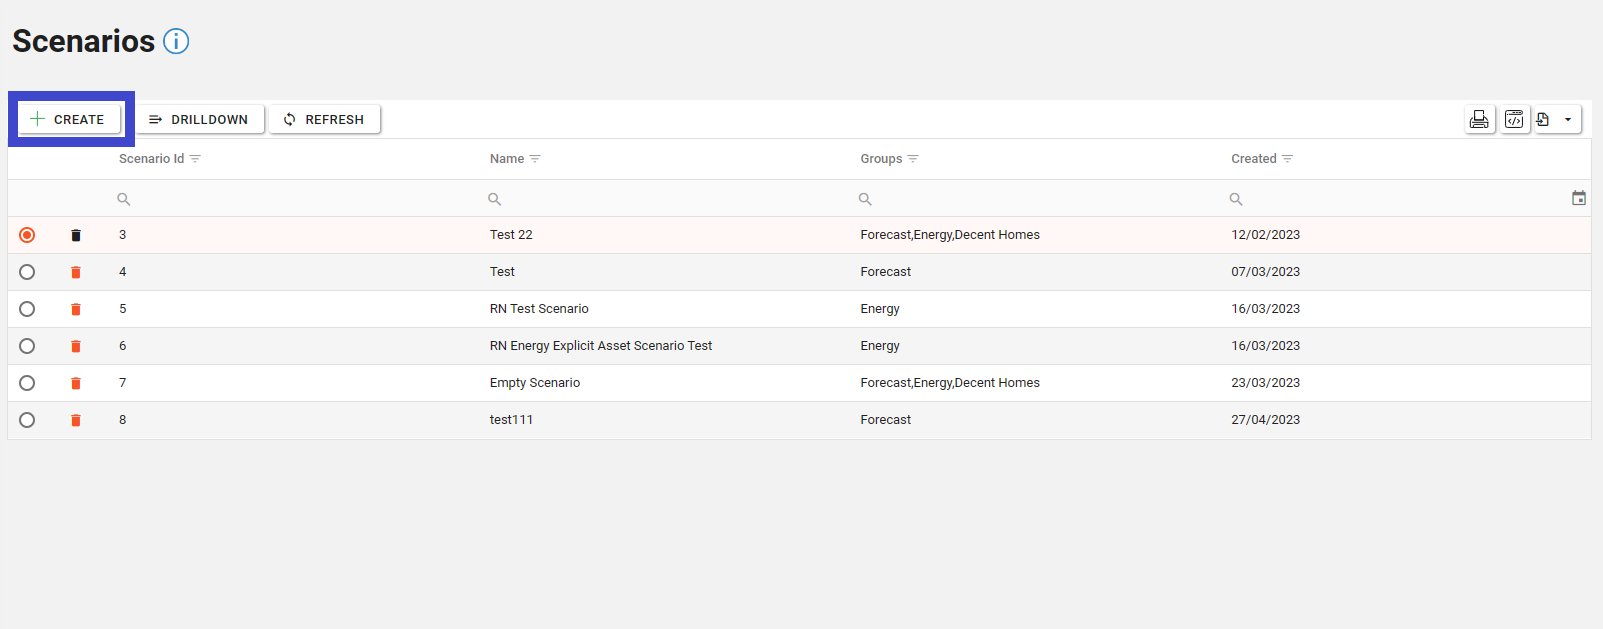
Creating a New Scenario
To create a new Scenario, click the “Create” button.
Within the next page, name the new Scenario and select which types of Scenario you wish to create from the drop down list.
Then click “Create new scenario” button. Alternatively, if a Scenario has already been created in Intelligent Energy, these can be loaded directly into Asprey assets by clicking the “Load Scenario from IE” button.
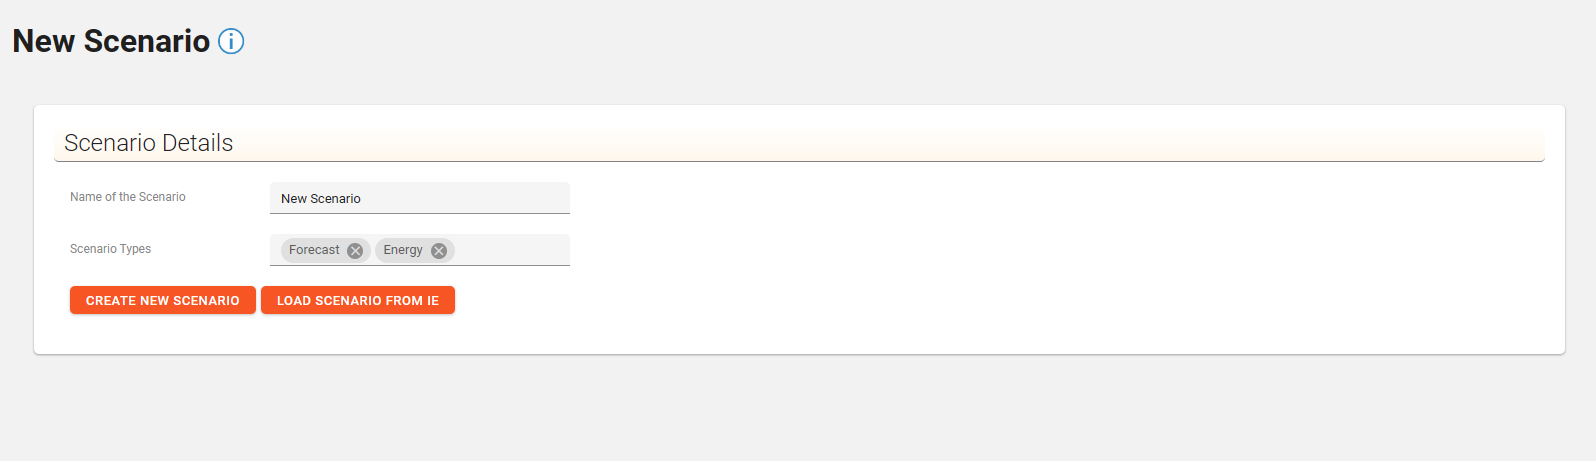
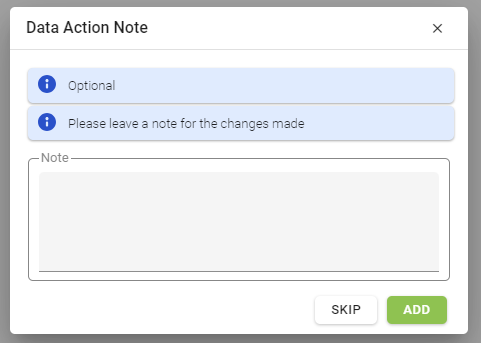
Depending on your system preferences, a dialogue box may appear to leave a note.
The new Scenario will open to allow new Rules to be created. See the section on Adding a new rule to a Scenario.
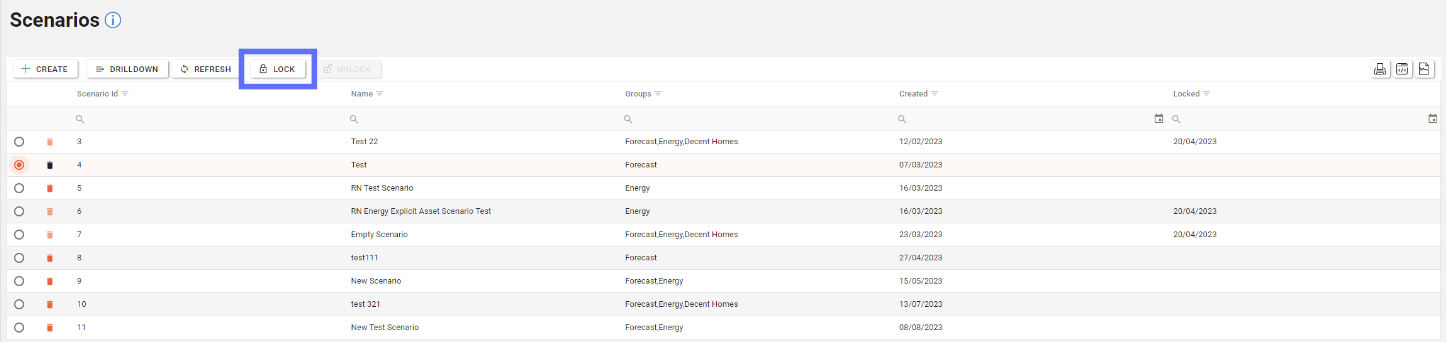
Locking Scenarios
Scenarios can be locked by selecting the Scenario row and clicking on the “Lock” button on the toolbar.
When a Scenario has been locked it will display the date it was locked on the grid and prevent any Rules from being added, edited or deleted.
Locking a Scenario has the benefit of making any Forecast dependant on the Scenario consistent when run repeatedly as the Rules aren’t changing between Forecasts.
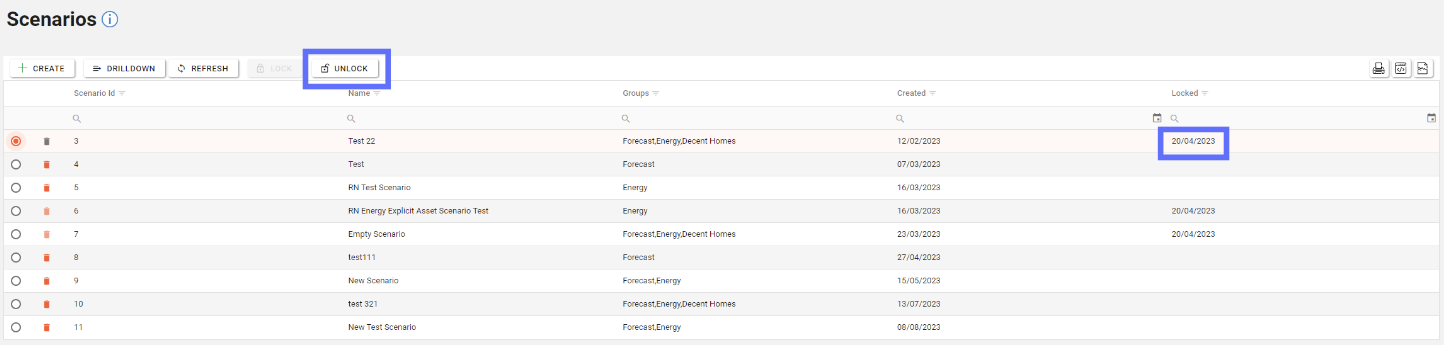
Unlocking Scenarios
Scenarios can be unlocked by selecting a locked Scenario row denoted by the locked date and clicking on the “Unlock” button on the toolbar.
When a Scenario has been unlocked it won’t display the locked date on the grid and will allow underlying Rules to be added, edited or deleted.
Unlocking and modifying the underlying Rules of a Scenario will have an impact on any Forecasts that are utilising the Scenario.
Creating a Scenario Rule
Drilldown into a Scenario and click the “New Rule” button to configure a new Rule.

A dialogue box will appear to show the Rule Types that are available to create. Select the relevant rule from the list below:
Rule Type |
|---|
Add New Repair |
Remove Repair |
Replace Repair |
Change Repair Cost |
Change Repair Interval |
Change Repair Year Due |
Add New Component |
Remove Component |
Replace Component |
Add Component Attribute |
Remove Component Attribute |
Replace Component Attribute |
When the Rule Type and been selected, click on the “Use” button.

The “New Rule” dialogue containing the rule builder will appear.
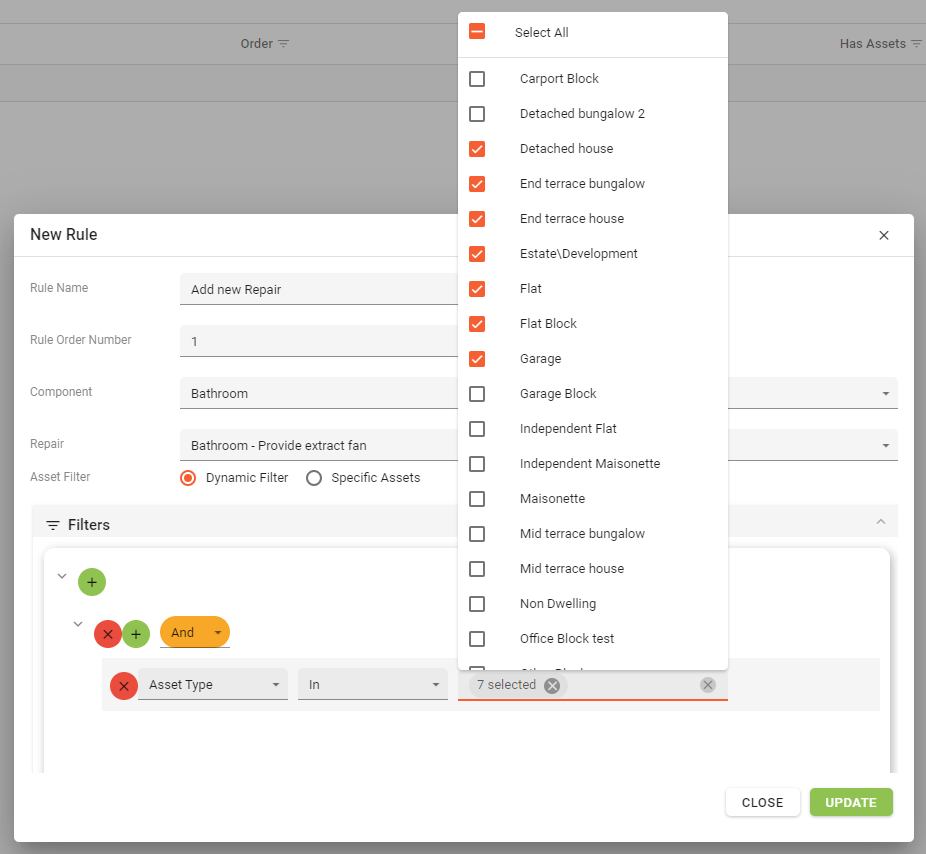
You’ll need to name the Rule, provide a Rule order number, select the Component from the list available and apply any relevant filters to the rule.
Filters can be applied to a specific set of Assets (selected via the Asset Explorer) or dynamically using a group of Assets that meet the certain criteria. (see below)
Then click the “Update” button to save the New Rule.
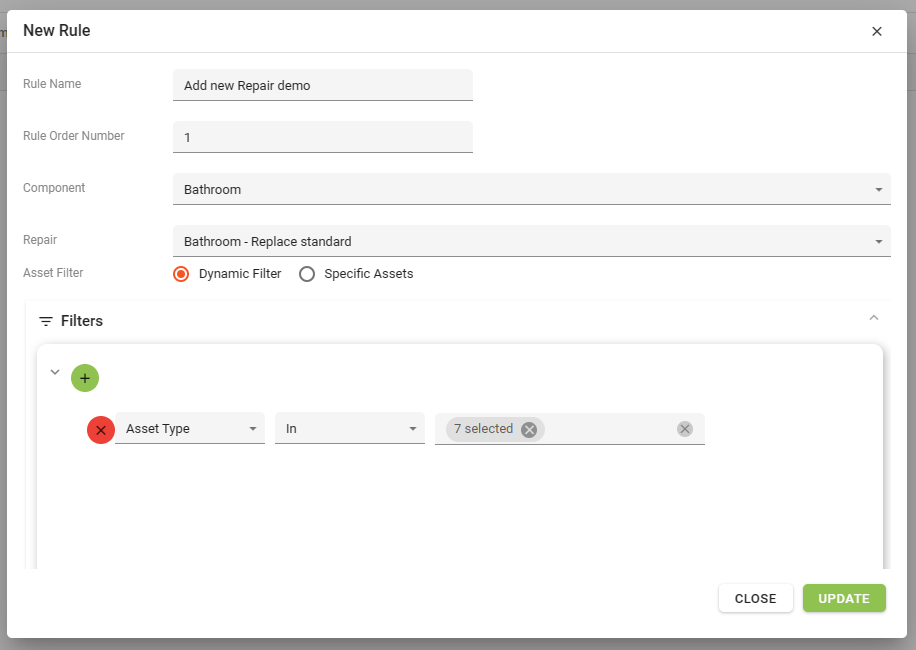
An example of using the “Dynamic Filter” to pick Assets based on a group filter. In this instance the Dynamic Filter will pick Assets that have an Asset Type of Detached house, End terrace bungalow, end terrace house etc.
The Rule will then appear in the Scenario details screen.

Editing a Scenario Rule
Scenario Rules can be edited by clicking on the pencil button on the corresponding Scenario Rule row (see below)

This will open up the “Edit Rule” dialogue which has an identical layout to the “New Rule” dialogue. You can now amend any of the Rule details and click on the “Add” button to save the changes.

Deleting a Scenario Rule
Scenario Rules can be deleted by clicking on the trash button on the corresponding Scenario Rule row (see below)

When you click on the trash button you will be presented with a delete confirmation dialog asking you whether you’re sure you want to delete the Rule.
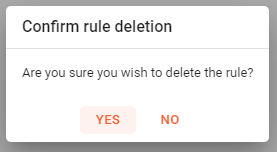
Clicking the “Yes” button will delete the rule from the Scenario. Clicking the “No” button will stop the Rule from being deleted and dismiss the delete confirmation dialogue.
Deleting a Rule from a Scenario removes it completely from the database! Make sure you’re 100% confident you’re deleting the right Scenario Rule.
Cloning a Scenario Rule
Scenario Rules can be cloned by clicking on the clone button on the corresponding Scenario Rule row (see below)

When the clone button has been clicked the clone dialogue will appear (see below).
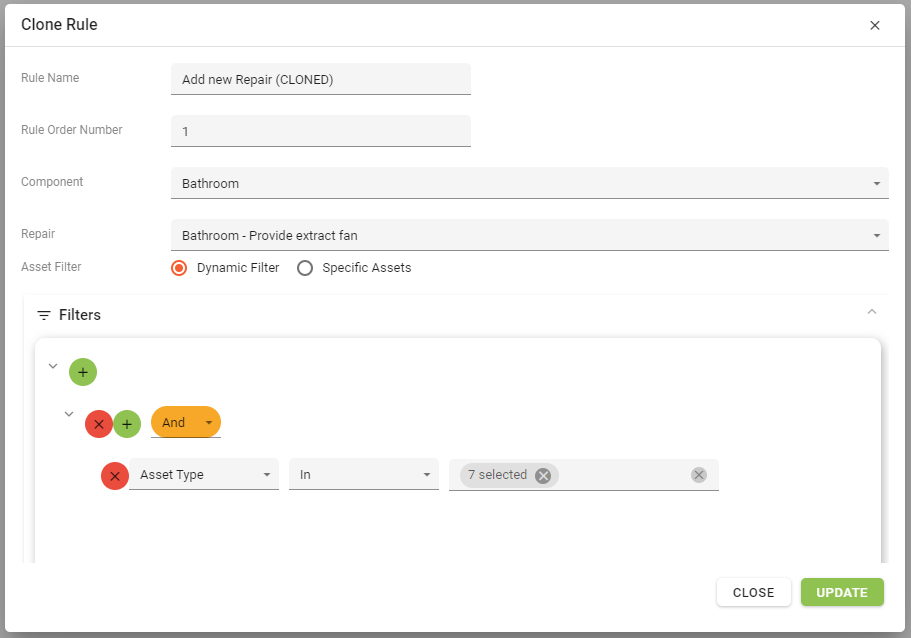
The Rule Name will have been cloned from the source Rule and “(CLONED)” will be appended to the end of the name.
It’s suggested that the cloned rule has it’s name changed prior to saving to avoid any confusion with existing rules.
All of the other rule data will be cloned across from the source Rule to this newly cloned Rule making it quicker to change the Rule. It’s advisable to edit the data to distinguish the new Rule from previous rules so that there isn’t multiple rules with the same settings. Multiple rules with the same settings will slow down Forecasts.