
Forecast Jobs
You will require the following permissions to complete all the actions on this page of the manual:
AA_Forecast_Job_Cancel_Job
AA_Forecast_Job_Create
AA_Forecast_Job_Delete
AA_Forecast_Job_Drilldown_Delete_Layout
AA_Forecast_Job_Drilldown_View
AA_Forecast_Job_View
Please speak to your internal administrator to grant the relevant permissions.
The forecast jobs section allows users to create and view financial forecasts from the Asprey Assets data.
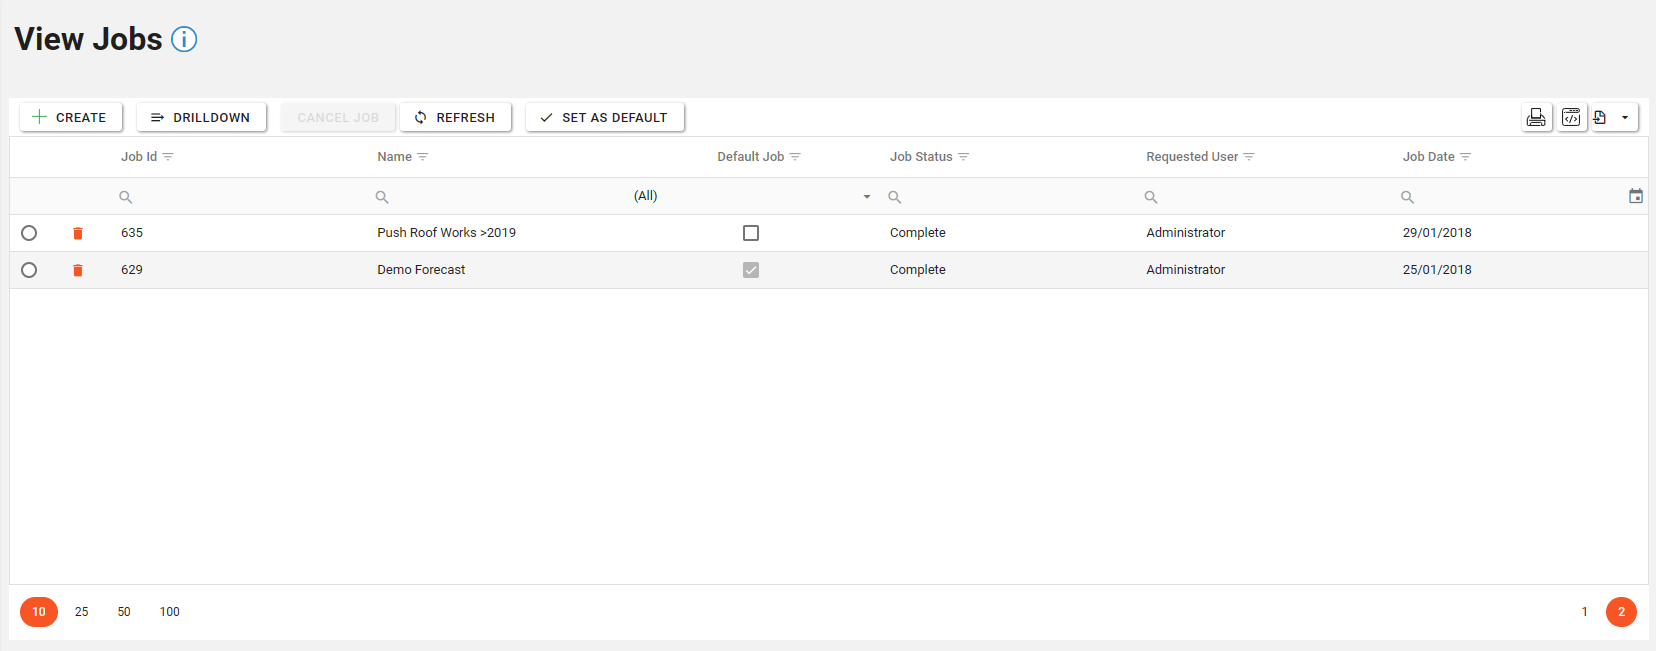
Viewing an existing forecast job
To view an existing forecast job, select the required job by clicking the selector icon in the leftmost column. Once selected, the job will be highlighted. Then click the “Drilldown” button to view the forecast.

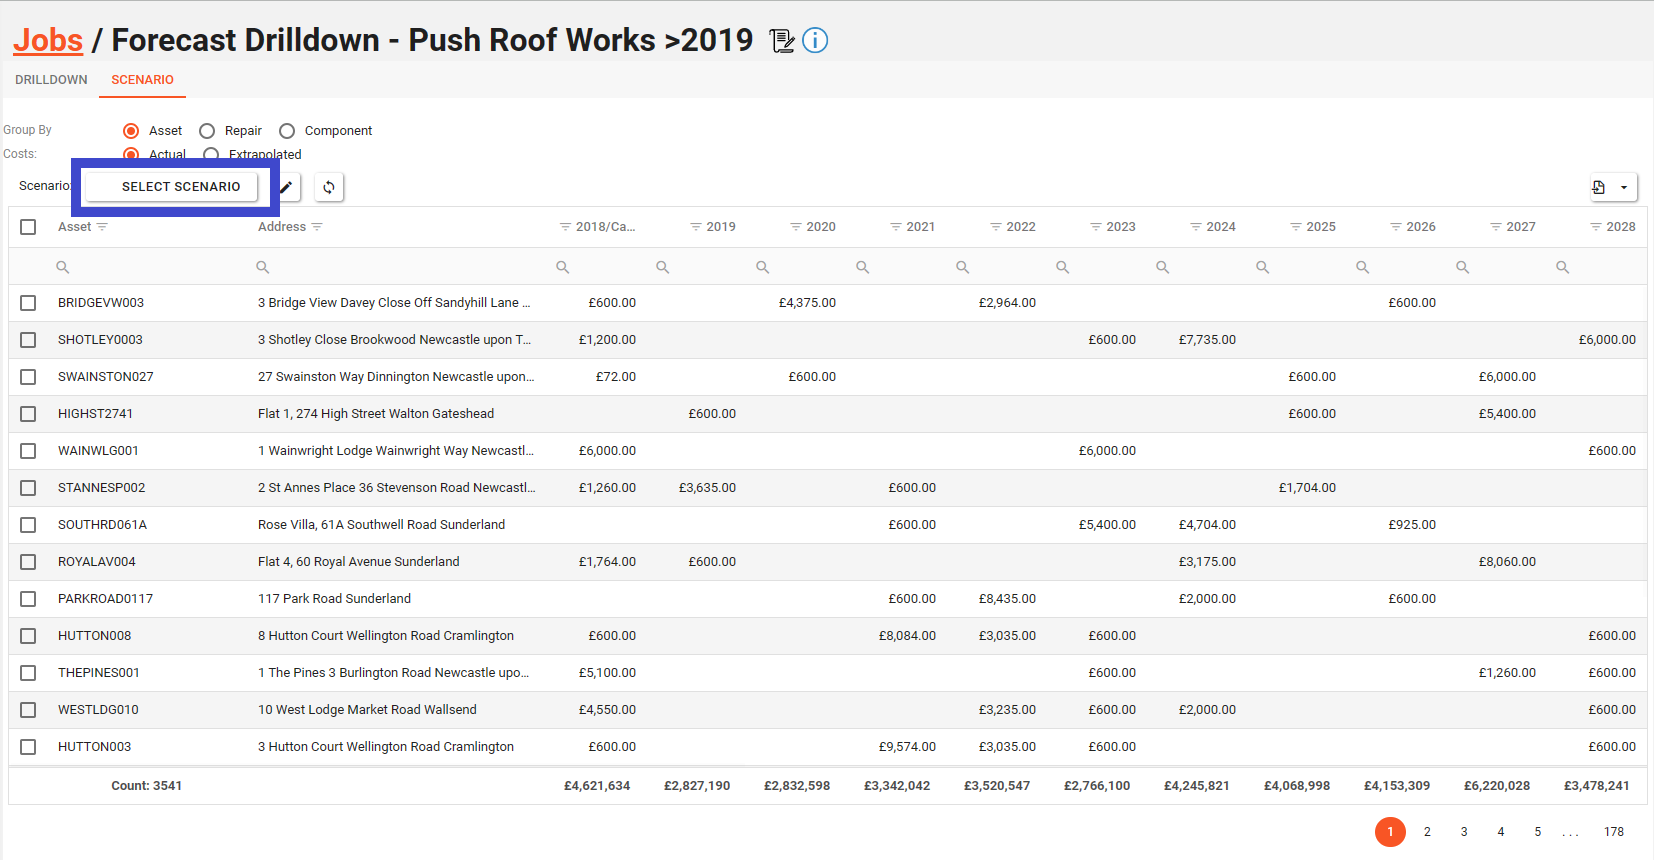
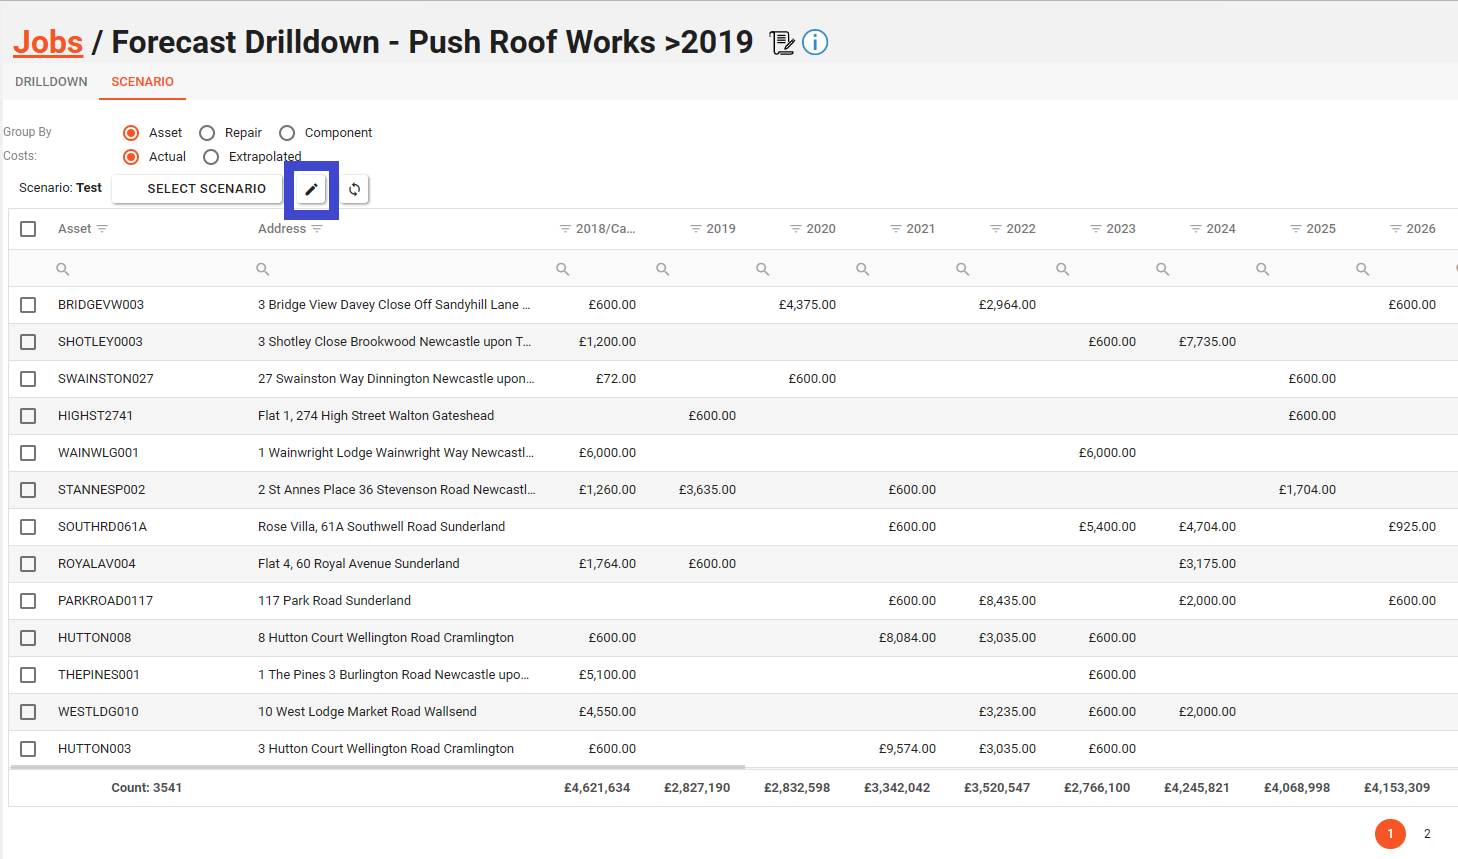
When the “Drilldown” button has been clicked, the screen will load the Forecast data for the selected Job. There are two tabs within the forecast job “Drilldown” and “Scenario”.
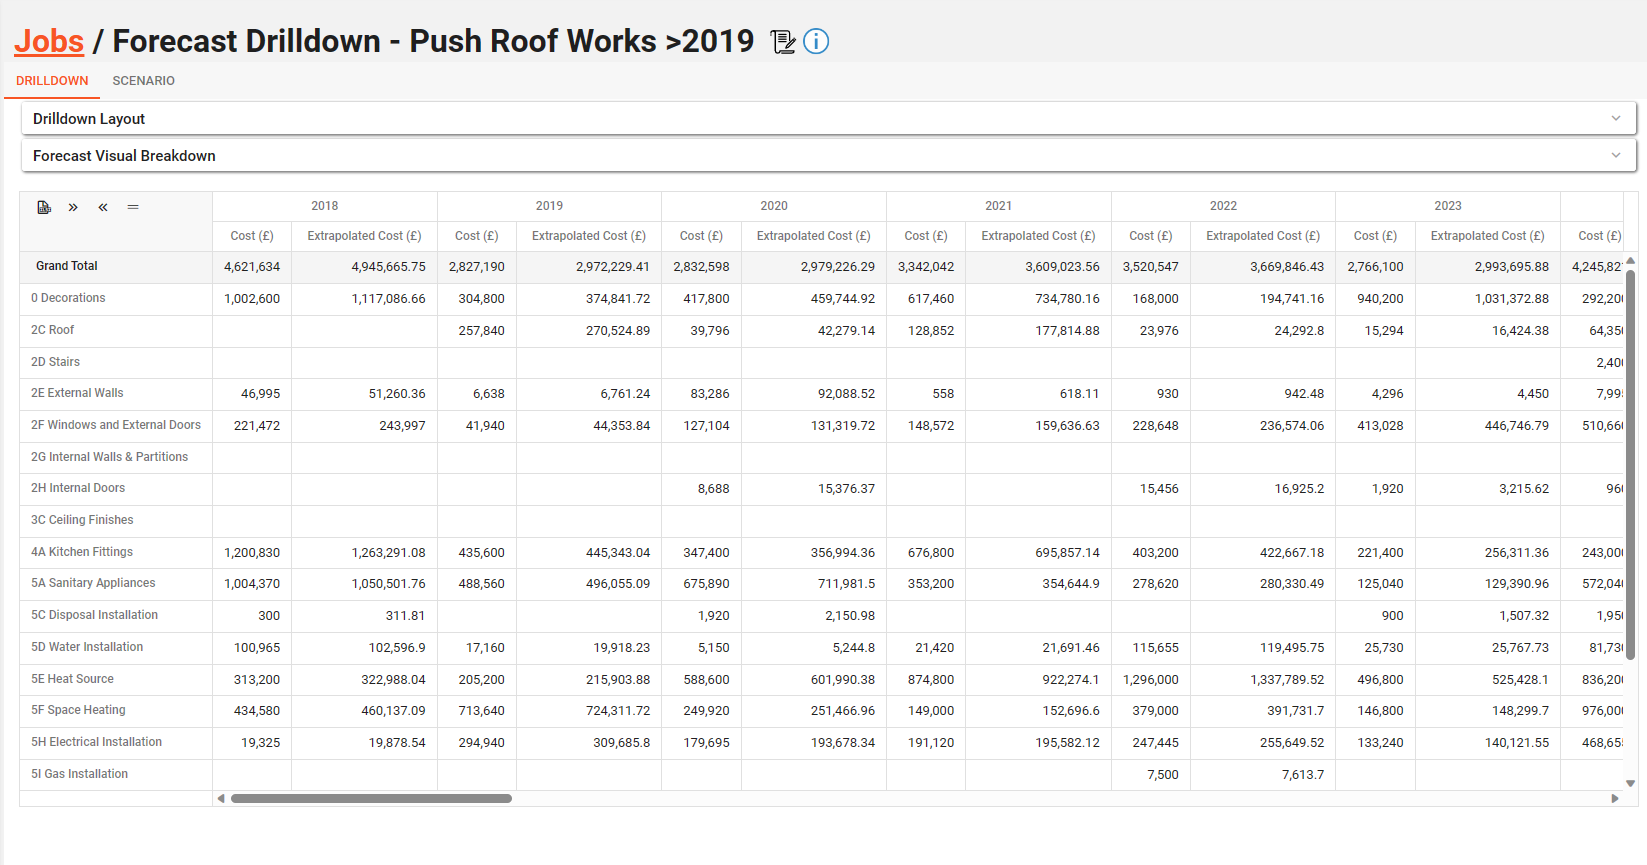
The lower grid shows the full breakdown of the forecast job, grouped by the Repairs within Asprey Assets.
The forecast can be exported to excel by using the export button at the top left-hand corner of the grid.
To adjust the layout of the drill down, select the “Drilldown Layout” bar at the top of the page. Once expanded, the grid can be adjusted to meet your requirements by changing the layout. As you make changes to the “Drilldown Layout”, the grid below will update to reflect these changes.
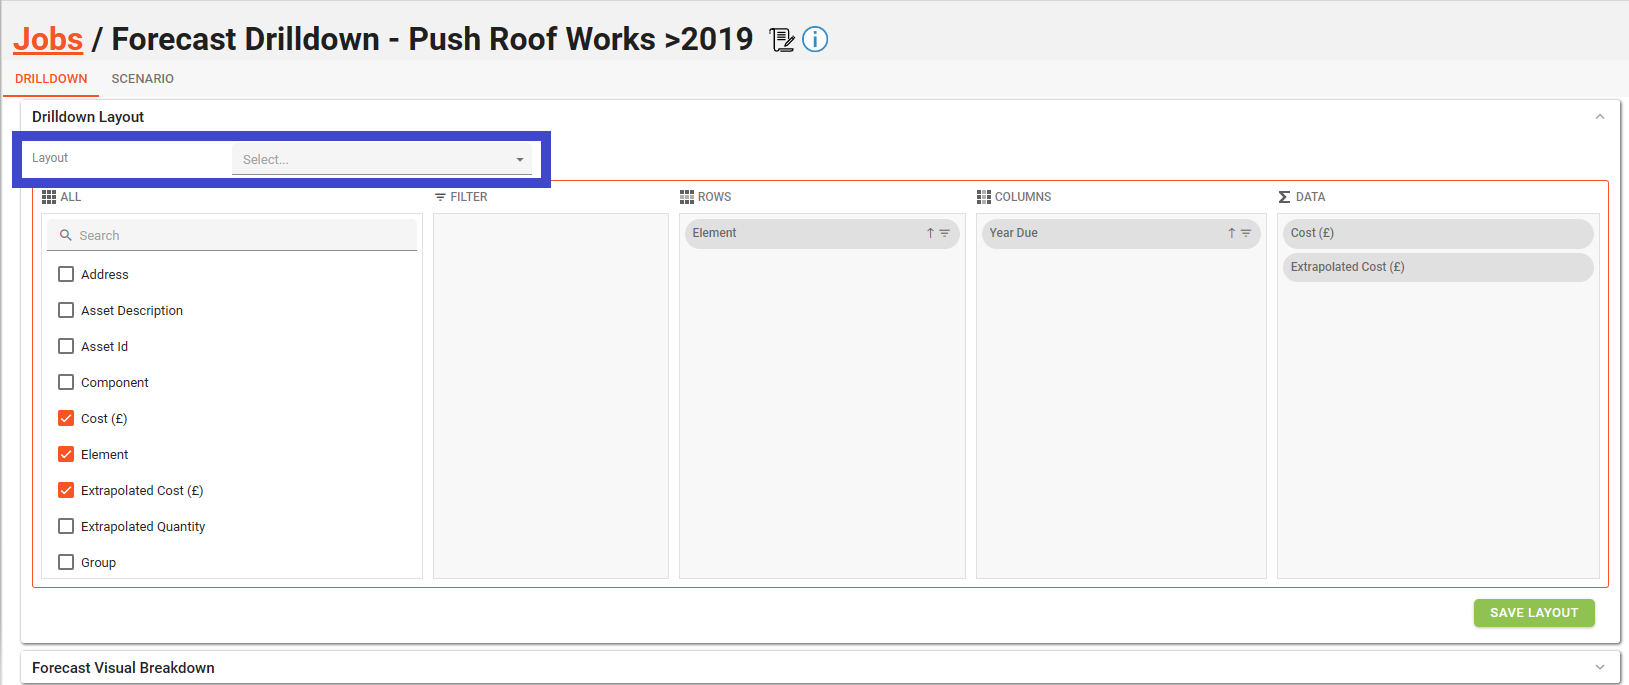
To access saved search layouts, click the dropdown marked “Layout” to load custom saved layouts.
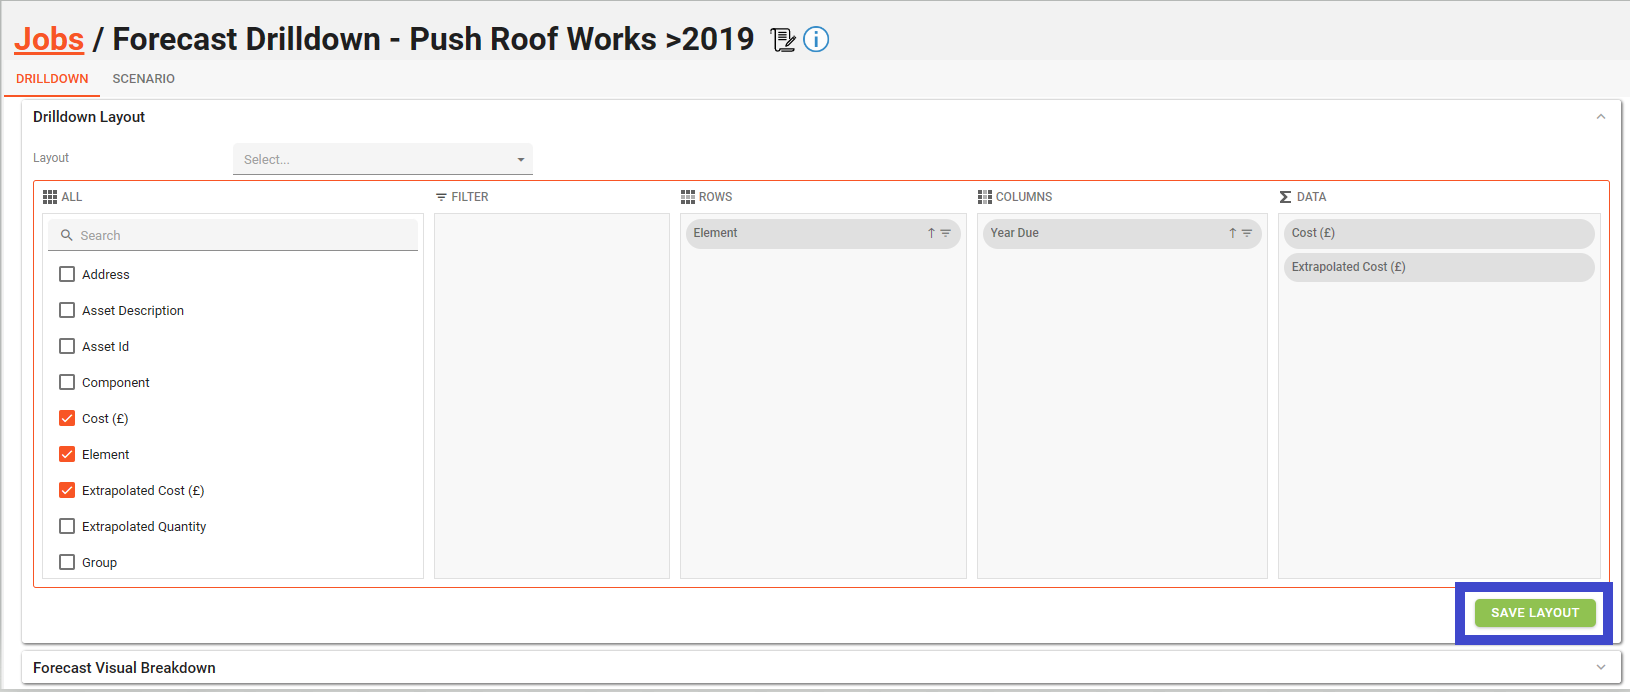
To save the current layout to be accessed later, click the “Save layout” button in the bottom left.
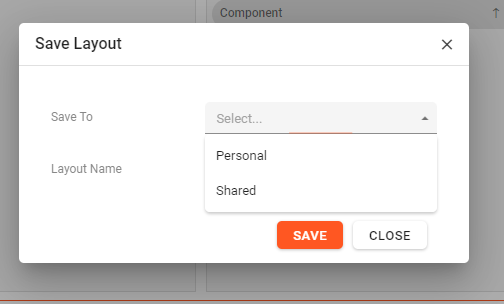
The dialogue box will appear. Custom layouts can be saved to your personal space (only accessed by you) or to a shared space (accessed by all with permissions to this area). Provide a name for the layout and click “Save”. This layout will be available from the dropdown as shown above.
To view the details of the job, click the job details icon next to the job title. A pop-up will appear that shows the underlying assumptions of the forecast.

Scenarios
Within the scenarios tab, changes can be made to the forecast from the baseline values. To do this, custom rules must be created. scenarios can be pre-configured in the scenarios section and selected here, or they can be custom added to the specific scenario.
Using pre-configured Scenarios
To apply a pre-configured scenario, click the “Select Scenario” button.
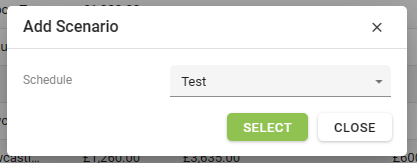
From there, a dialogue box will appear with a drop-down list of scenarios available to select. Select the desired scenario and click “Select”.
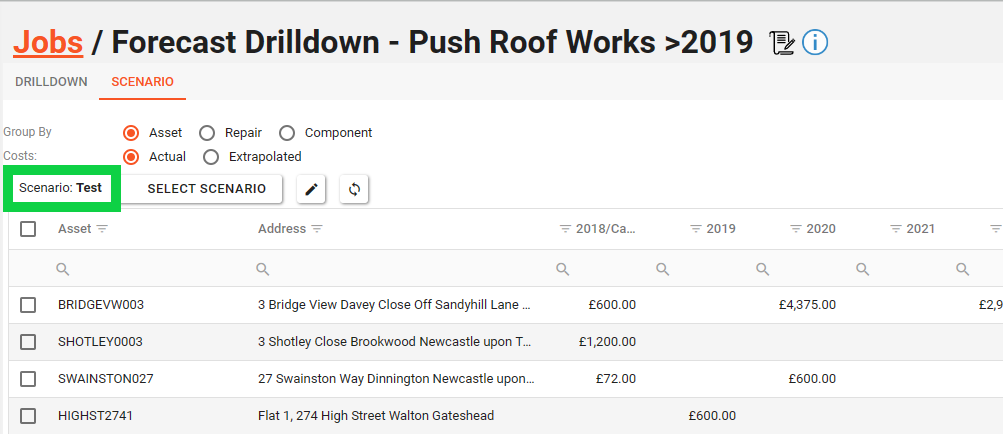
The selected scenario will then apply and the scenario being applied to the forecast will show in the header.
Creating a custom Scenario Rule
To add a custom rule, click the “pencil” icon which will open the Scenario Rules Viewer.
When the dialogue for Scenario Rules Viewer is open, users can see any current rules being applied to the scenario. To add a new rule, click the “New Rule” button.
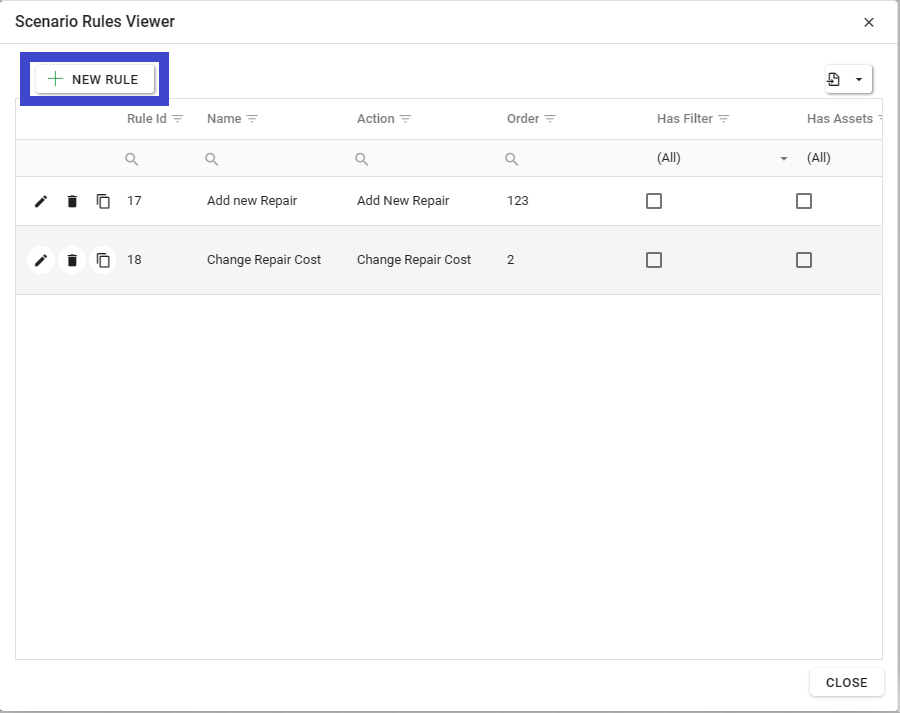
For more information on the types of rules that can be created, please refer to the Scenarios Section.
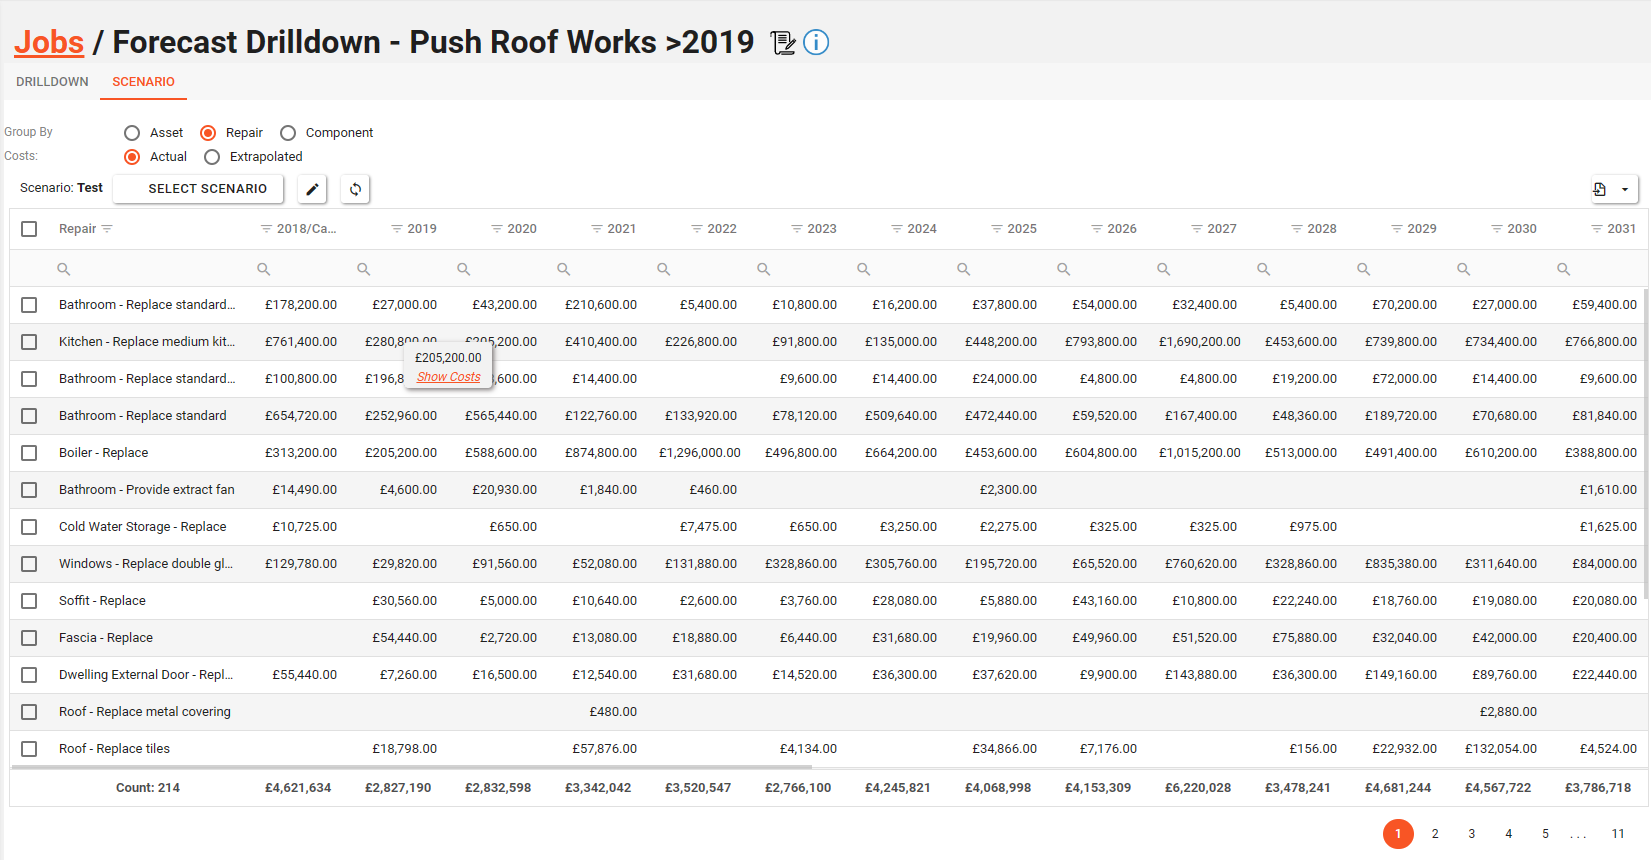
Once the adjustments are complete, hover over any value in the adjustments gid and click “Show Costs” to see the full details of the adjustment.
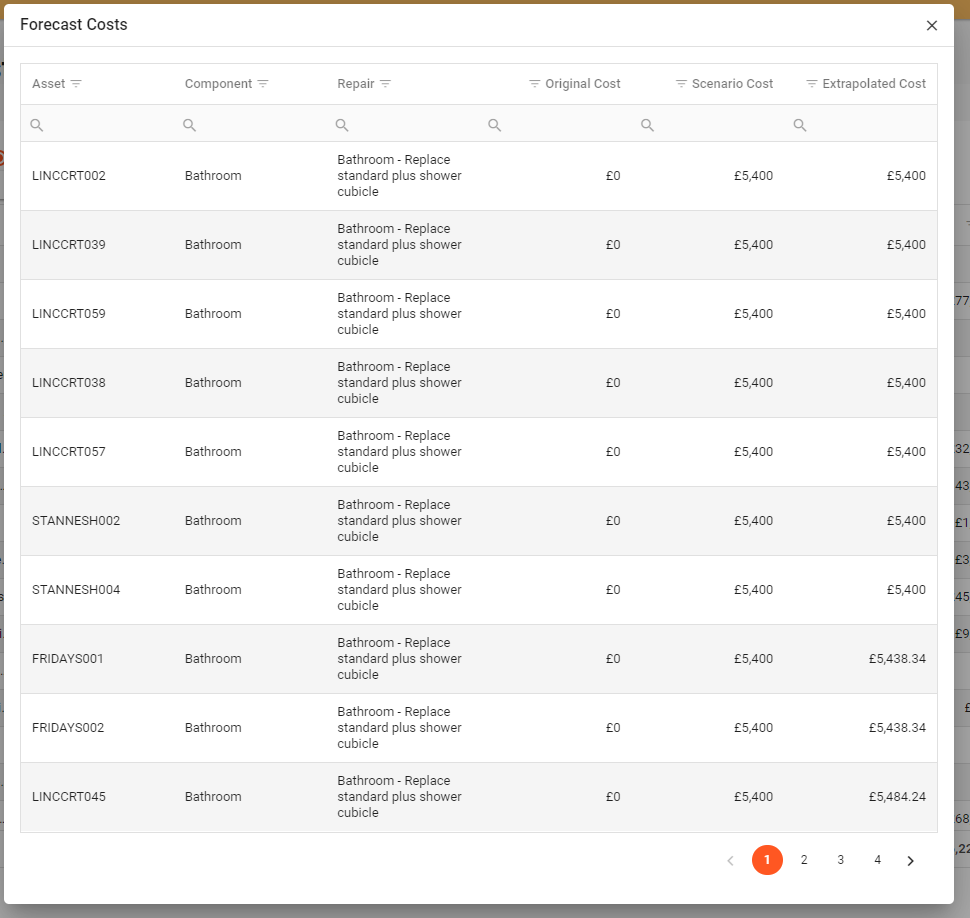
This will then open a new window with the full details of the cost adjustments.
If any changes are made and they do not appear, simply click the “recalculate” button.
Creating a Forecast Job
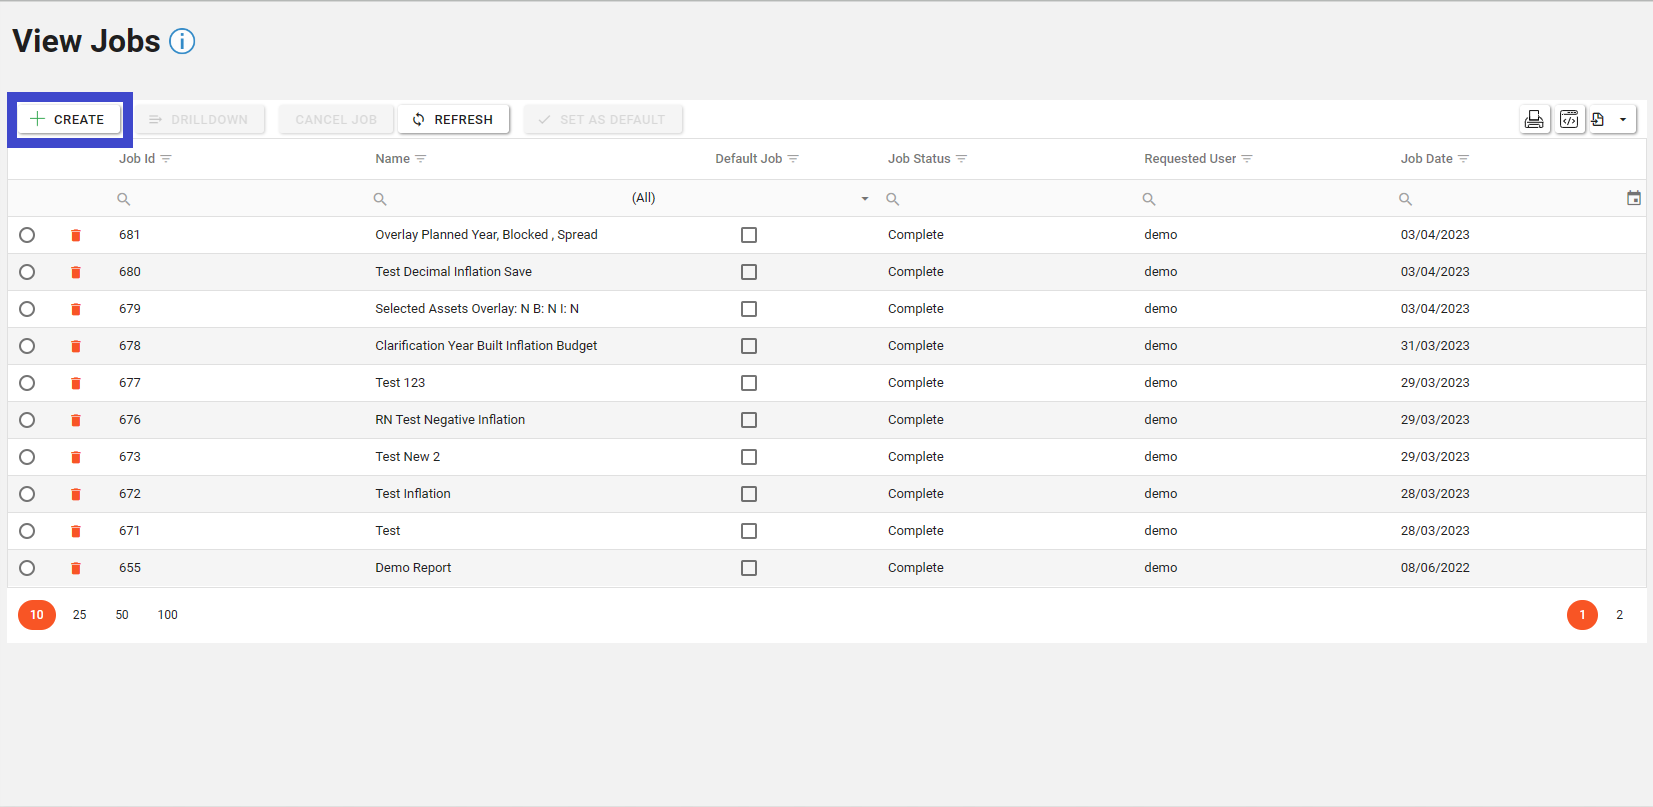
To create a new Forecast Job, click the “Create” button.
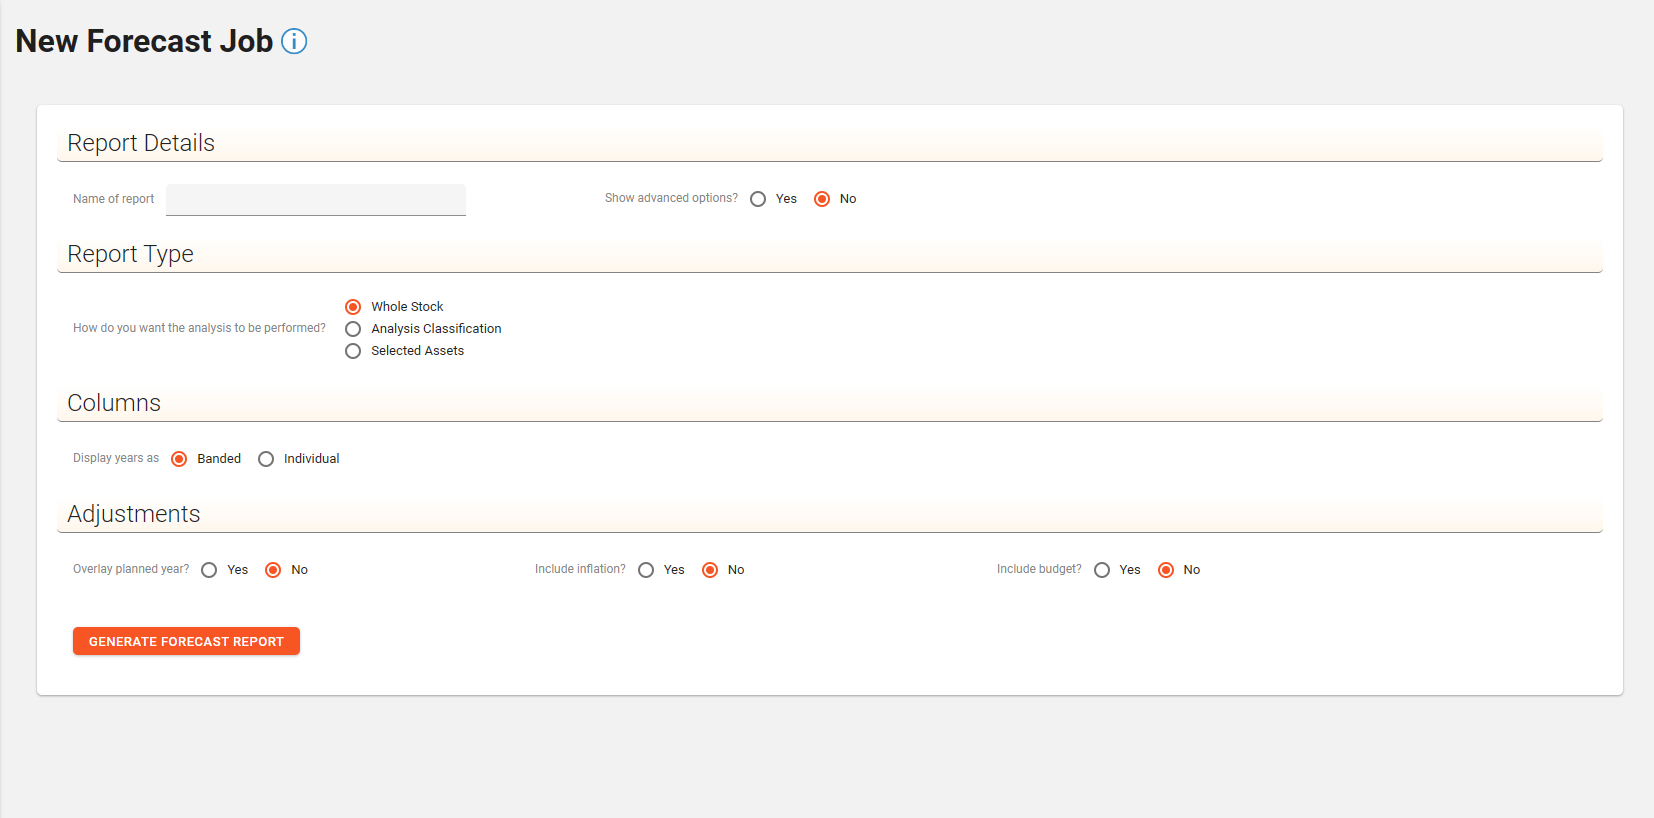
The Forecast Job creation form will appear. allowing you to name the new Forecast Job and fill out the other details as shown below:
Field | Description |
|---|---|
Name of Report | This is where the name of your report is entered |
Show advanced options? | This shows the additional options available. The default is whole stock, however representation levels can be used here. |
Report Type | This allows you to define which Assets the report will be generated for:
|
Selection Criteria | This is driven by the report type. If whole stock is selected this element is removed. If Analysis Classification is selected this is where you define the classifications you want to use. If Selected assets is used, this is where you select the assets you wish to run the forecast for. |
Columns | These can either be banded or individual. banded means the default banding, Individual allows the end user to use custom groups. |
Adjustments | There are five options for adjustments:
|
Filter Repairs | There are two options for filtering Repairs:
|
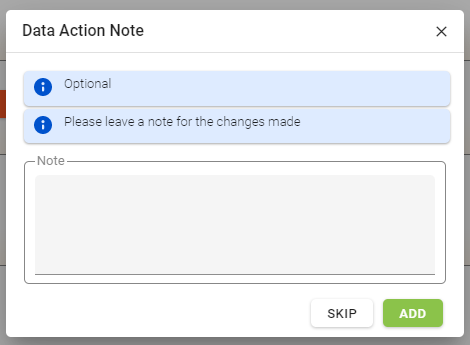
Once the Forecast has been configured, click the “Generate Forecast Report” button. If your configuration requires notes to be added, please add the required notes and click the “Add” button in the dialogue box.
The Forecasted Job will then appear in the Forecast Jobs list ready to be viewed.