Configure Components
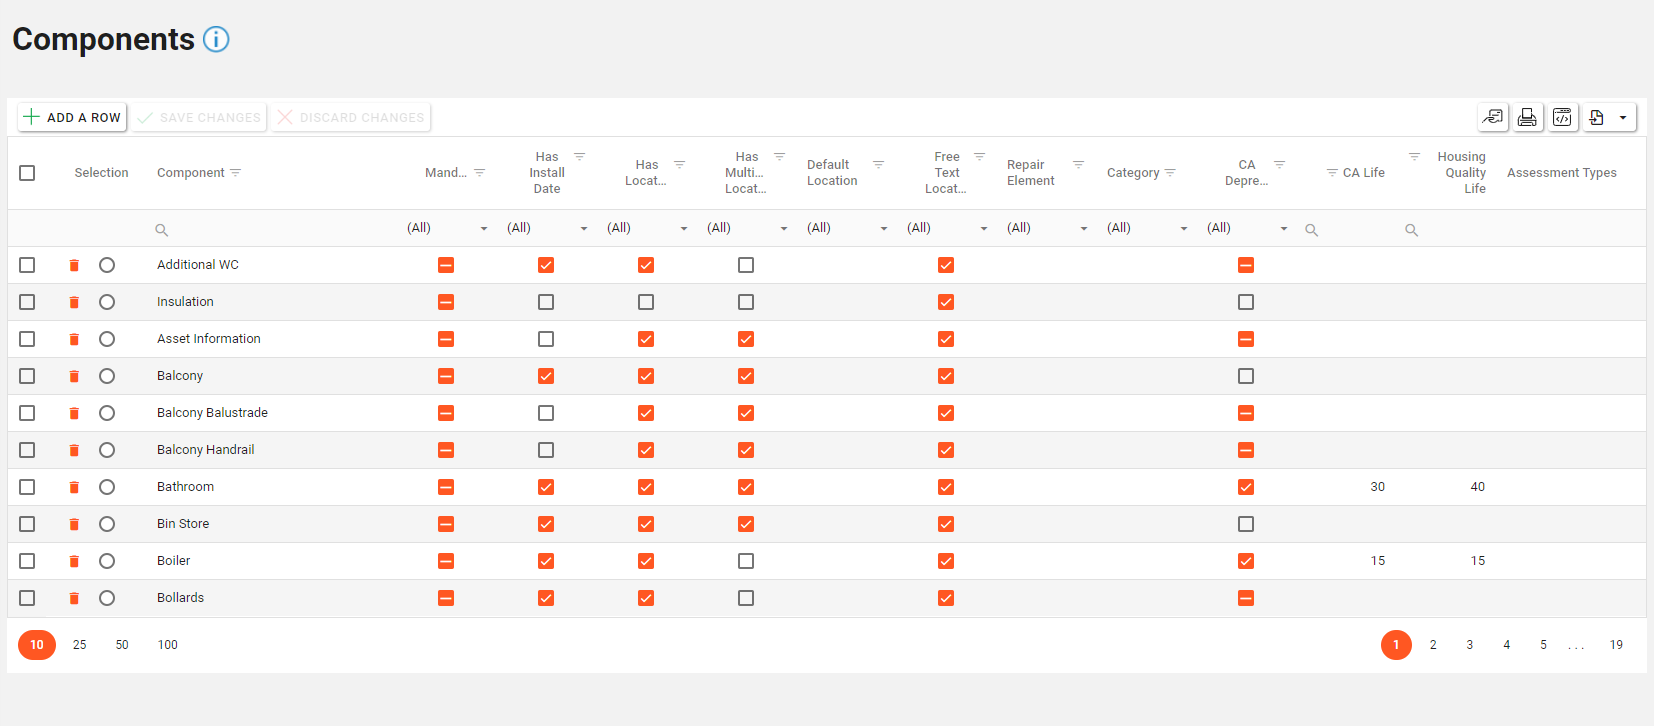
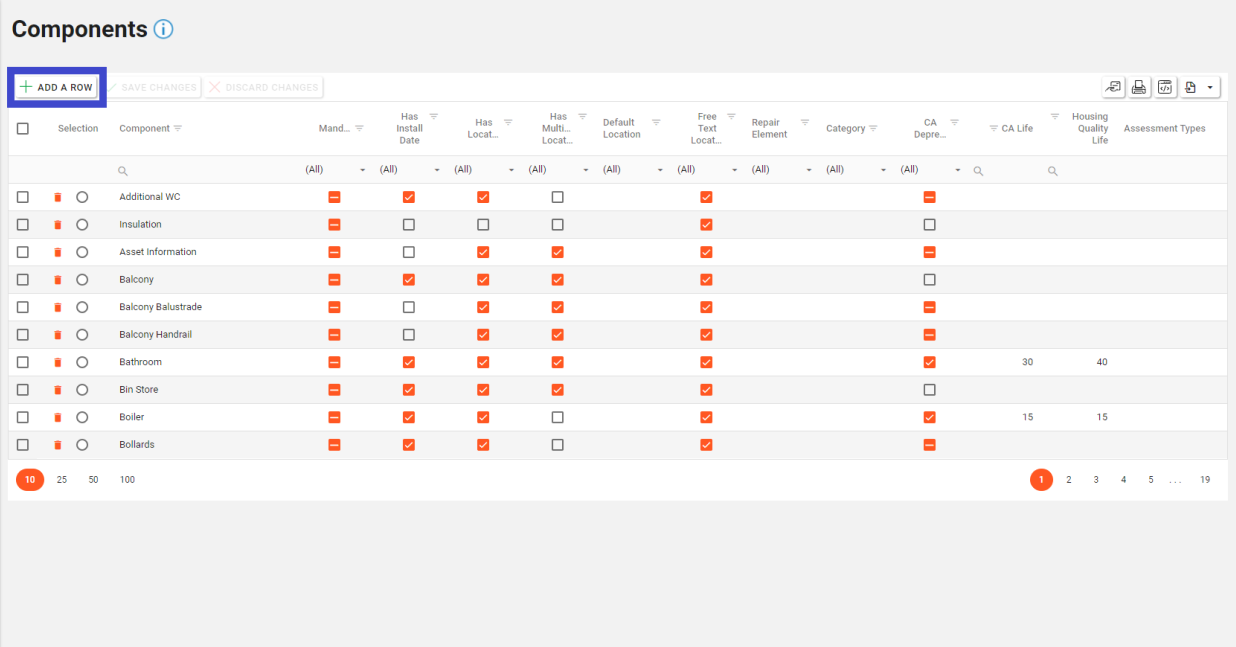
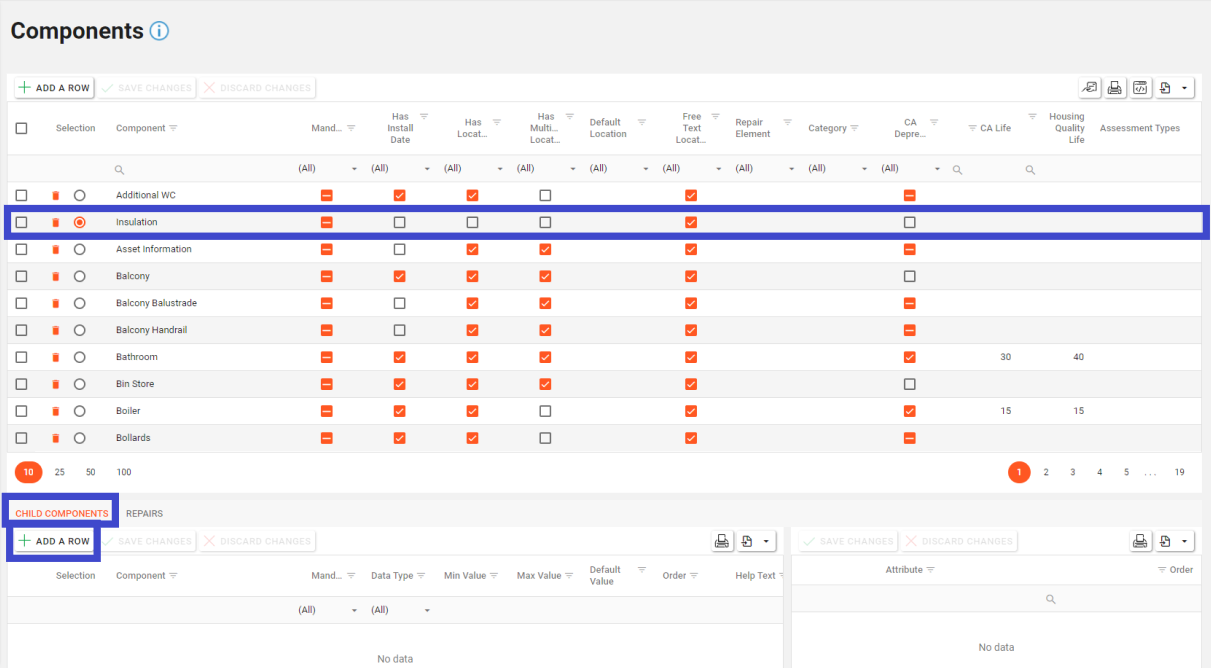
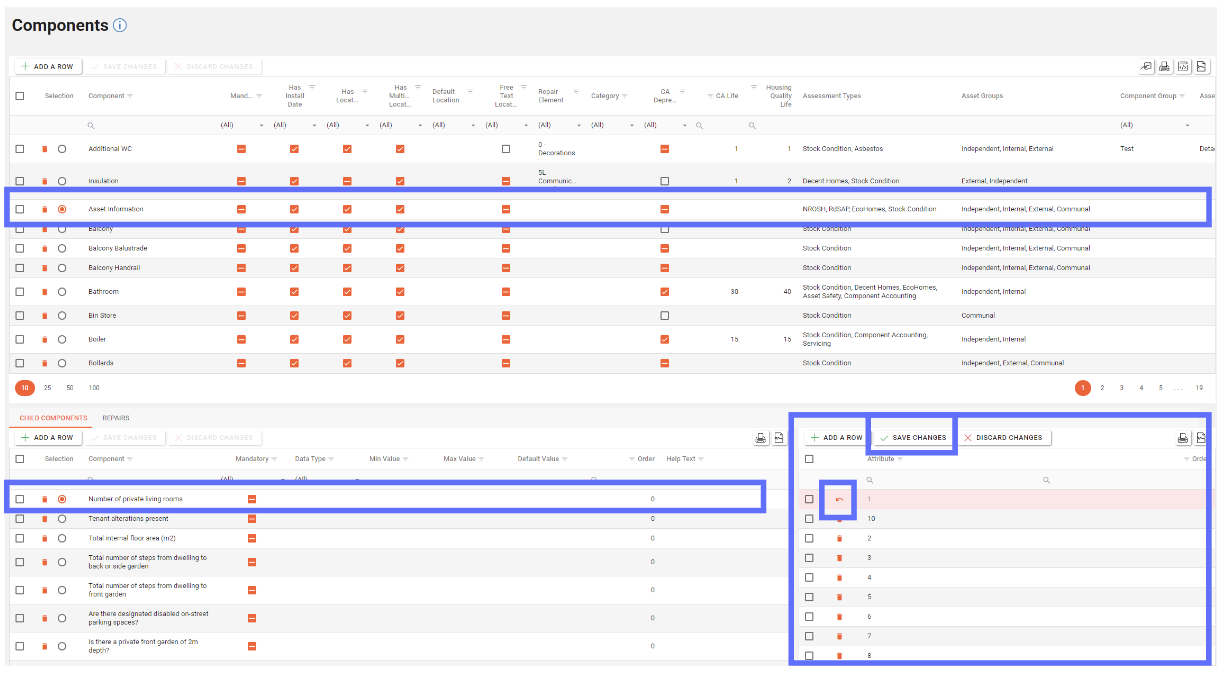
Components can be configured in the Configuration → Components screen (see below).
Components are used to inform all areas of Asprey Assets which utilise Components, therefore, if a component does not appear on this screen, it cannot be used anywhere else in the application.
You will require the following permissions to access and edit this area.
AA_Configuration_Component_Create
AA_Configuration_Component_Delete
AA_Configuration_Component_Update
AA_Configuration_Component_View
Please speak to your internal administrator to grant the relevant permissions.
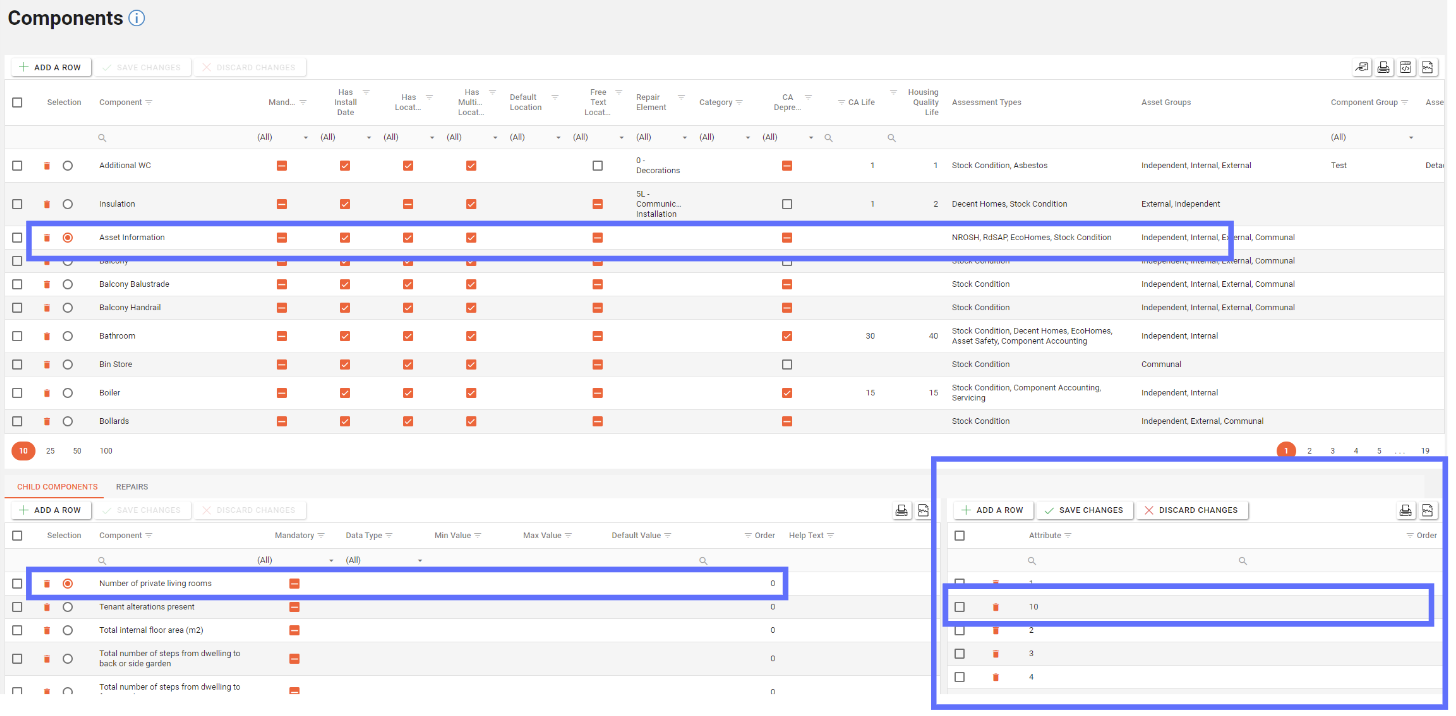
When selections are made in the top grid, a lower grid will appear showing any Child Components or Repairs associated with the parent Component.
Editing a Component
To edit an existing Component, select the row you wish to edit and then select the field to be edited and overwrite the existing data present. Once all changes are made to the relevant columns, click the “Save Changes” button.
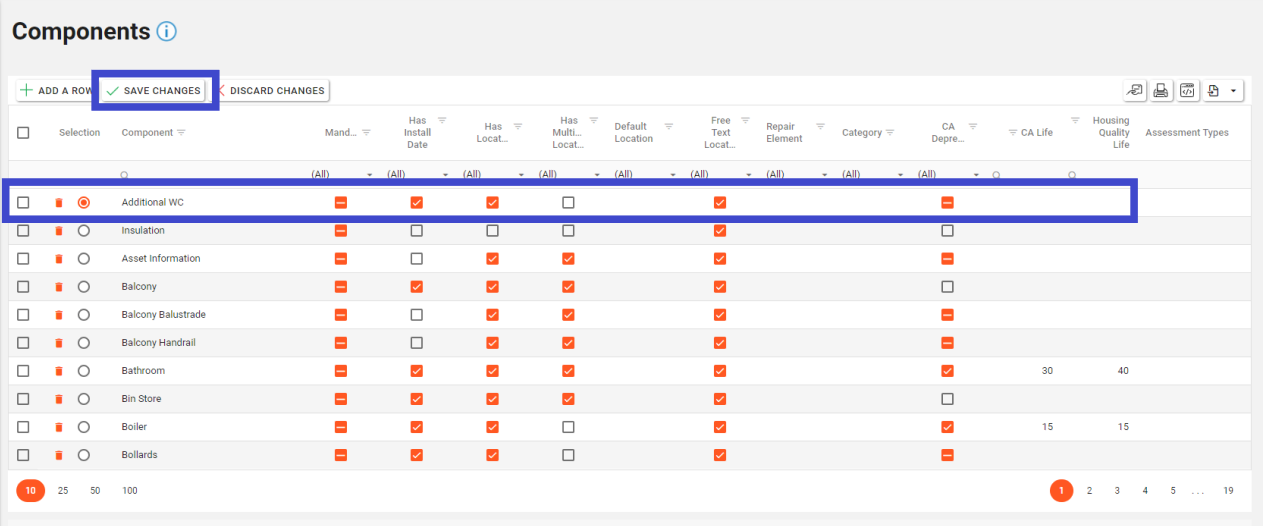
If you wish to undo the changes made before saving, select the “Discard Changes”
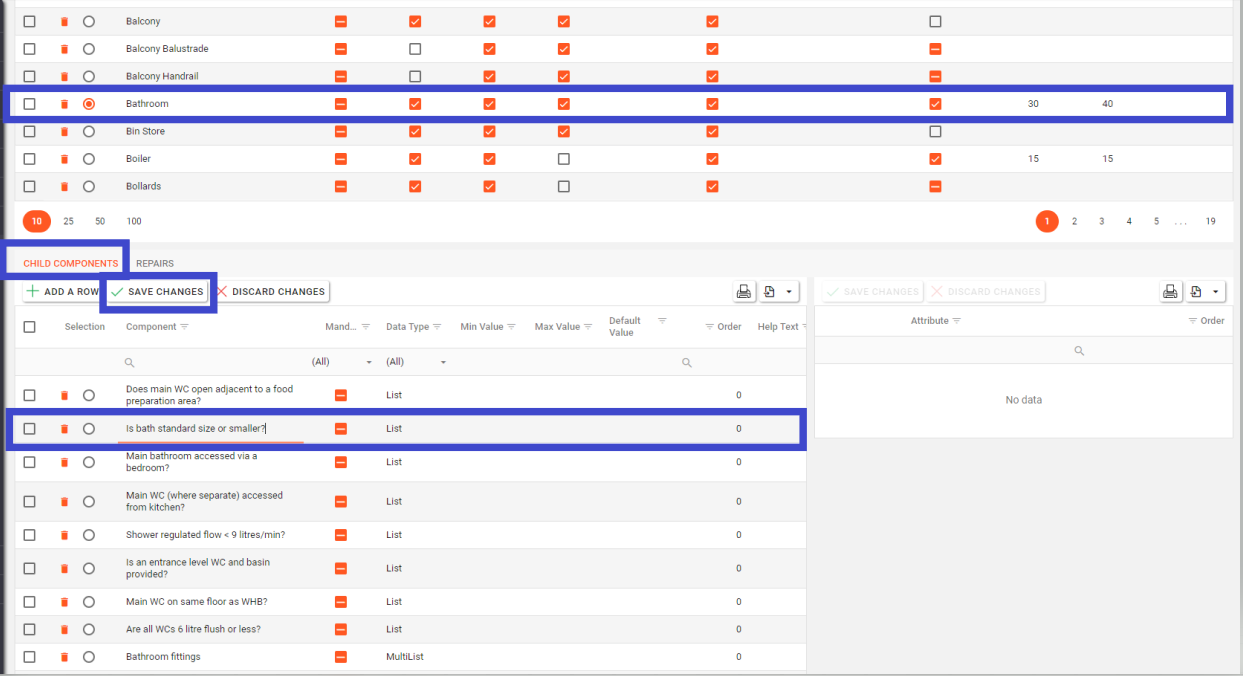
Editing a Child Component
To edit a Child Component, select the Component the Child Component is associated with from the top grid.
The lower grid will appear with all relevant Child Components. Select the Child Component to be edited and make the relevant changes. Once changes have been identified, the “Save Changes” button will illuminate.
Once all changes have been made, click the “Save Changes” button. To undo these changes before saving, click the “Discard Changes” button.
Editing an Attribute
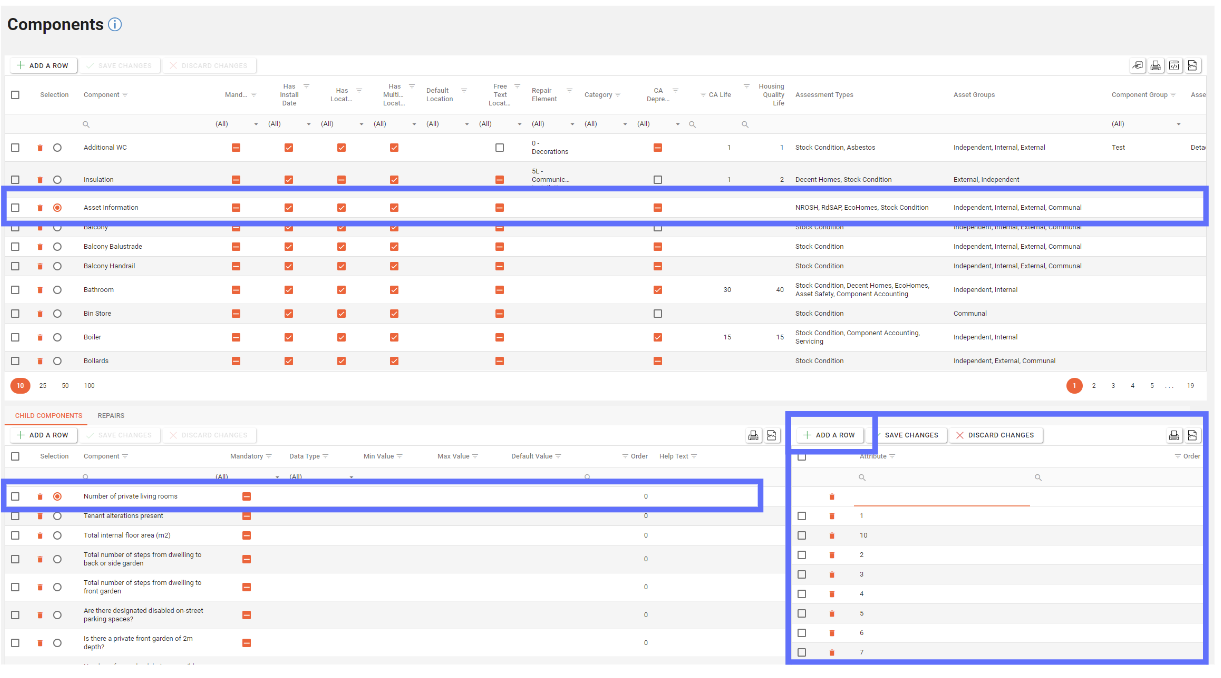
To edit an Attribute, select a parent Component (from the top grid), then select a Child Component (from the lower left-hand grid) that is associated with the Attribute.
Select the Attribute from the lower right-hand grid and make the relevant changes. When the changes have been made, click on the nearest “Save Changes” button to persist the amendment to the database.
To undo any Attribute changes before saving, click on the nearest “Discard Changes” button to the Attributes grid.
Editing a Repair
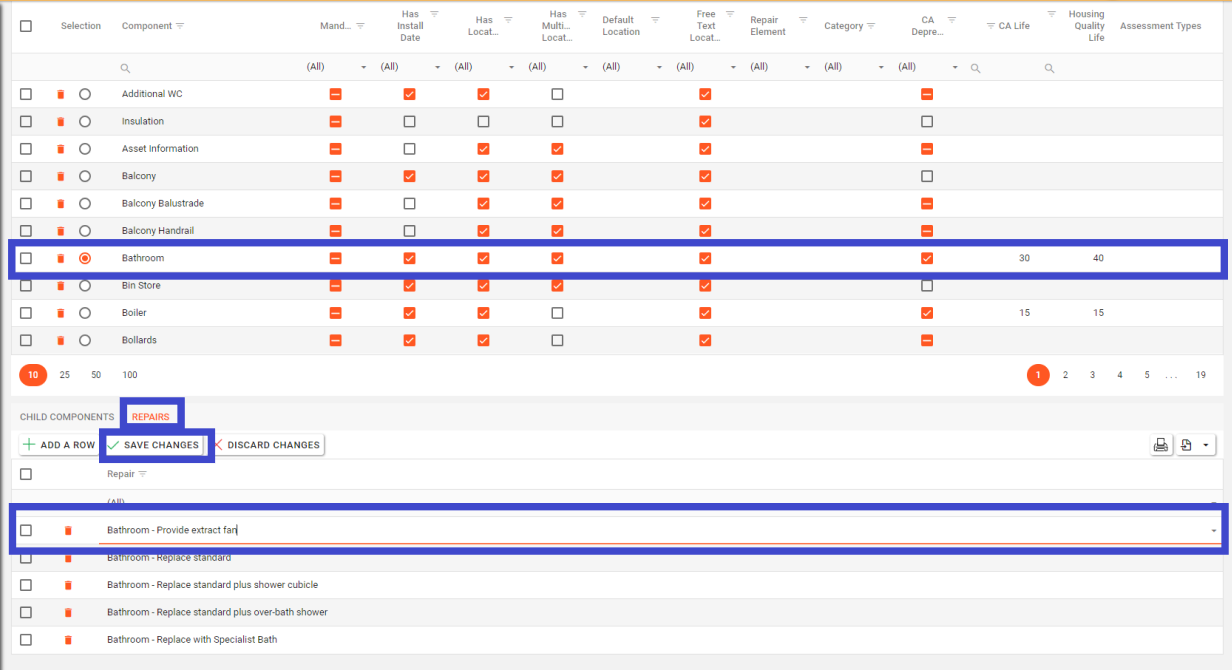
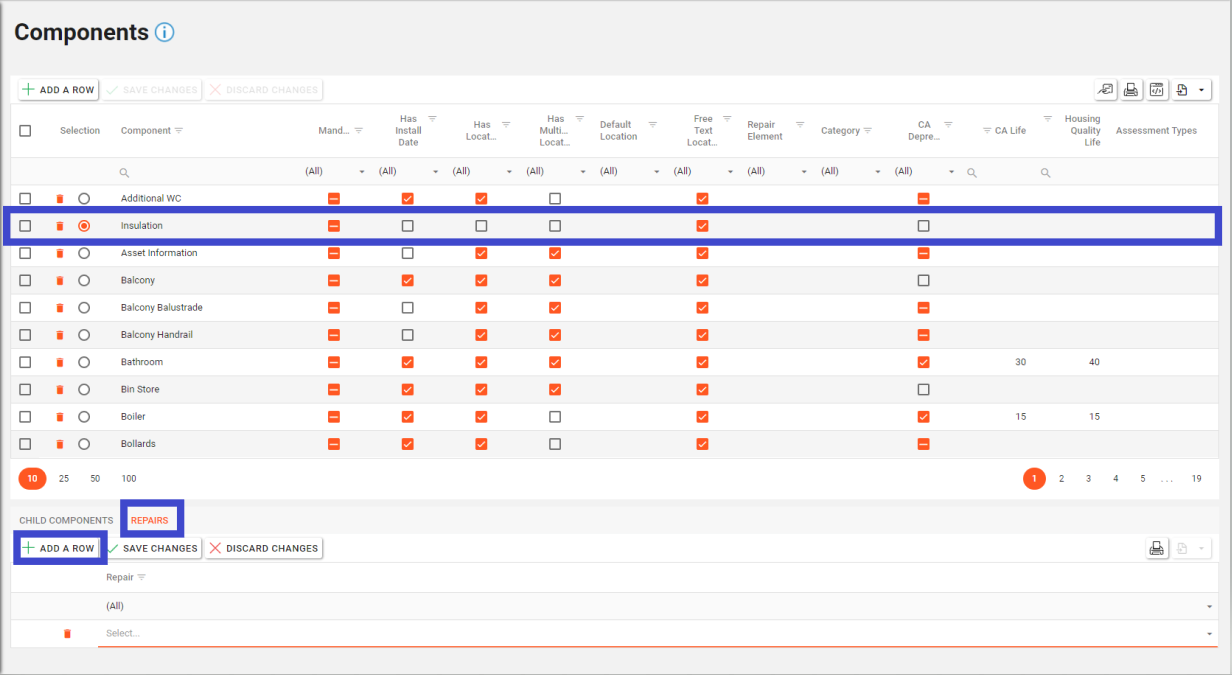
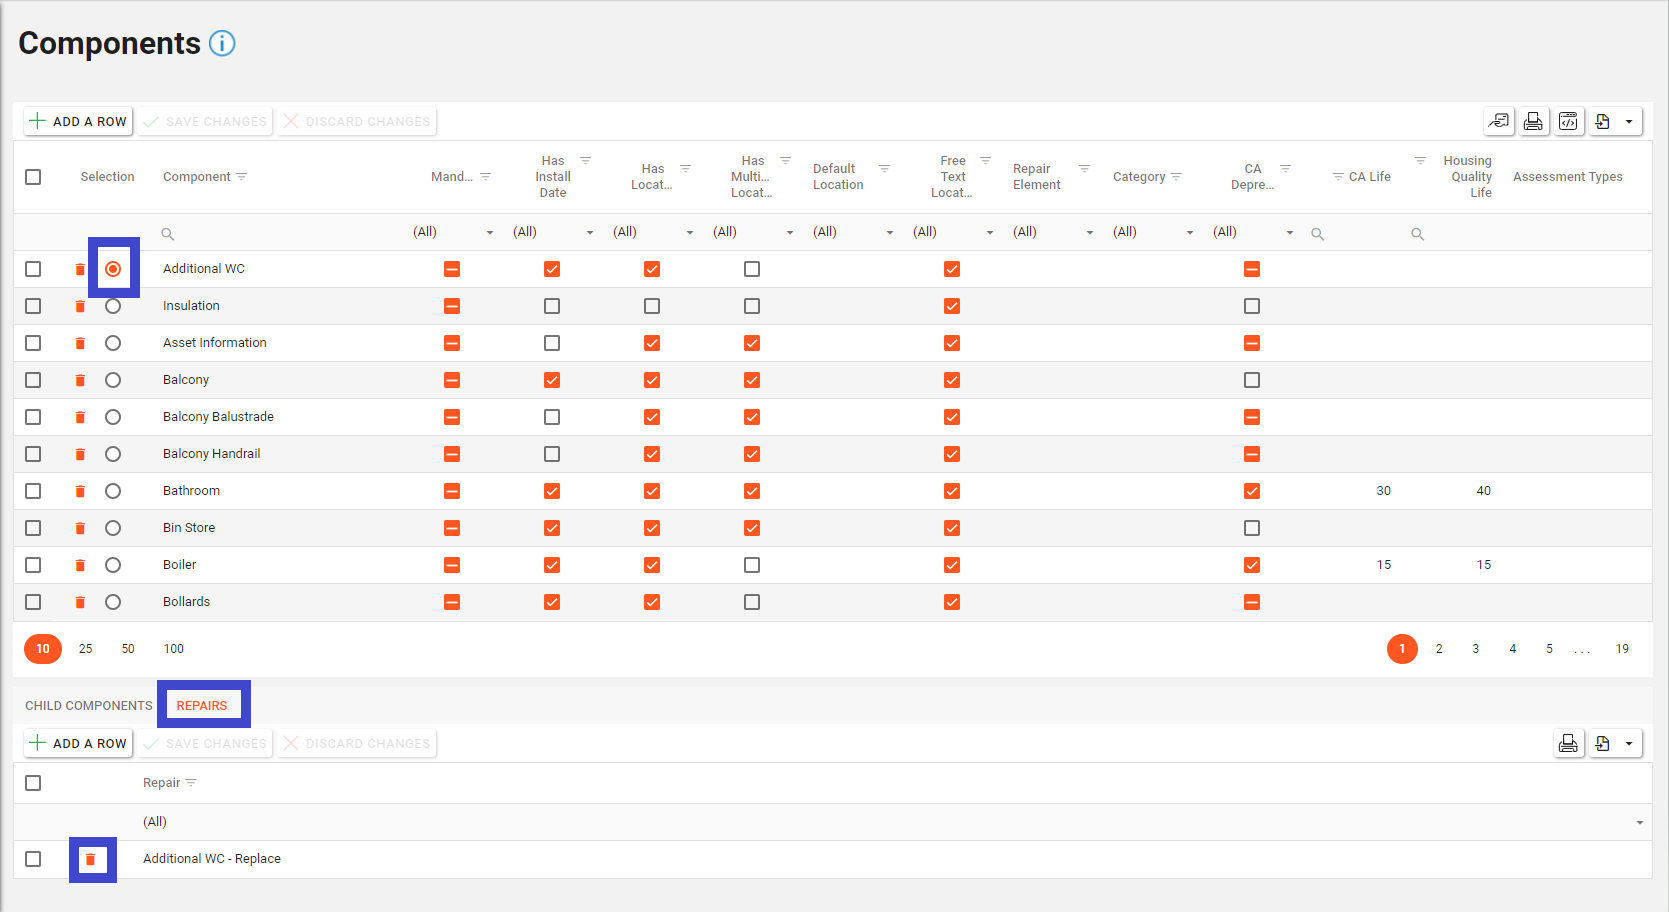
To edit a Repair, select the Component the Repair is associated with from the top grid.
Navigate to the Repairs tab in the lower grid and all relevant Repairs associated with the selected Component will appear.
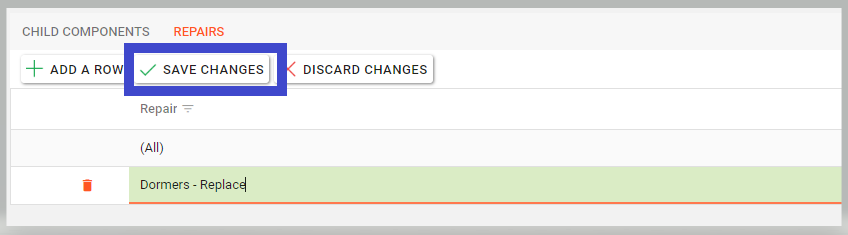
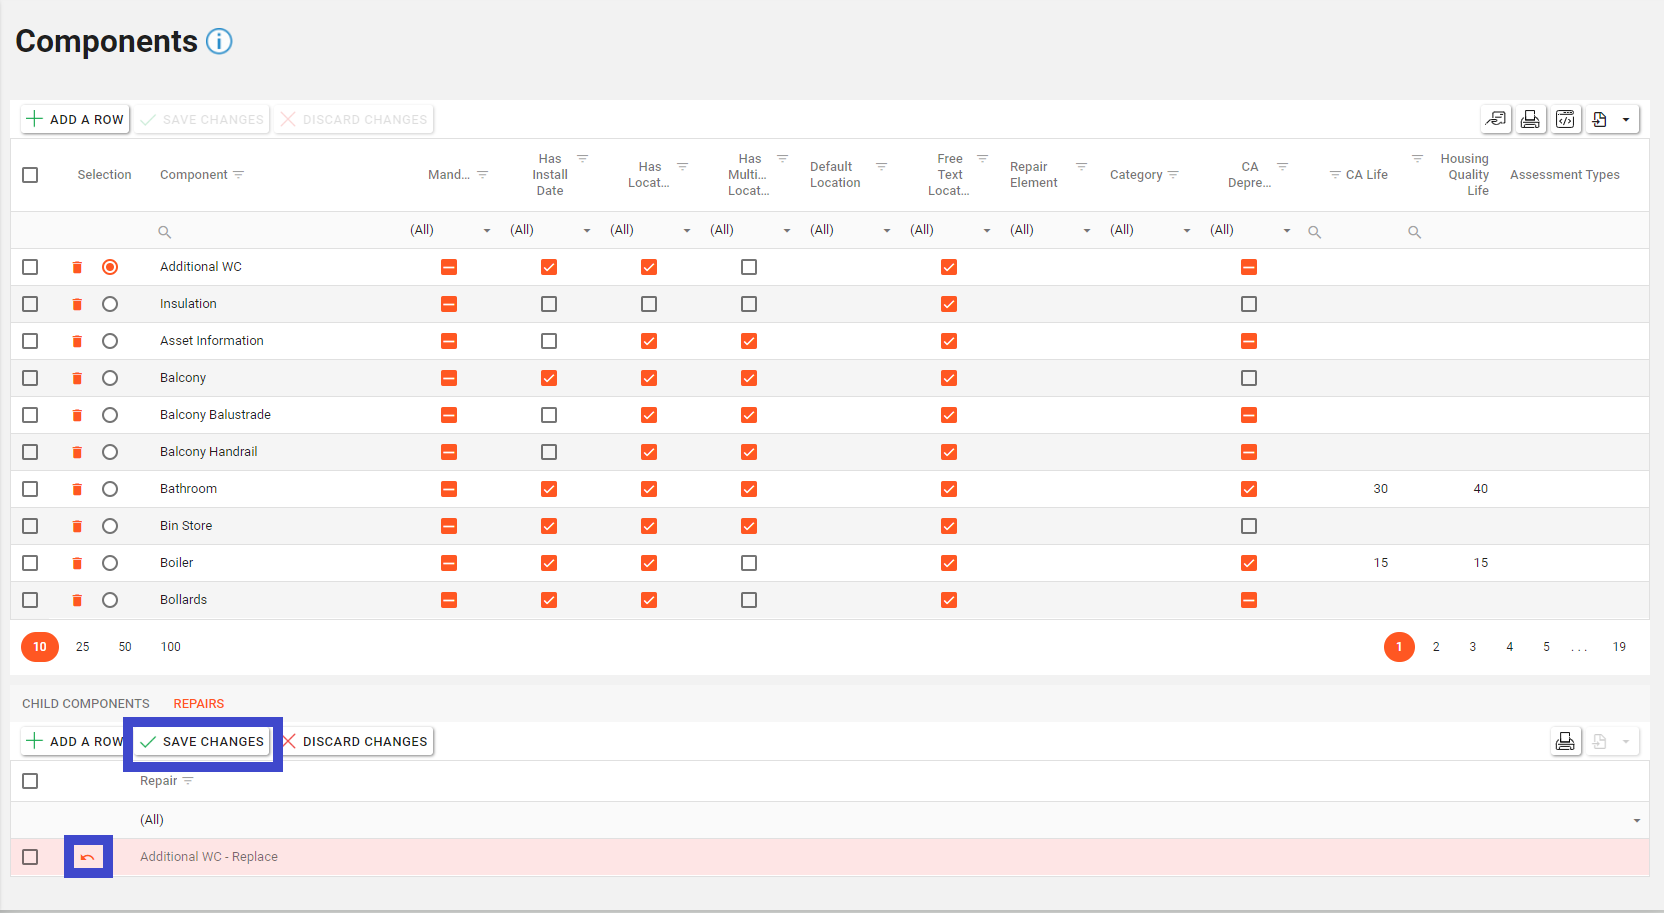
Select the Repair to be edited and make the relevant changes. Once changes have been identified, the “Save Changes” button will illuminate. Once all changes have been made, click the “Save Changes” button.
To undo these changes before saving, click the “Discard changes” button.
Creating a Component
To add a new Component, click the “Add a Row” button located at the top left-hand side of the Components page.
A new row will appear at the top of the Components (top grid). Enter the details of the new Component here.
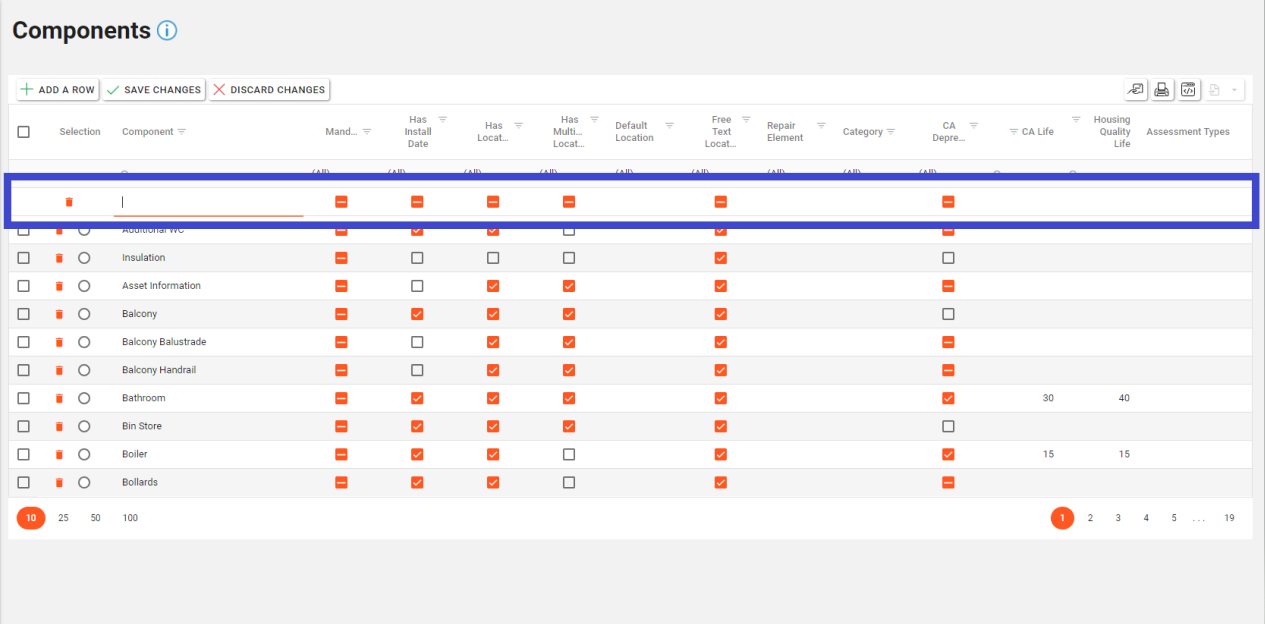
Once the required data has been entered, click the “Save Changes” button to save the new Component row.
Creating a Child Component
To add a new Child Component, first select the parent Component the Child Component is to be associated with from the top grid. The Child Component grid will appear in the lower grid and click the “Add a Row” button in the lower grid.
Once the required data has been entered, click the “Save Changes” button to save the changes.

Creating an Attribute
Select the parent Component from the top grid. This will present a list of Child Components in the lower left-hand grid. Select a Child Component and then click on the “Add A Row” button in the right-hand Attributes grid. Fill in the required Attribute value and Order number and click on the “Save Changes” button nearest the Attributes grid.
Creating a Repair
To add a new Repair, first select the parent Component the Repair is to be associated with from the top grid. The Child Component grid will appear in the lower grid, click the Repairs tab and click the “Add a Row” button in the lower grid.
Once the required data has been entered, click the “Save Changes” button to save the changes.
The Repair must exist in the Repairs Configuration before it can be assigned - see the Repairs Configuration Section for more details.
Deleting a Component
Deleting a Parent Component will remove any underlying Child Components, Attributes & Repairs permanently from the database.
To delete an existing component click the trash icon in the row of the Component you wish to delete from Asprey Assets.
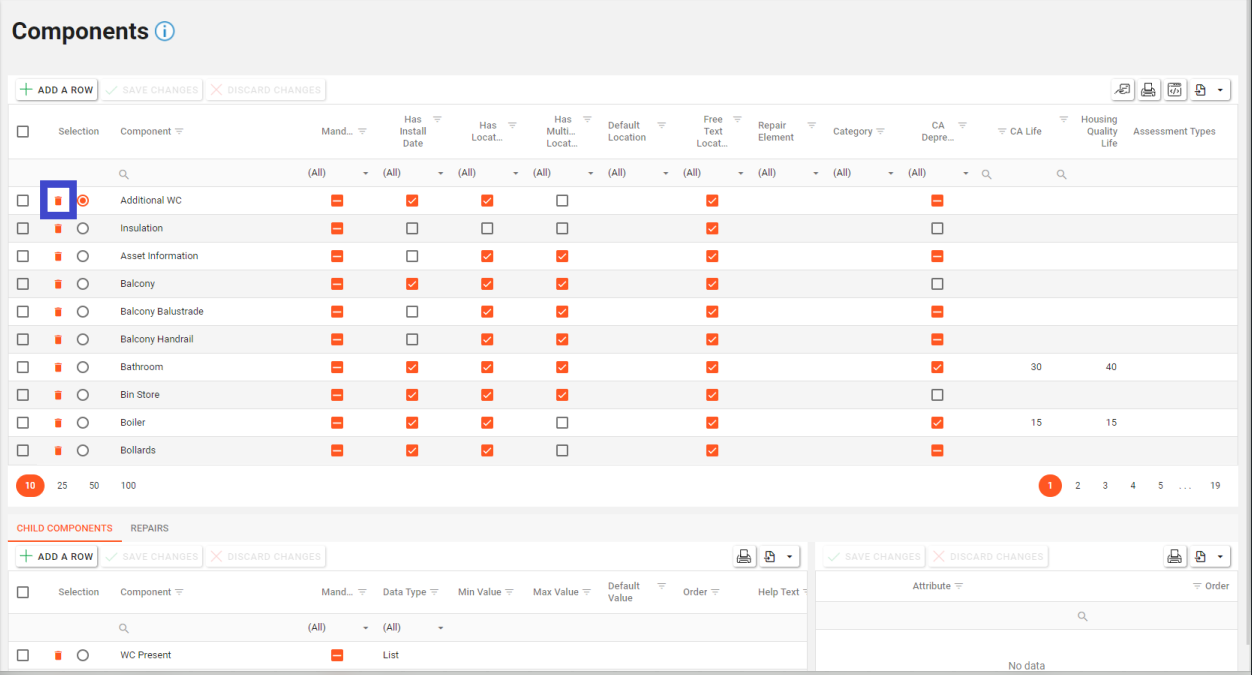
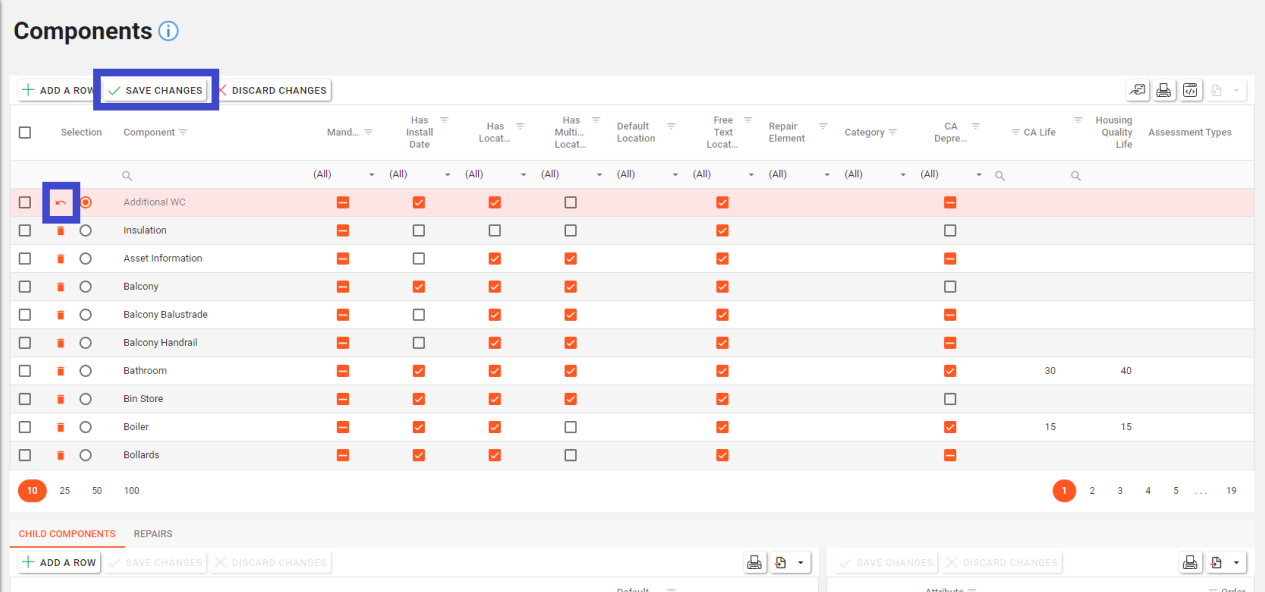
This will then update the screen to show an “undo” arrow in place of the trash can and the save changes/discard changes buttons are illuminated indicating a change has been made on the page. To confirm the deletion, click the “Save Changes” button.
Deleting a Child Component
Deleting a Child Components will permanently remove it and any linked Attributes from the database.
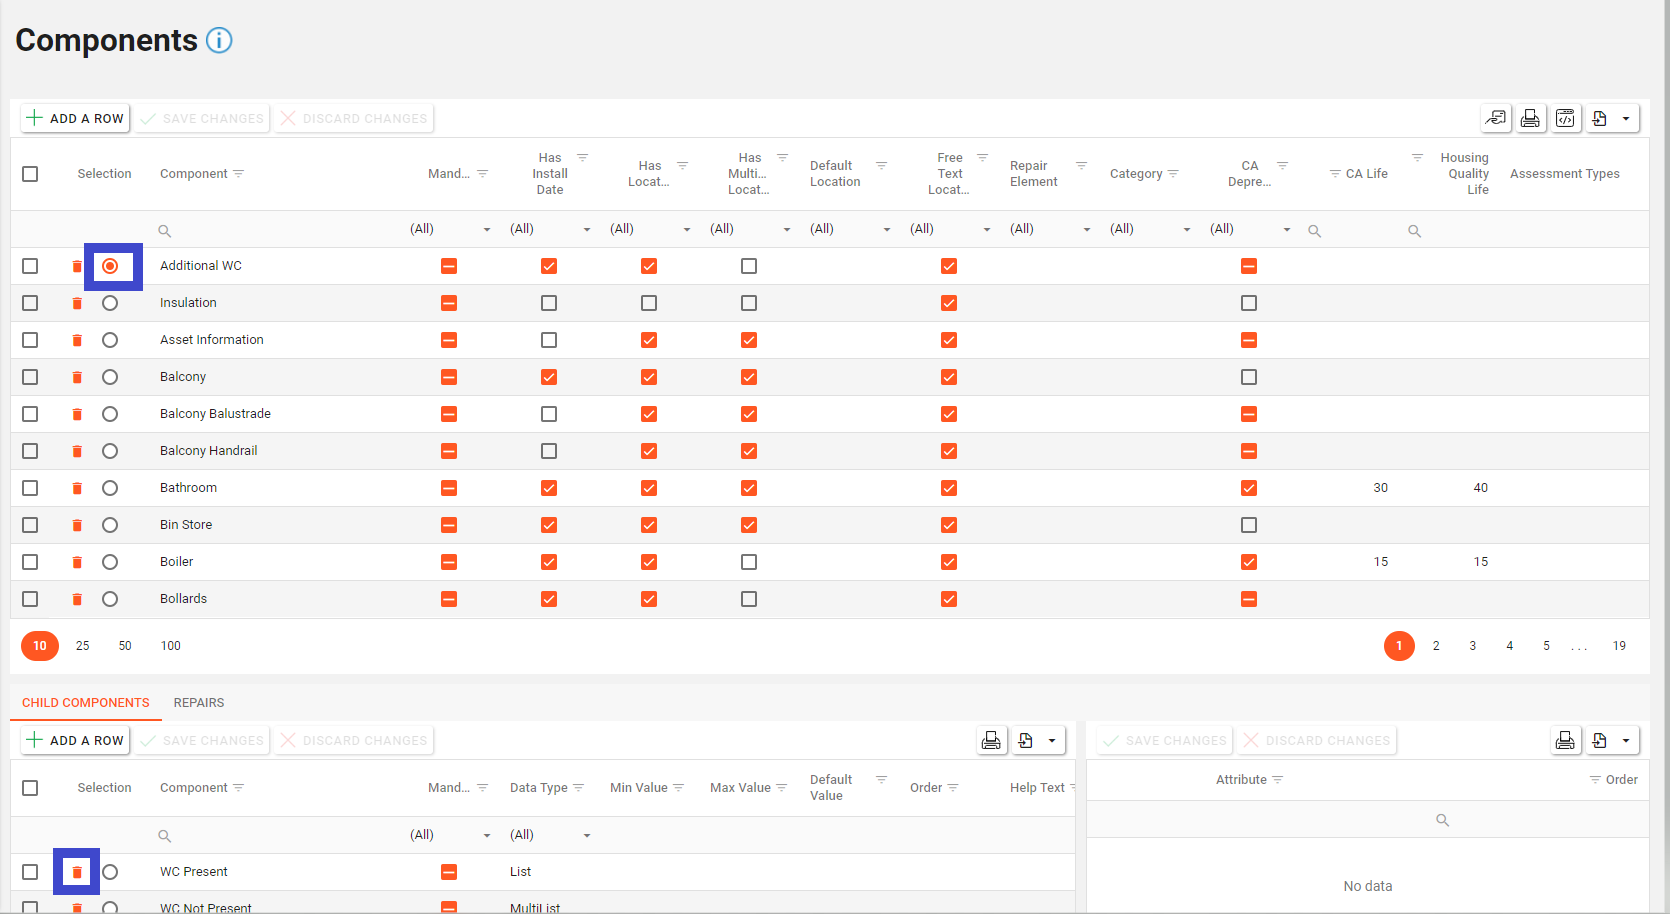
To delete an existing Child Component, select the parent Component the Child Component is linked to in the top grid.
Then click the trash can icon in the row of the Child Component (in the lower grid) you wish to delete from Asprey Assets.
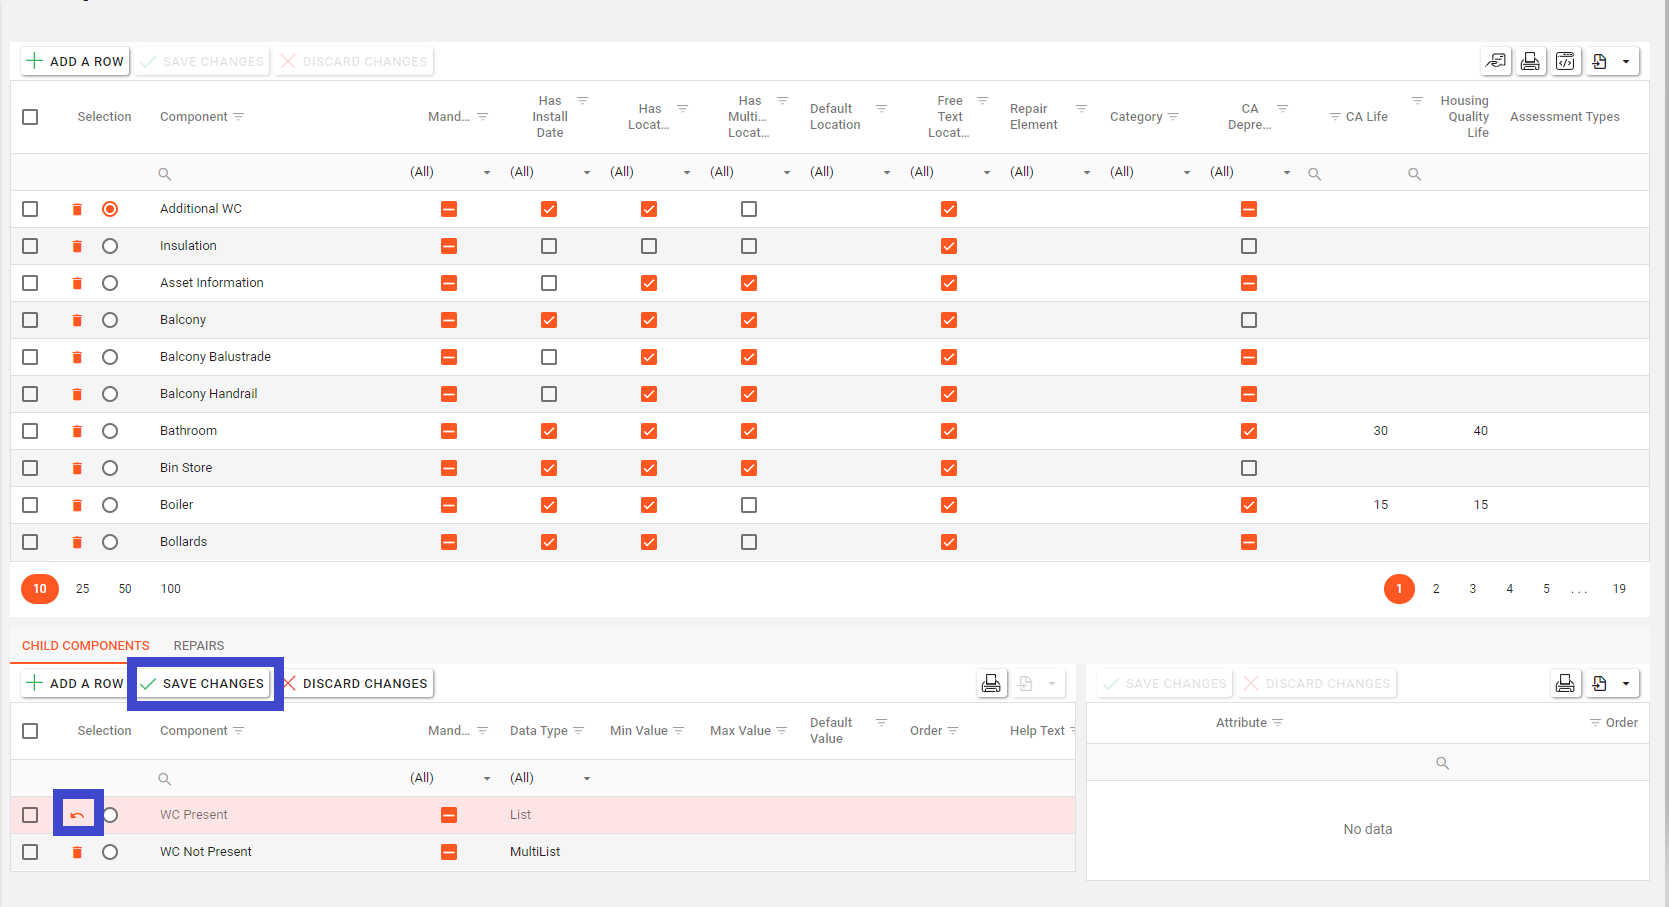
This will then update the screen to show an “undo” arrow in place of the trash can and the save changes/discard changes buttons are illuminated indicating a change has been made on the page. To confirm the deletion, click the “Save Changes” button.
Deleting an Attribute
Deleting an Attribute will permanently remove it from the database.
Select the parent Component from the top grid. This will present a list of Child Components in the lower left-hand grid. Select a Child Component and then select the trash can button on the Attribute row you want to delete from the right-hand Attributes grid.
Click on the “Save Changes” button in the right-hand Attributes grid to delete the Attribute.
Deleting a Repair
Deleting a Repair will permanently remove it from the database.
To delete an existing Repair, select the parent Component the Repair is linked to in the top grid. Click the Repairs tab and then click the trash can icon in the row of the repair (in the lower grid) you wish to delete from Asprey Assets.
This will then update the screen to show an “undo” arrow in place of the trash can and the save changes/discard changes buttons are illuminated indicating a change has been made on the page. To confirm the deletion, click the “Save Changes” button.
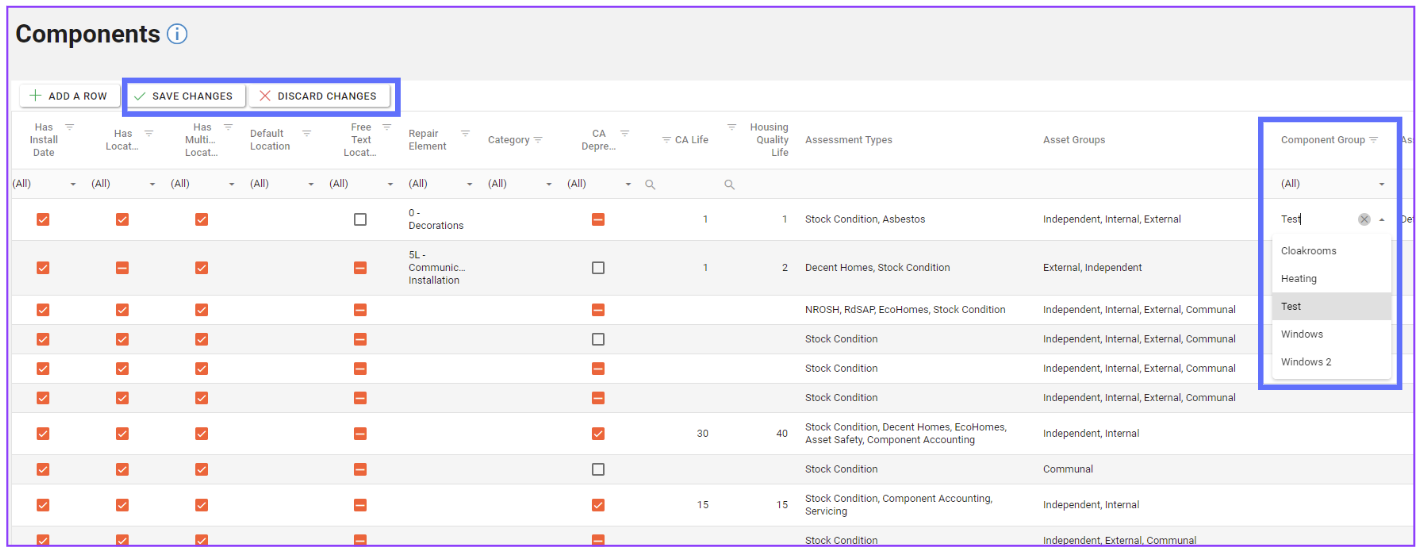
Adding a Component to a Group
Prior to adding a Component to a group; Groups will need to be set up. Please see the section about how to Create Component Groups
If Component Groups have already been configured, you will be able to choose a group from the dropdown list in the Component Group column in the Components (top grid)
Click on the “Save Changes” button to persist the change back to the database or click on the “Discard Changes” button to undo any amendments to the Components grid.