
Users
User details
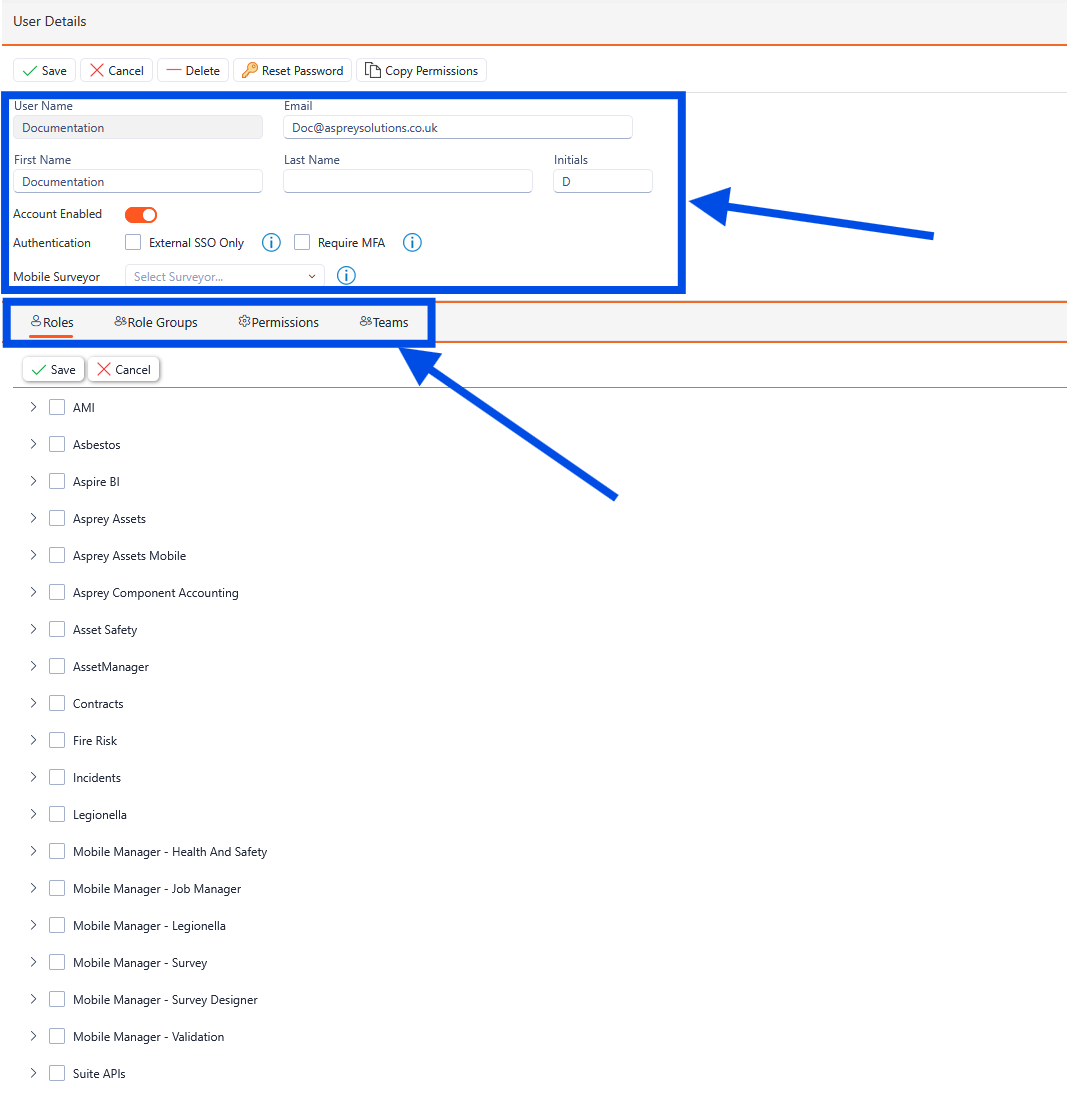
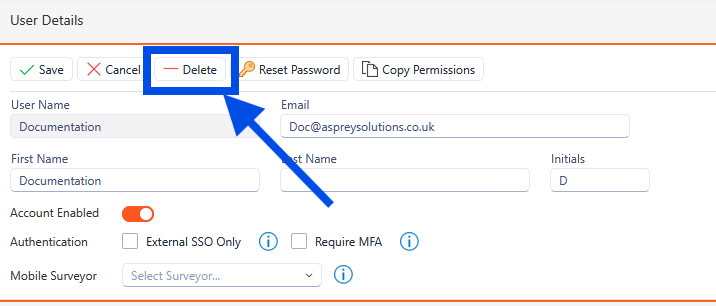
When in the Users section, the current users are located on the left-hand side. Select a user and the right-hand side pane updates with their details. The first section is the user details.
There are help icons throughout the User Manager to guide you. Should you wish to update these with personalised notes, these can be done by clicking the pencil icon which appears when hovering over them.
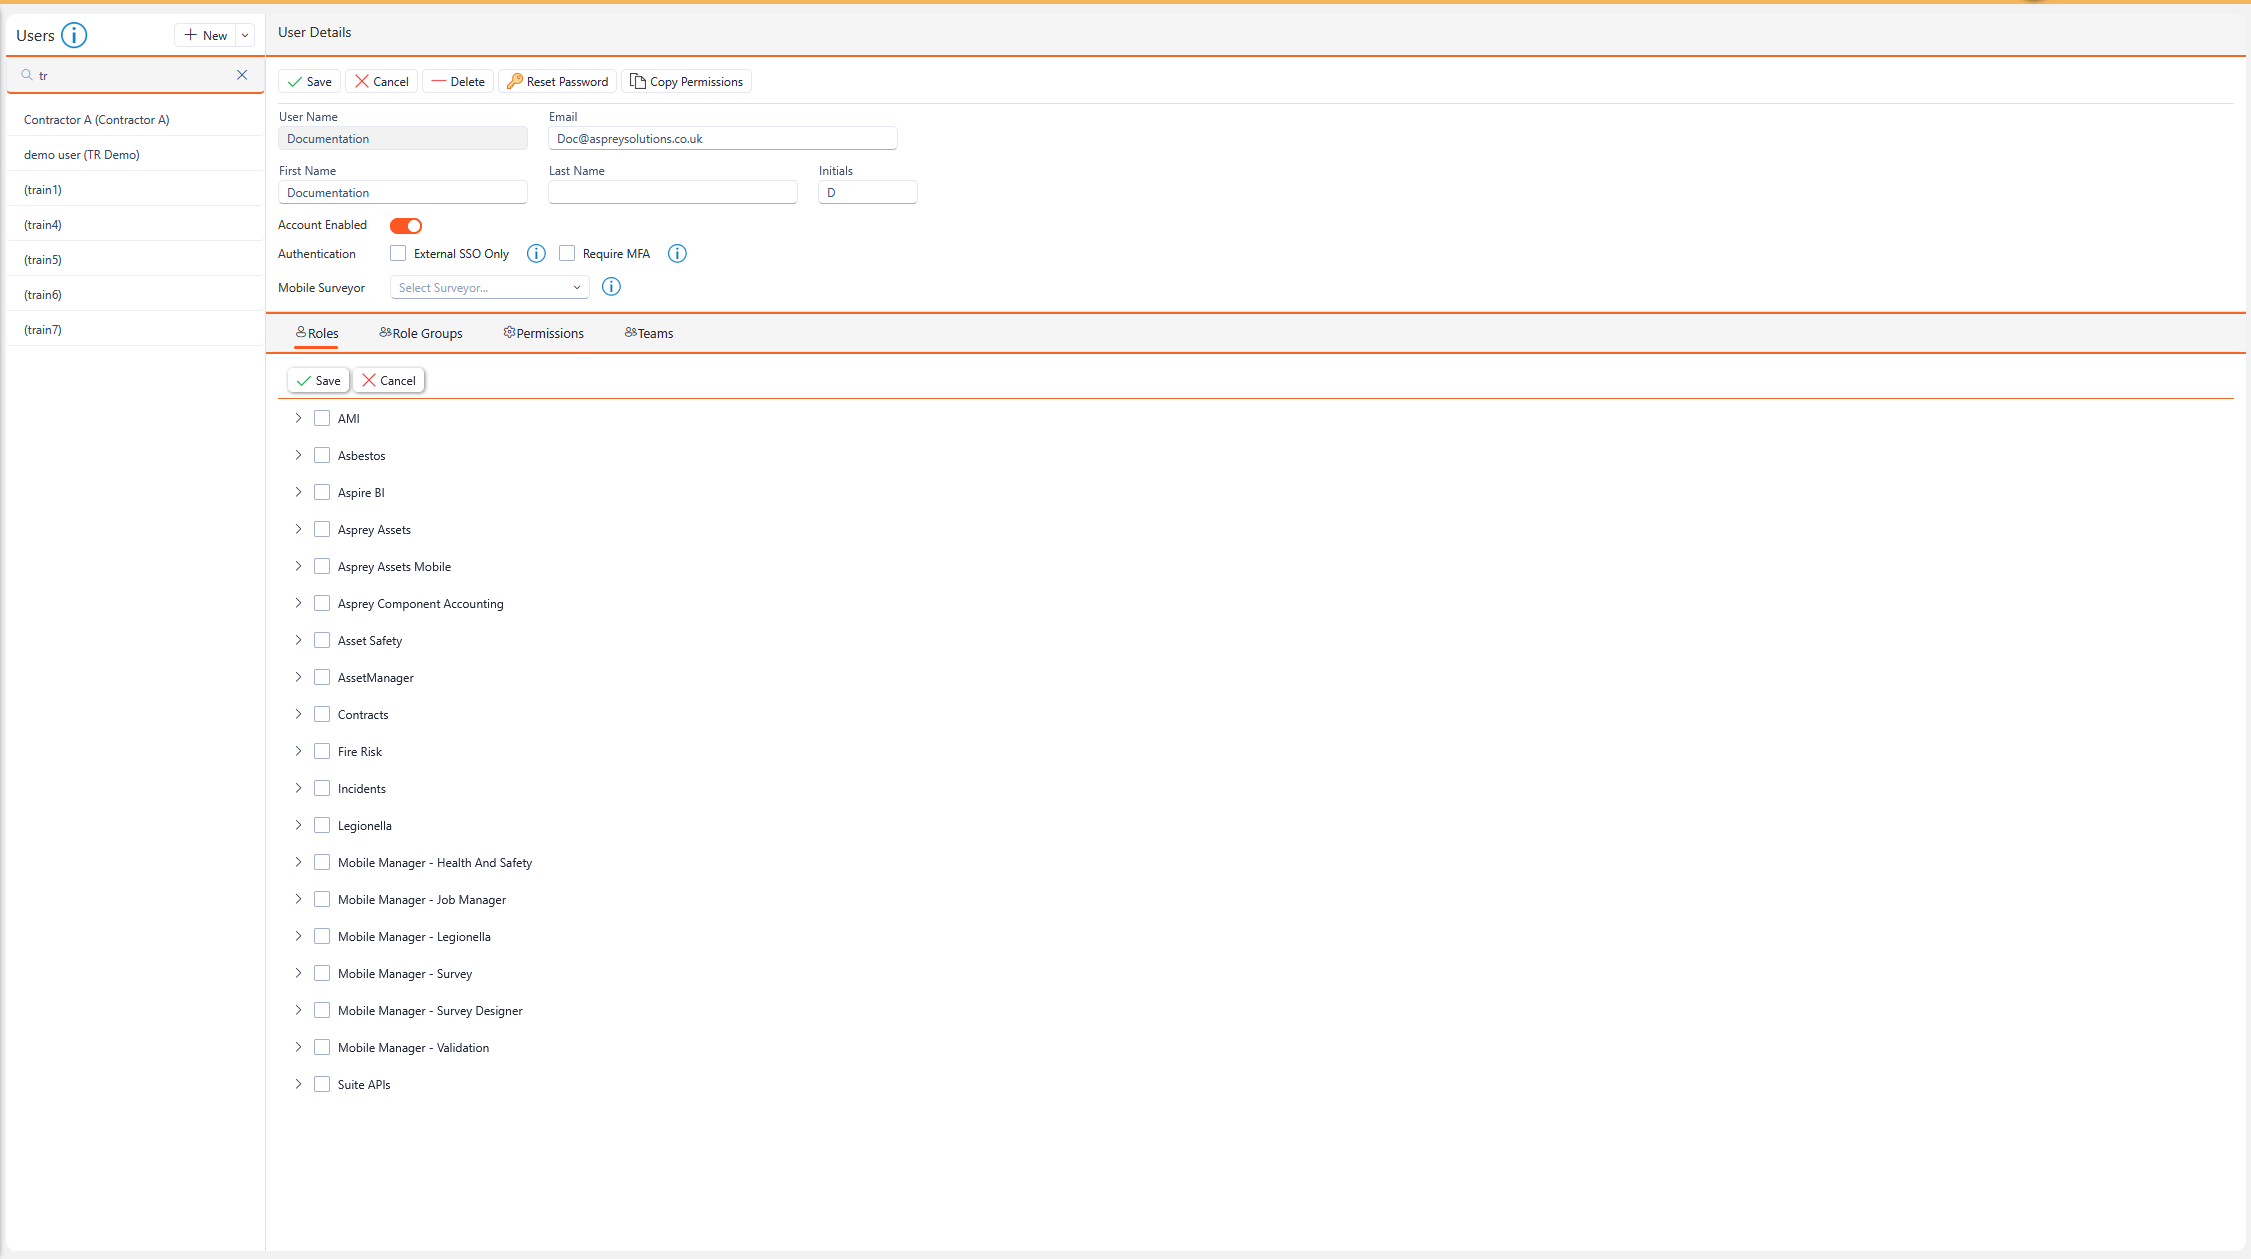
In the User Details section, this will show key information regarding the user such as Username, First and Last Name, the Email address and if the user is disabled. The Account Enabled flag shows if the account is an active account. If unchecked, the user account cannot access Asprey products.
Different Authentication methods can be used when logging into Asprey, if configured, Single Sign On (SSO) can be forced for the specific user, requiring them to use organisational SSO and Multi Factor Authentication (MFA) can be required for log in when checked. The mobile surveyor links the user in the mobile to the user within Asprey Assets.
SSO and MFA must be configured by Asprey - please contact support to enable this.
To navigate the separate section of the Users screen, click the required tabs underneath the user details. The Roles will be shown by default.
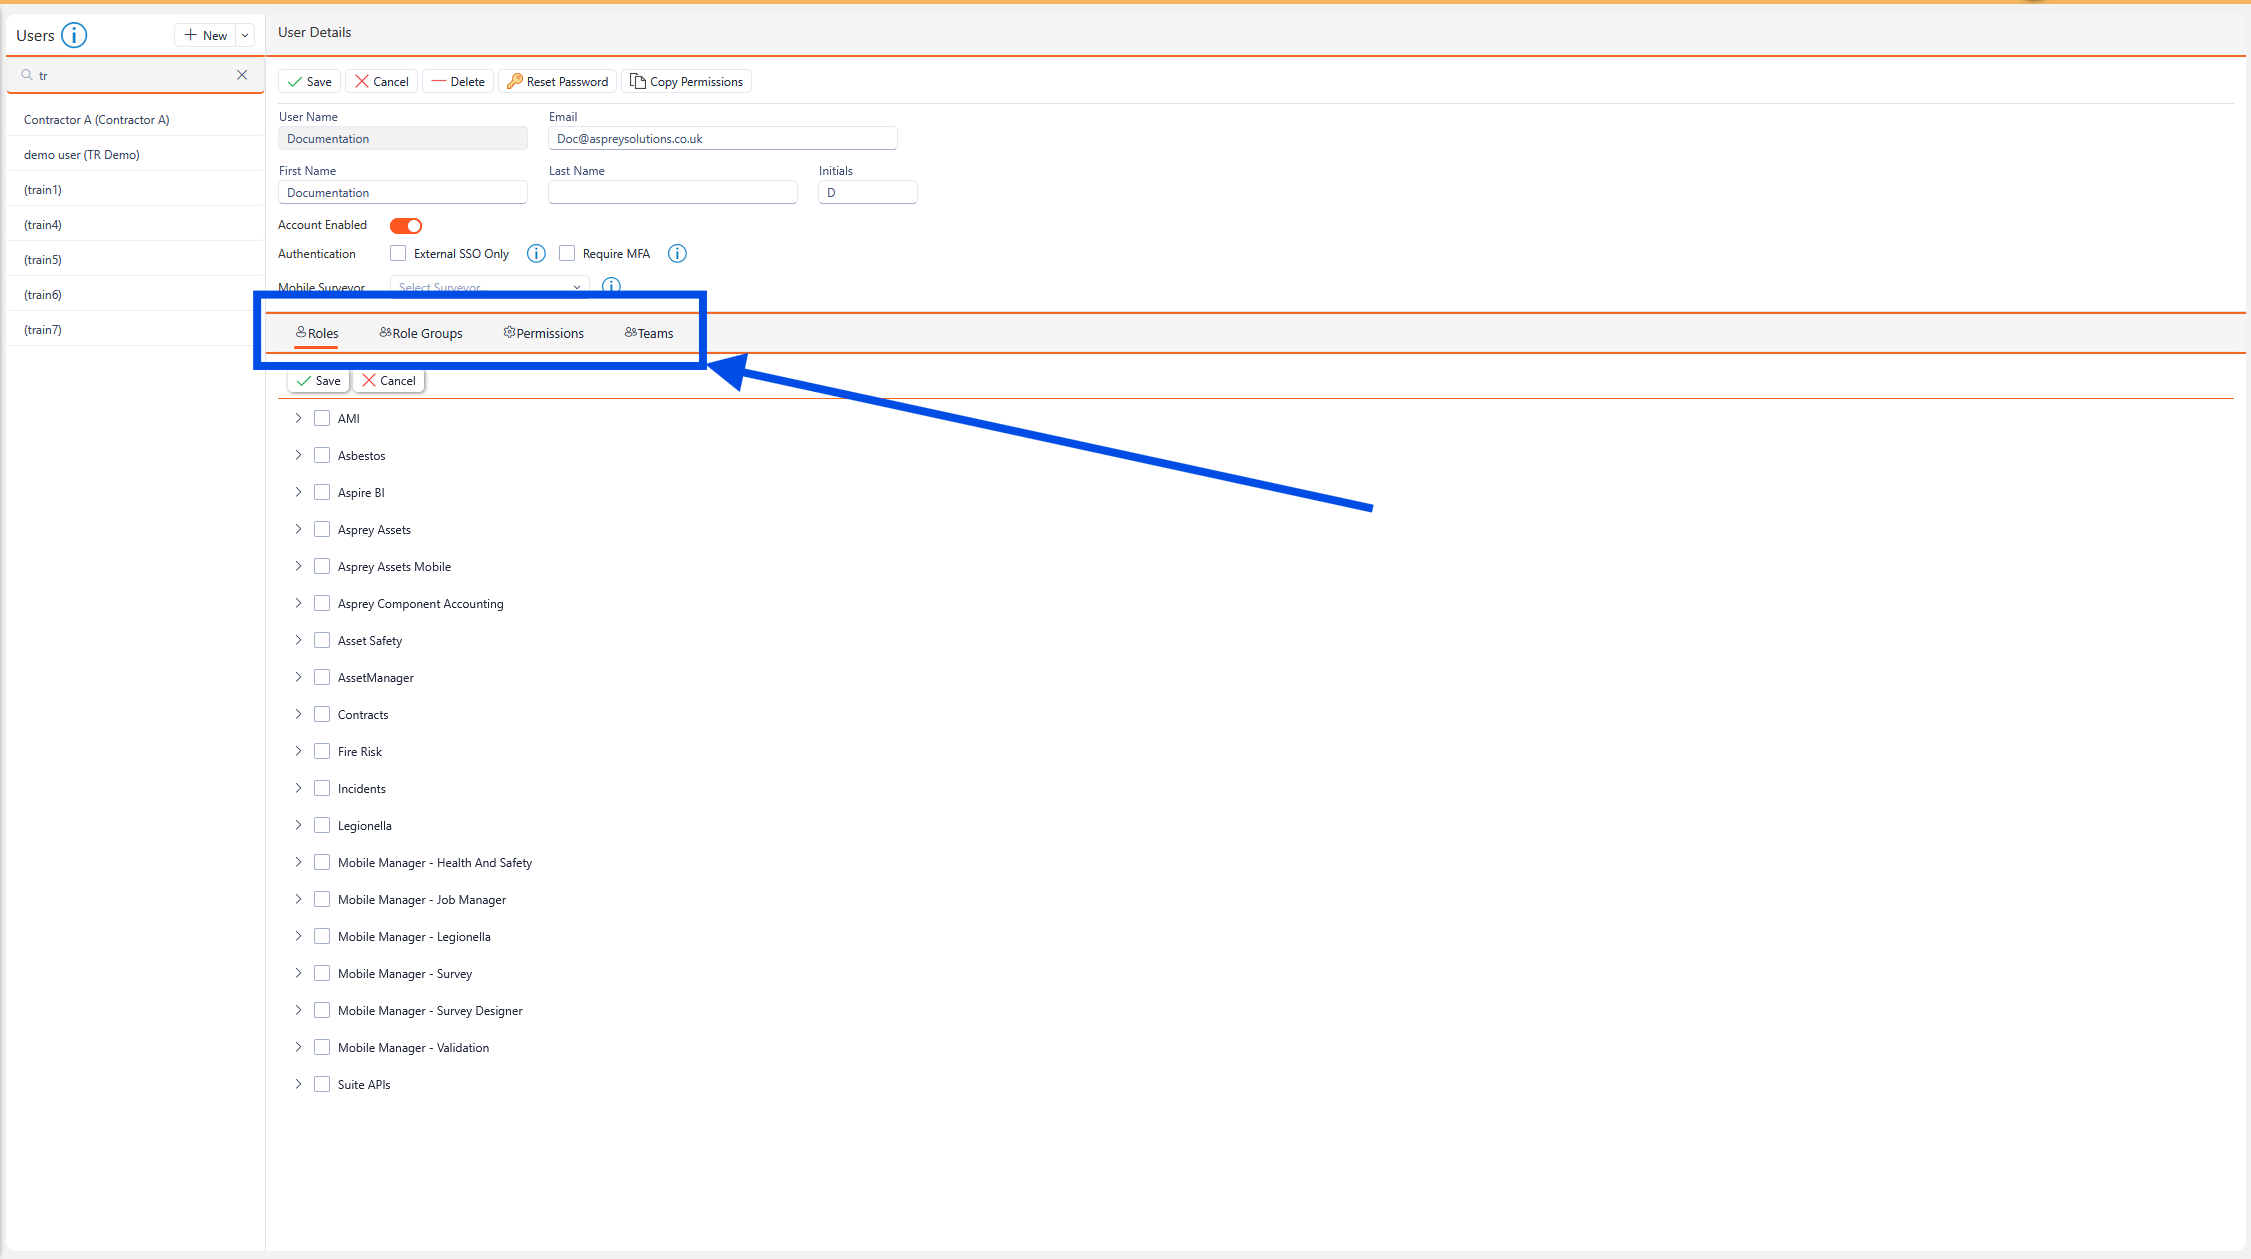
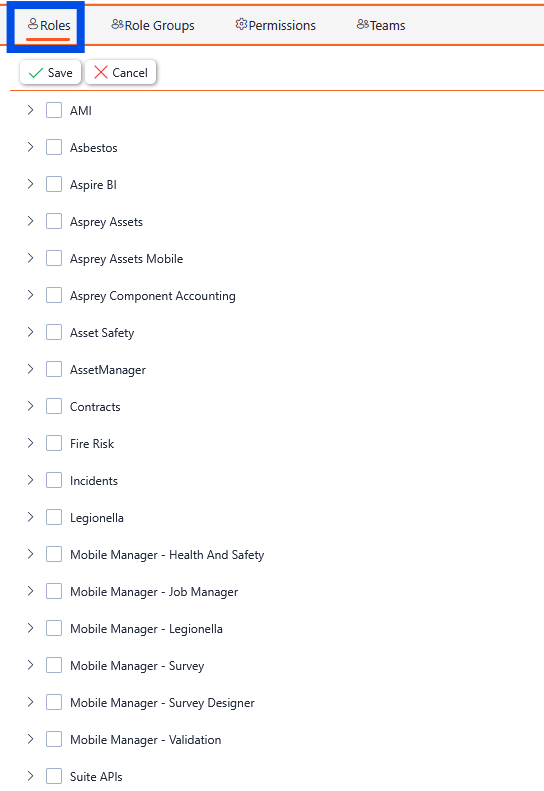
User Roles
To assign a user a role for a specific product, click roles and assign the required roles to the user.
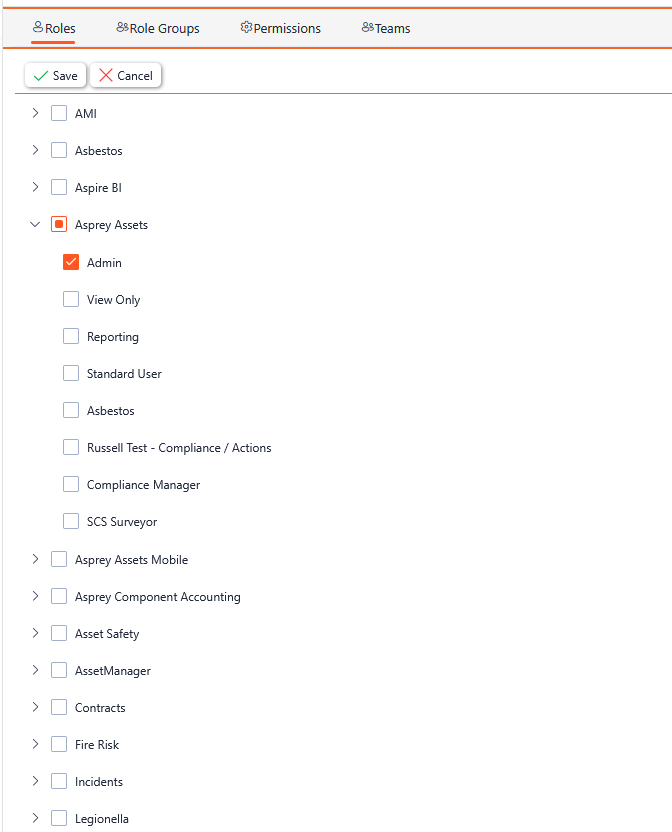
Once the required roles have been selected, click the “save” button. To undo any changed before saving, click the “cancel” button.
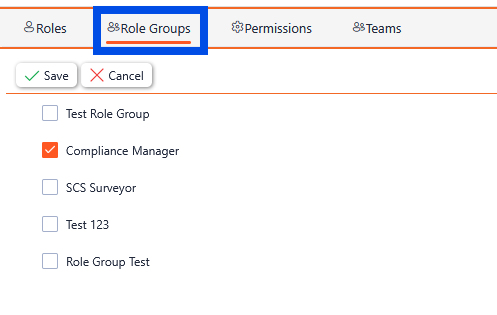
User Role Groups
The Role Groups assigned to a user are shown in the Role Groups tab of the user manager. To assign a user a role group, click the check box next to the desired role group and click save.
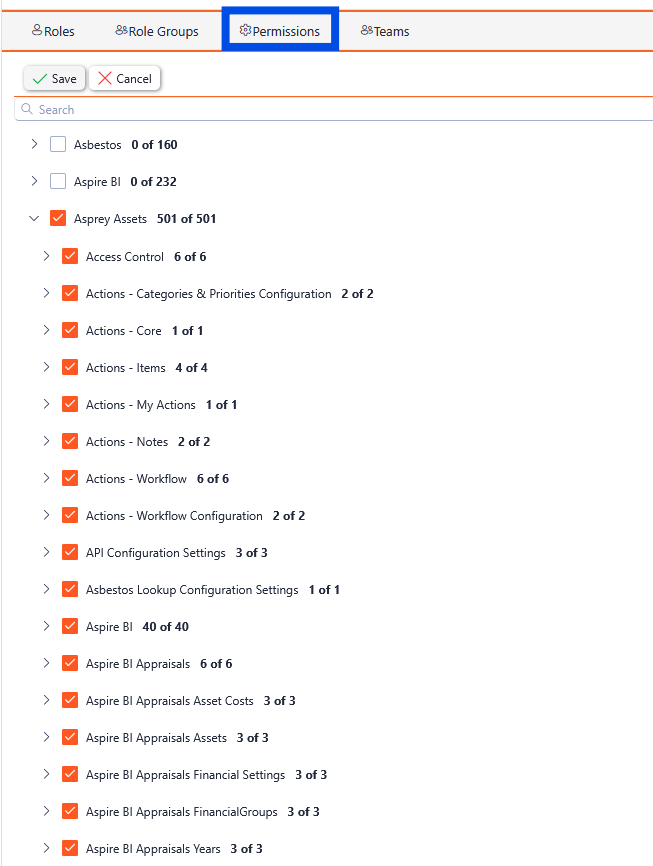
User Permissions
To assign any permissions to a user, select permissions and click save.
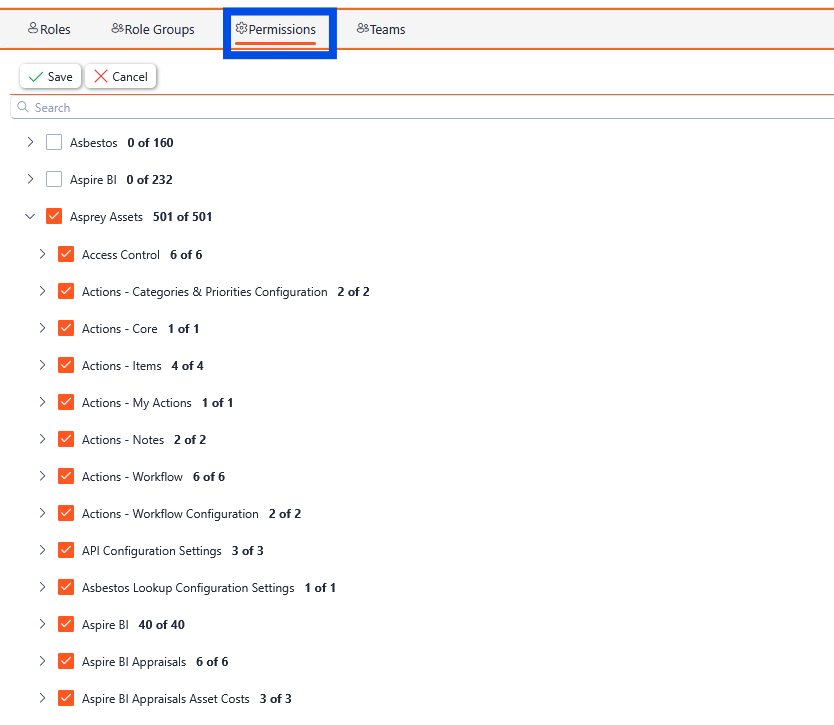
Once the required user permissions have been selected, click the “save” button. To undo any changed before saving, click the “cancel” button.
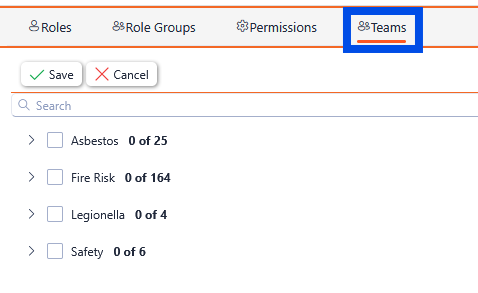
User Teams
To assign a user to a team, select the “teams” section and apply the user to the desired team.
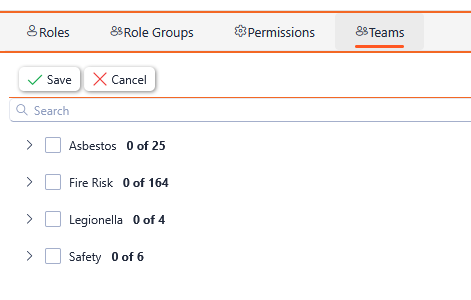
Once the required Teams have been selected, click the “save” button. To undo any changed before saving, click the “cancel” button.
Adding a new user
To add a new user to the User Manager, click the “New” button within the Users section.
A Dialogue box will appear where you can enter the details of the new user.
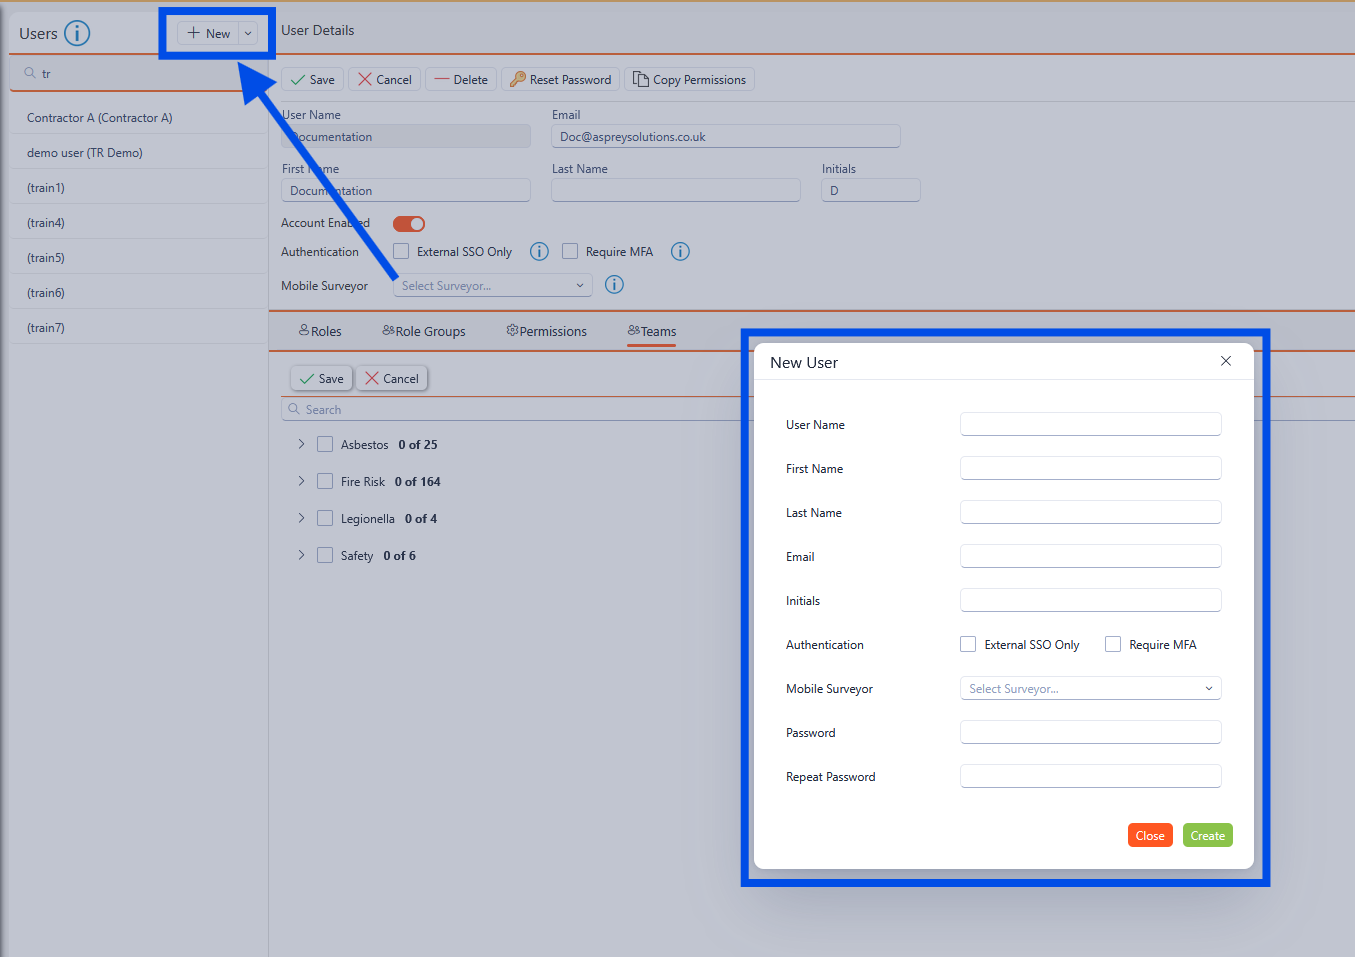
Enter the Username in any format you like, most organisations have a standard format to help administer this easily. Please refer to your internal administrator for further guidance.
Continue to enter the details as required. Enter a password for the user, the user can change this themselves within AMI - further details can be found in the section.
When complete, click “Create” and the new user will appear in the Users list on the left-hand side.
You have successfully added a new user.
Editing an existing user
To edit an existing user, select the user from the list on the left-hand side and the user details will be shown on the right-hand side.
The Username field cannot be edited after it has been created.
To edit the details of the user, roles, permissions or Teams, select the relevant section in the right-hand side.
Updating User Details
Select the field to be updated and edit the data within the field. When completed, click the “Save” button.
Updating Roles
To assign a different role to a user, select the roles section of the Users screen, and click the required roles from the options available. Once the new roles have been selected, click the “save” button.
Updating Permissions
To assign different permissions to a user, select the Permissions section of the Users screen, and click the required permissions from the options available. Once the new permissions have been selected, click the “save” button.
Updating Teams
To assign different Teams to a user, select the Teams section of the Users screen, and click the required Teams from the options available. Once the new permissions have been selected, click the “save” button.
Deleting a User
To delete a user, select the user from the Users list and under the User details, click the “Delete” button.
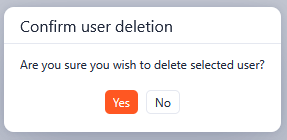
As an additional layer of protection from accidentally deleting a user, you must confirm the username of the account you are deleting. Once this has been confirmed, click the “Delete” button and the user account has been deleted.
Resetting a password
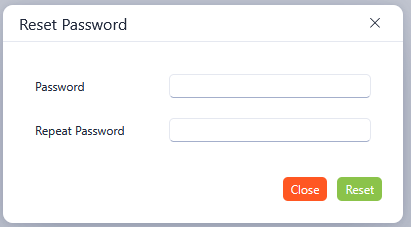
To reset a user’s password, select the user from the left-hand side and click the “Reset Password” button.

A Dialogue box will appear and ask you to enter a new password for the selected user.
The user can then edit the password to a more secure and safe password by navigating to the Profile section.
Once you have entered and confirmed the new password, click the reset button.