
Imports
The Imports section within Asprey Assets allows for bulk importing of data into the system.
Import templates can be found in each section by clicking the “Export Data into import template” button (see the Common Functionality section for more details).
There are two types of imports within Asprey Assets, uploading documents and uploading bulk import templates.
Importing Bulk Import Templates
Once the required template has been populated, you can upload the template to Asprey Assets from the Imports section.

The importer dialogue box will appear where the required import template can be selected.
Select the Upload type which matches the template to be imported and then select the upload import to be imported by clicking the “Upload Import File” button.

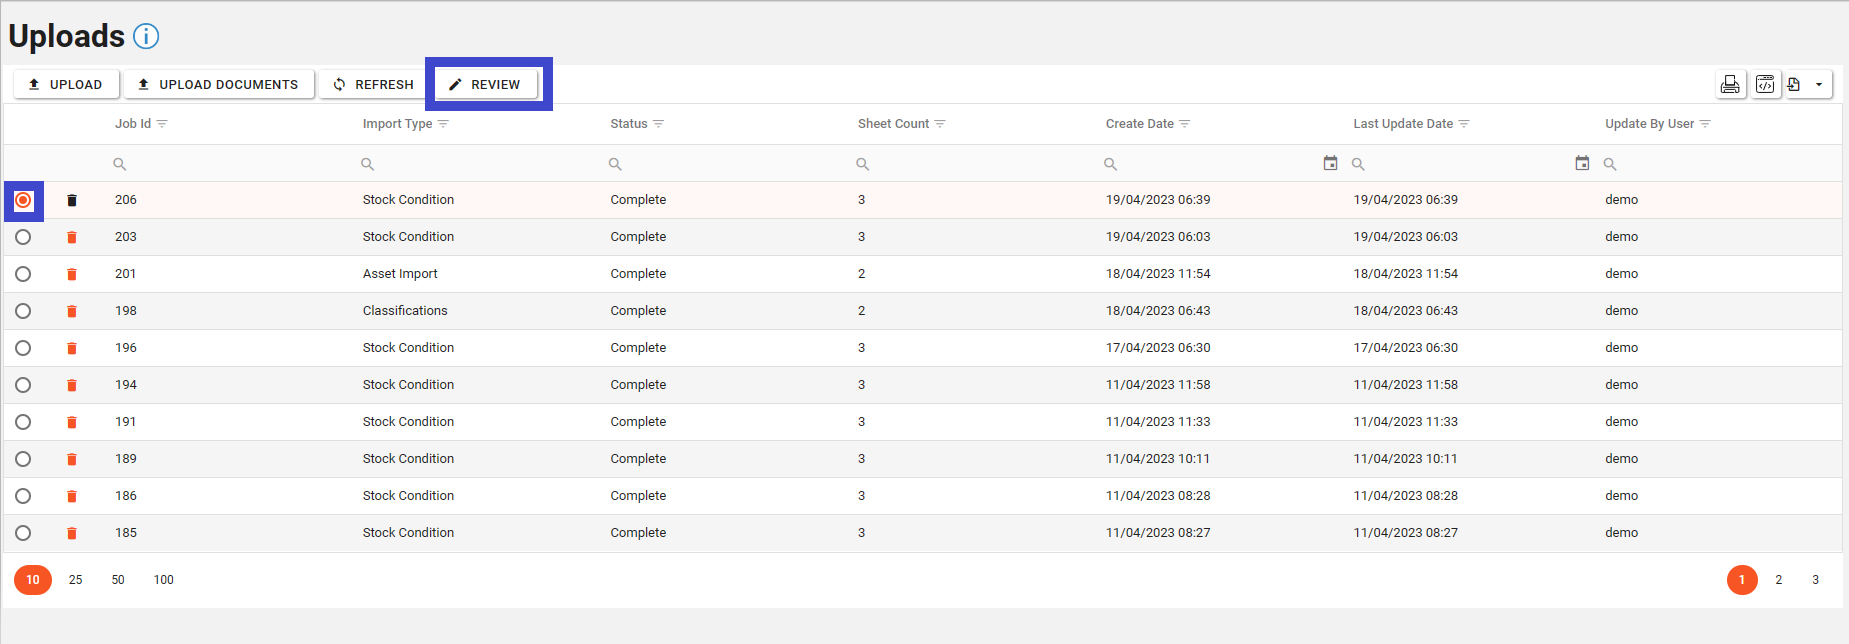
Once the file has been uploaded it will appear in the Manage Jobs screen.
When the upload has been processed and the status is marked as complete, select the row and click the review button.
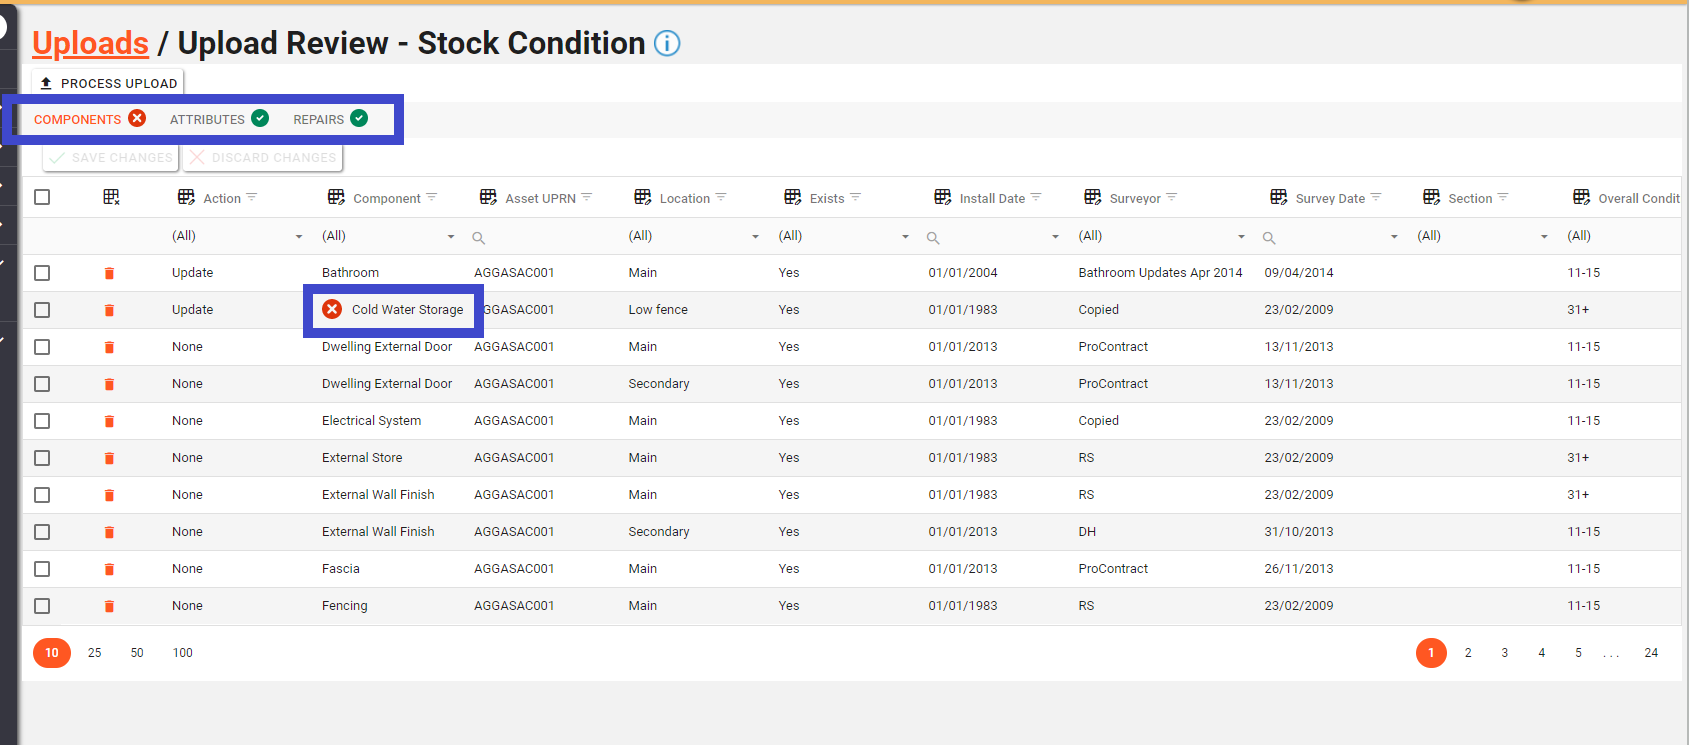
Once in the upload review screen, any errors with the upload will be validated and you will have the opportunity to amend the data as required. The tabs of the import will be shown at the top and a cross will appear against the tab to show there are errors with the validation. If a green tick appears, then there are no validation issues with the import. Click on the errors within the table to update them accordingly.
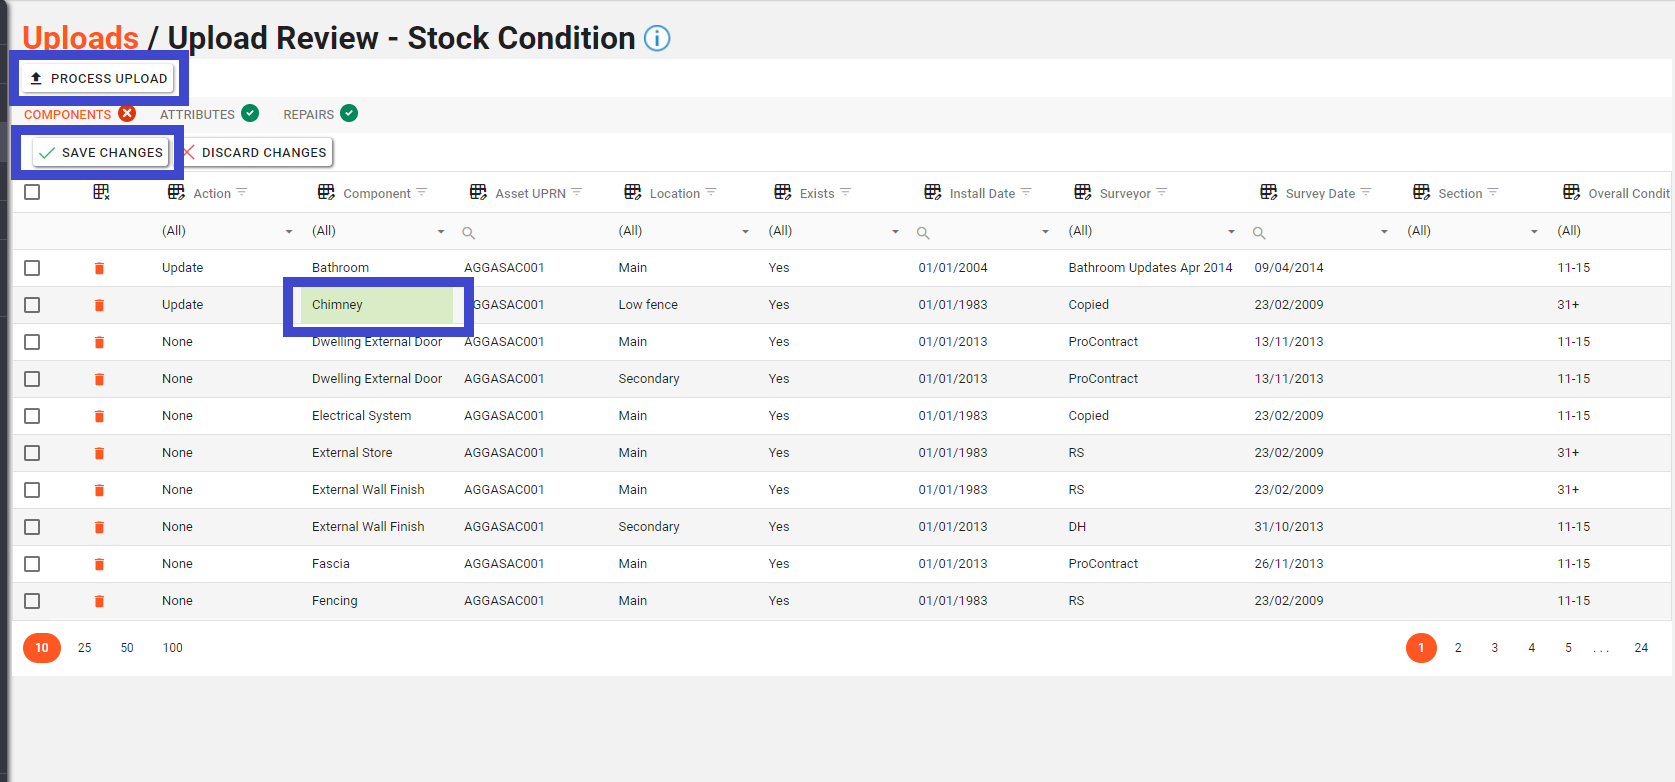
Once all the changes are made, click the “Save Changes” button to save and re-validate the import. Once the import has all the changes made and has been validated, click the “Process Upload” button to save the changes to the database.
The uploader will not allow the importer to progress the import if there are any errors in the import. The errors will need remedying before you can proceed. They’re usually issues with the data, either it’s missing, wrong type or formatted incorrectly.
Uploading Documents
In the Imports section click on the “Upload Documents” button on the tollbar at the top of the screen.

An “Upload Documents” dialogue will appear on screen (see below)
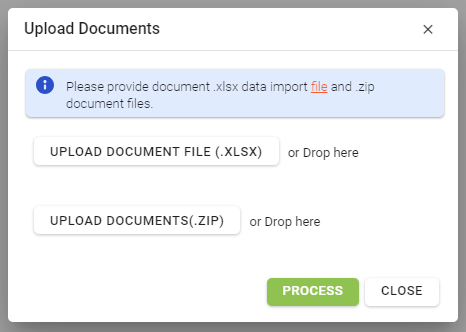
Clicking on “Upload Document File (.XLSX)” or the “Upload Documents (.ZIP)” buttons will open an operating system explorer/finder style window to allow you to choose the file you want to upload.
Alternatively you can drag and drop the file on to the “Upload Documents” dialogue where the labels “or Drop here” indicate.
When the file has successfully uploaded you should see the file name of the file in the “Upload Documents” dialogue.

After the file has been uploaded click on the “Process” button.