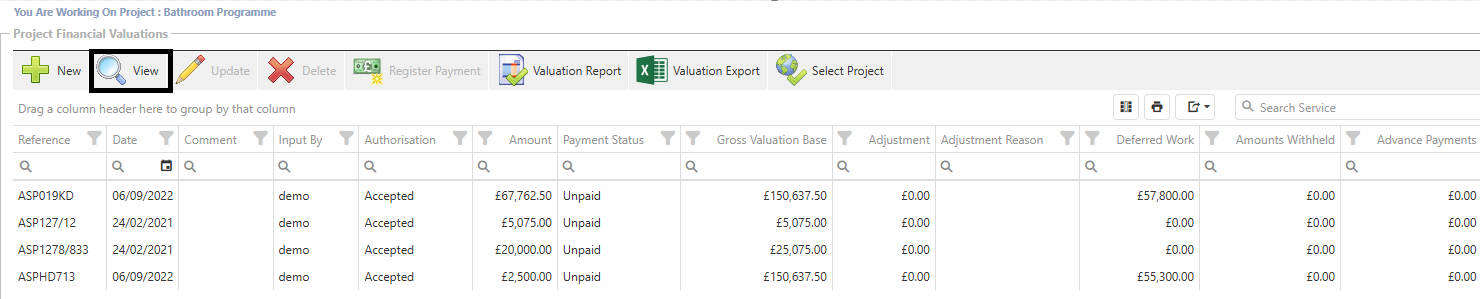
Valuations
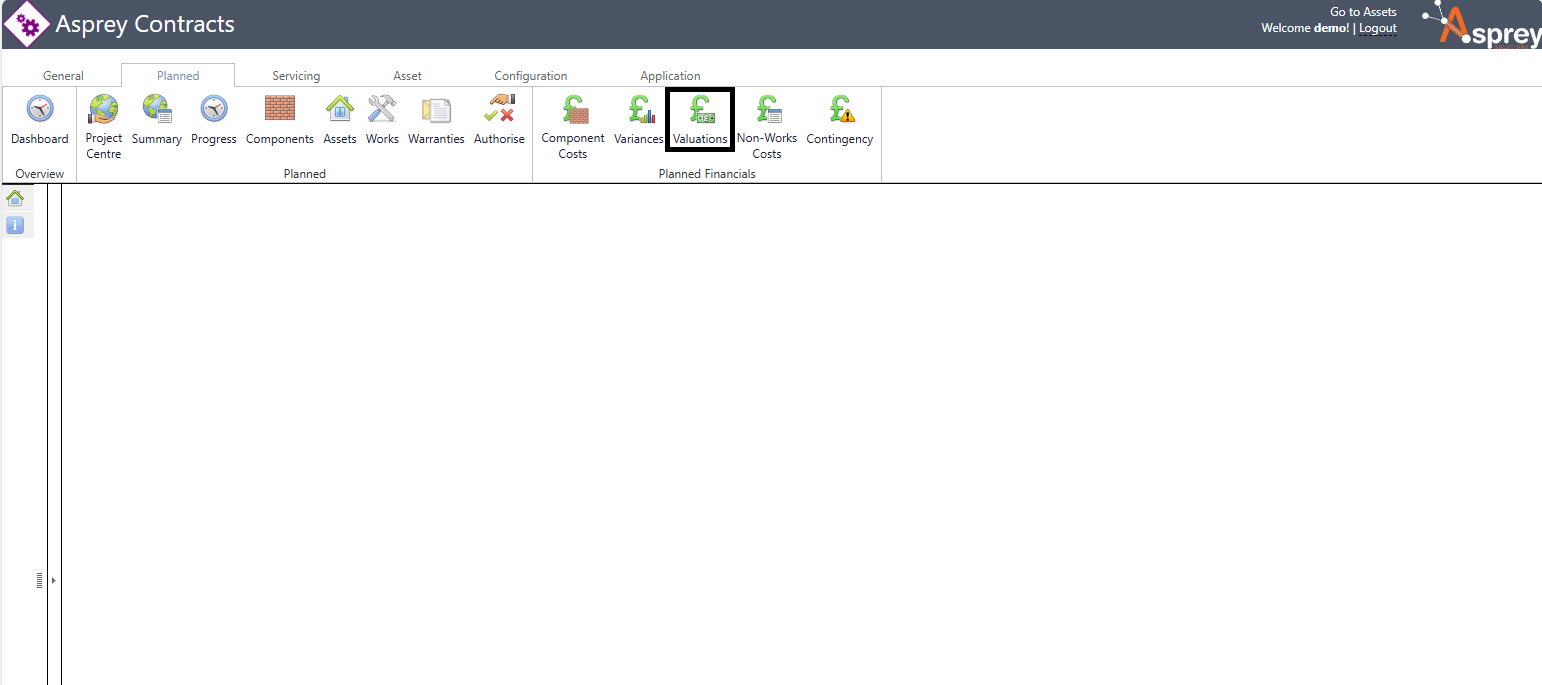
The valuations section is accessed through the planned tab in Asprey Contracts once a project has been selected from the Project Centre.
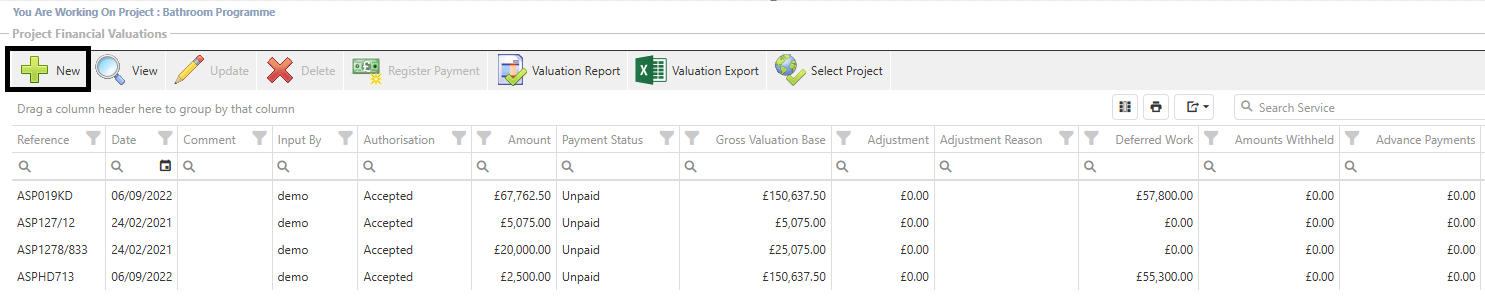
The Valuations section allows users to add valuations to a programme. Users can only add completed works to the valuation.

Adding a Valuation
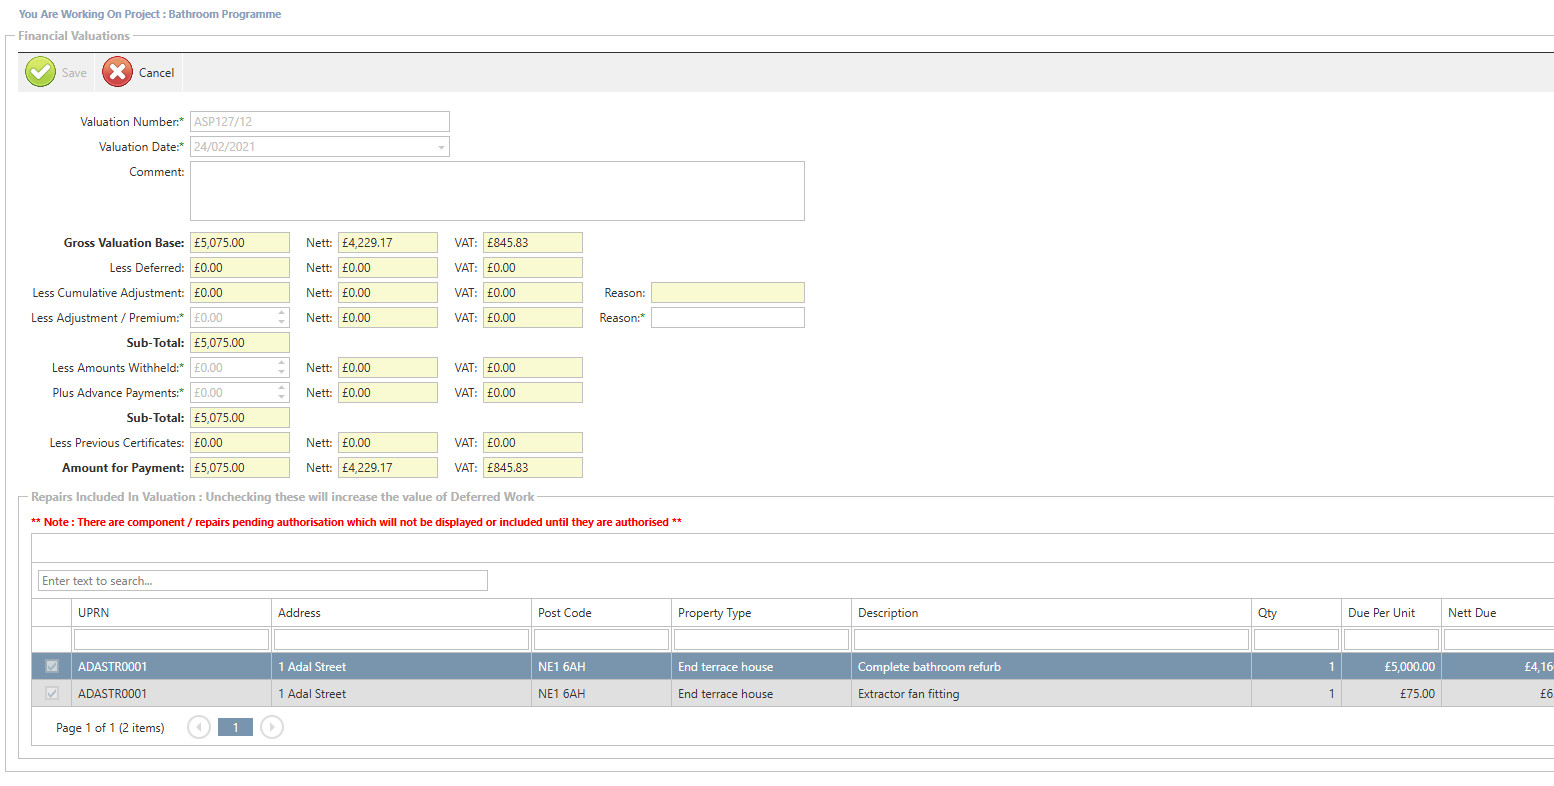
To add a new valuation, click the “New” button in the grid. A new window will appear with the relevant fields to be completed as part of the valuation.
Complete the required fields marked with an Asterix and select the assets the valuation relates to. Once complete, click the “save” button to commit the valuation.
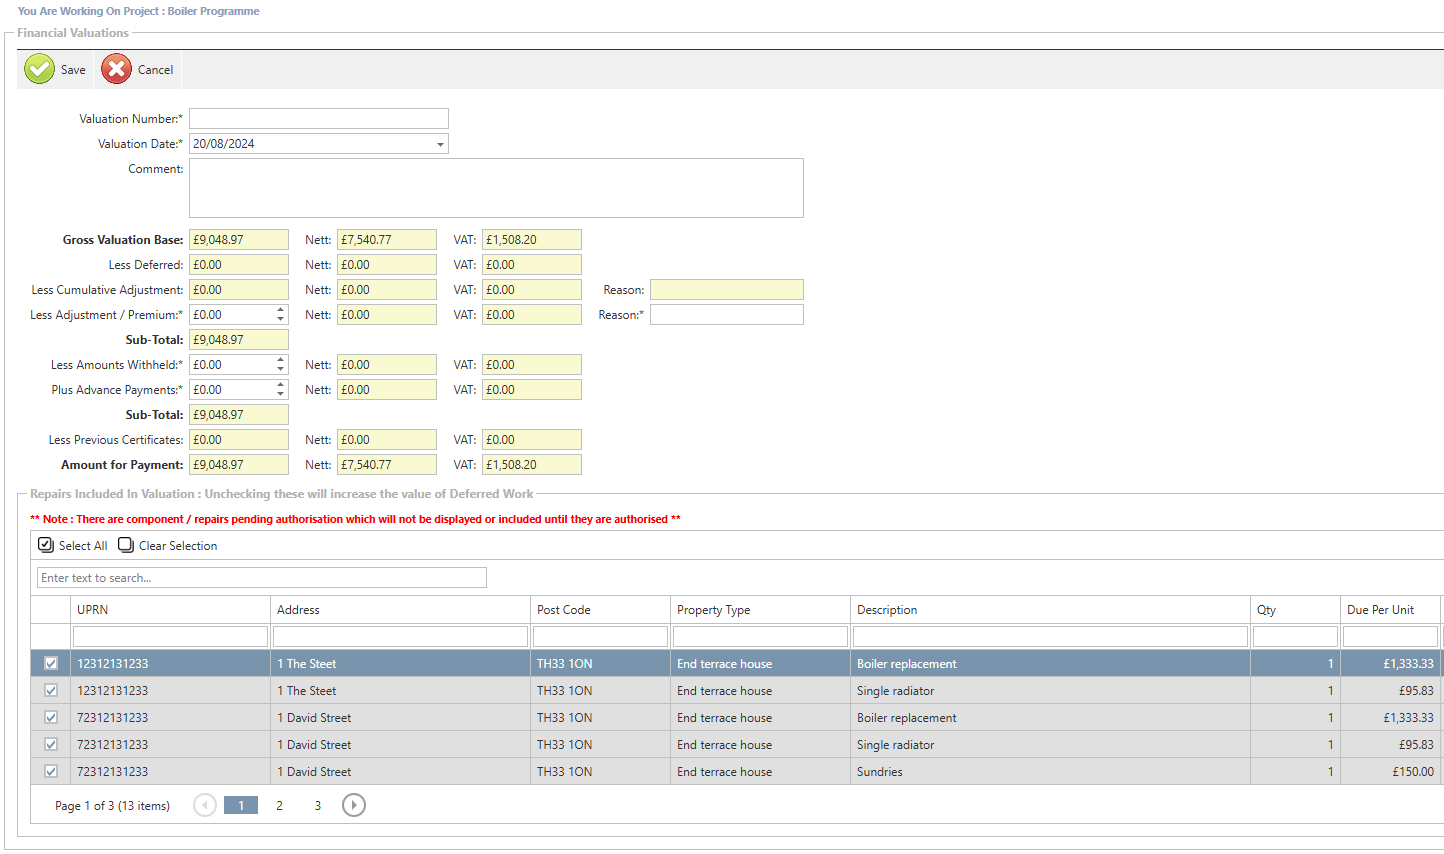
Any components/repairs pending authorisation will not be displayed or included until they are authorised.
Viewing a valuation
To view a valuation in detail, select the valuation from the list in the grid and click the “view” button.
A new window will appear with the details of the valuation selected.
To go back to the previous screen, click the “cancel” button.
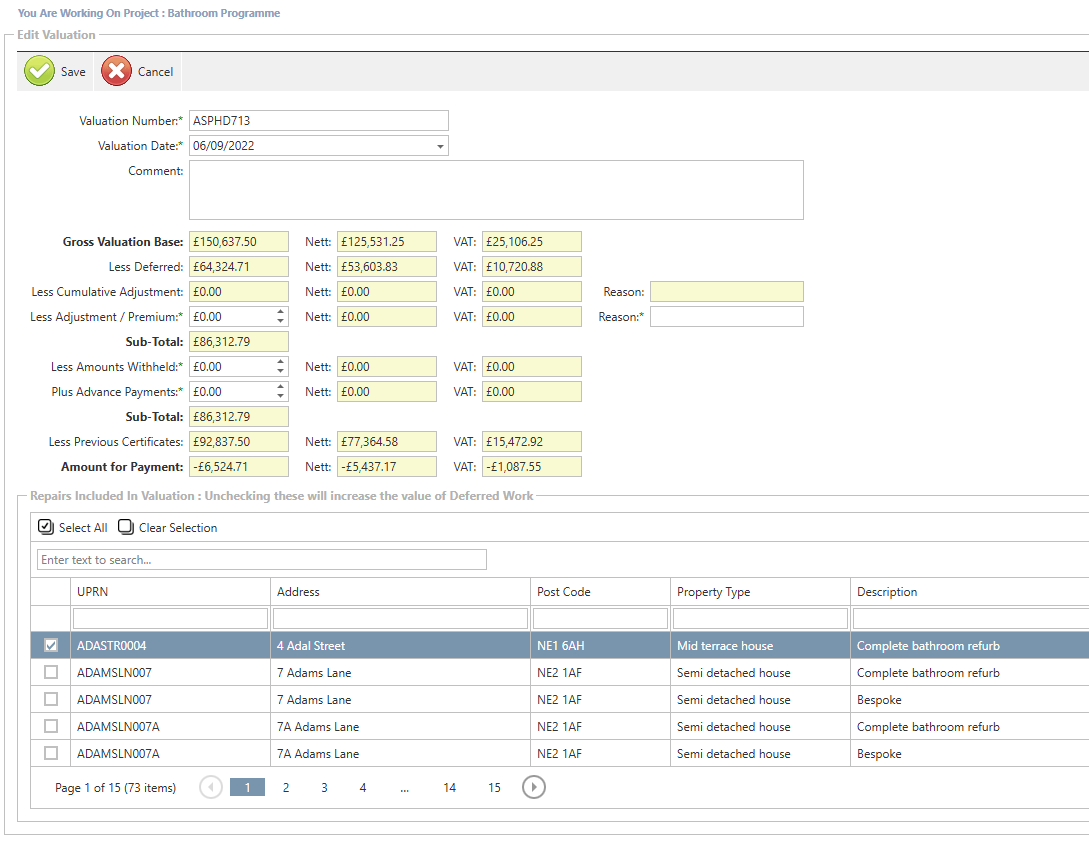
Updating a valuation
To update a valuation, select the valuation from the list in the grid and click the “Update” button.

A new window will appear with the details of the valuation selected. Update the required fields and click save when complete.
Deleting a valuation
To delete a valuation, select the valuation from the list in the grid and click the “Delete” button.

A confirmation box will appear to confirm the delete action. Once confirmed, the selected valuation will be removed from the system.
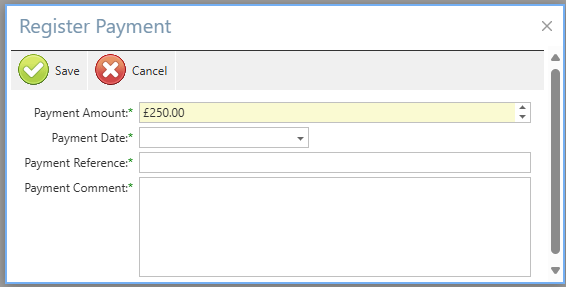
Register a payment for a valuation

To register that a payment has been made for the valuation, select the record and click the “register payment button. A pop-up box will appear to fill in the details of the payment. Once complete, click “save” to register the payment.