Configuration - Risk & Reinspection
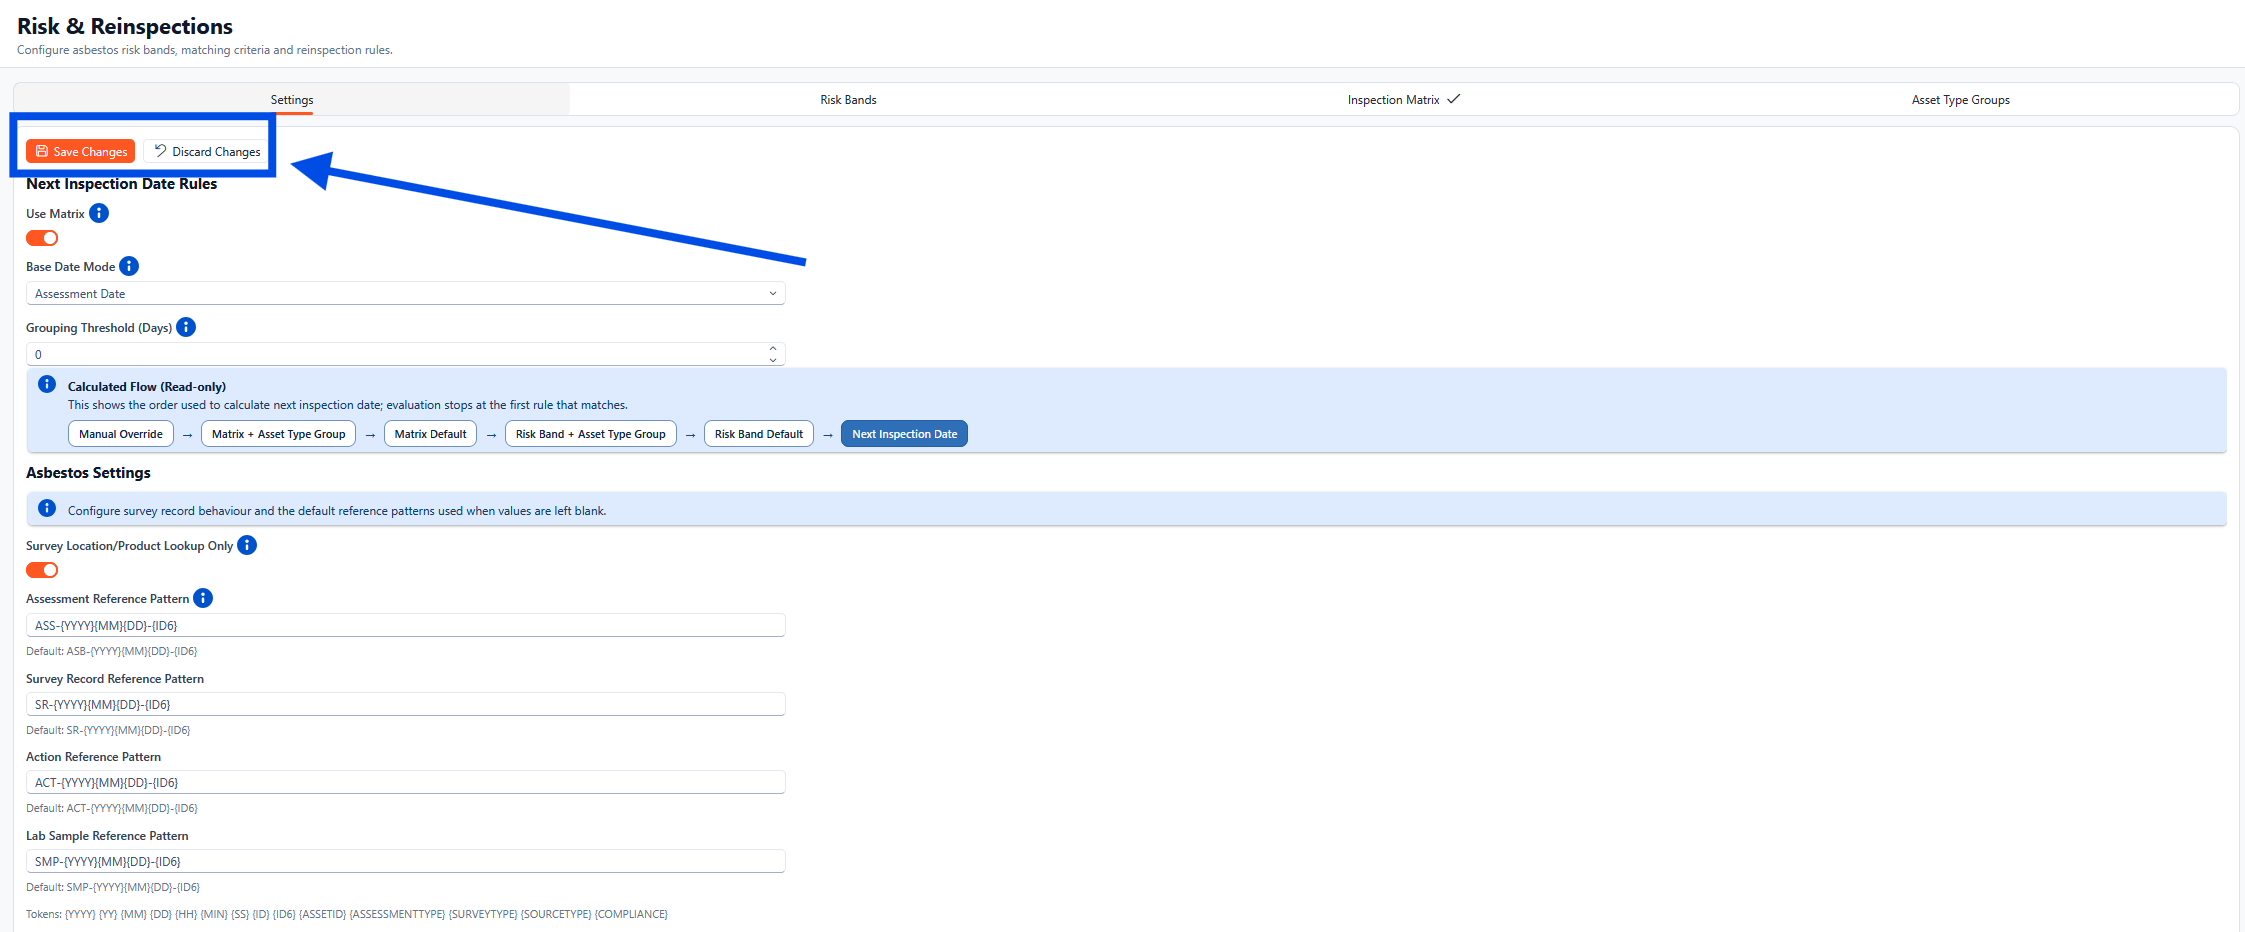
The Risk and Reinspection configuration page allows for the risk bands, matching criteria and reinspection rules to be configured for the asbestos tool. There are four tabs along the top, Settings, Risk Bands, Inspection Matrix and Asset Type Groups.

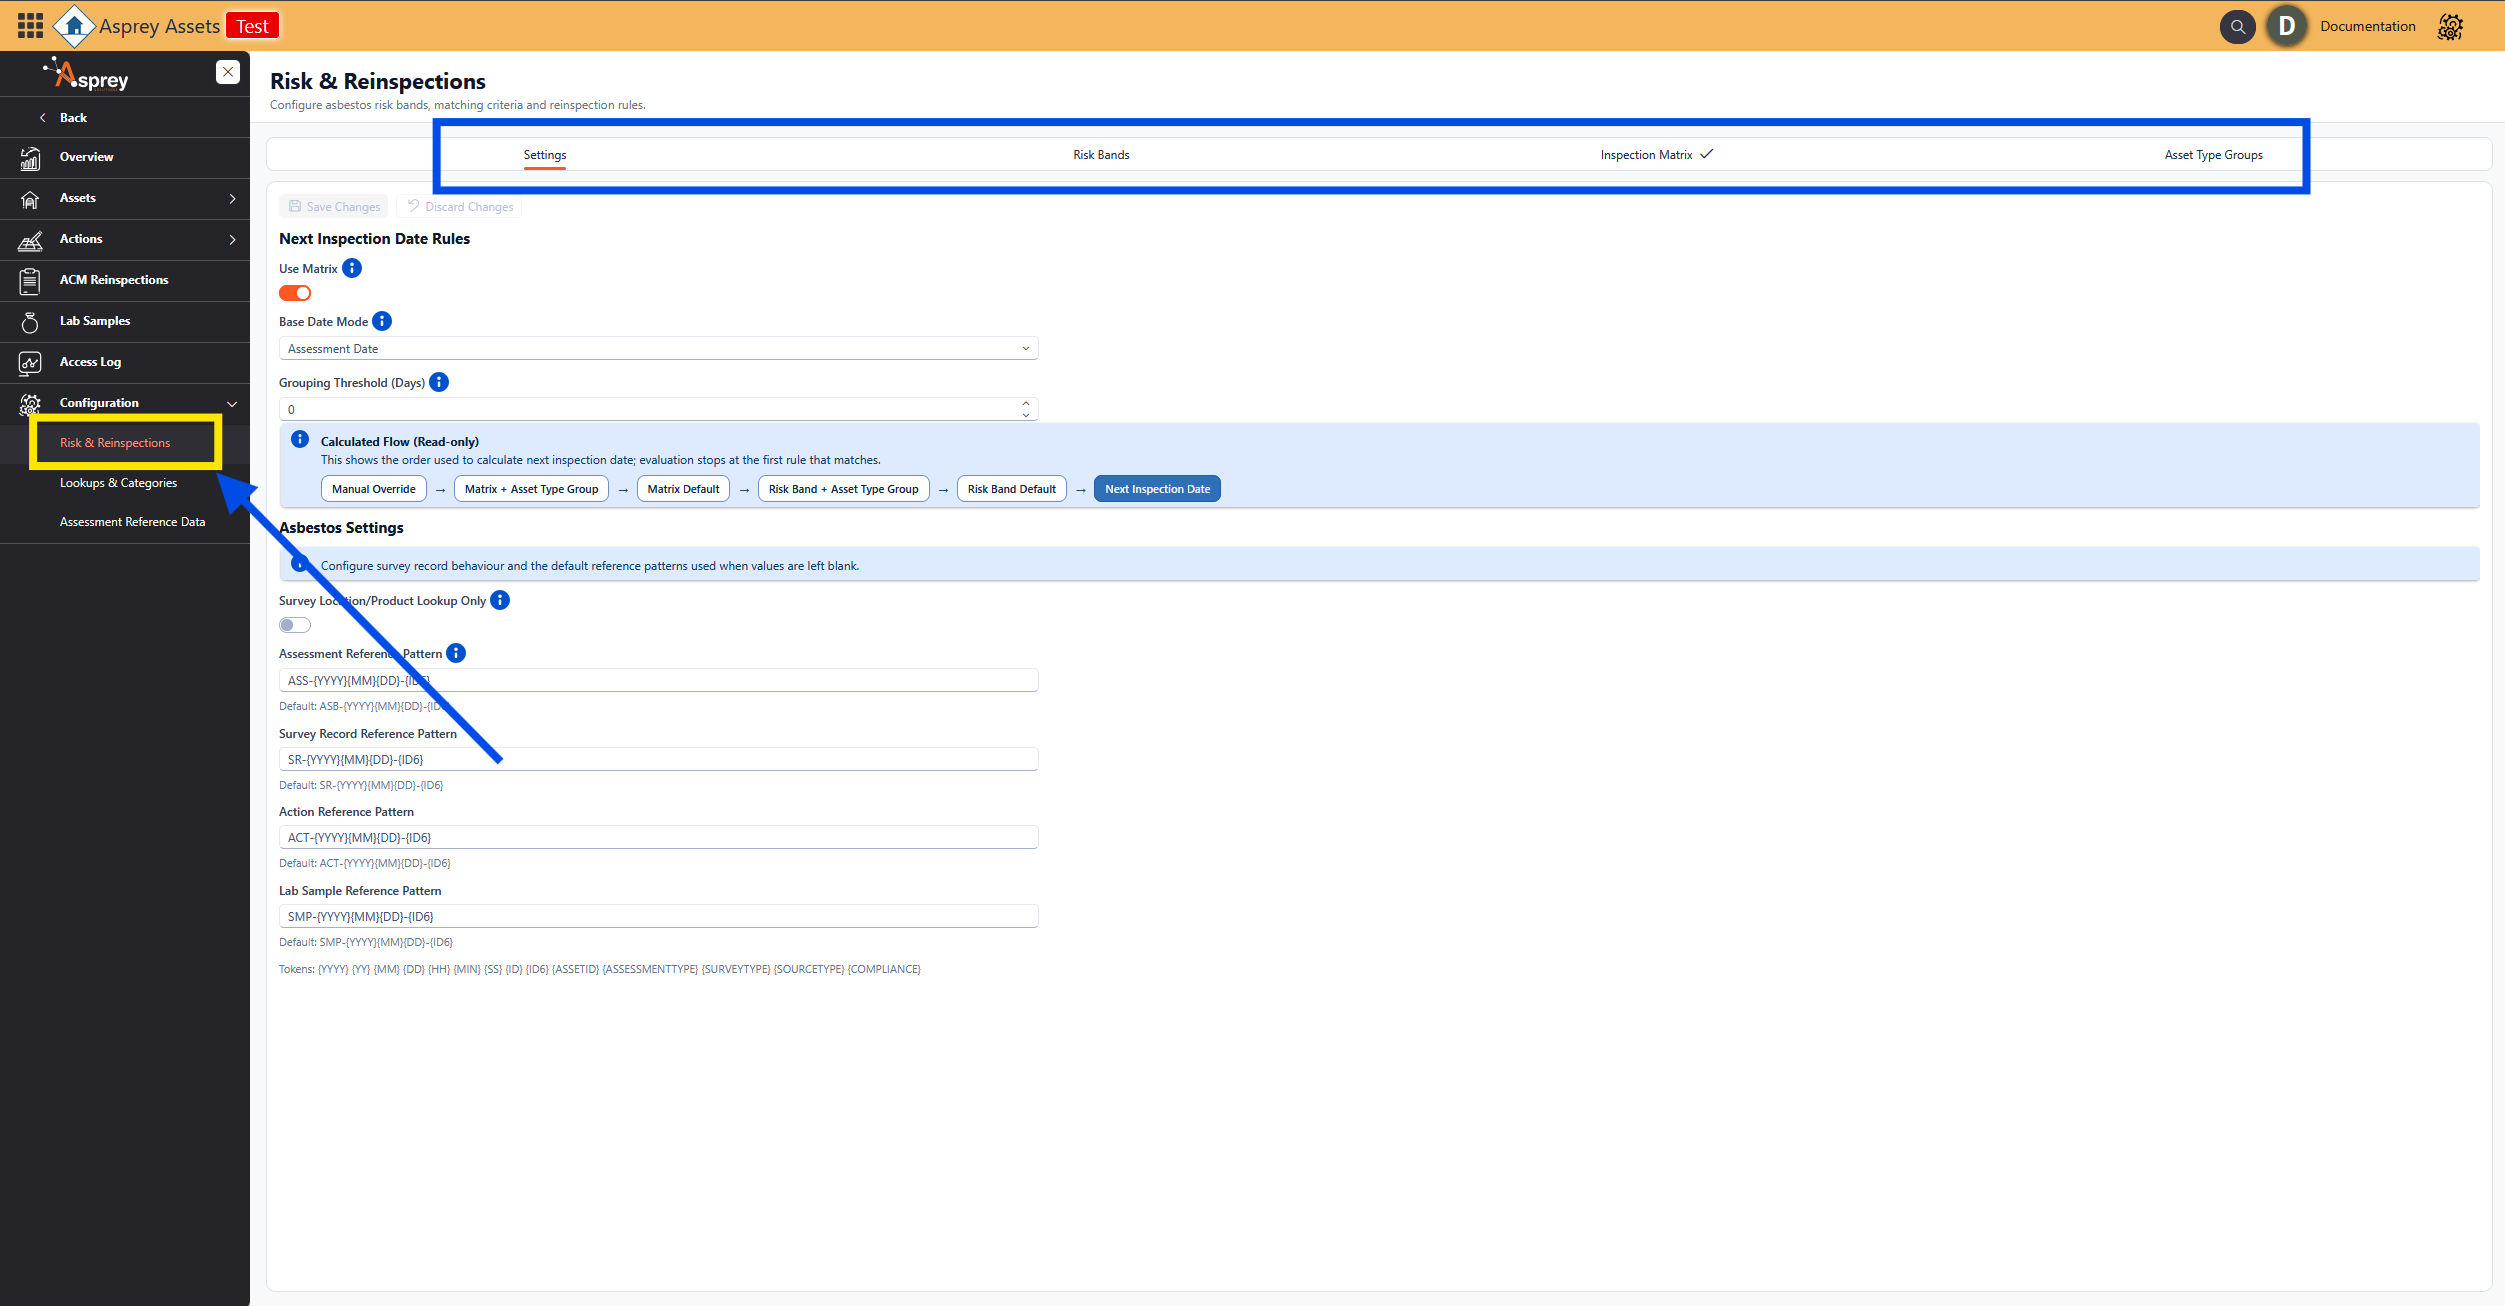
Risk & reinspection Configuration
Settings
The Risk & Reinspections Settings tab is where the next inspection and asbestos settings are configured.
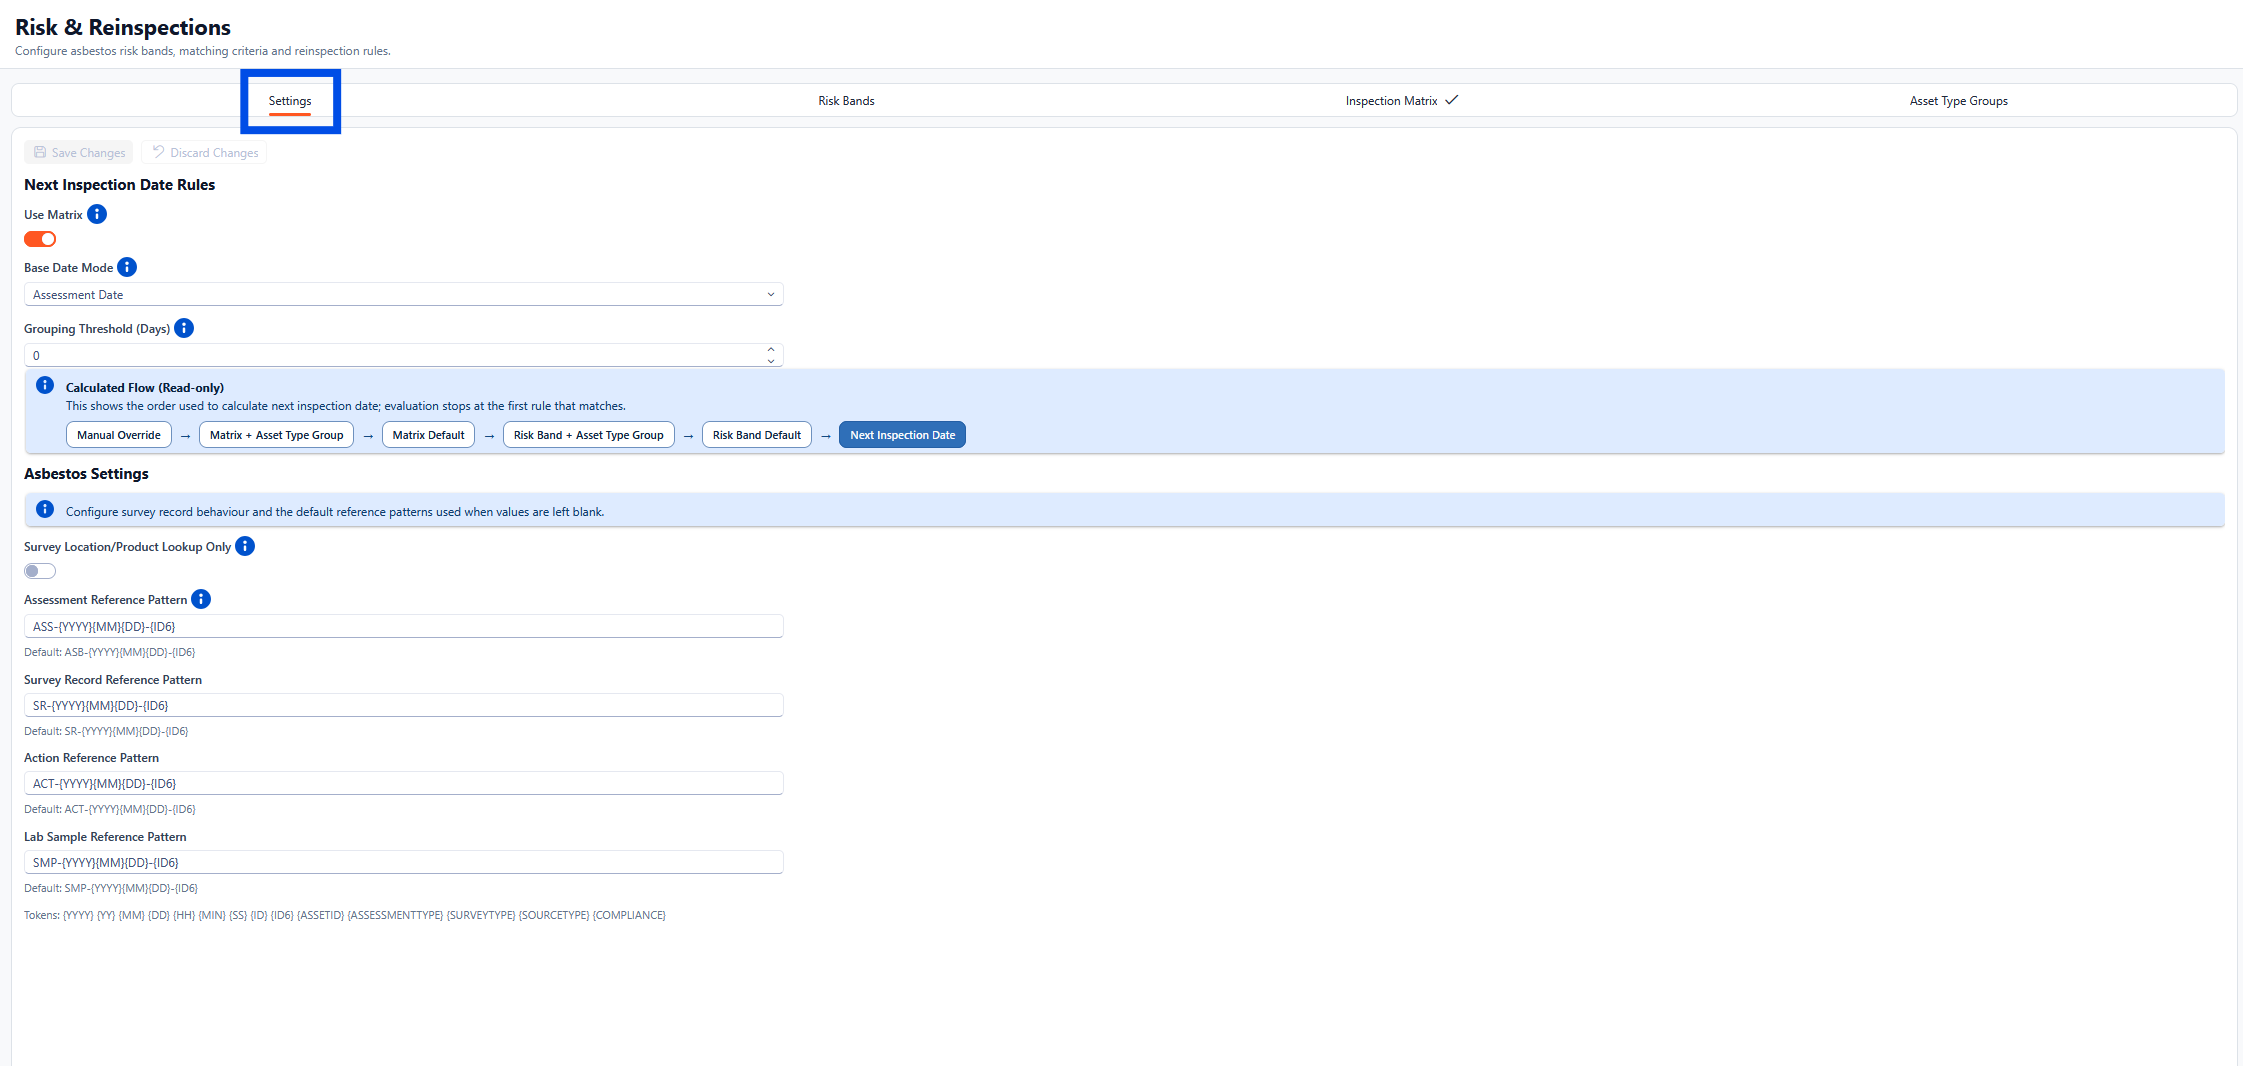
Next Inspection Date Rules
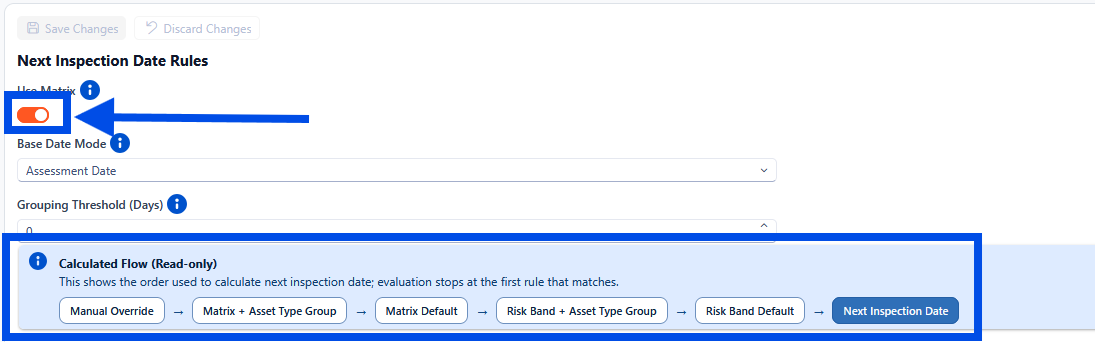
Use Inspection Matrix Toggle
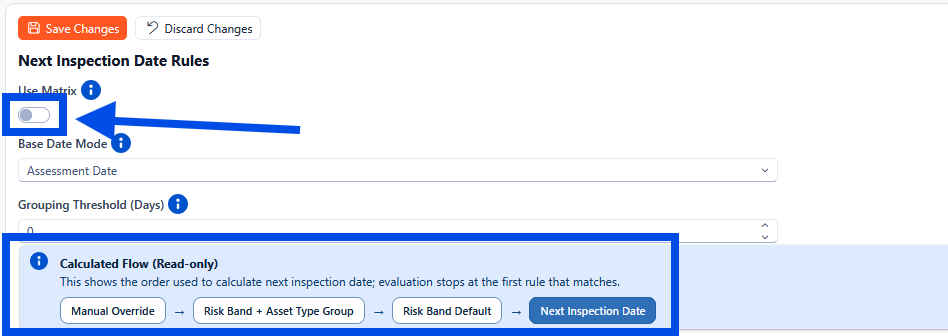
Under the Next Inspection date Rules section, there are a few options, the first use matrix check box determines if the Inspection Matrix is used to calculate the next inspection date. When enabled, the next inspection date uses the matrix matching first, followed by the risk band as a fallback.
If the Inspection Matrix tab has a tick against it, then the inspection matrix is in use. If there is no tick present, then the inspection matrix is not in use.
Base Date Mode
The Base Date Mode chooses which date is used as the starting point before cycle months are applied. Select the desired date from the drop-down list for the system starting date.

Calculated Flow
The calculated flow section will update to reflect the use of the inspection matrix. If selected, this will be the second stage for the flow, it disabled then it will not appear as shown below.
Use Matrix toggle set to On.
Use Matrix toggle set to Off.
Asbestos Settings
The Asbestos settings section allows for configuration of the survey record behaviour.
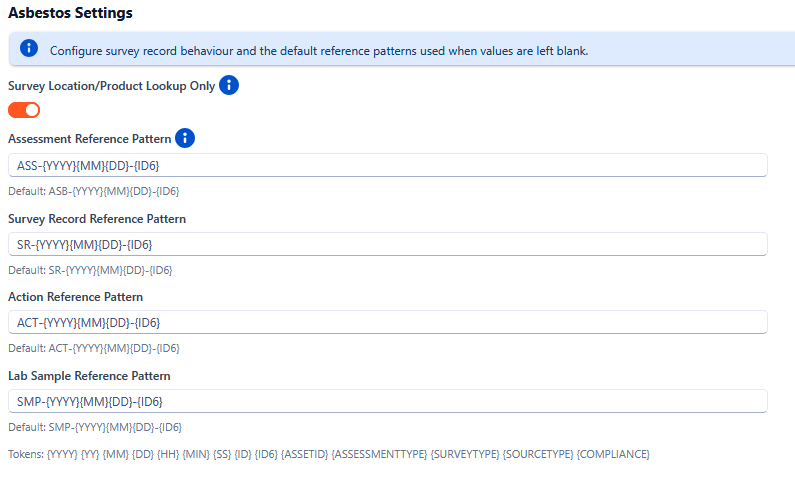
Survey Location/Product Lookup Only
When enabled, Floor, Room, Location, and Product Description in survey records are restricted to configured lookup values only. When disabled, users can type custom values in addition to selecting lookups.

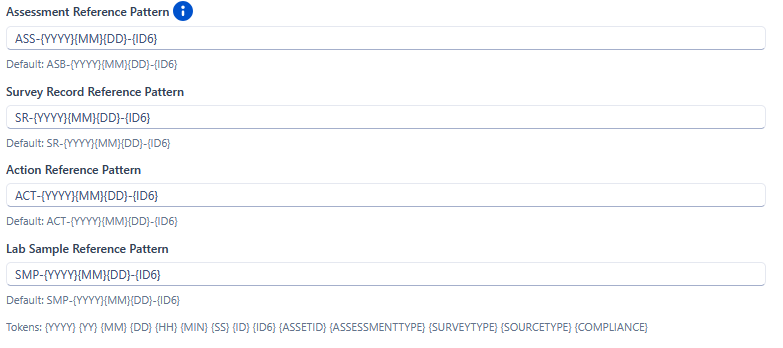
Assessment Reference Pattern
Patterns are used only when Reference is left blank. If a user enters a manual reference, that value is kept.
Once all desired settings have been configured, click the Save Changes button at the top right-hand corner of the grid. To proceed without saving click the Discard Changes button and any amendments will be discarded.
Risk Bands
There are two sub tabs for the Risk Bands tab, Defaults and Asset Group Overrides.
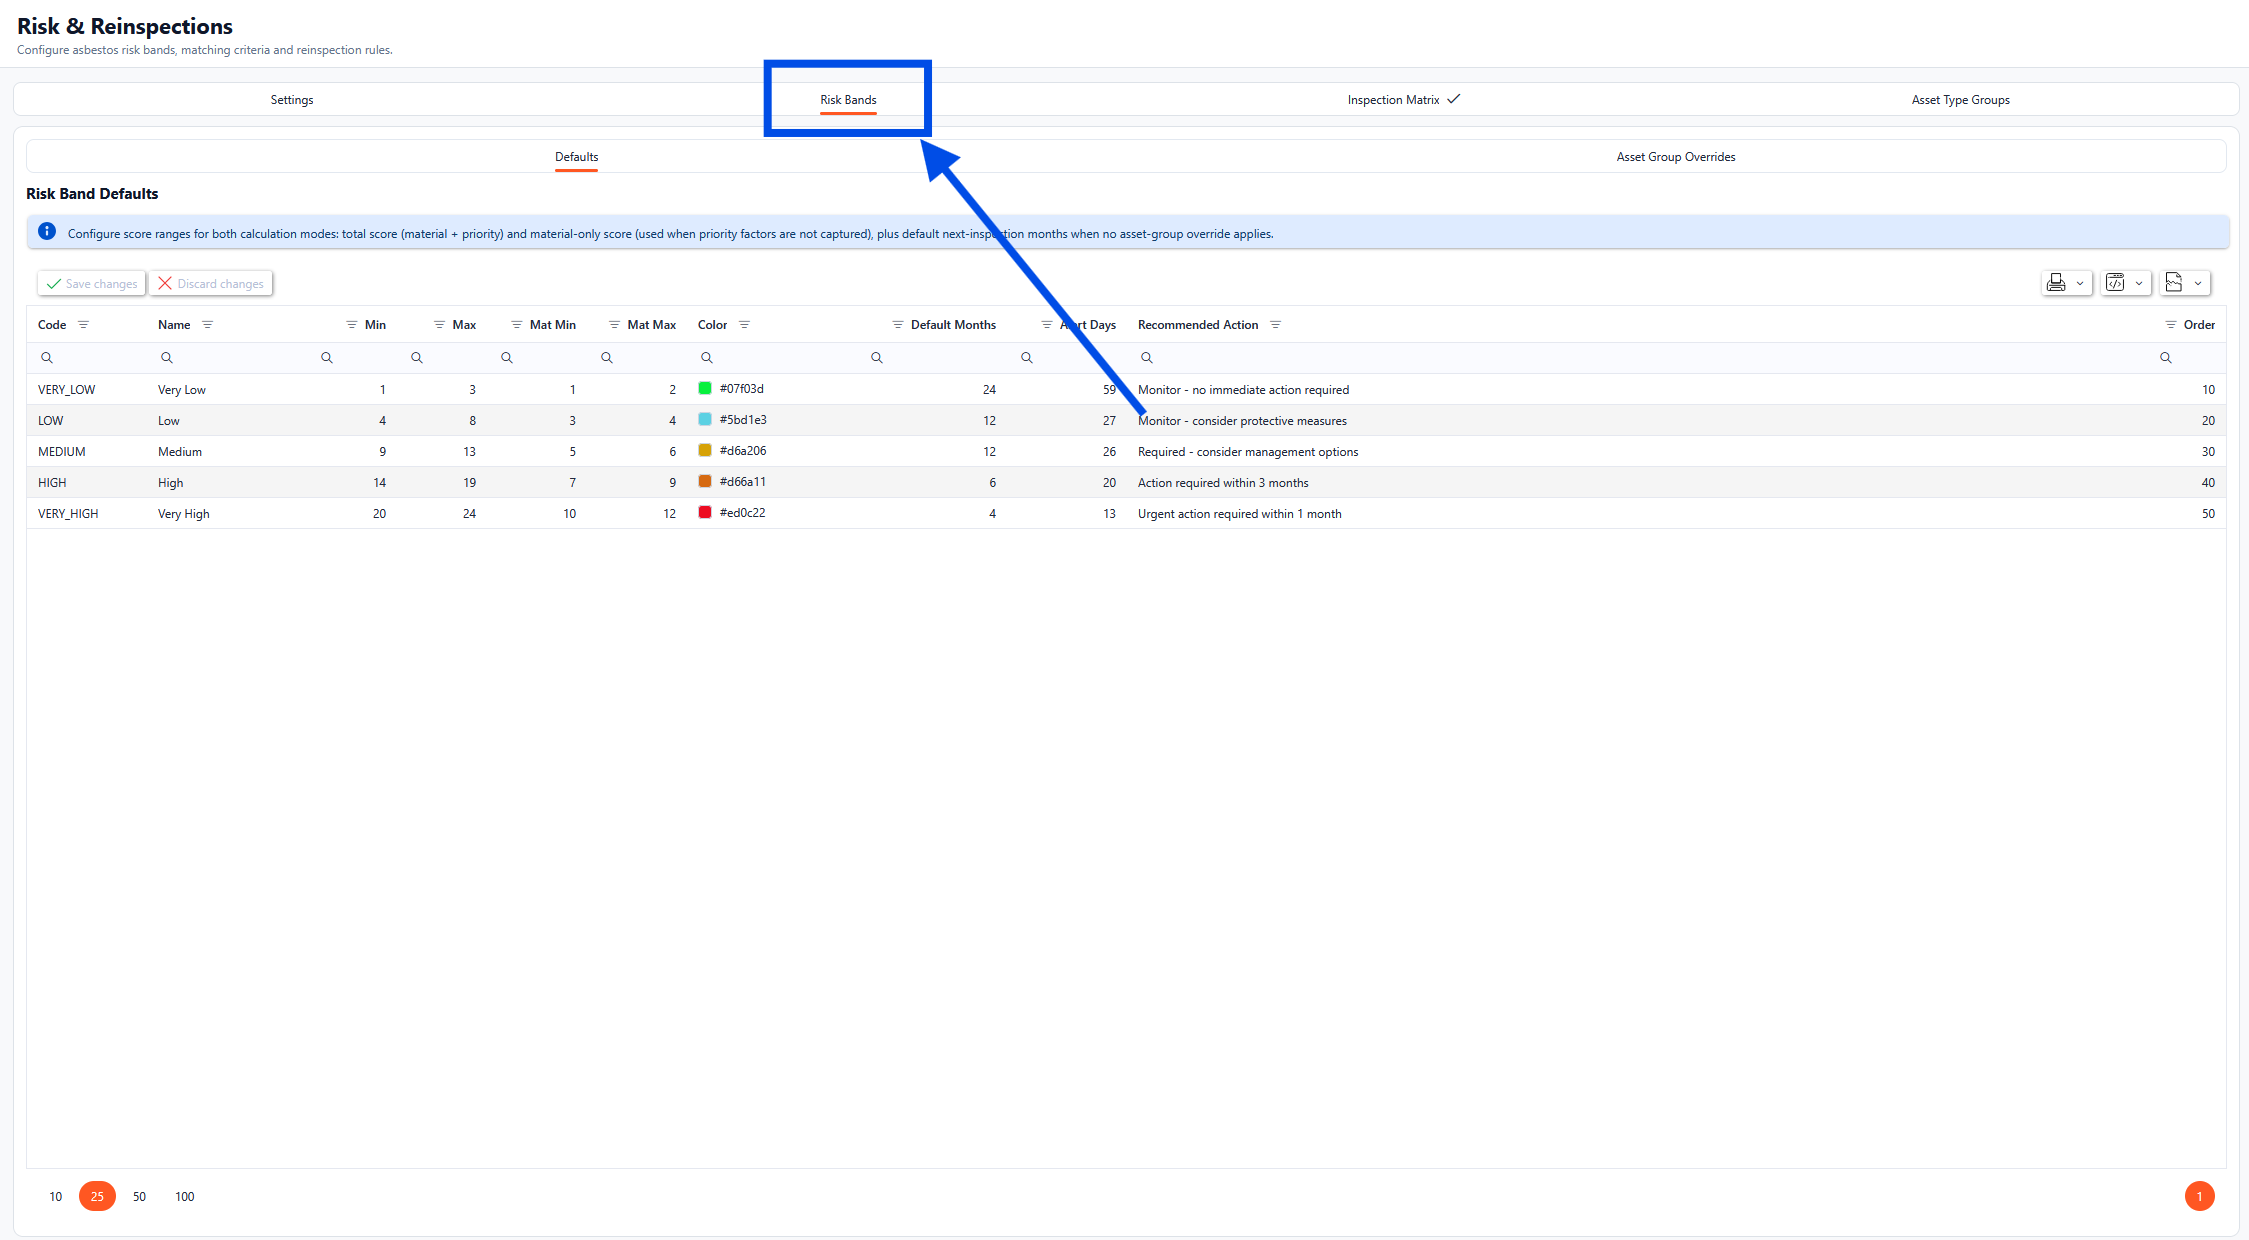
Defaults
The Defaults tab allows for the Configuration of score ranges for both calculation modes:
total score (material + priority); and
material-only score (used when priority factors are not captured)
In addition to the above, the default next-inspection months can be configured for when no asset-group override applies.
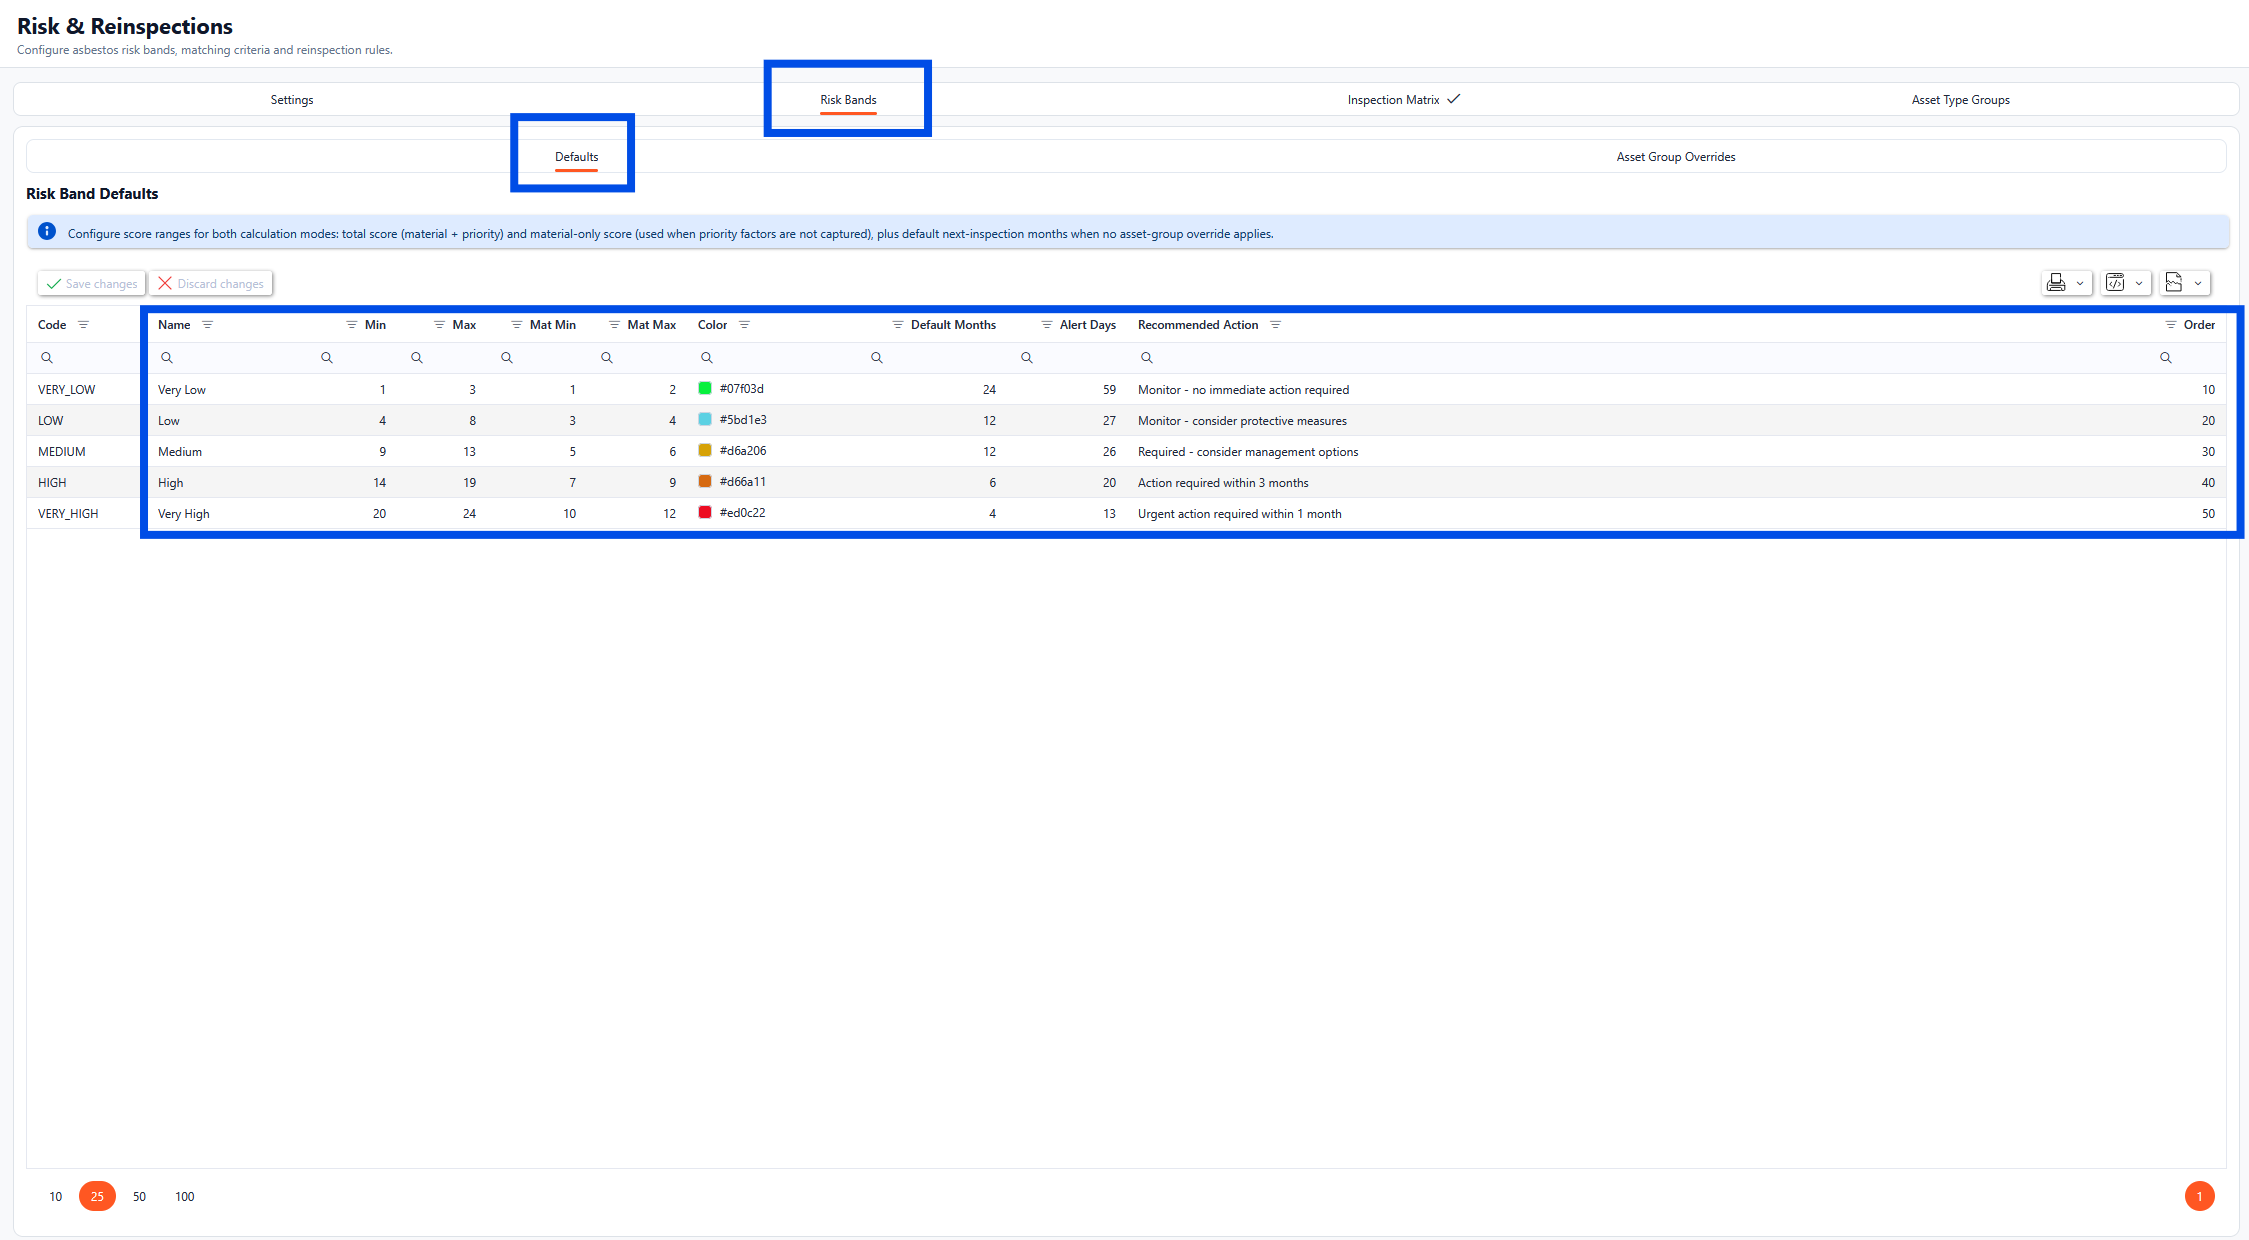
All of the columns in the grid can be updated with the exceptions of the code column.
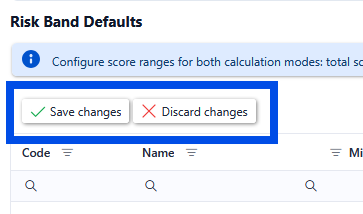
Once the changes have been made click the Save Changes button to commit the changes to the system. To proceed without saving and revert back to the current system values, click the Discard Changes button.
Asset Group Overrides
Use the Asset Group Overrides section to configure per-asset-group month overrides for each risk band. These overrides apply before default risk band months.
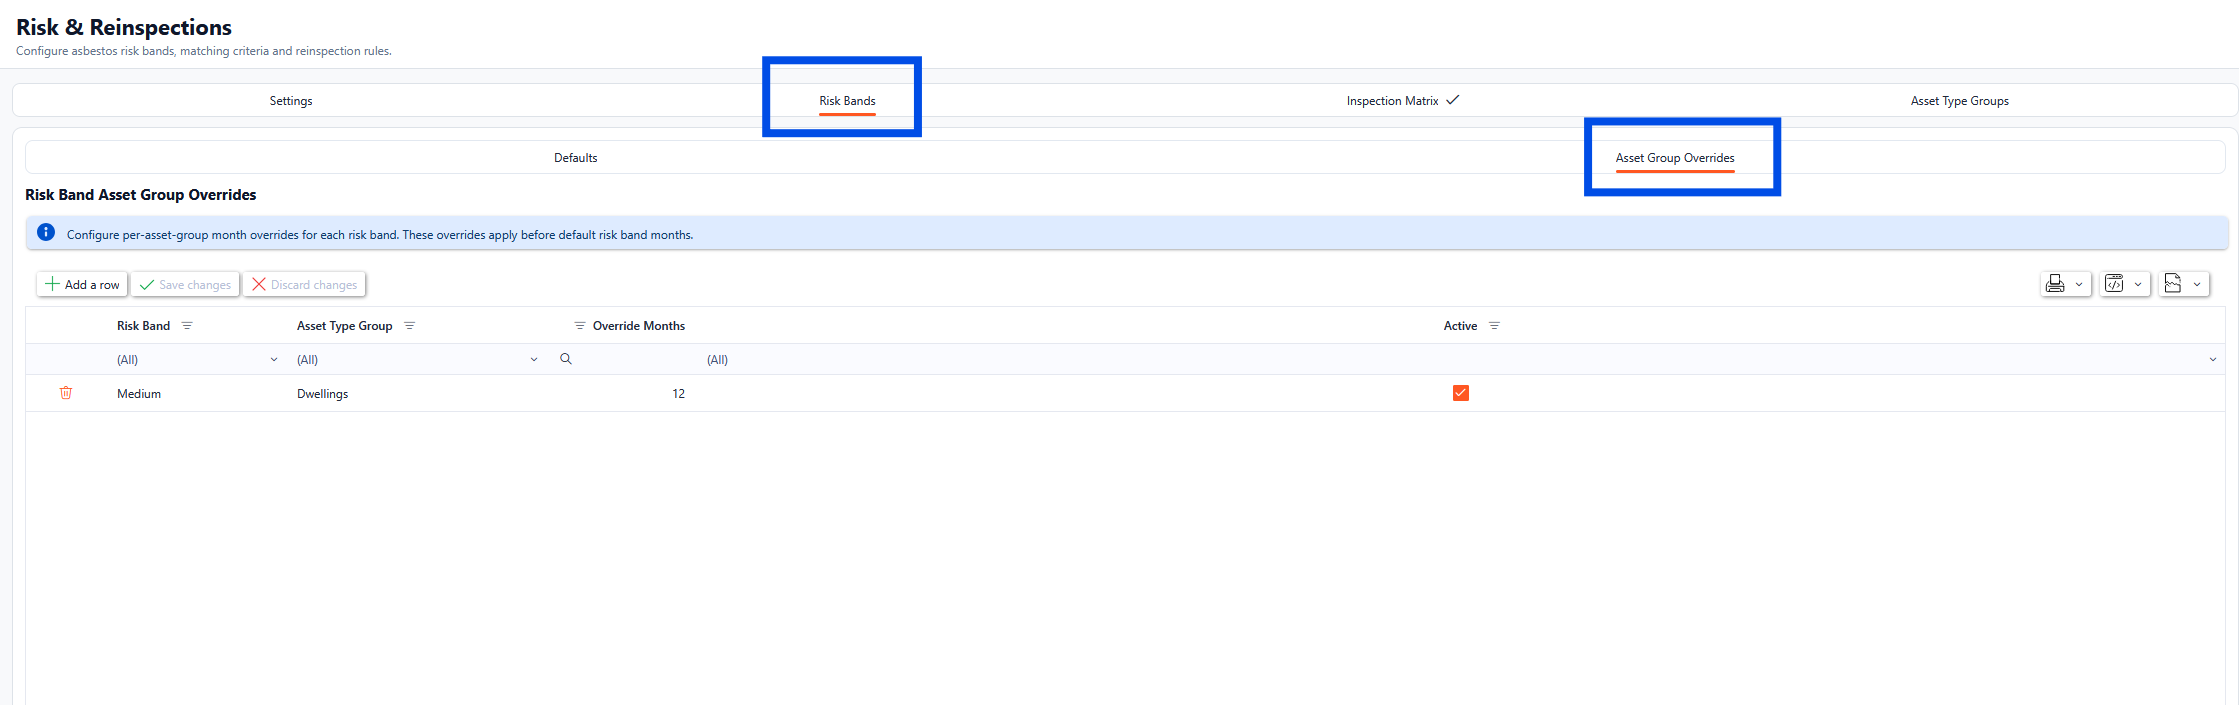
To edit any of the existing rows, select the field to be updated and type the new values in place (these will highlight in green until saved), once all the relevant information has been updated, click the Save Changes button.

To add a new Asset Group Override, click the Add a row button. A new record will appear. Complete the relevant records as required and click the Save Changes button.

Inspection Matrix
There are three sub tabs for the Inspection Matrix tab, Matching Criteria, Default Rules and Asset Type Group Overrides.
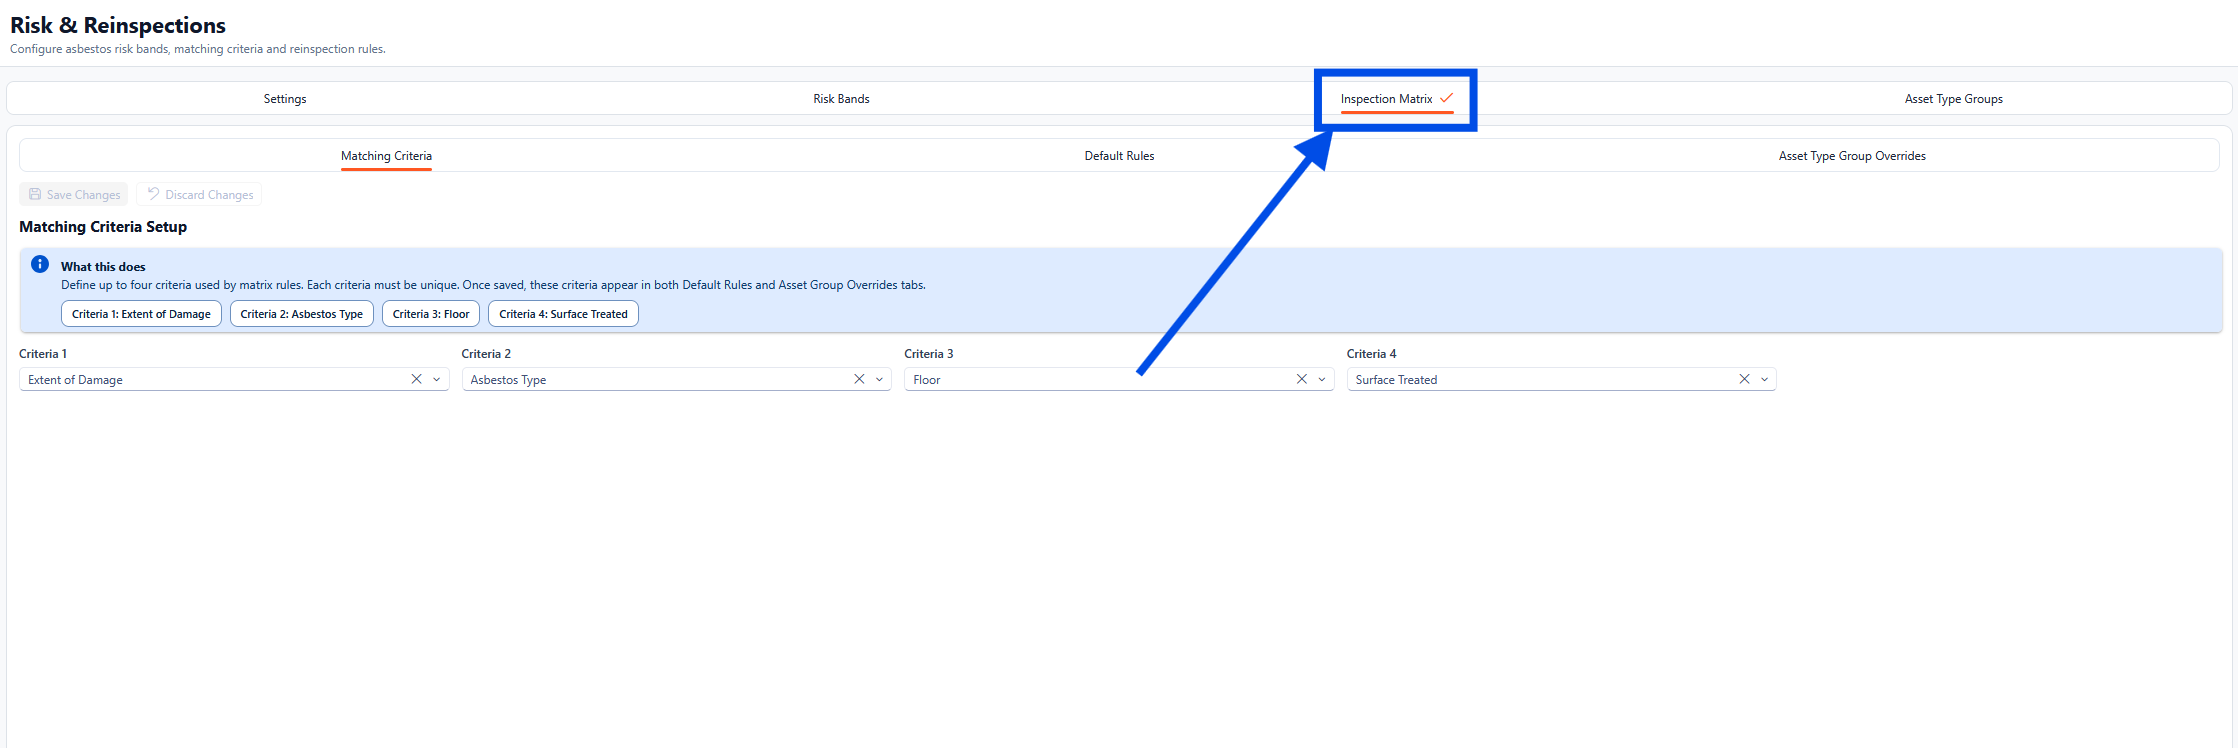
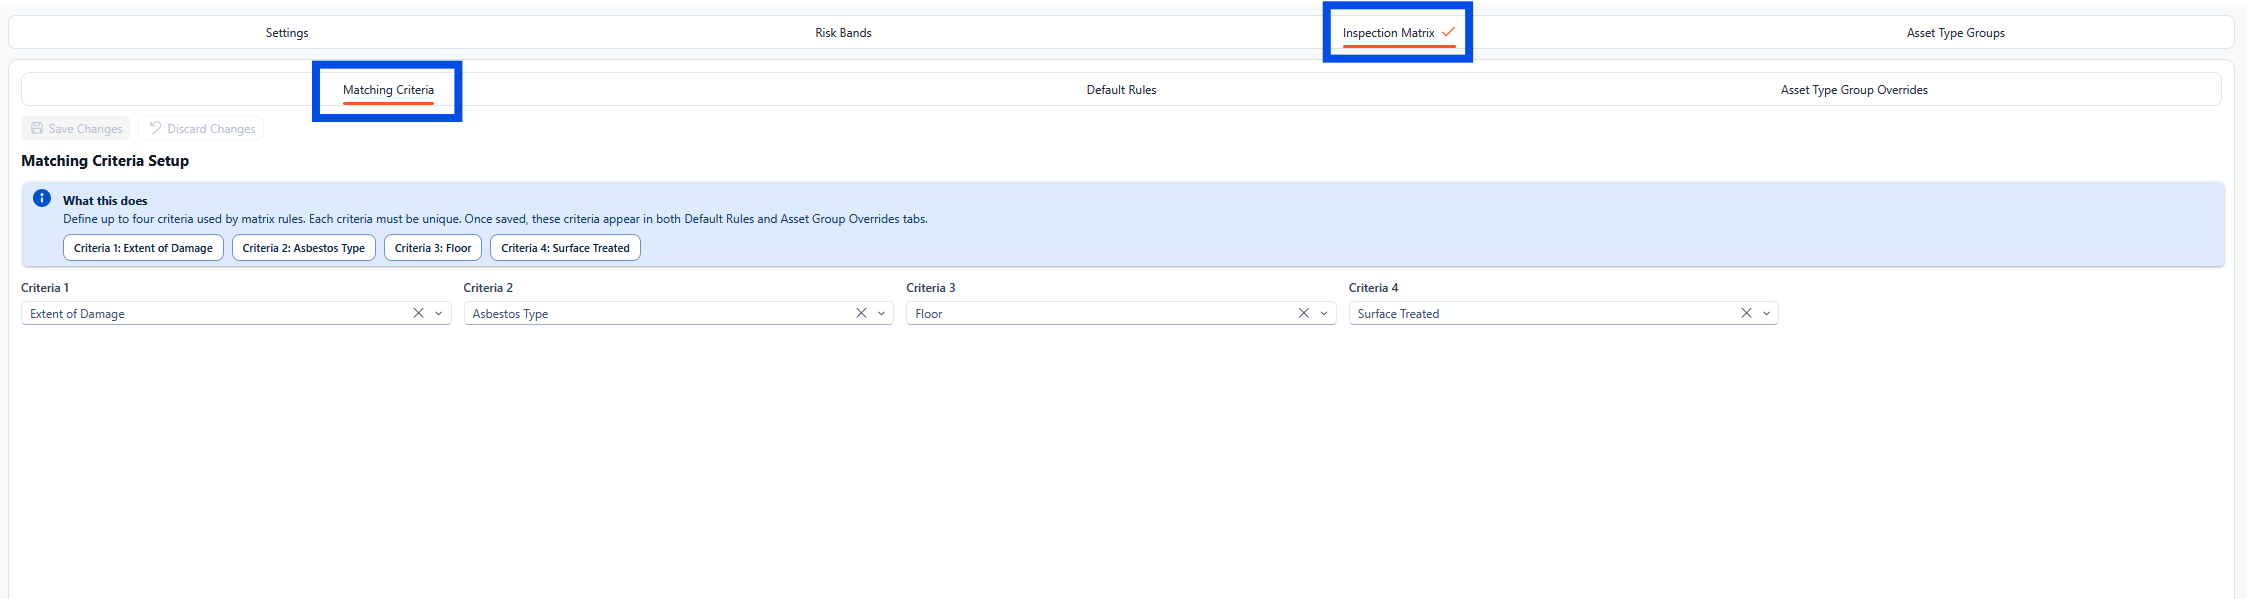
Matching Criteria
The matching criteria allows for up to four criteria to be used within the matrix rules. Once saved, these criteria will appear in both Default Rules and Asset Group Overrides tabs.
Each criterion must be unique. If a duplicate criterion is entered, an error will appear when saving the changes.
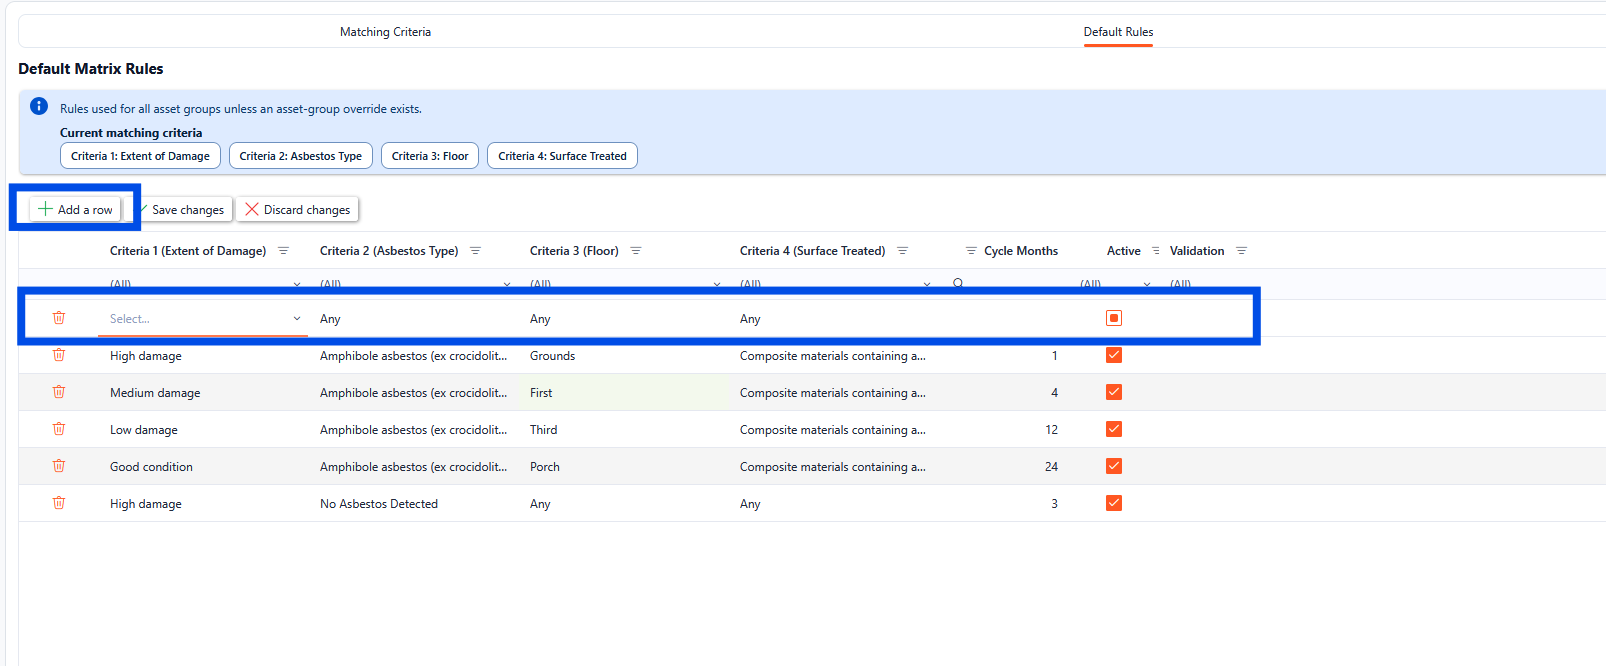
Default Rules
The Default Rules are used for all asset groups unless an asset-group override exists which will take priority.
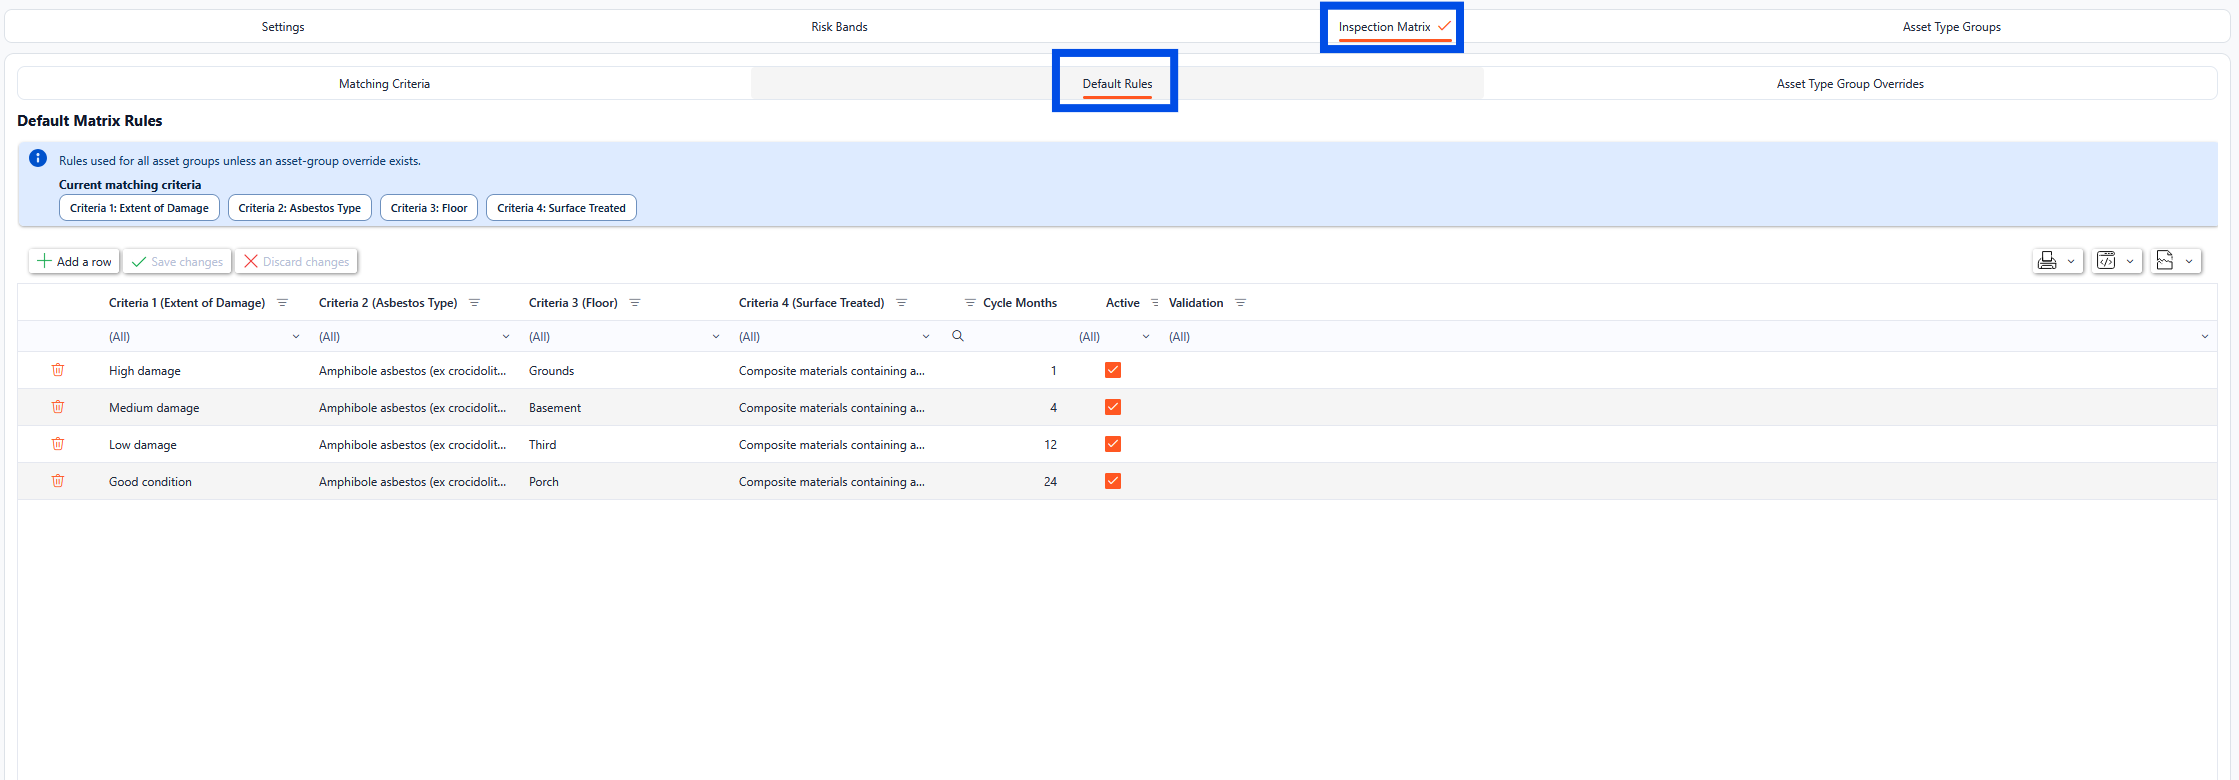
The default rules utilise the matching criteria to create a grid of values that can be configured. The Active check shows that the rule is in use and is being applied to the rules. If a column is left blank when configuring, the system will default to any response for that field.
To edit any of the existing rows, select the field to be updated and type the new values in place (these will highlight in green until saved), once all the relevant information has been updated, click the Save Changes button.
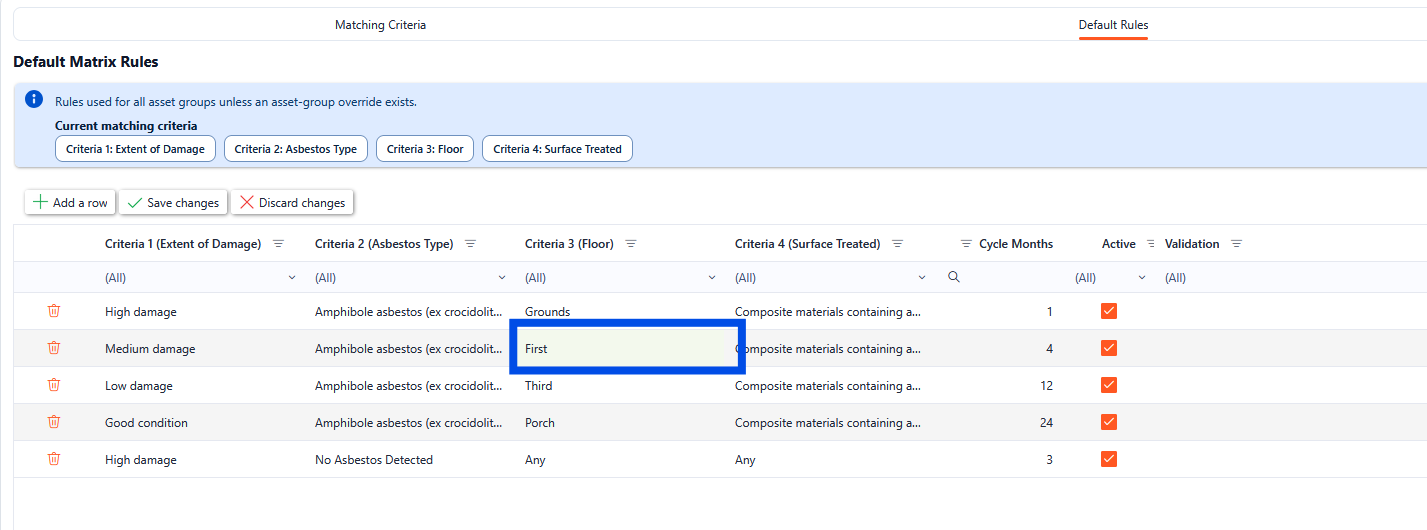
To add a new Default Rule, click the Add a row button. A new record will appear. Complete the relevant records as required and click the Save Changes button.
Asset Type Group Overrides
The Asset Type Group Overrides is used when there is a specific asset group that requires a different cycle than the defaults.
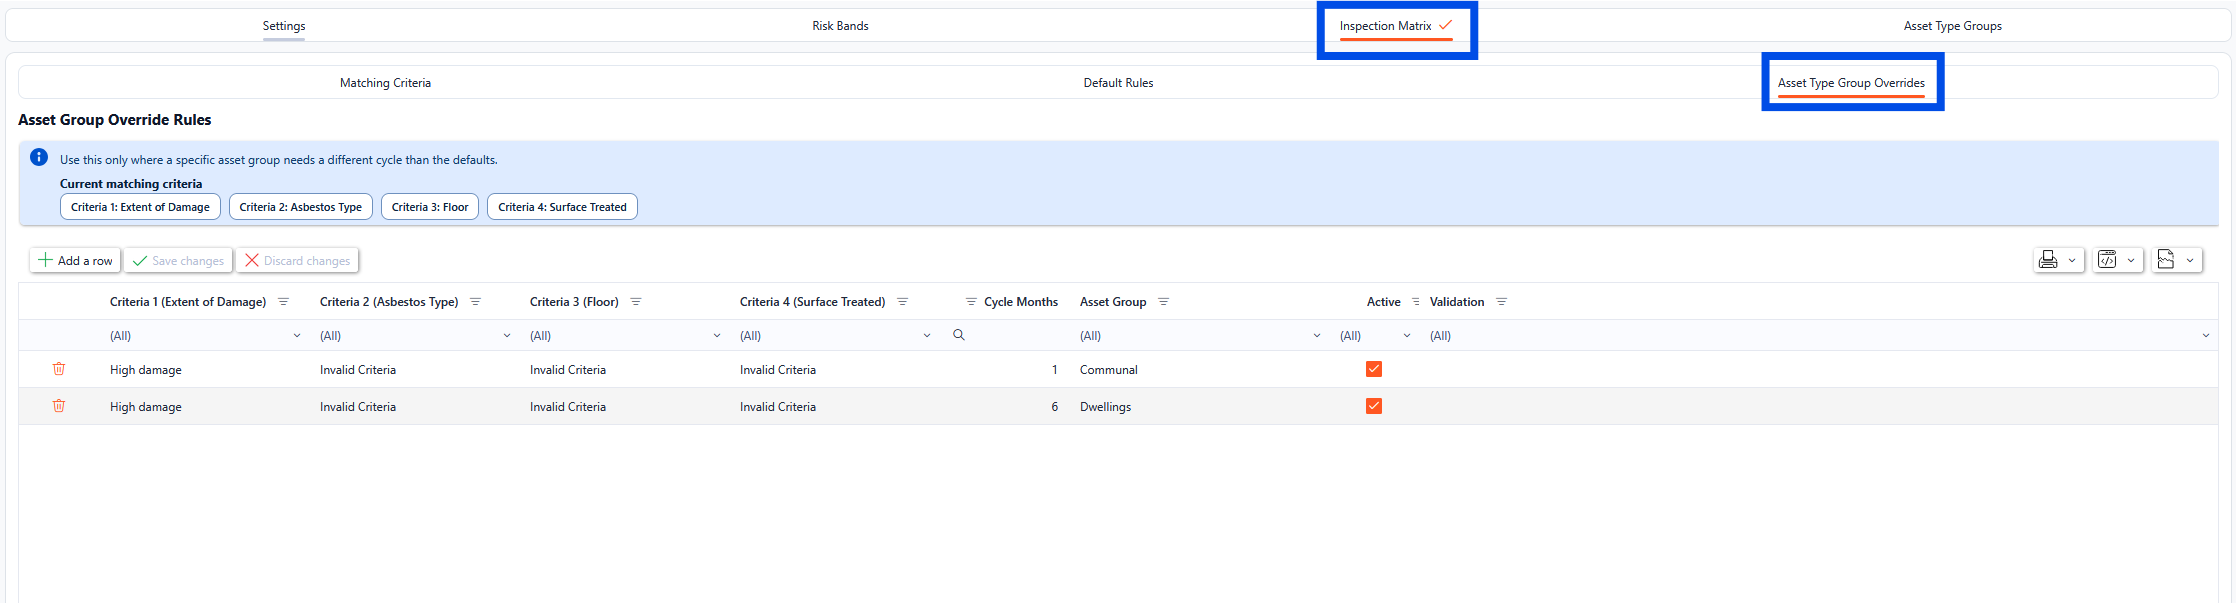
The Asset Type Group Overrides utilise the matching criteria to create a grid of values that can be configured. The Active check shows that the rule is in use and is being applied to the rules. If a column is left blank when configuring, the system will default to any response for that field.
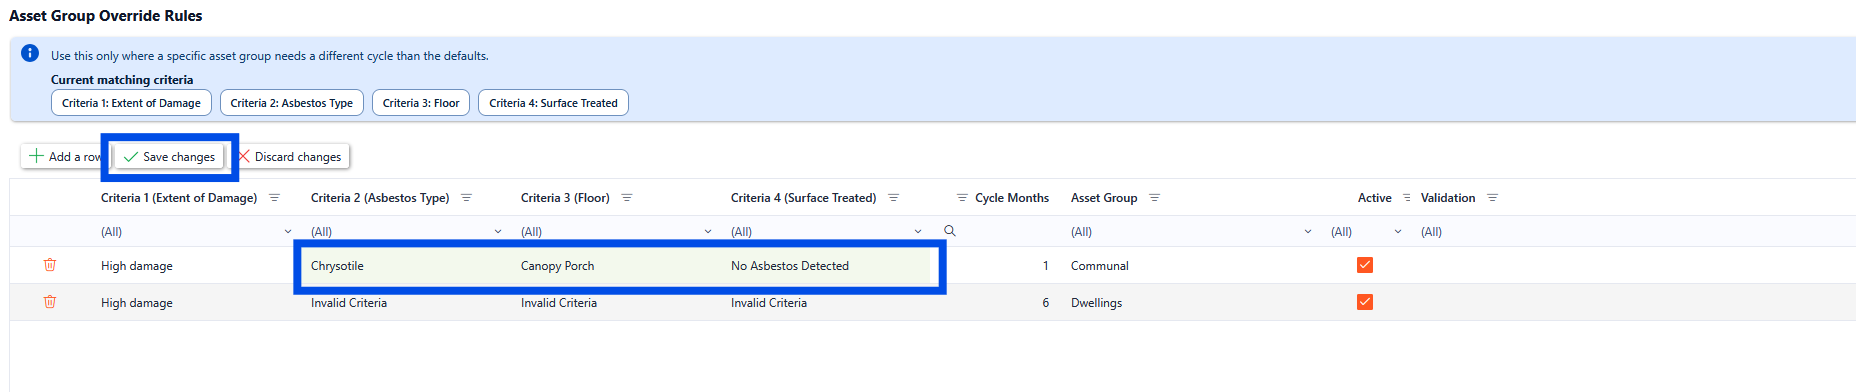
To edit any of the existing rows, select the field to be updated and type the new values in place (these will highlight in green until saved), once all the relevant information has been updated, click the Save Changes button.
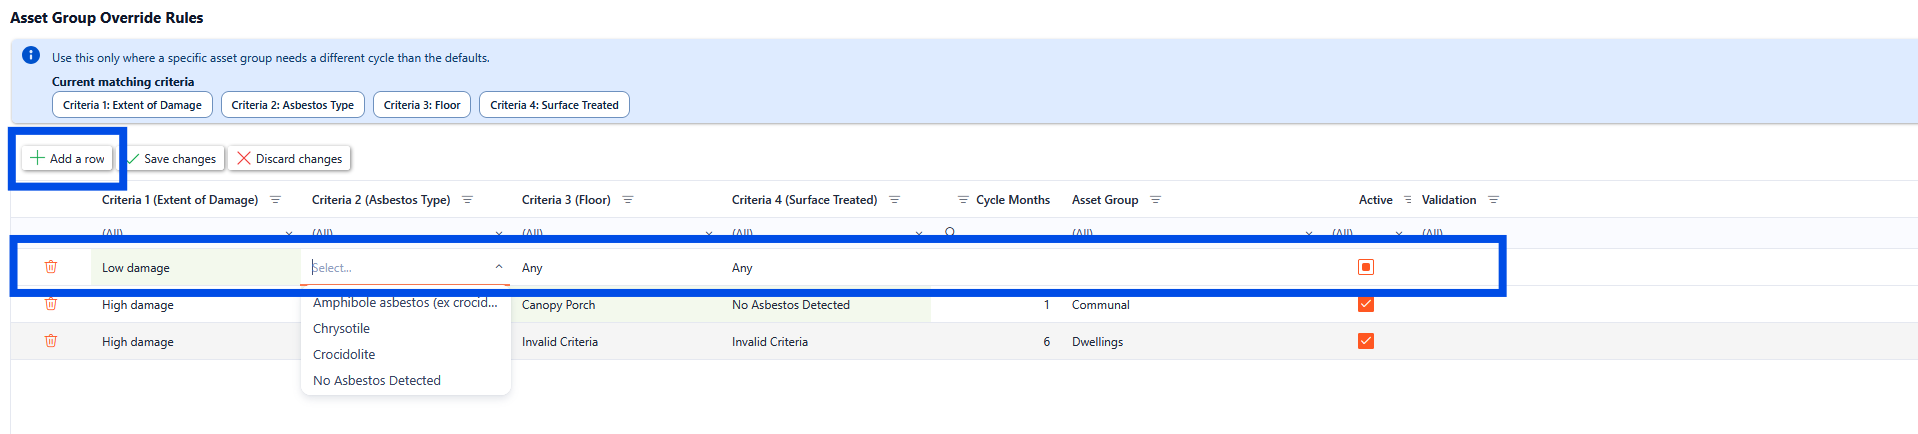
To add a new Asset Type Group Override Rule, click the Add a row button. A new record will appear. Complete the relevant records as required and click the Save Changes button.
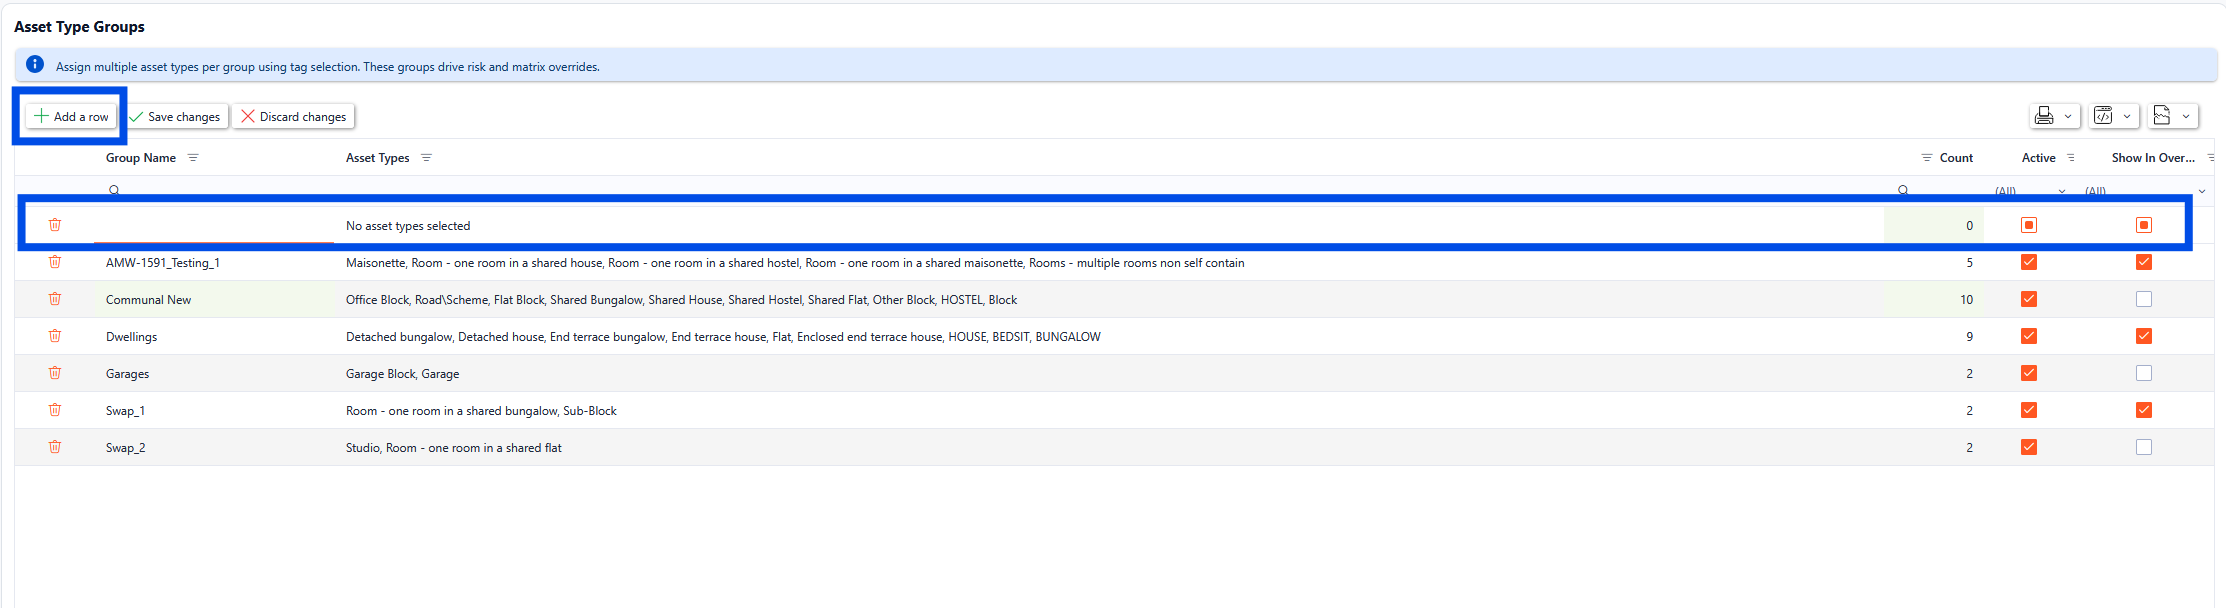
Asset Type Groups
The Risk & Reinspections Asset type Groups tab is where Asset Type Groups can be configured for the Asbestos function.
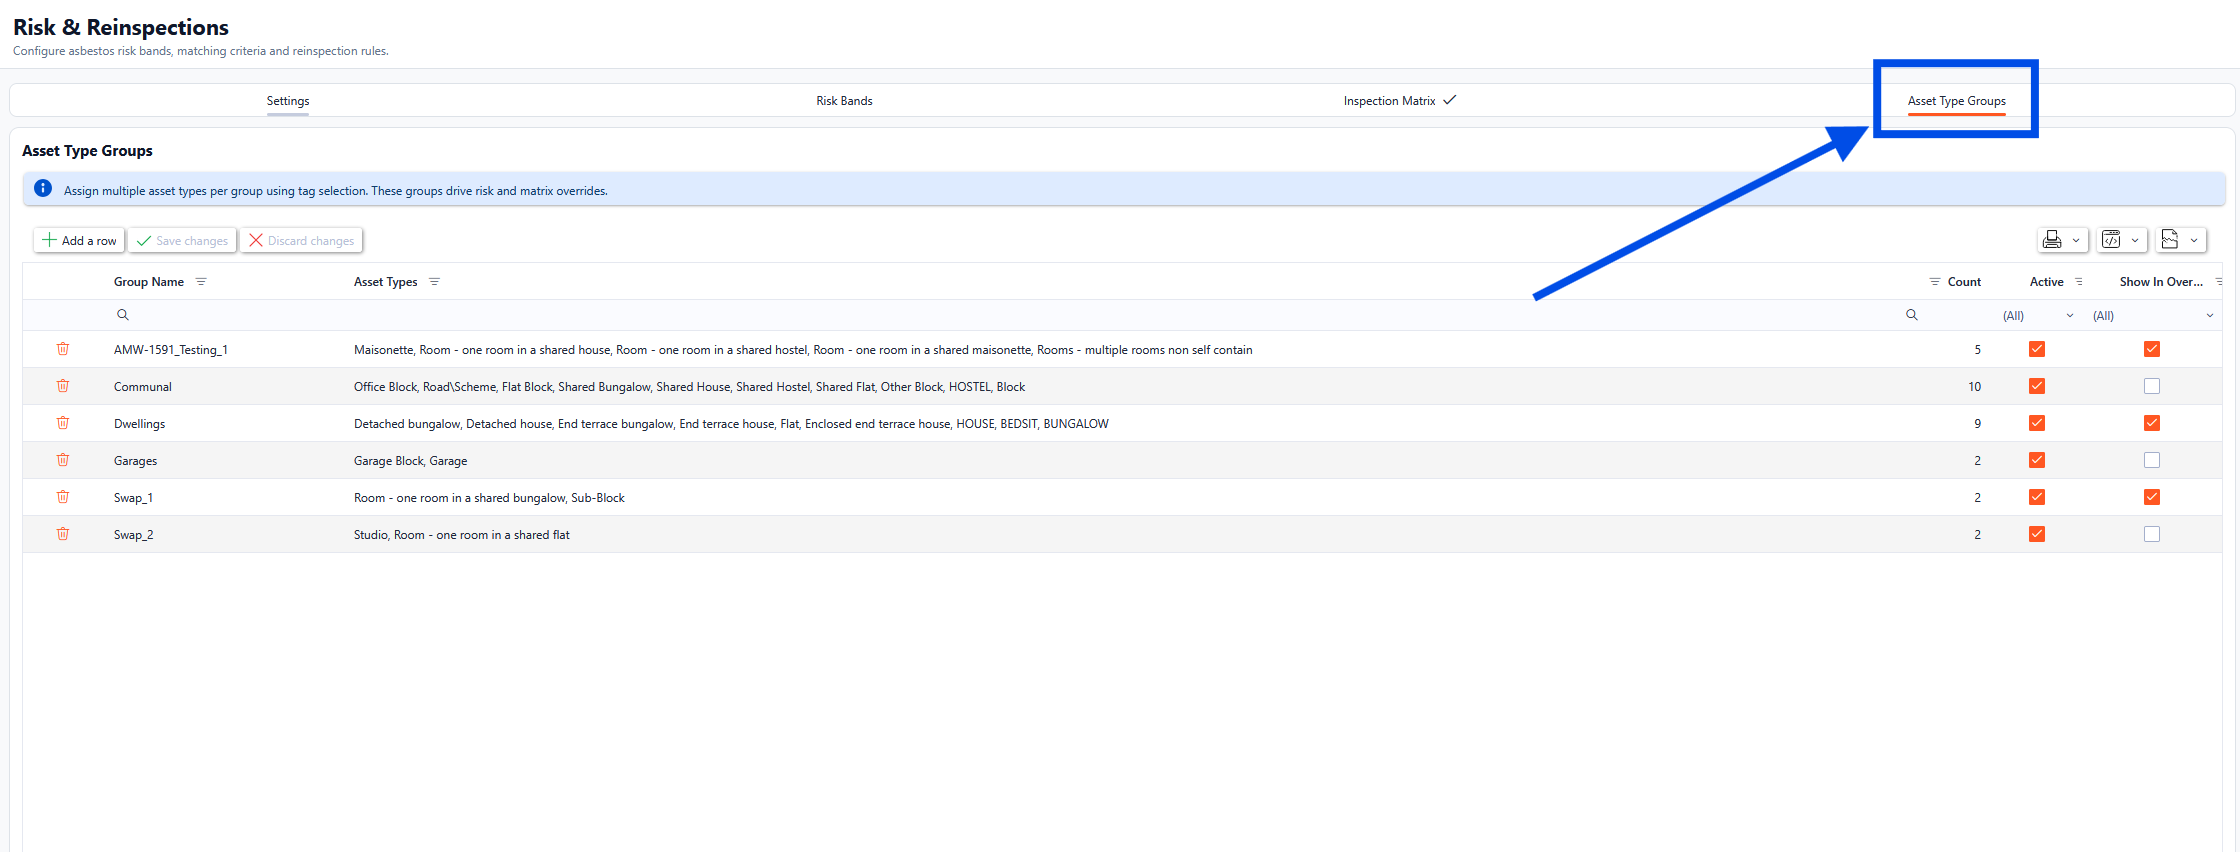
From here, users can assign multiple asset types per group using tag selection. These groups drive risk and matrix overrides.
To edit any of the existing rows, select the field to be updated and type the new values in place (these will highlight in green until saved), once all the relevant information has been updated, click the Save Changes button.
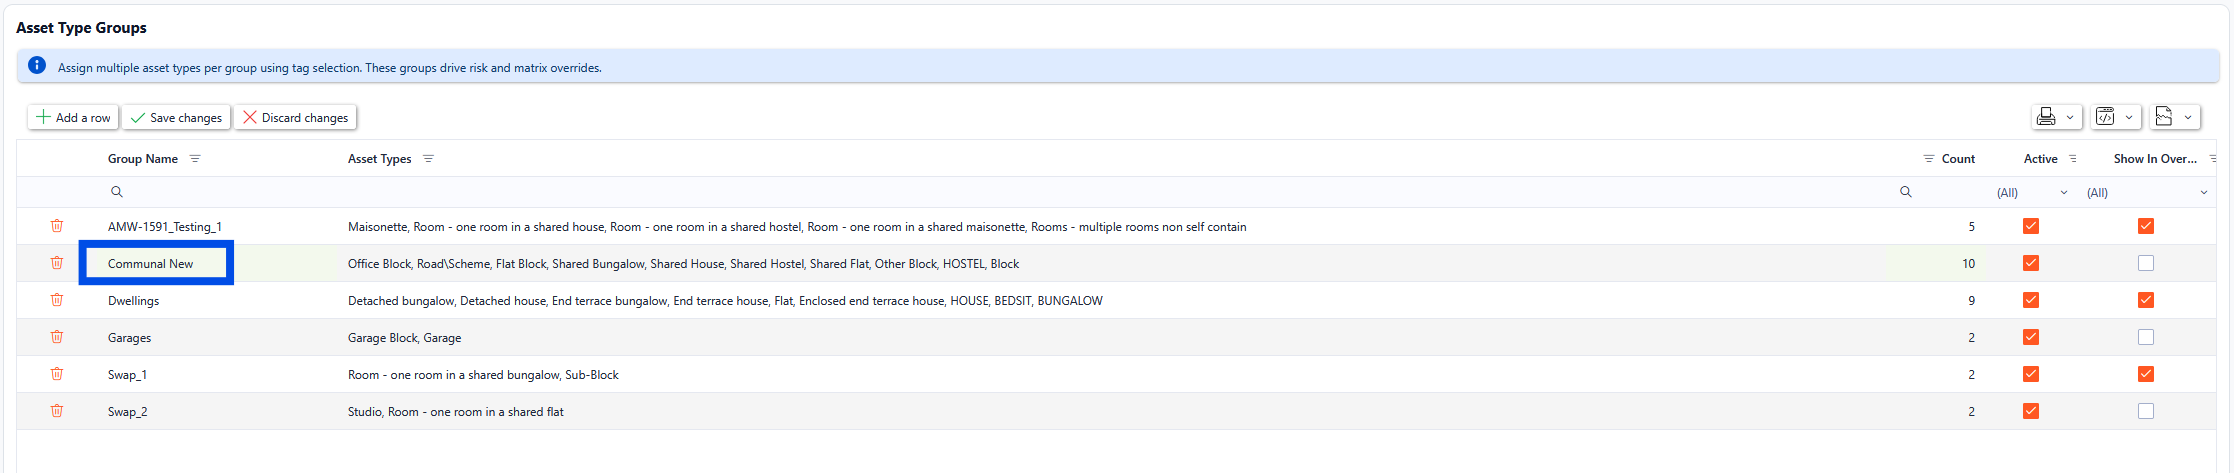
To add a new Asset Type Group, click the Add a row button. A new record will appear. Complete the relevant records as required and click the Save Changes button.