
Compliance Actions (My / All)
The All Actions and My Actions pages behave in the same way, with different views, one shows ALL actions for compliance, and the other only showing MY ACTIONS that are assigned to your user profile or Team. The view shows a grid with all the actions. By default, it shows all the Active actions, but these can be filtered at the top to the required status. The scope button allows for viewing your own actions Mine or those within the Team you are a part of My Team.
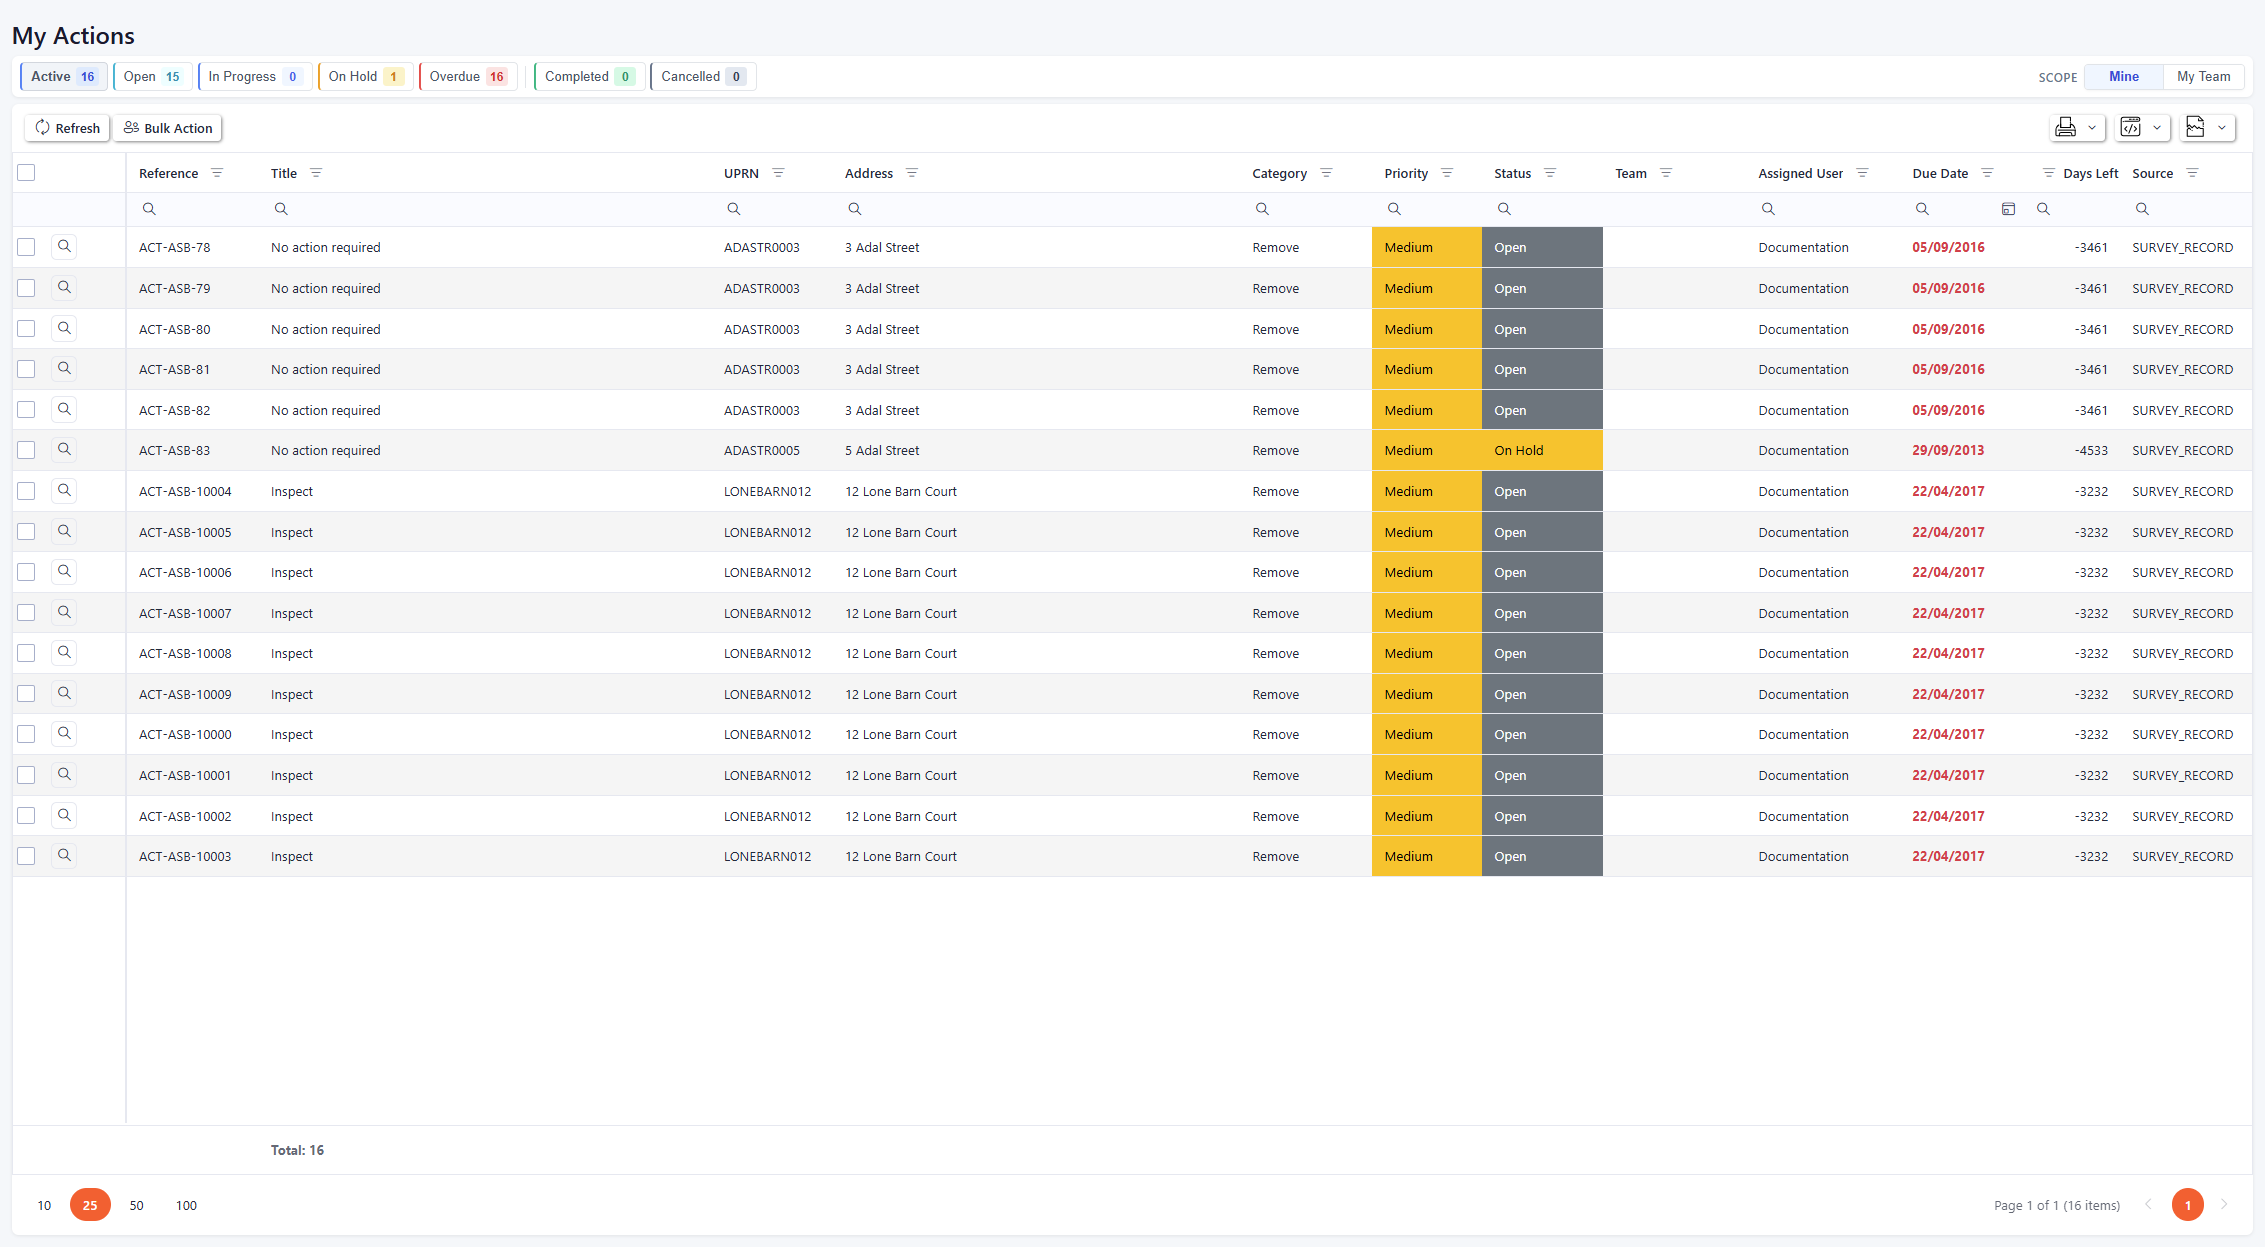
My Actions Page
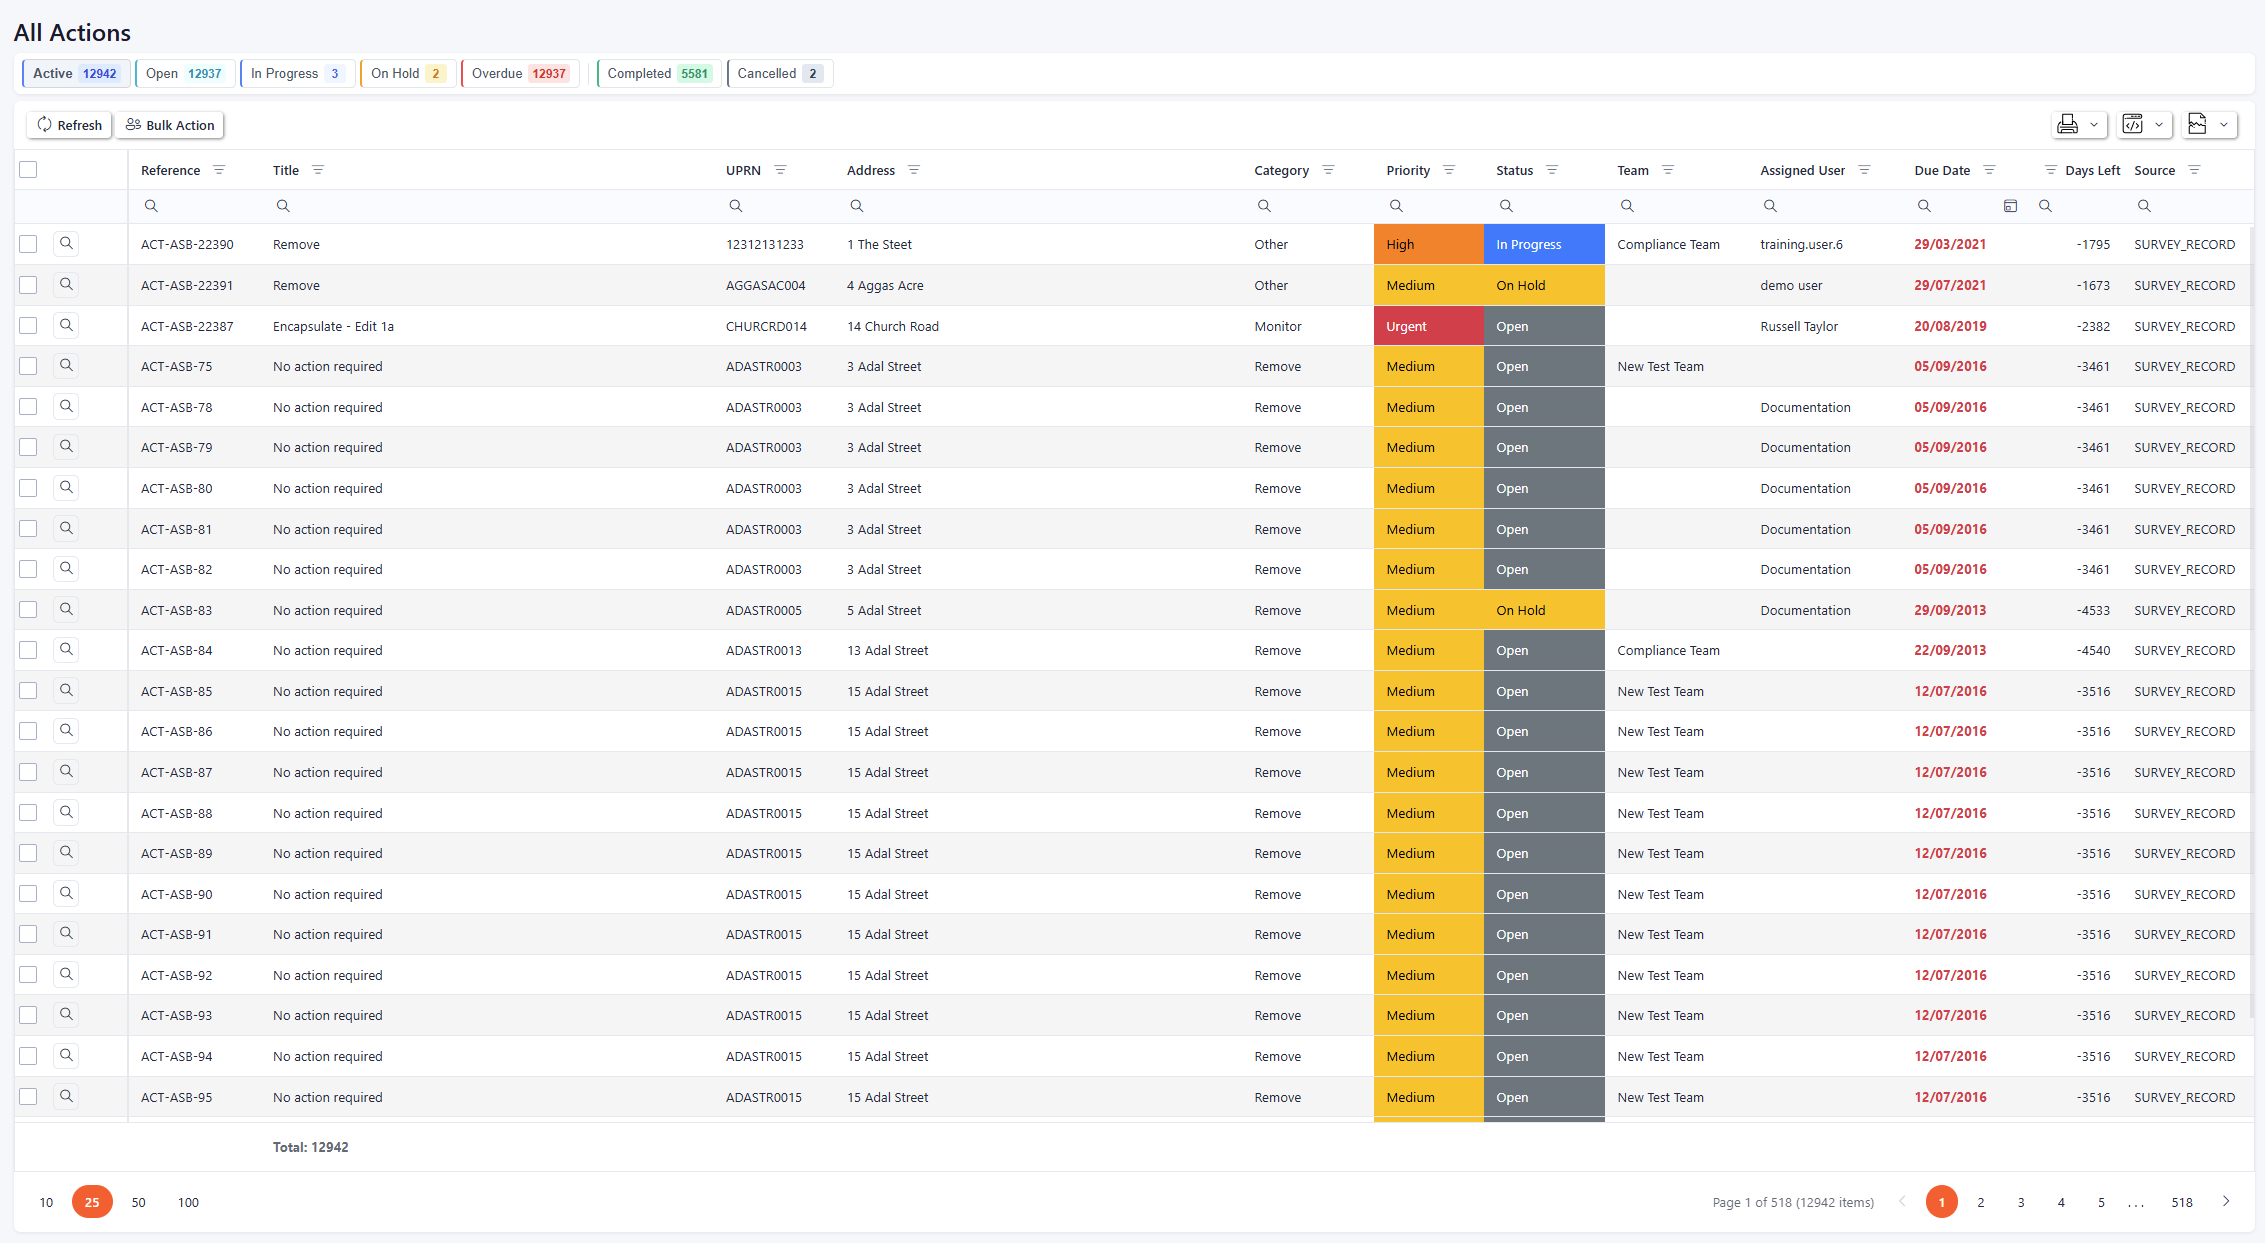
All Actions Page
The header bar has all the status options available with the count of actions per status. Clicking on these will filter the view of the grid to show the relevant actions for that status.

Actions status bar
Viewing an Action from the My Actions/All Actions screen
To view an action from the My/All Actions screen, click on the magnifying glass in the desired row. This will open up a pop-up with the action details.
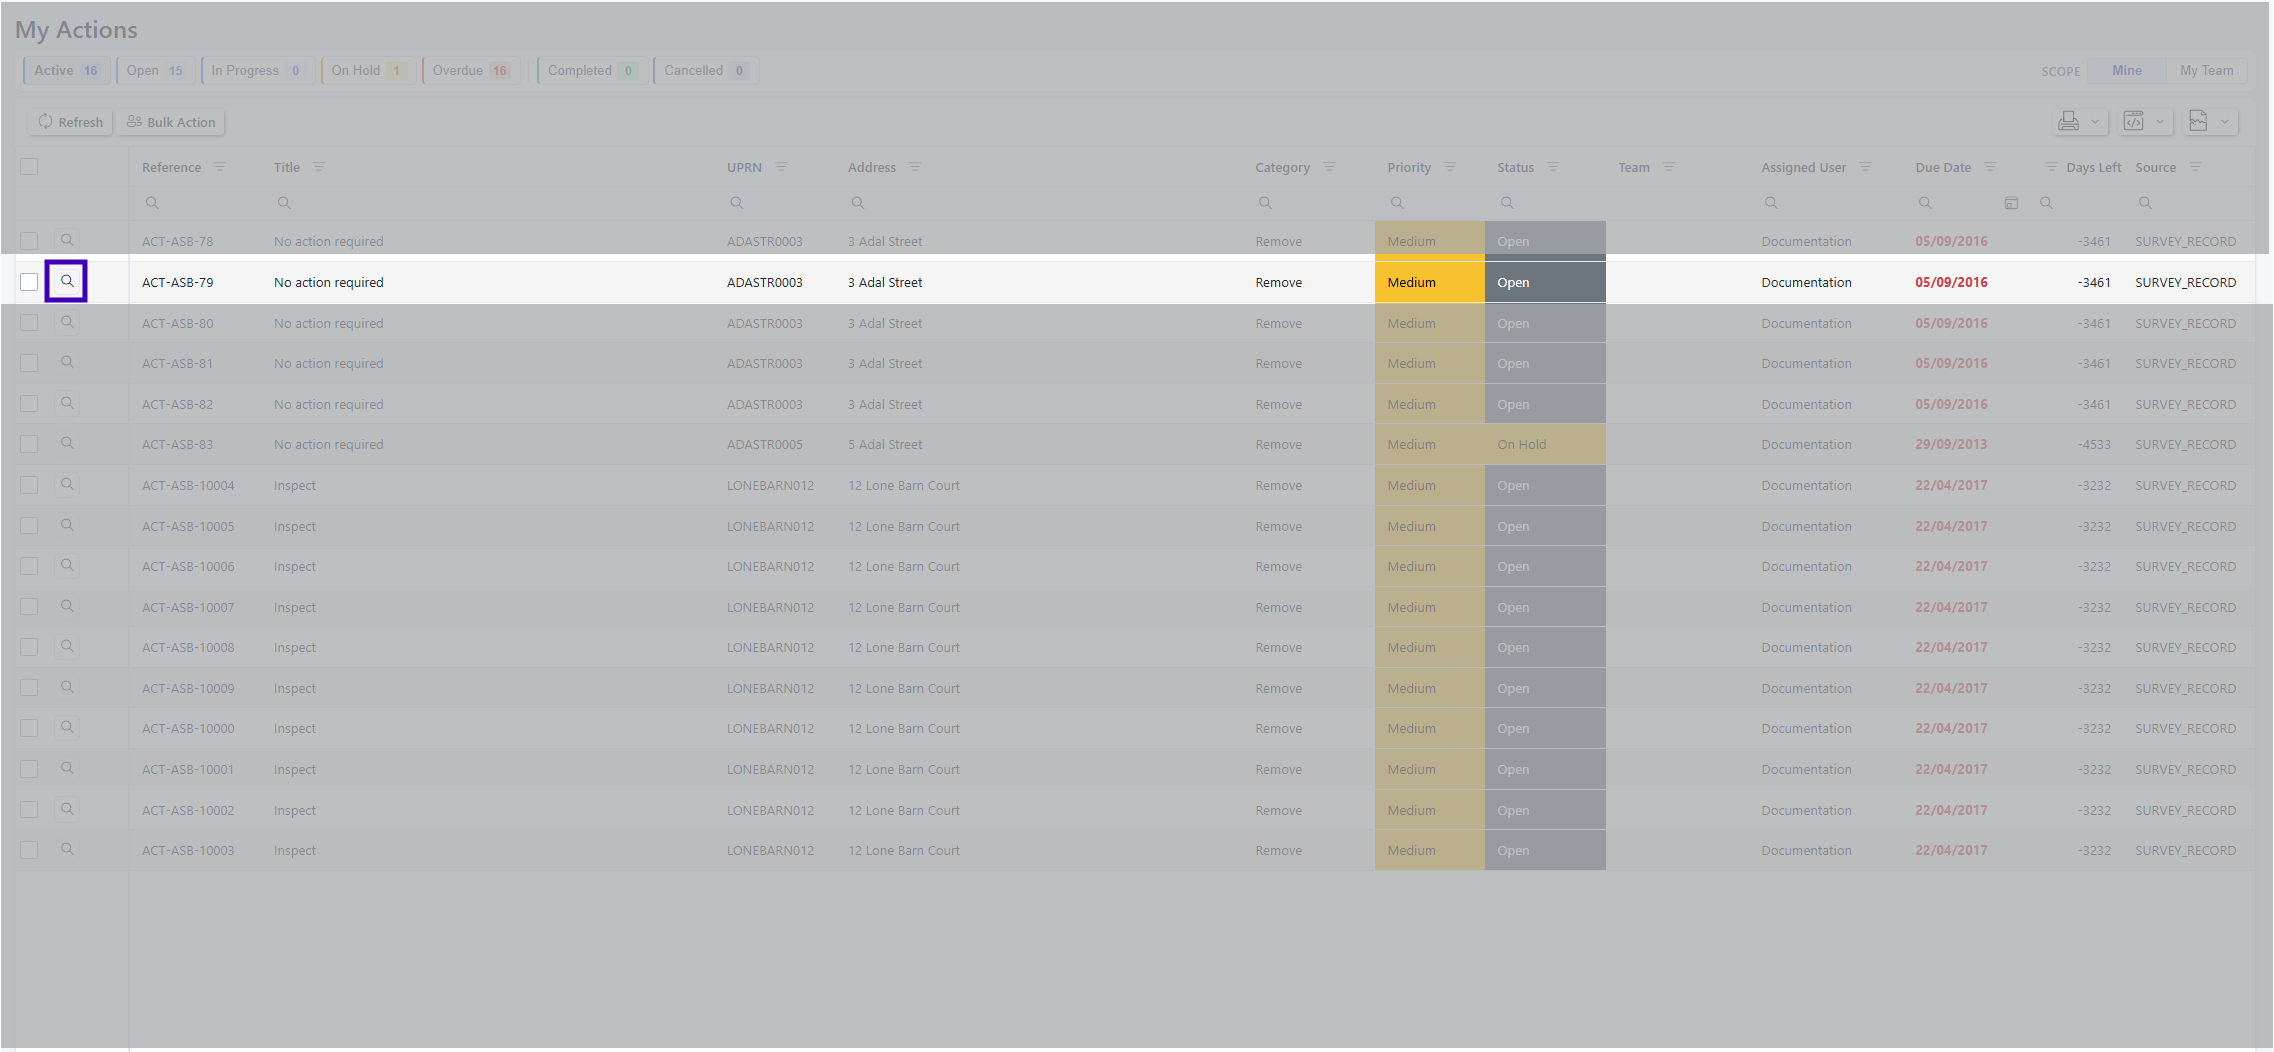
Navigating to view an action record
The Action pop up screen shows all the relevant information about the action with the Action reference in the header and the current status easily visible in the top left-hand corner. The first page of the pop up is the details page with further tabs for Associations, Documents, Notes, Pause History and Audit History. There is a quick access button to start work, in the top right-hand corner which updates that status of the action to In Progress when clicked.
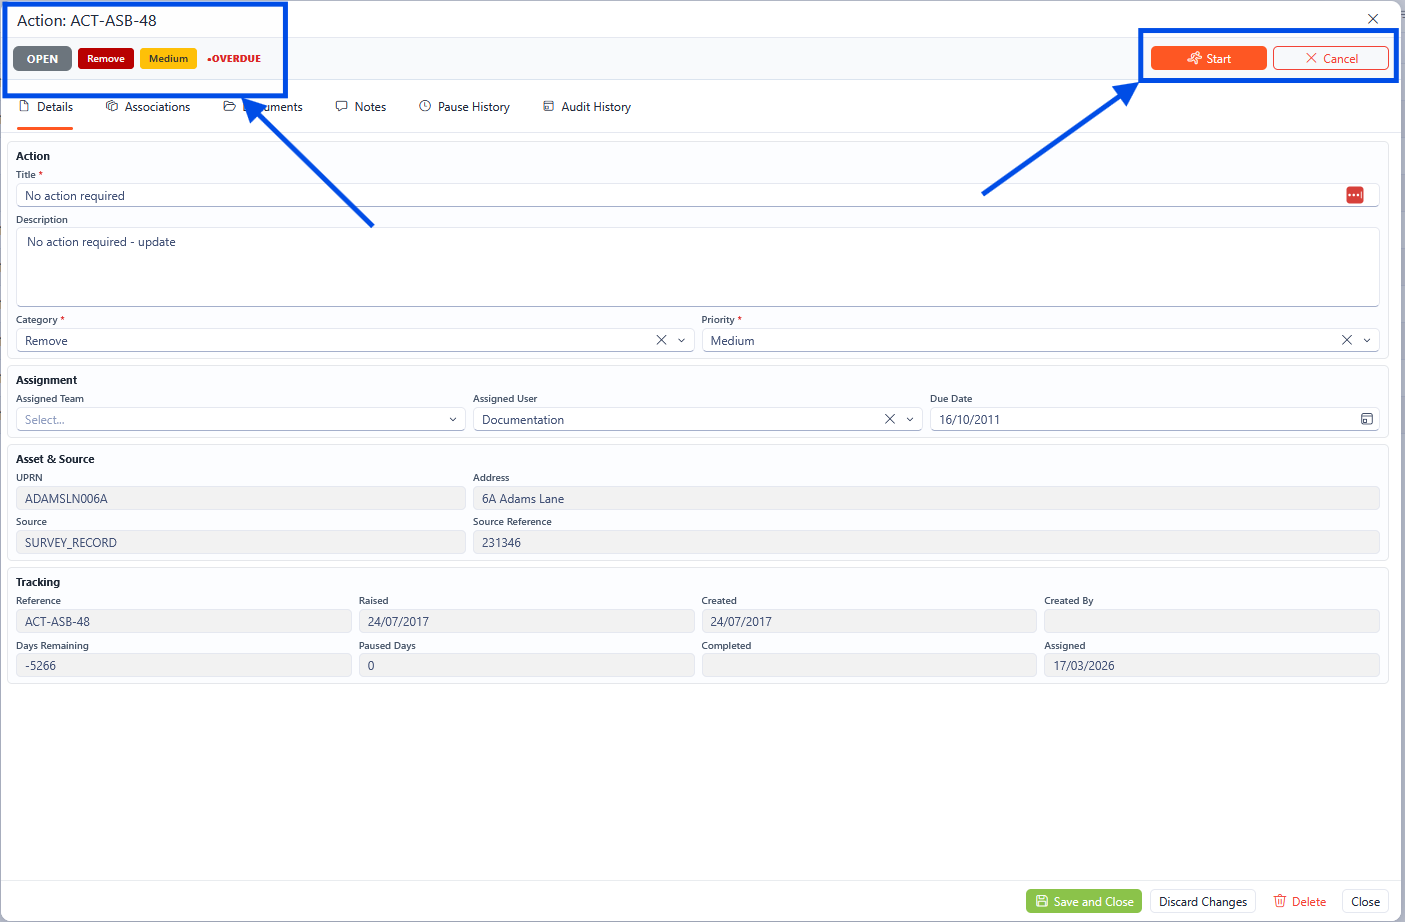
Actions Screen Overview
Updating the Status
To update the status of the action, click the Start button in the top right-hand corner.

The change status area
This will then update the current status to In Progress.
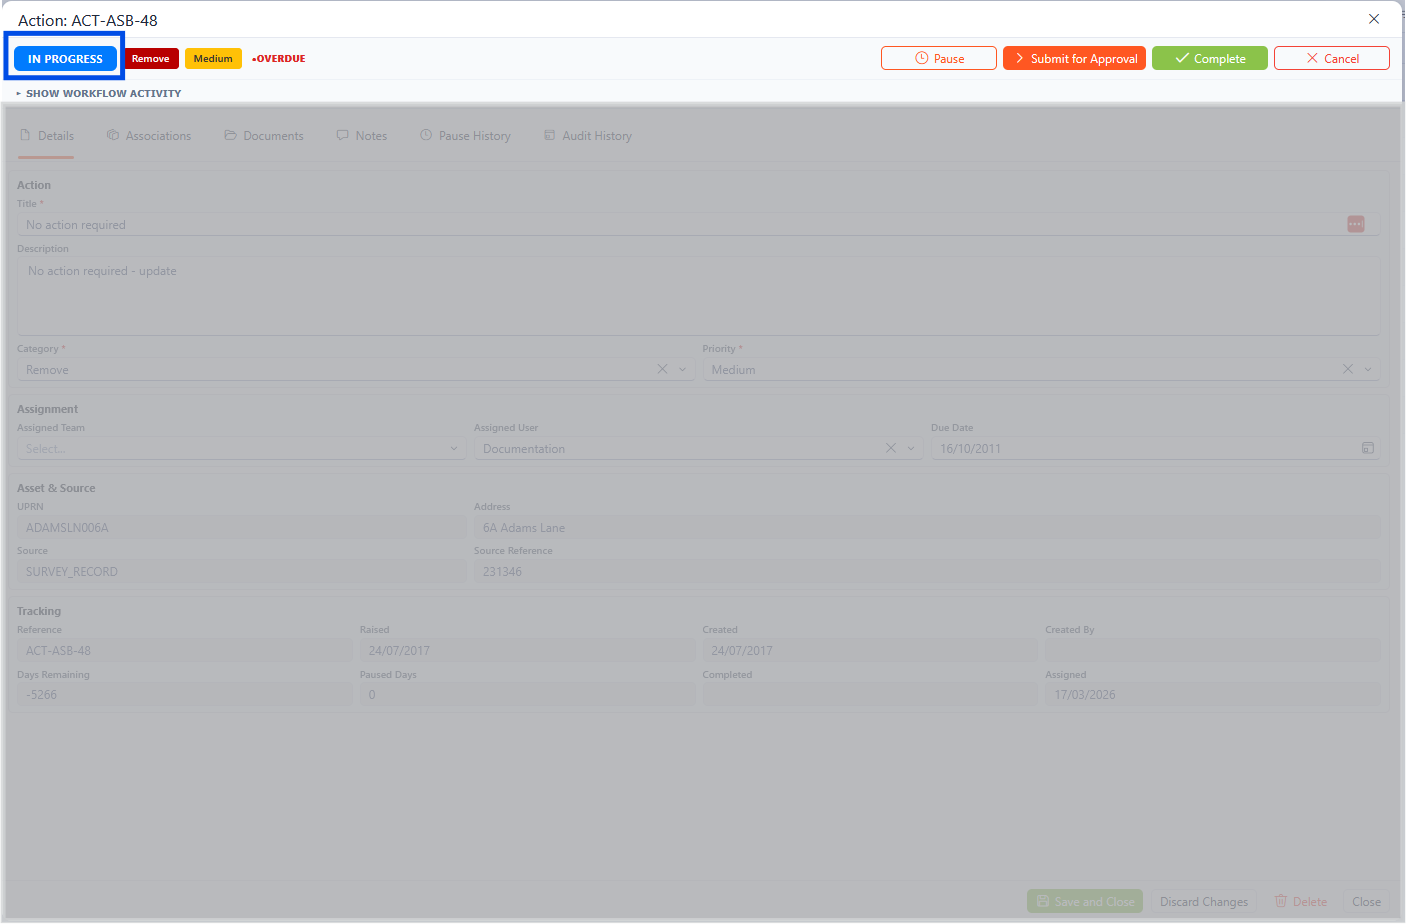
The Action Page with the current status shown in the top left-hand corner
The top right-hand corner options will change once it is In Progress. The options available are to Pause, Submit for Approval, Mark Complete and Cancel Action.

The Change Status Area
Pausing an Action
When an Action is In Progress it is possible to pause the status by clicking the Pause button which will change the status to On Hold.
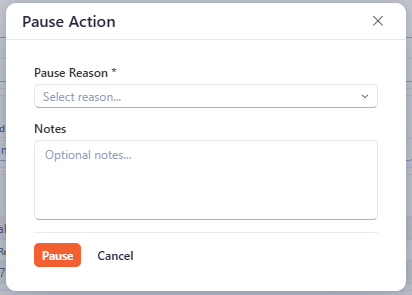
The pause Action reason pop-up
To pause and action, a reason is required, which can be selected from the drop down. Further details can be provided in the notes section.
This will update the status to On Hold in the top left-hand corner and will provide different options in the top right-hand corner accordingly.
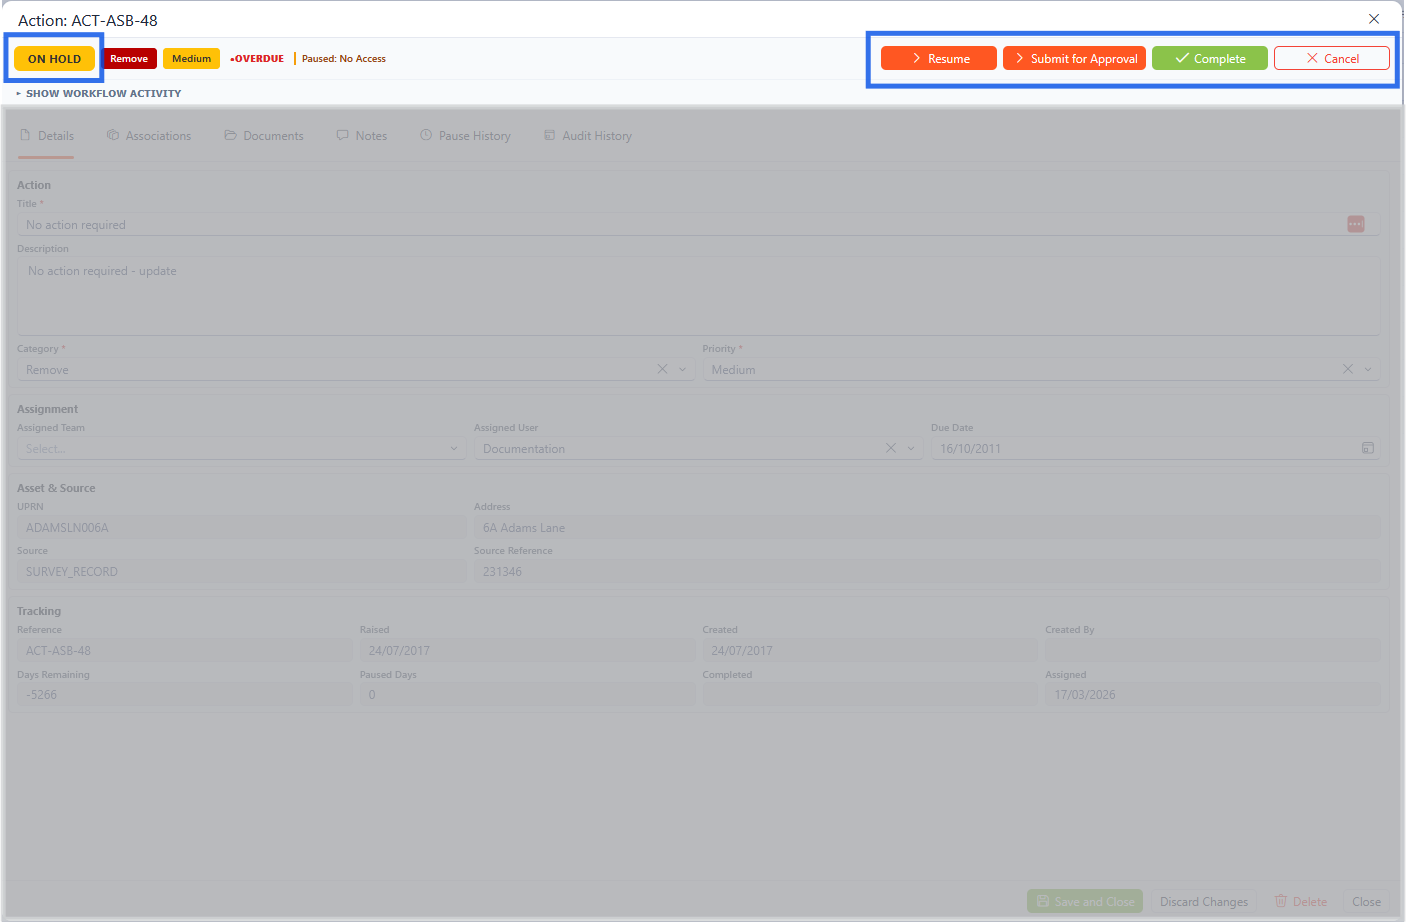
The change status and current status areas highlighted
Resuming Work
When the status of the action is set to On Hold, the work can be resumed by clicking the Resume button in the top right-hand corner.

The change status area
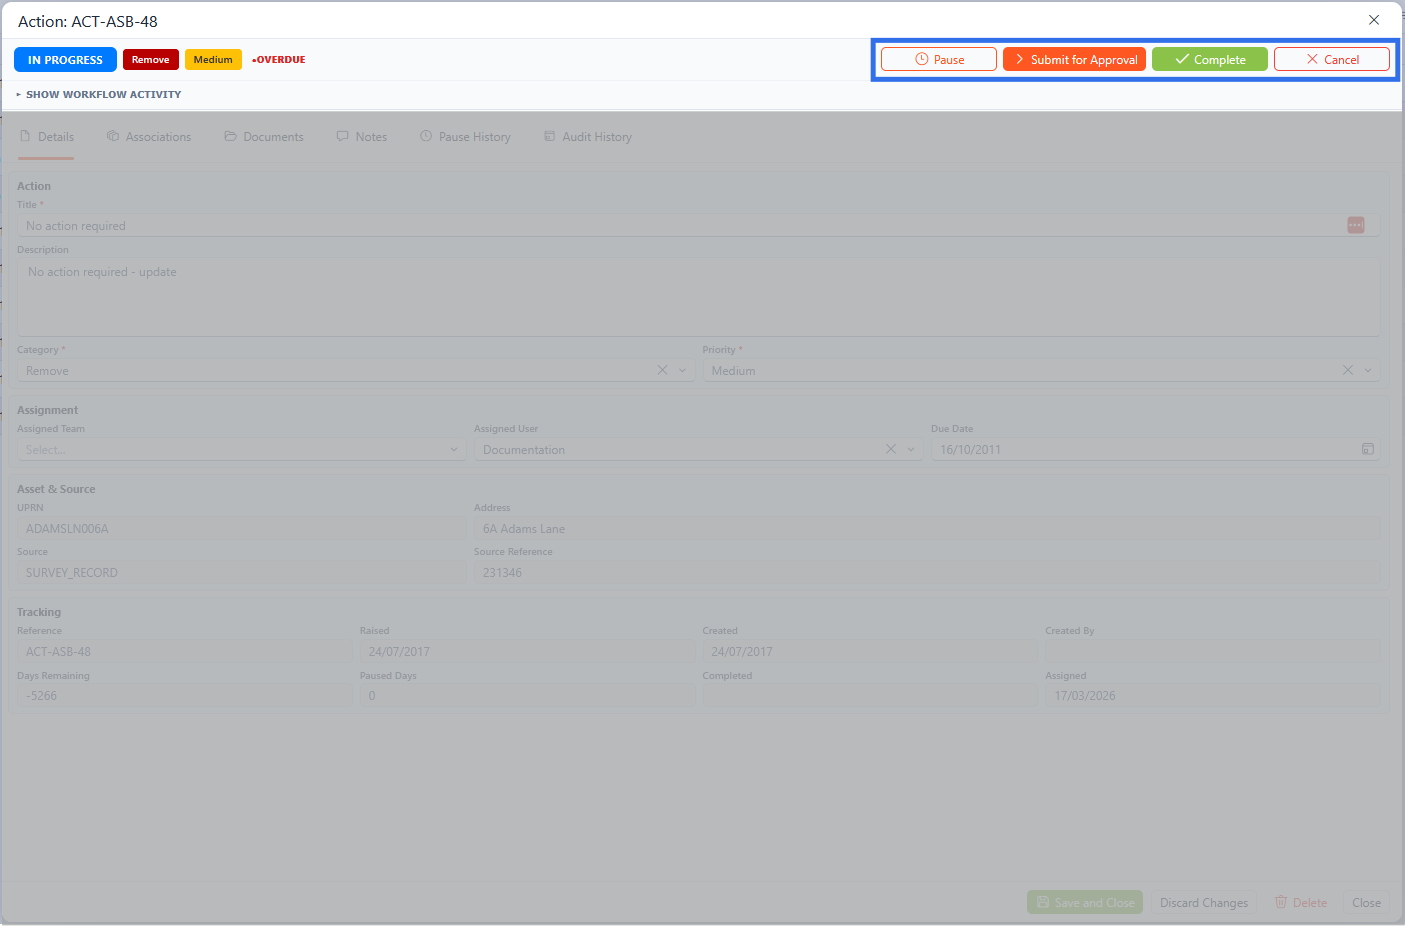
Clicking this will update the status to In Progress.
Completing an Action
To complete an action, click the Complete button in the top right-hand corner. The work does not have to be in progress to mark as complete.
The change status section of the Action page in the top right-hand corner
When the Complete button is clicked, a pop-up dialogue box will appear to provide further information and link a document (optional).
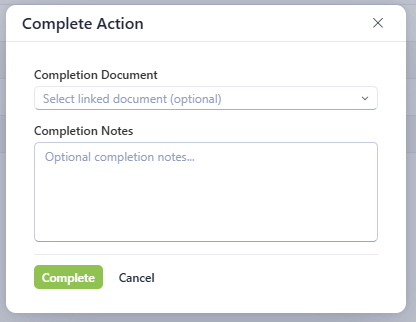
The Complete Action Dialogue box
Once the relevant information is entered, click the Complete button. This will then mark the action as complete.
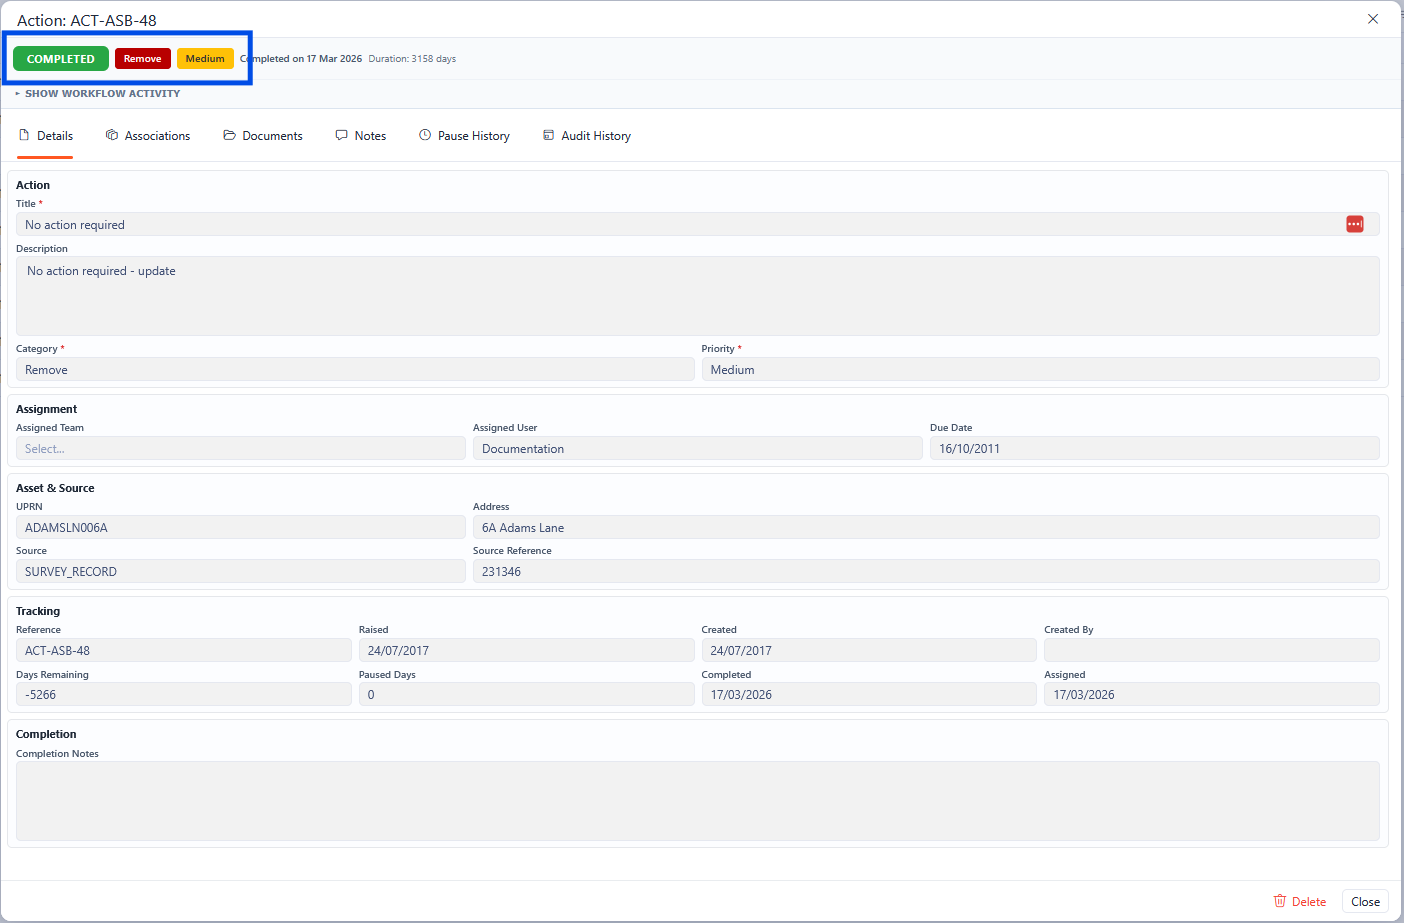
The Action page with the current status shown in the top left-hand corner
Once the Action is complete, the data can no longer be updated.
Cancelling an Action
To cancel an action, click the Cancel button in the top right-hand corner.
The change status area
When the cancel action button is pressed, a popup dialogue box appears. A note is required when cancelling an action. Once the note is completed, click the Cancel Action button to confirm cancelling the action.
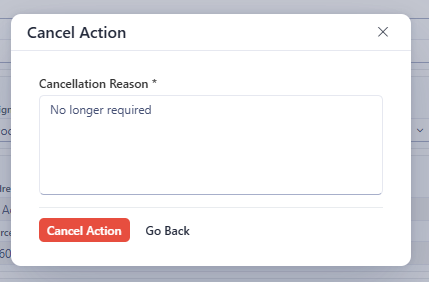
The pop-up to show the cancellation reason before cancelling the action.
This will update the status to Cancelled.
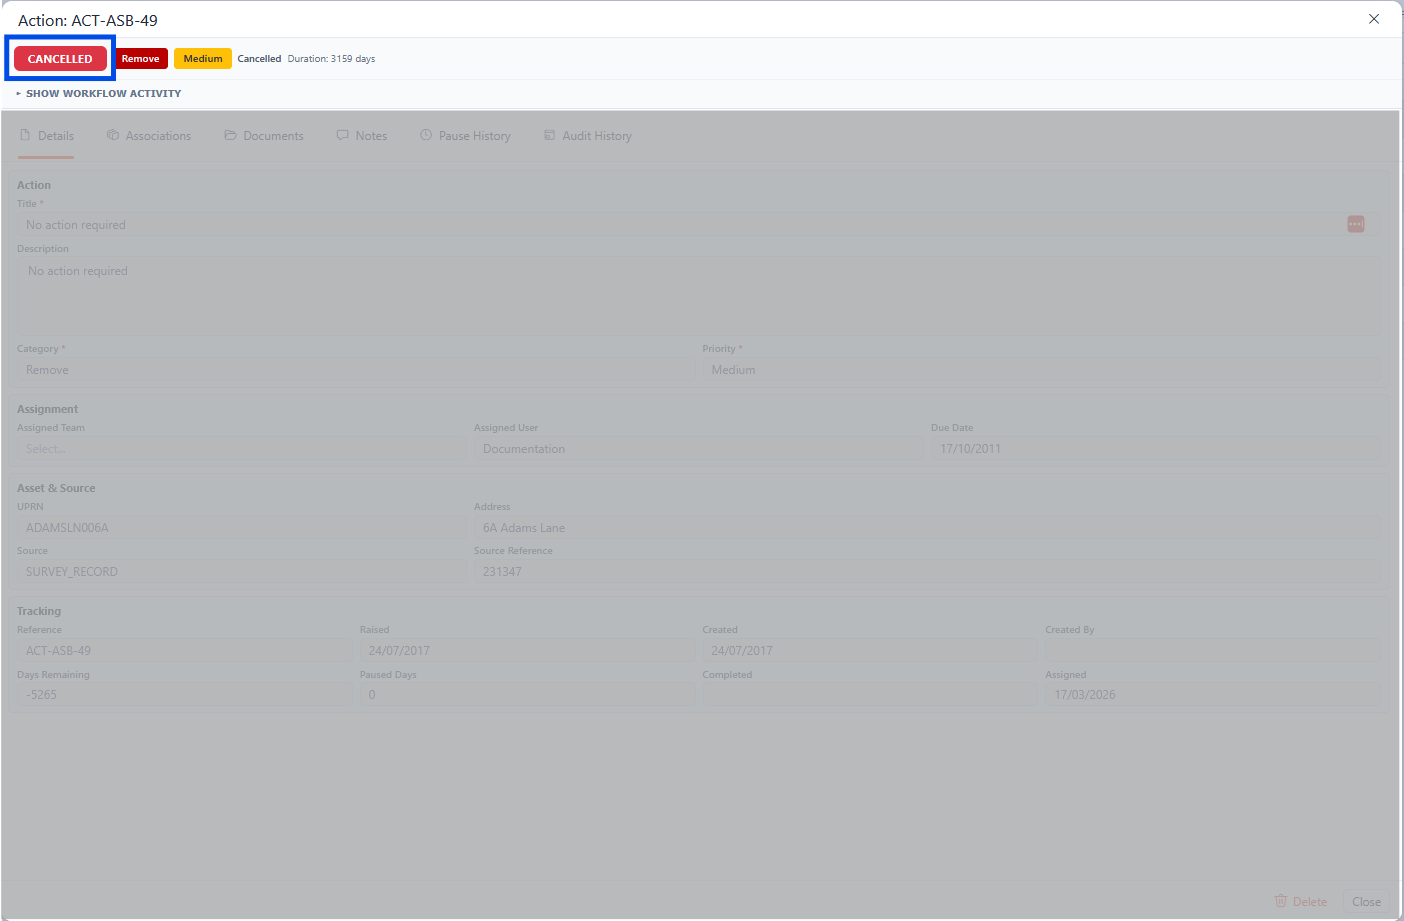
The updated status to cancelled in the Action Page
Action Details
The Action Details tab shows all the relevant information about the action, which with relevant permissions can be updated within this screen.
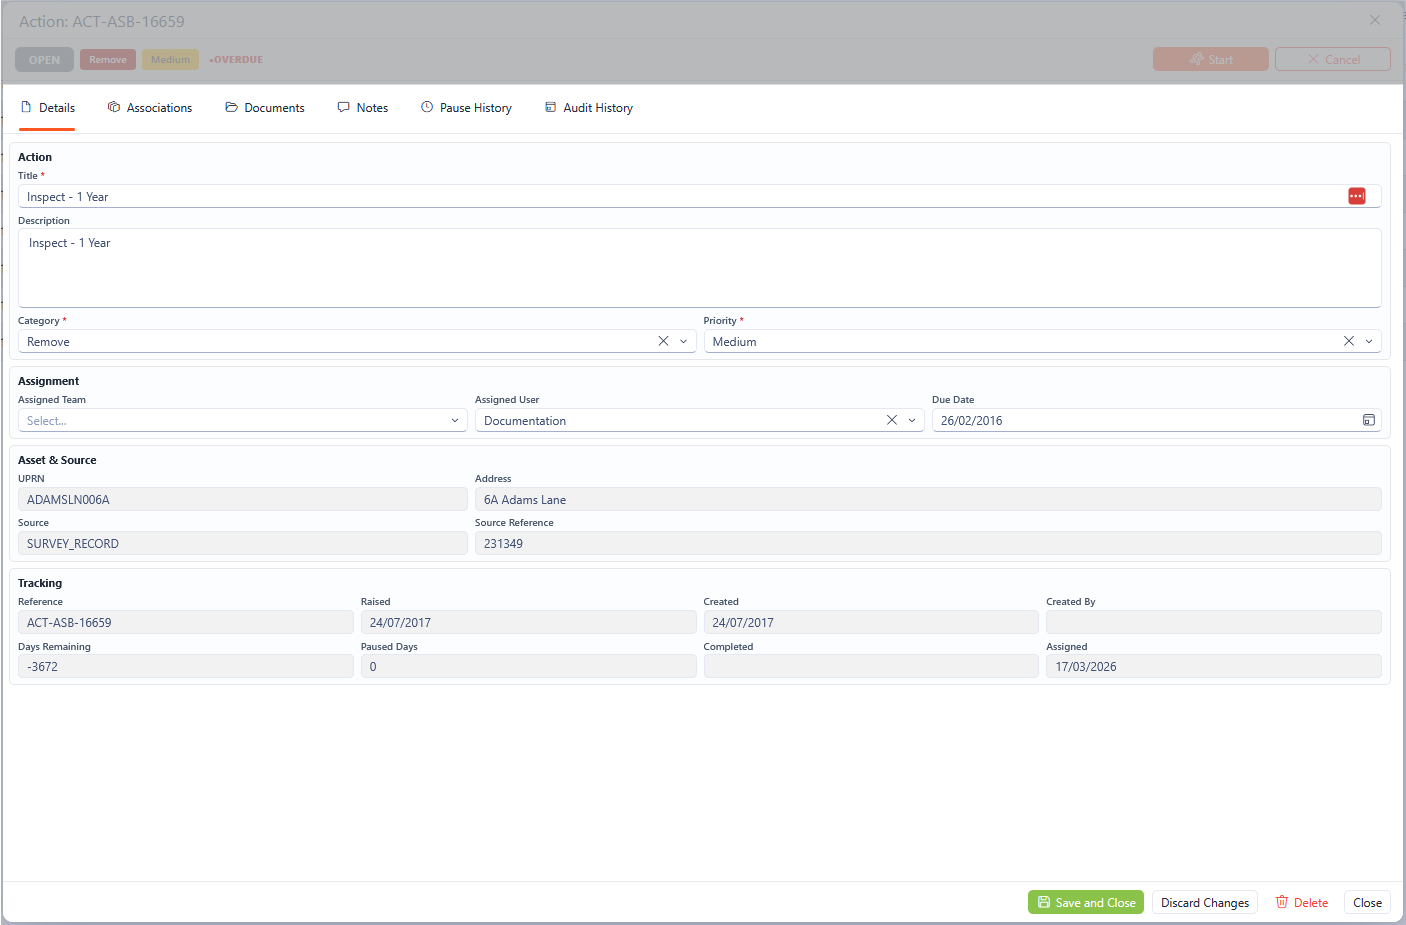
Details section of the Action screen
The details screen shows information on the Action, Assignment, Asset & Source, and Tracking to give pertinent information about the action.
Action
Within the action section, it is possible to view/edit the Title, Description, Category and Priority of the Action.

Action Section of the Action screen
Field | Field Type | Required | Description |
|---|---|---|---|
Title | Free Text | Yes | The title of the action to give a summary of the action |
Description | Free Text | This allows for further detail to be added about the action. | |
Category | Drop Down | Yes | This shows the category of the action from a drop-down list. |
Priority | Drop Down | Yes | This shows the priority of the action from a drop-down list. |
Assignment
Within the Assignment section, it is possible to assign the action to a Team or User with a Due Date.

Assignment Section of the Action Screen
Field | Field Type | Required | Description |
|---|---|---|---|
Assigned Team | Drop Down | No | The title of the action to give a summary of the action |
Assigned User | Drop Down | No | This allows for further detail to be added about the action. |
Due Date | Date | No | This shows the category of the action from a drop-down list. |
When assigning a Team, if the current selected user is not part of that team, they will be removed as the assigned user.
Asset & Source
This section is READ ONLY and is for information only, showing the asset UPRN, Address, the source of the Action and the Source Reference,

Asset & Source Section of the Action Screen
Tracking
This section is READ ONLY and is for information only, showing the Reference, the date raised, Date Created and by whom, Days remaining, paused days, completed and assigned date.

Tracking section of the Action Screen
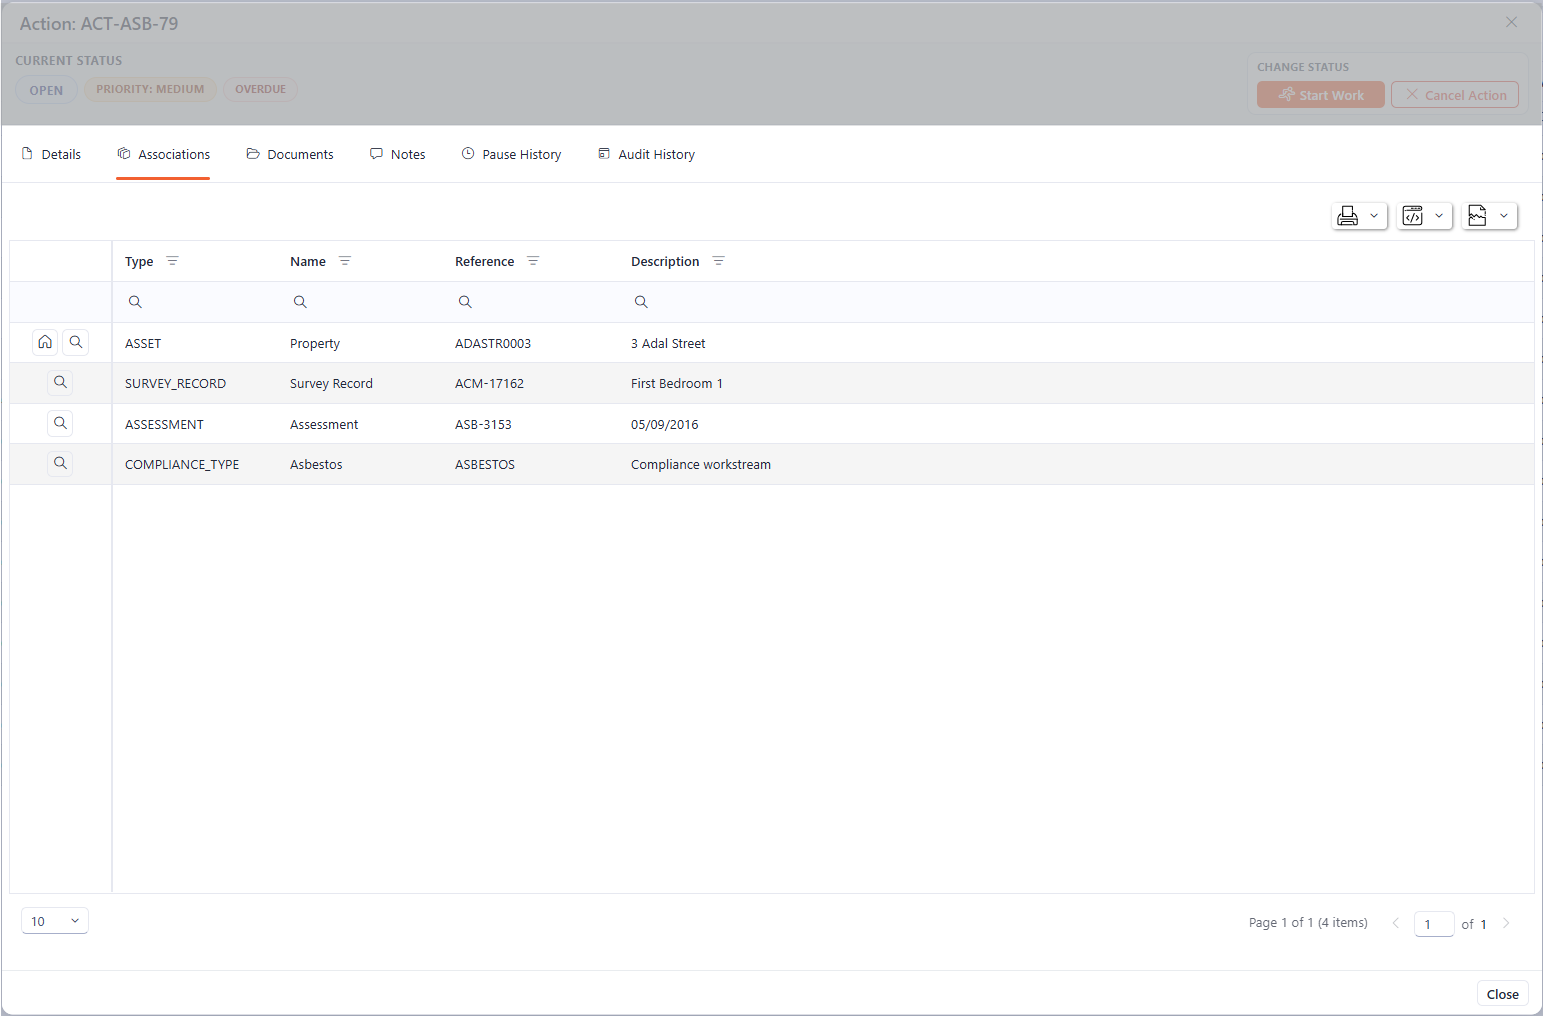
Associations
The Associations tab of the Action screen shows all associations to the current action. The associations tab shows the type, name, reference and description of the association.
Associations tab of the Action screen
Where the association is associated with the Asset, there is an option to drill through to the asset 360 view (the house logo) as well and the asbestos 360 view (the magnifying glass).

The two types of drill through from the associations tab
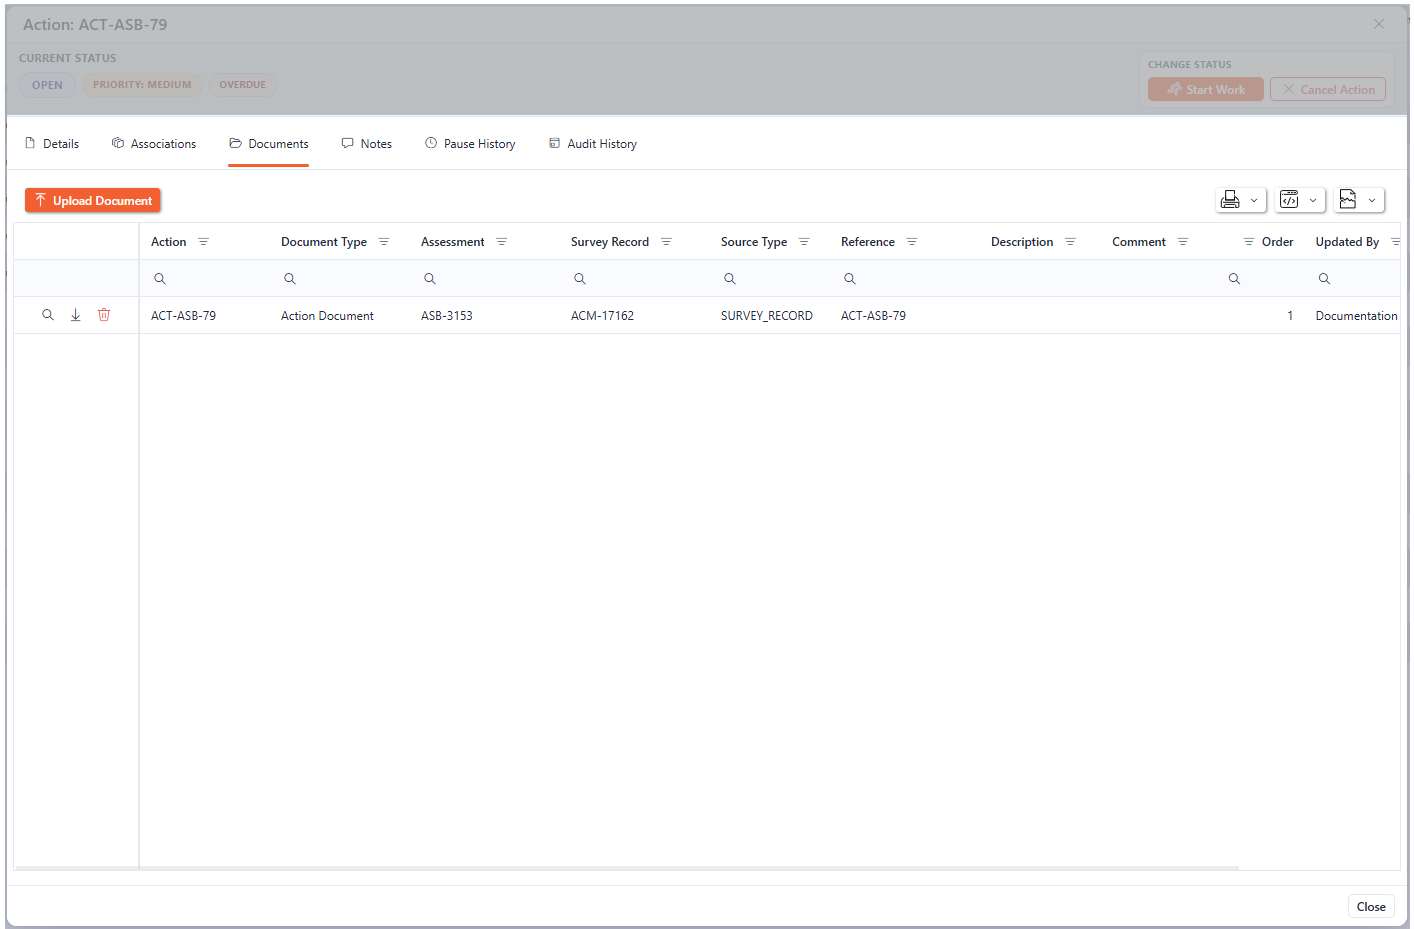
Documents
The documents tab of the action screen shows all documents associated with the action. These can be viewed, downloaded or deleted depending on permissions.
Documents tab of the Actions screen
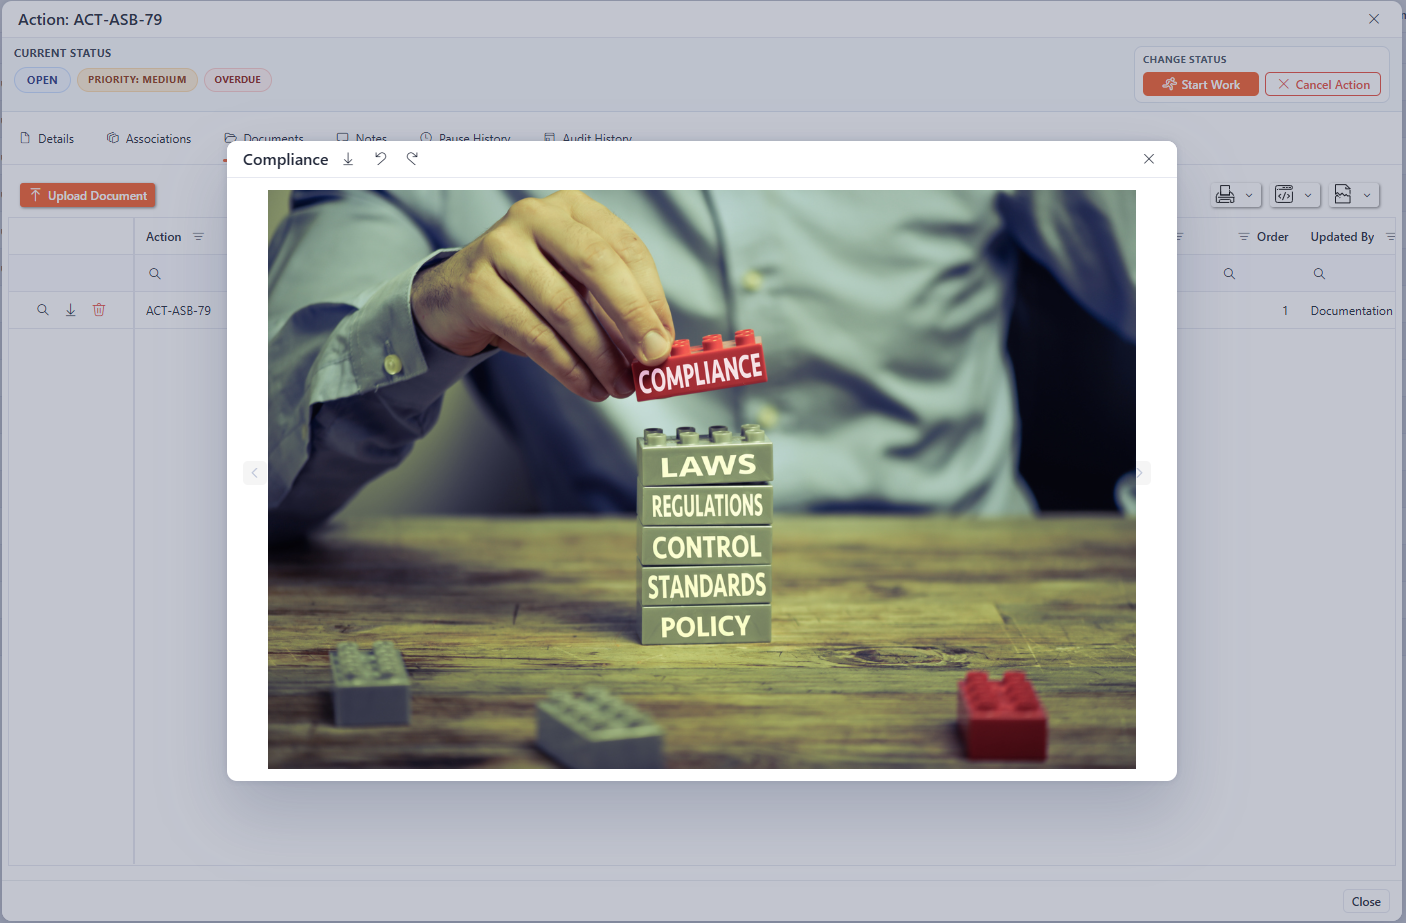
To view a document, click the magnifying glass on the desired record and the document will open up in a separate pop-up screen.

How to view an already uploaded document by clicking the magnifying glass.
This can be rotated or downloaded within the pop-up. To close the pop-up, click the cross in the top right-hand corner.
Viewing an already uploaded document
Uploading a document
To upload a new document associated with the action, click on the “Upload Document” button.
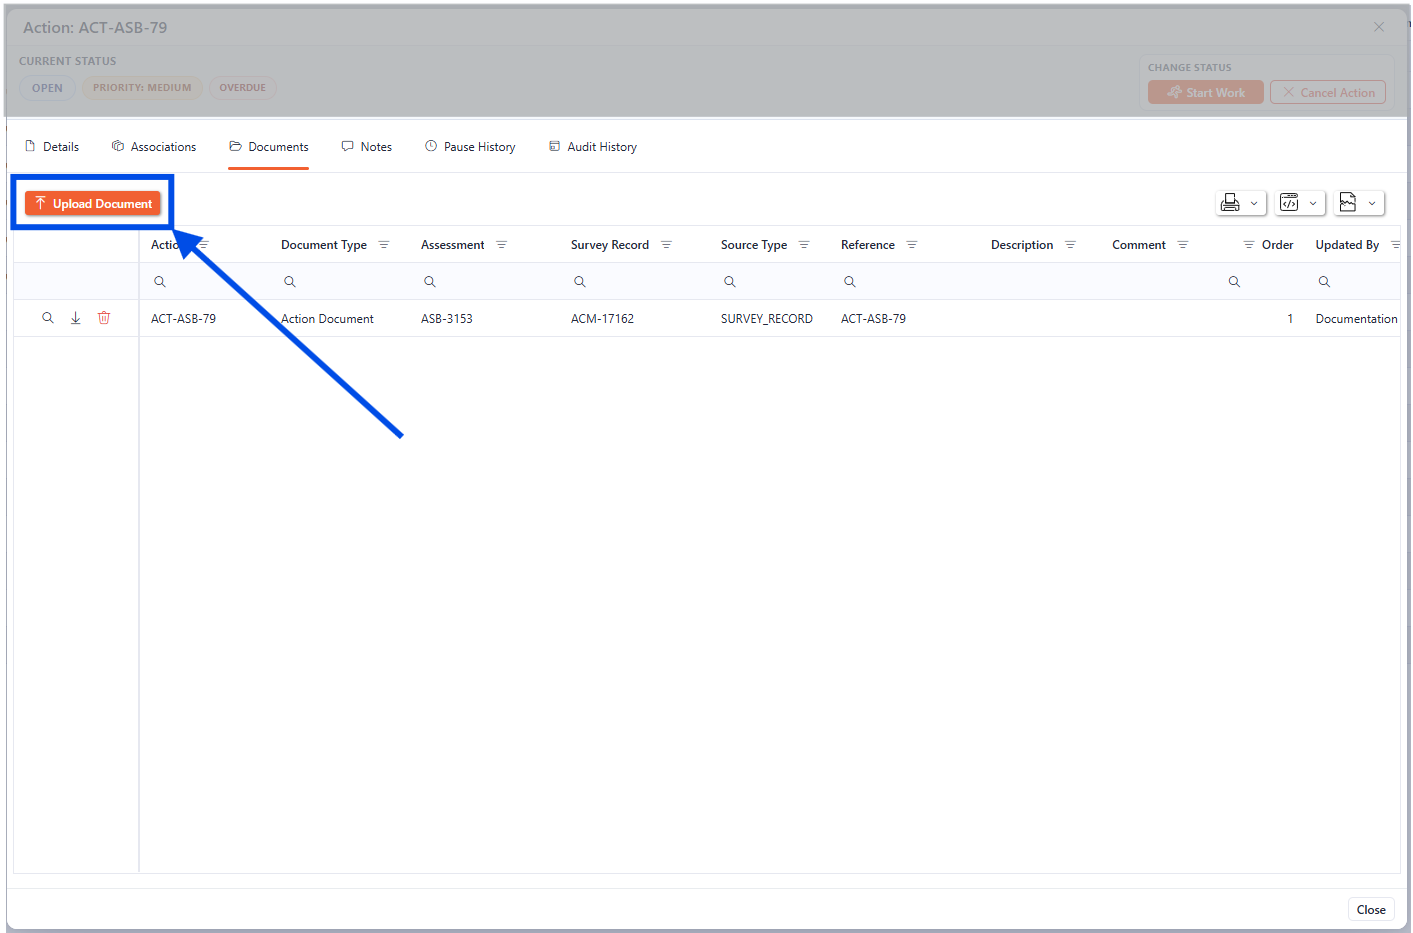
how to upload a document to the documents tab of the Action
An upload dialogue box appears showing the options for uploading.
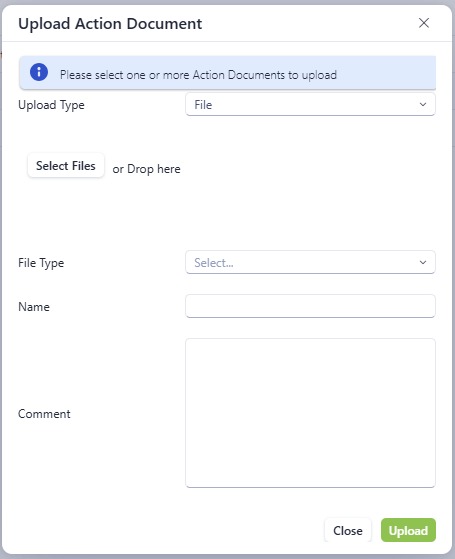
The upload document screen
The following information is required for uploading a document to the action:
Field | Field Type | Required | Description |
|---|---|---|---|
Upload Type | Drop Down | Yes | The file type being uploaded, either a file or a photo. |
Select Files | File | Yes | Use the select files to find the relevant file, or drag the file into the “Drop here” section. |
File Type | Drop Down | Yes | Select the file type to be uploaded. |
Name | Text | Yes | This is the name of the file within Asprey. This will default to the name of the file. |
Comment | Text | No | Place a comment relating to the uploaded document here. |
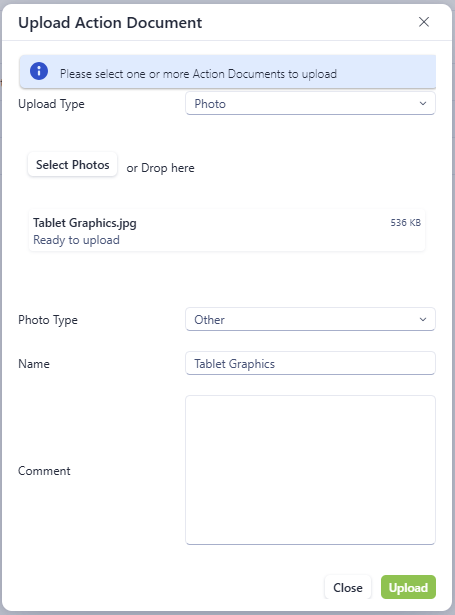
The upload document screen completed with file and information
Once complete, click the “upload” button to save the file to the Action.

The uploaded files for the action
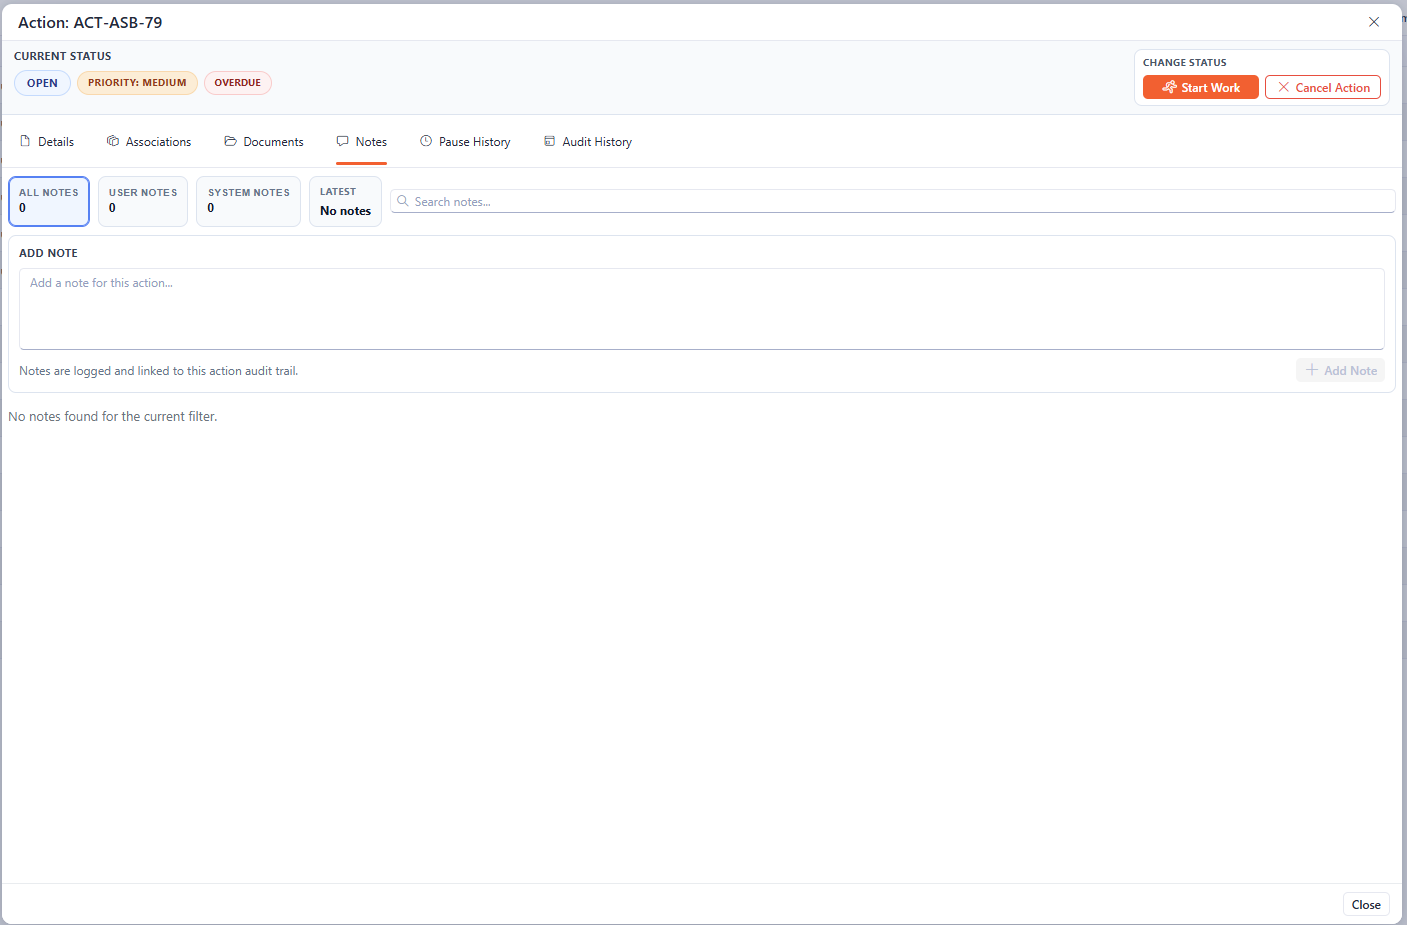
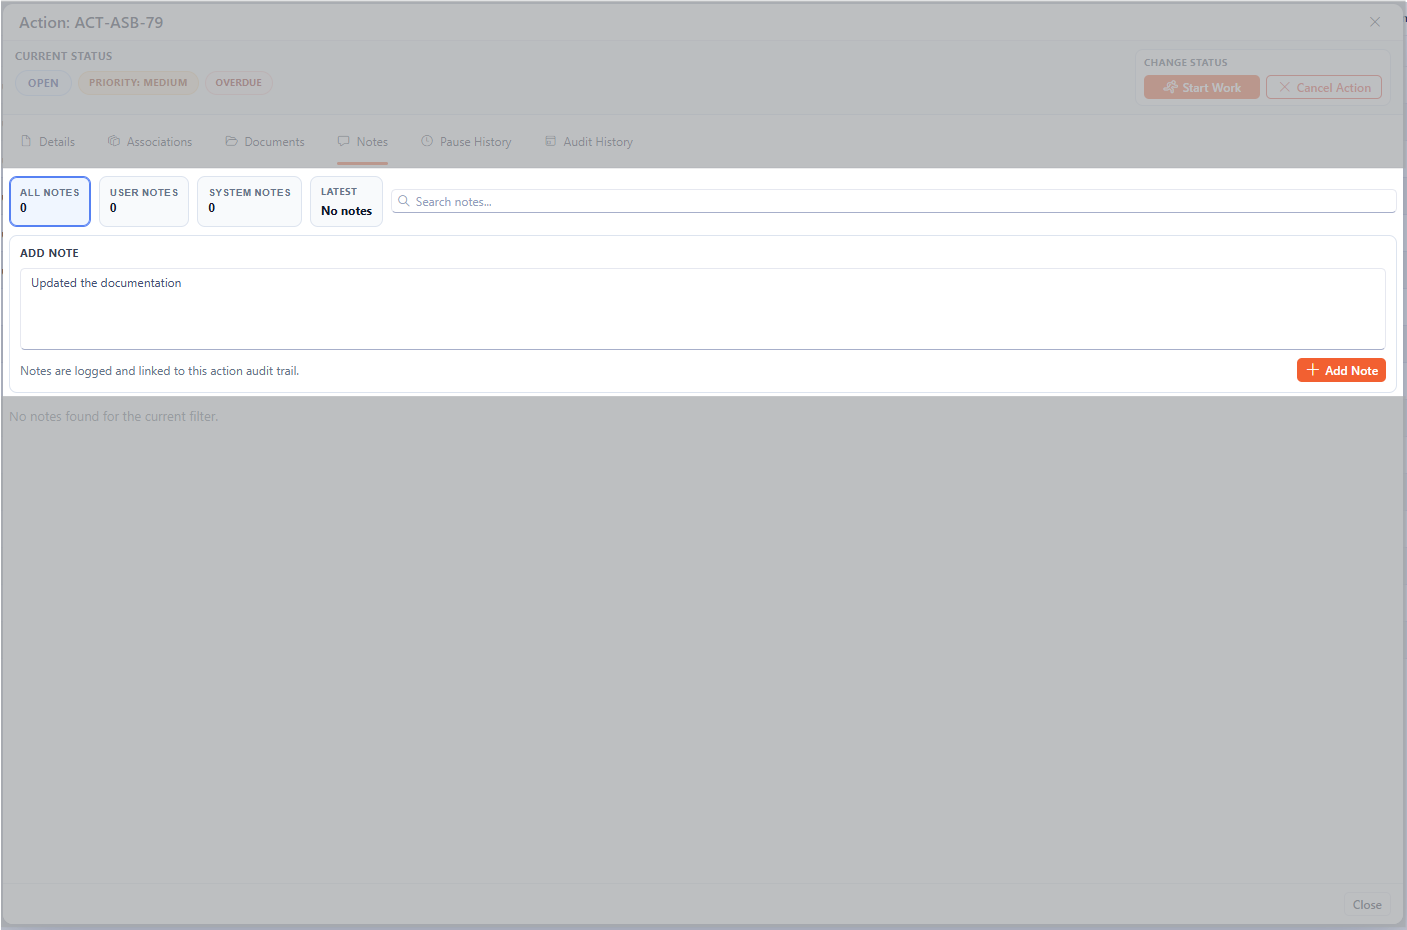
Notes
The notes tab of the actions screen shows the notes associated with the action. By default, this will show all notes, but this can be filtered to show only “User Notes” or “System Notes”.
The Notes section of the Action Details
Adding a new note
To add a new note, start to type the note in the ADD NOTE section of the screen. The Add Note button will highlight orange to indicate that the note can be added. Click this button to save the note to the action.
Adding a note to the Action details
Once saved the note will appear in the lower section.
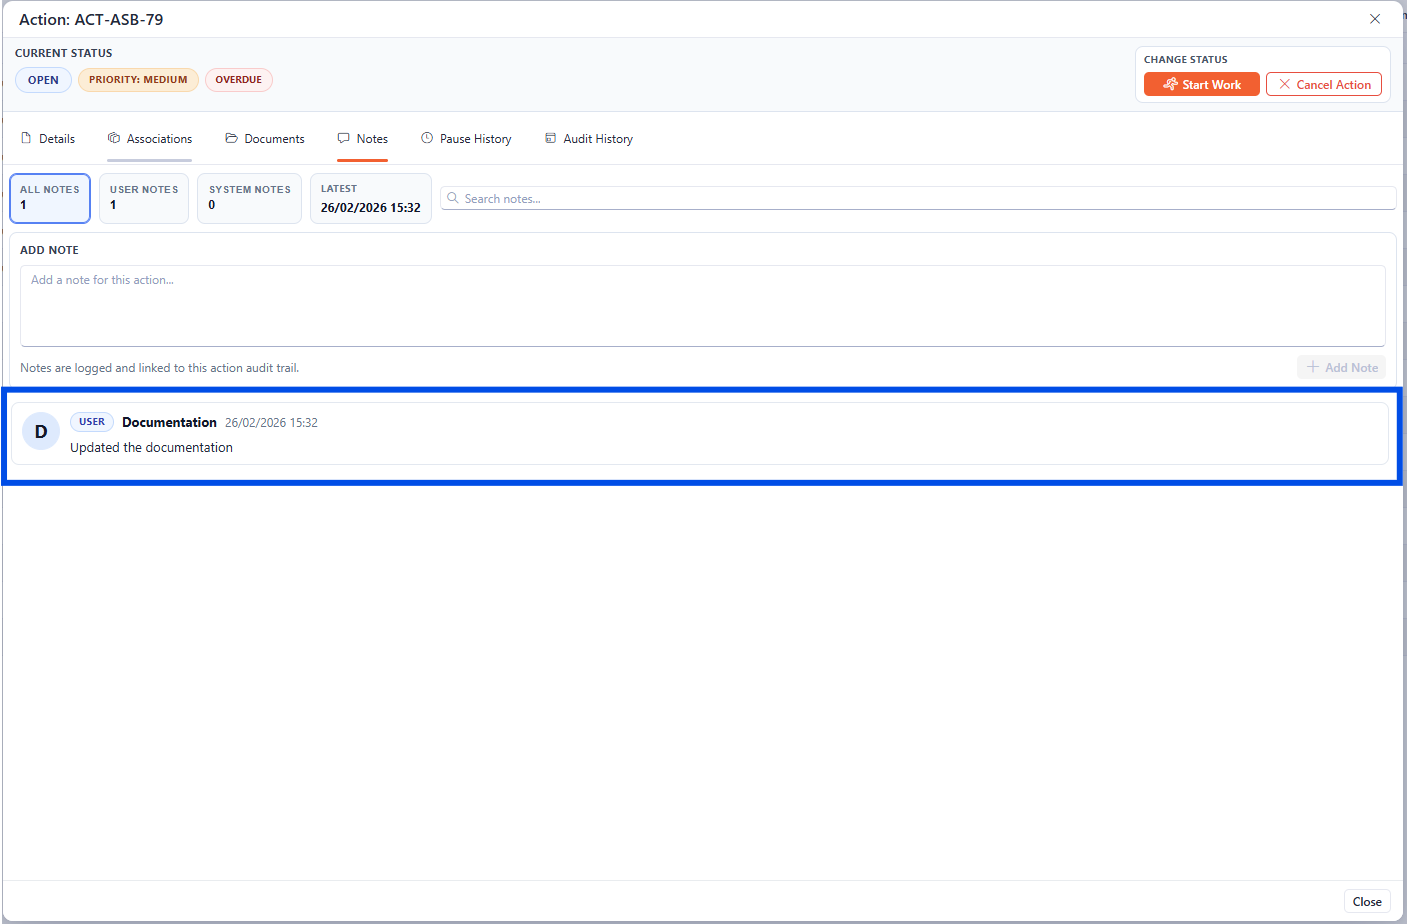
The Notes section of the Action Details showing an added note
Pause History
The Pause History page shows the history of pauses for the action. The pauses are logged each time the action is placed On Hold through the status. See section on changing status for more details.
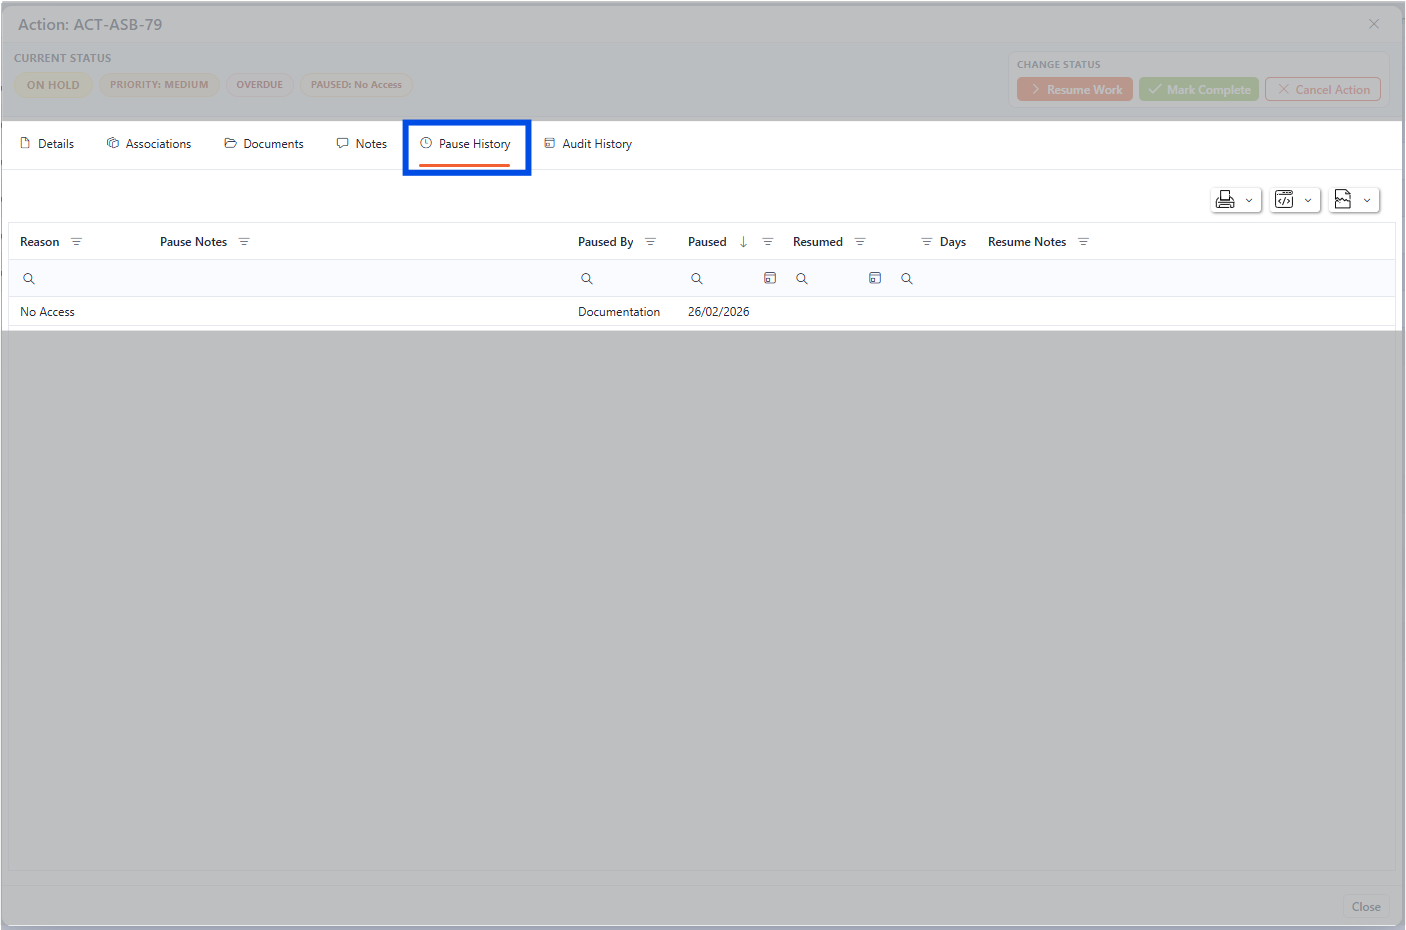
The Pause History section of the Action Details
Audit History
The Audit history shows any changes made to the action in detail and by whom they were made.
The Audit functions within this section operate the same as the general audit within Asprey Assets with filtering by User, date, action area, etc. Please see the audit section for further details.
The section on the right-hand side shows all the actions and the right-hand side shows the details of the action selected.
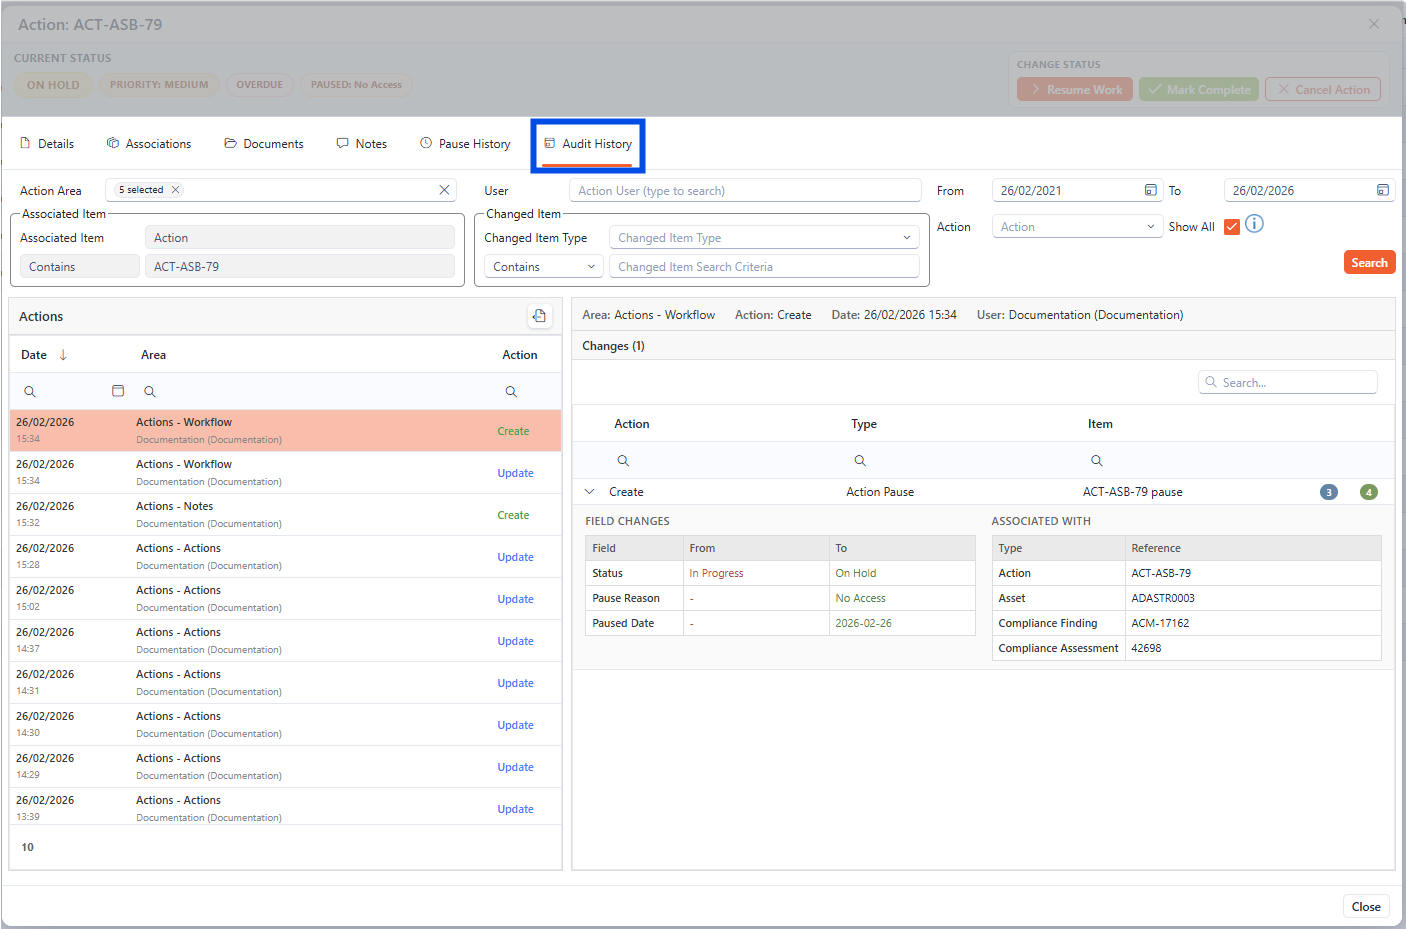
The Audit history section of the Action Details
Bulk Action
Within the My/All Actions screen, there is a built-in tool for bulk actions, allowing users to make changes to multiple selected actions.
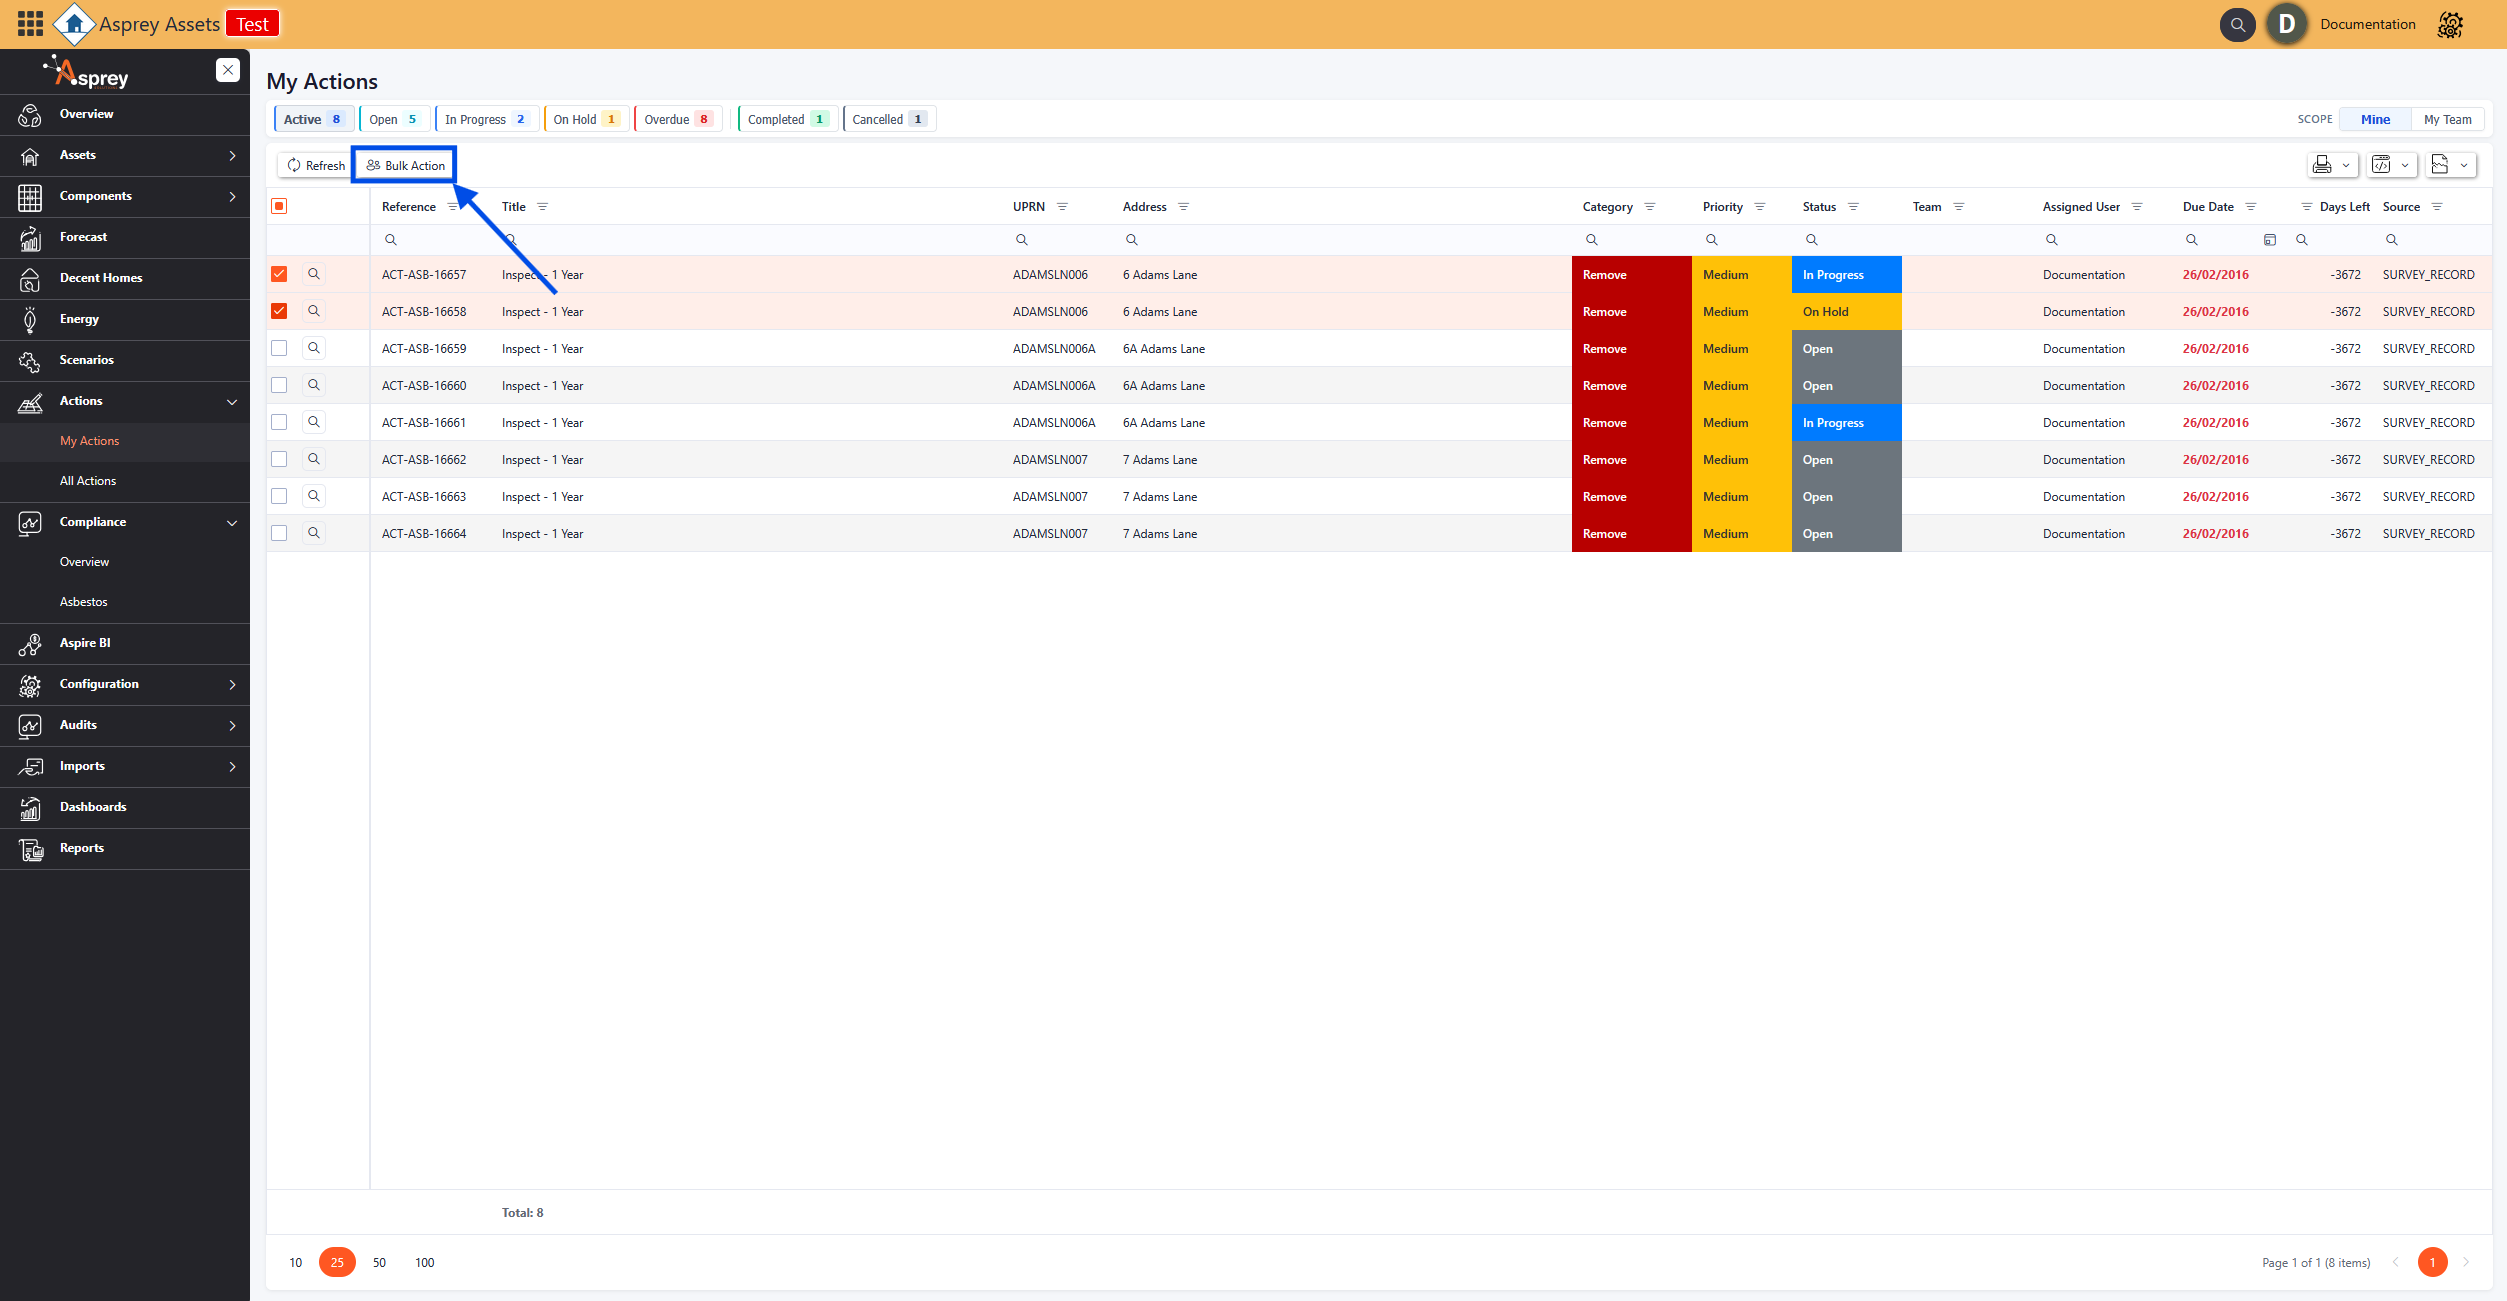
Bulk action location within the My/All Action section
Once the bulk action button has been selected, a popup dialogue box will appear with the bulk change options available.
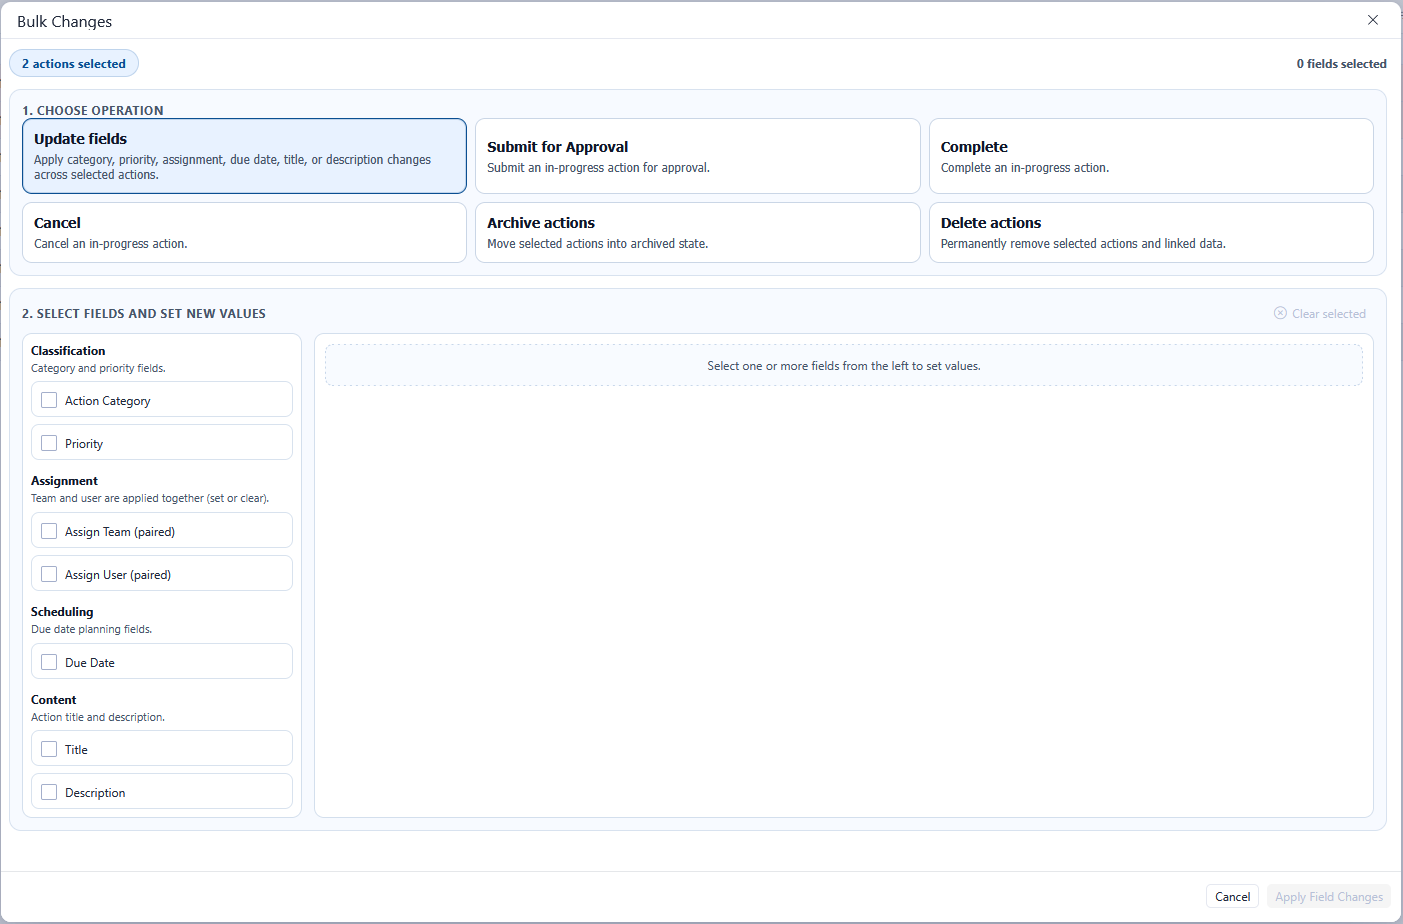
The bulk changes popup box has six operation options to choose from. The lower grid will update to reflect the operation selected in the top section.
Bulk Actions - Update Fields
When the Update Fields operation is selected in the bulk actions popup, this allows for certain fields to be bulk updated. Any number of the update fields can be selected in a single update. The number of selected fields is displayed in the top right-hand corner.
The available fields to bulk update are:
Action Category
Priority
Assign Team
Assign User
Dues Date
Title
Description
Bulk Actions - Update Fields
Once the relevant updates have been selected, click the Apply Field Changes button to save the changes.
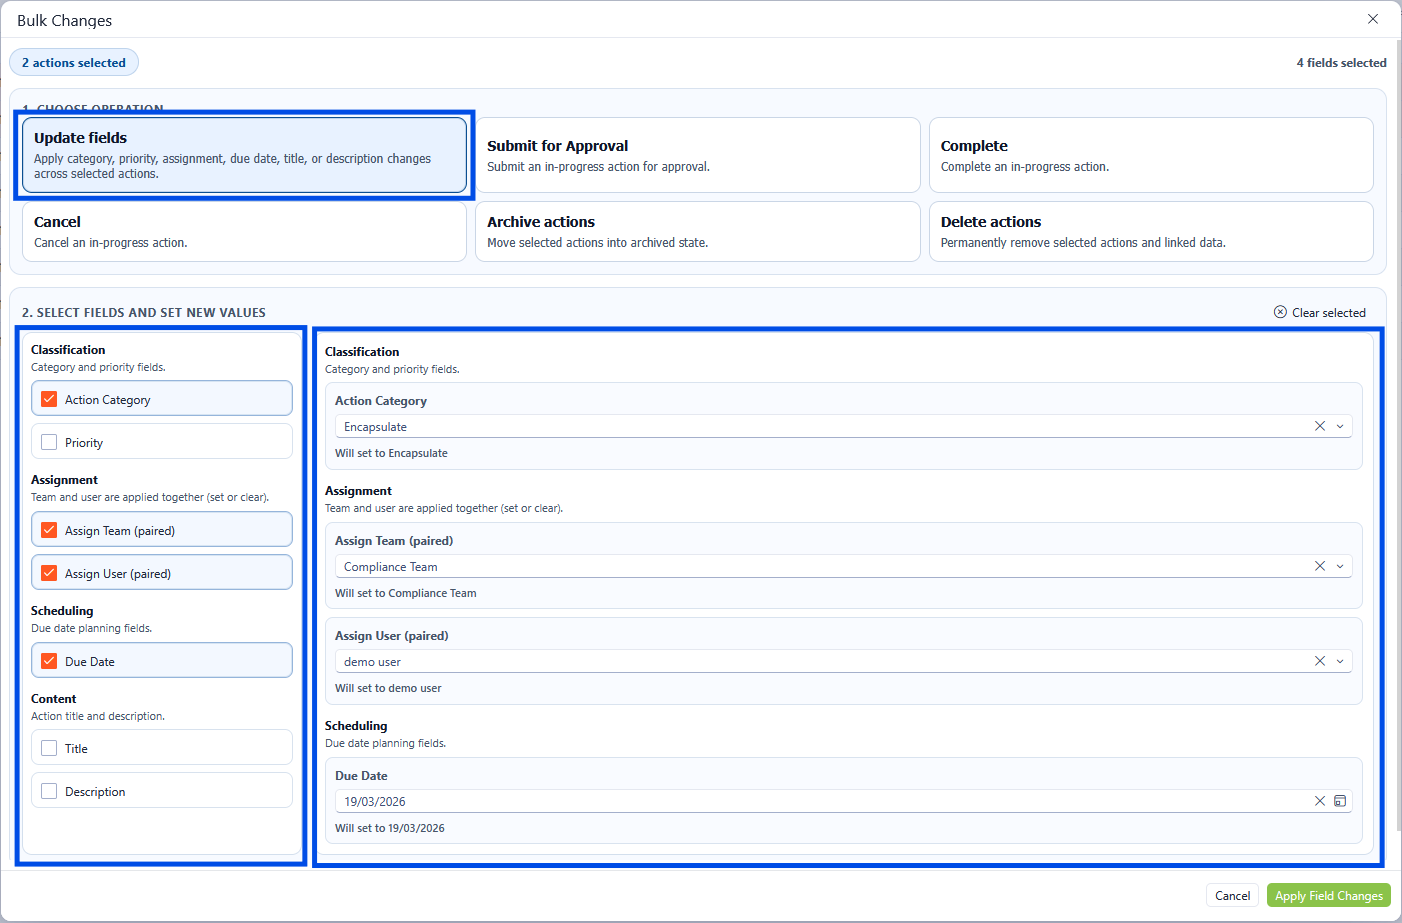
Bulk Actions - Submit for Approval
Multiple actions can be updated to the submit for approval status in the bulk actions screen. Select the Submit for Approval icon in the upper section. The lower grid will allow additional details to be added in the form of notes as required. Once all relevant notes are applied, click the Apply Action button to save the changes.
Bulk Actions - Submit for Approval
Bulk Actions - Complete
Multiple actions can be updated to the Complete status in the bulk actions screen. Select the Complete icon in the upper section. The lower grid will allow additional details to be added in the form of notes as required. If there are linked surveys and you would like these to be marked as removed, then check the Linked Survey Record checkbox. Once all relevant notes are applied, click the Apply Action button to save the changes.
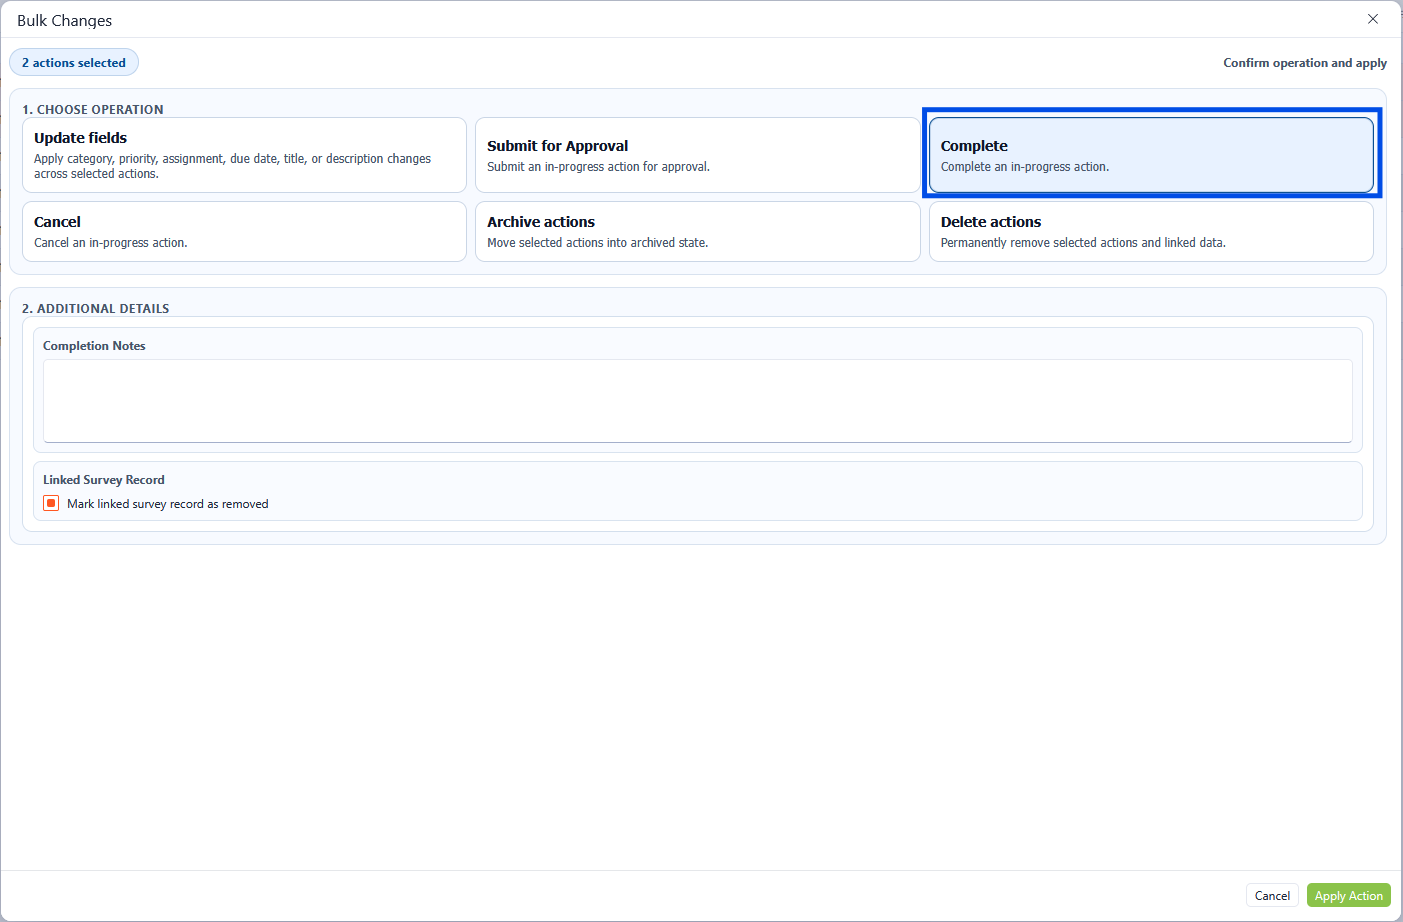
Bulk Actions - Complete
Bulk Actions - Cancel
Multiple actions can be updated to the Cancelled status in the bulk actions screen. Select the Cancel icon in the upper section. The lower grid will allow additional details to be added in the form of notes; this is a required field and is marked with an asterisk(*). Once all relevant notes are applied, click the Apply Action button to save the changes.
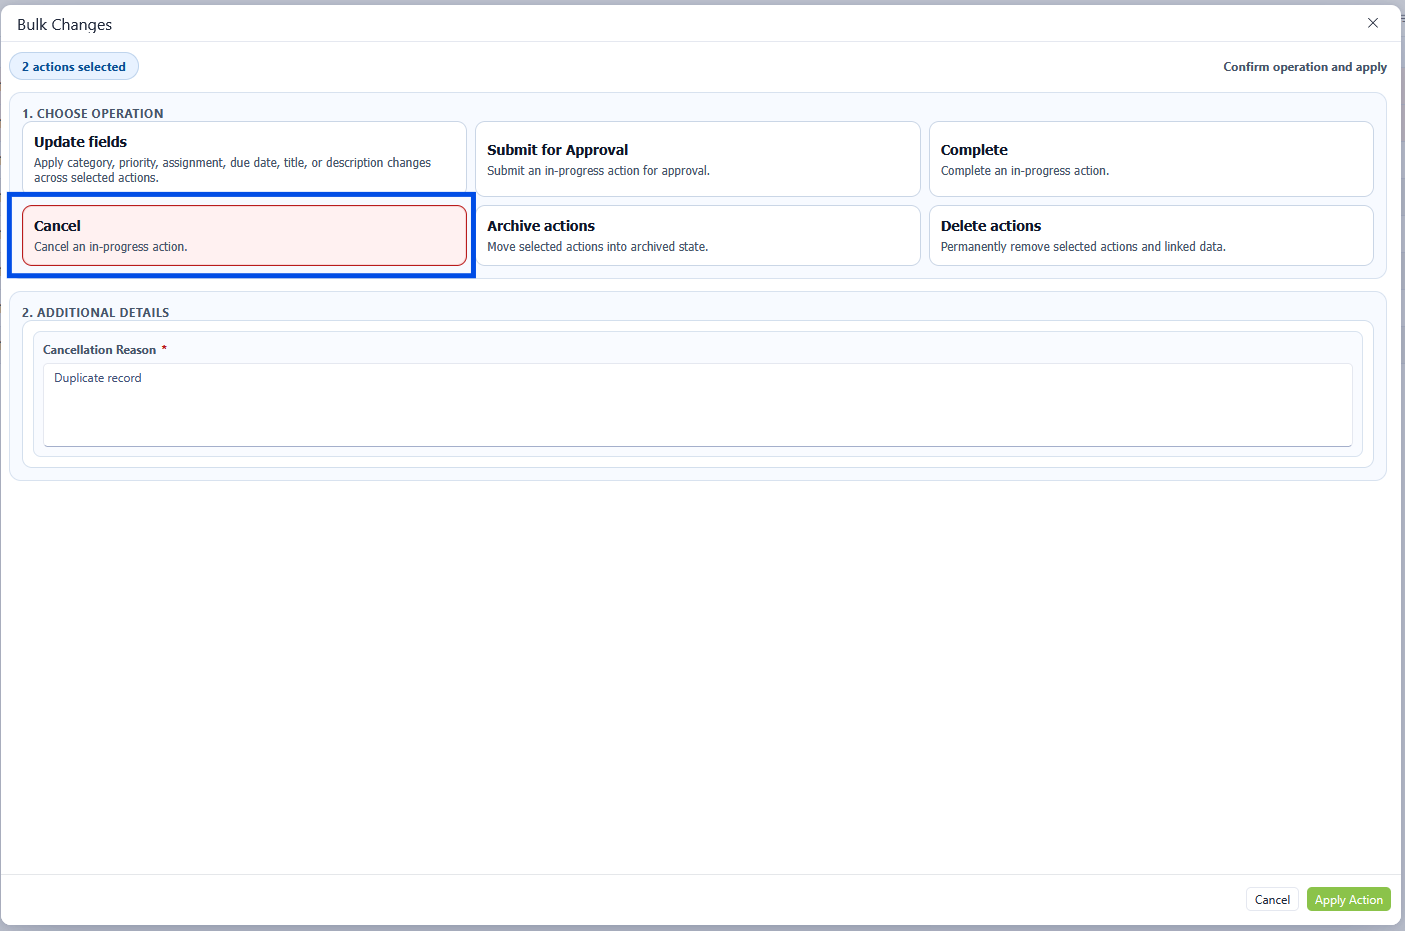
Bulk Actions - Cancel
Bulk Actions - Archive
Multiple actions can be updated to the Cancelled status in the bulk actions screen. Select the Cancel icon in the upper section. There are no additional steps when archiving an action, therefore click the Apply Action button to save the changes.
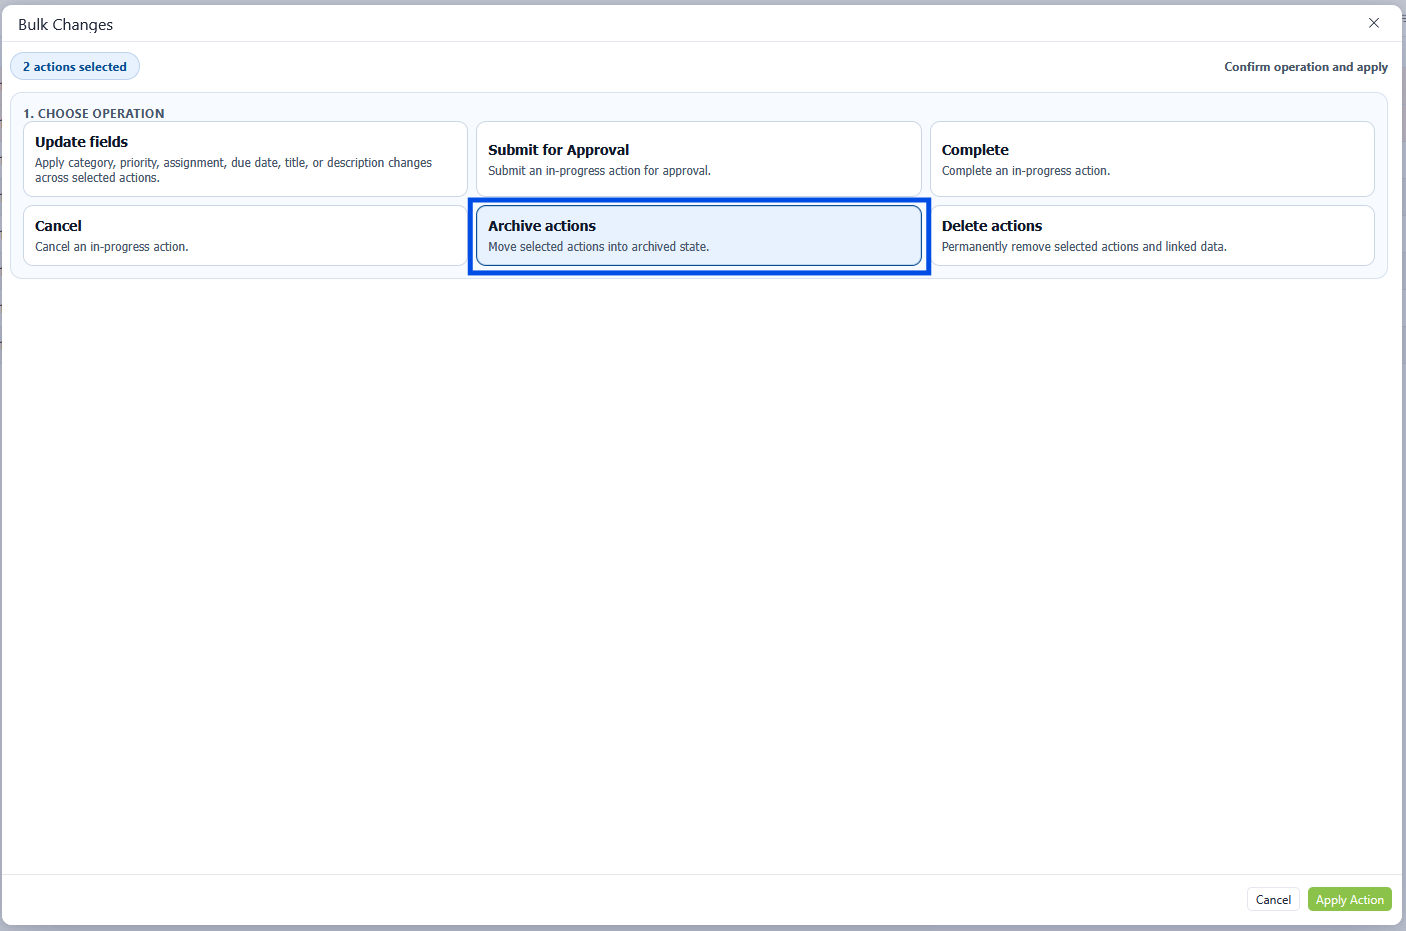
Bulk Actions - Archive
Bulk Actions - Delete
Multiple actions can be Deleted in the bulk actions screen. Select the Delete Actions icon in the upper section. There are no additional steps when deleting an action, therefore click the Apply Action button to save the changes.
Delete is permanent and will remove linked data based on archive rules.
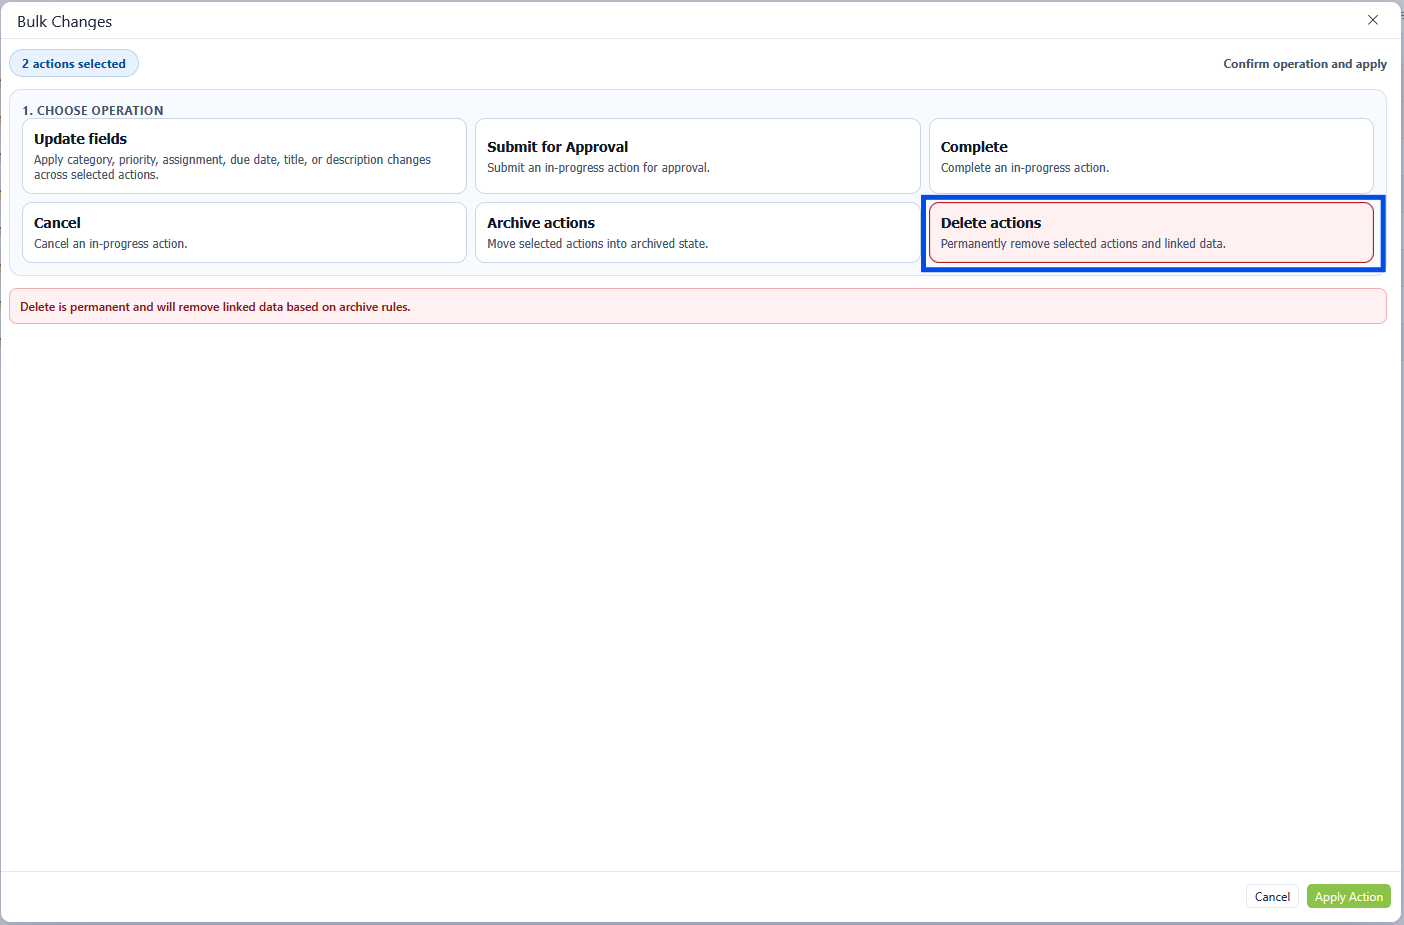
Bulk Actions - Delete